2015 JEEP GRAND CHEROKEE bulb
[x] Cancel search: bulbPage 18 of 717

WARNING!(Continued)
•Do not leave children or animals inside parked
vehicles in hot weather. Interior heat build-up may
cause serious injury or death.
CAUTION!
An unlocked car is an invitation to thieves. Always
remove the Key Fob from vehicle, cycle the ignition
OFF and lock all doors when leaving the vehicle
unattended.
SENTRY KEY®
The Sentry Key® Immobilizer system prevents unauthor-
ized vehicle operation by disabling the engine. The
system does not need to be armed or activated. Operation
is automatic, regardless of whether the vehicle is locked
or unlocked.
The system uses a Key Fob with a factory-mated Remote
Keyless Entry (RKE) transmitter, a Keyless Ignition Node
(KIN) and a RF receiver to prevent unauthorized vehicle
operation. Therefore, only Key Fobs that are pro-
grammed to the vehicle can be used to start and operate
the vehicle. The system will not allow the engine to crank
if an invalid Key Fob.
After placing the ignition to the ON/RUN position, the
Vehicle Security Light will turn on for three seconds for a
bulb check. If the light remains on after the bulb check, it
indicates that there is a problem with the system. In
addition, if the light begins to flash after the bulb check,
it indicates that someone used an invalid Key Fob to start
the engine. Either of these conditions will result in the
engine being shut off after two seconds.
If the Vehicle Security Light turns on during normal
vehicle operation (vehicle running for longer than 10
seconds), it indicates that there is a fault in the system.
16 THINGS TO KNOW BEFORE STARTING YOUR VEHICLE
Page 82 of 717

free, if any of the following occurs, have an authorized
dealer service the air bag system immediately.
•The Air Bag Warning Light does not come on during
the four to eight seconds when the ignition switch is
first turned to the ON/RUN position.
•The Air Bag Warning Light remains on after the four to
eight-second interval.
•The Air Bag Warning Light comes on intermittently or
remains on while driving.
NOTE:If the speedometer, tachometer, or any engine
related gauges are not working, the Occupant Restraint
Controller (ORC) may also be disabled. In this condition
the air bags may not be ready to inflate for your protec-
tion. Have an authorized dealer service the air bag
system immediately.
WARNING!
Ignoring the Air Bag Warning Light in your instru-
ment panel could mean you won’t have the air bags
to protect you in a collision. If the light does not come
on as a bulb check when the ignition is first turned
on, stays on after you start the vehicle, or if it comes
on as you drive, have an authorized dealer service the
air bag system immediately.
80 THINGS TO KNOW BEFORE STARTING YOUR VEHICLE
Page 112 of 717

WARNING!(Continued)
•If it is necessary to sit in a parked vehicle with the
engine running, adjust your heating or cooling
controls to force outside air into the vehicle. Set the
blower at high speed.
The best protection against carbon monoxide entry into
the vehicle body is a properly maintained engine exhaust
system.
Whenever a change is noticed in the sound of the exhaust
system, when exhaust fumes can be detected inside the
vehicle, or when the underside or rear of the vehicle is
damaged, have a competent mechanic inspect the com-
plete exhaust system and adjacent body areas for broken,
damaged, deteriorated, or mispositioned parts. Open
seams or loose connections could permit exhaust fumes
to seep into the passenger compartment. In addition,
inspect the exhaust system each time the vehicle is raised
for lubrication or oil change. Replace as required.
Safety Checks You Should Make Inside The
Vehicle
Seat Belts
Inspect the seat belt system periodically, checking for
cuts, frays, and loose parts. Damaged parts must be
replaced immediately. Do not disassemble or modify the
system.
Front seat belt assemblies must be replaced after a
collision. Rear seat belt assemblies must be replaced after
a collision if they have been damaged (i.e., bent retractor,
torn webbing, etc.). If there is any question regarding seat
belt or retractor condition, replace the seat belt.
Air Bag Warning Light
The light should come on and remain on for
four to eight seconds as a bulb check when the
ignition switch is first turned ON. If the light is
11 0 T H I N G S TO K N O W B E F O R E S TA R T I N G Y O U R V E H I C L E
Page 179 of 717

Turn Signals
Move the multifunction lever up or down and the arrows
on each side of the instrument cluster flash to show
proper operation of the front and rear turn signal lights.
NOTE:If either light remains on and does not flash, or
there is a very fast flash rate, check for a defective outside
light bulb. If an indicator fails to light when the lever is
moved, it would suggest that the indicator bulb is
defective.
Lane Change Assist
Tap the lever up or down once, without moving beyond
the detent, and the turn signal (right or left) will flash
three times then automatically turn off.
Flash-To-Pass
You can signal another vehicle with your headlights by
partially pulling the multifunction lever toward the steer-
ing wheel. This will cause the high beam headlights to
turn on until the lever is released.
High/Low Beam Switch
Push the multifunction lever toward the instrument
panel to switch the headlights to high beam. Pulling the
multifunction back toward the steering wheel will turn
the low beams back on, or shut the high beams off.
3
UNDERSTANDING THE FEATURES OF YOUR VEHICLE 177
Page 277 of 717

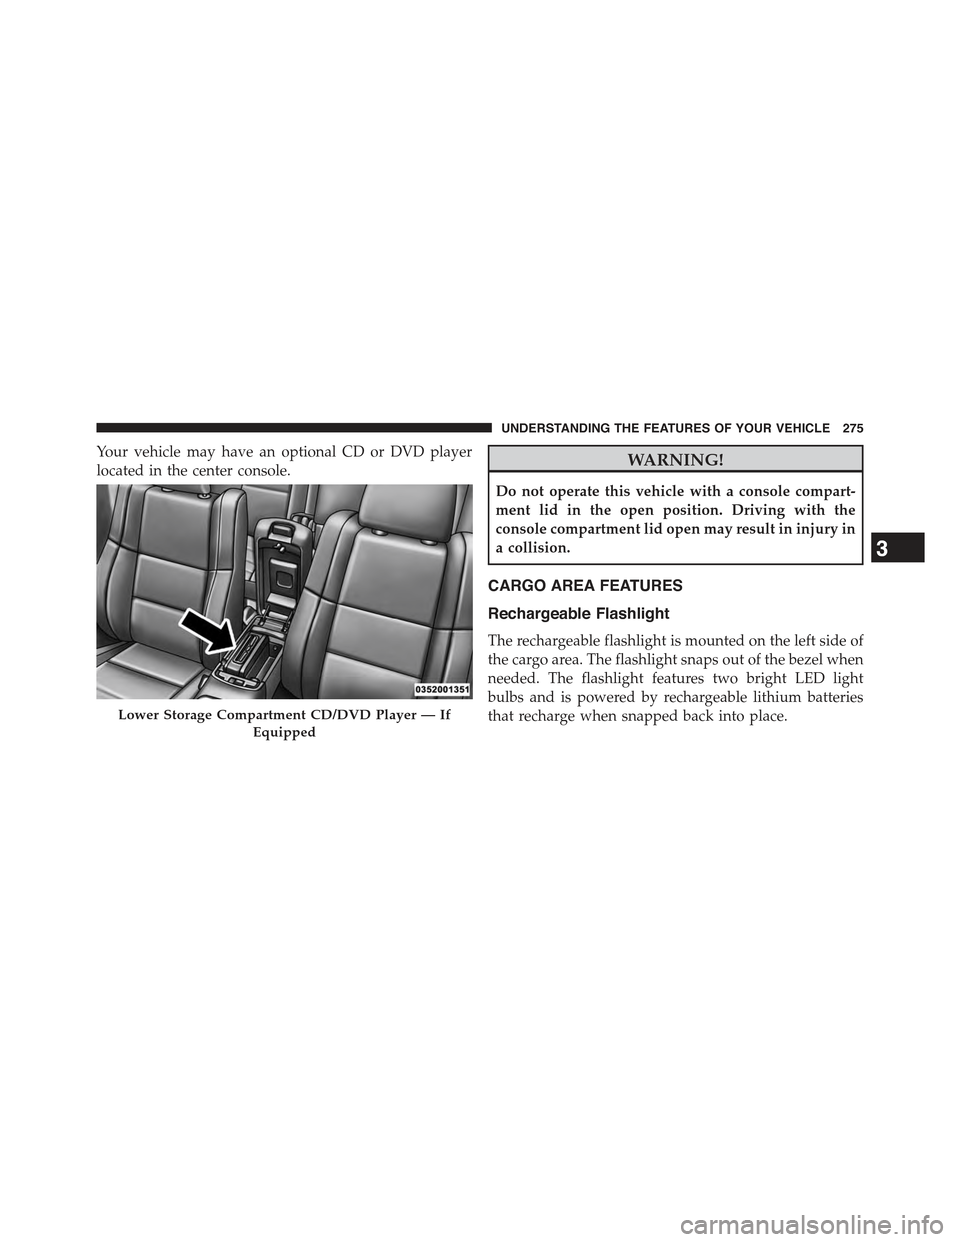
Your vehicle may have an optional CD or DVD player
located in the center console.WARNING!
Do not operate this vehicle with a console compart-
ment lid in the open position. Driving with the
console compartment lid open may result in injury in
a collision.
CARGO AREA FEATURES
Rechargeable Flashlight
The rechargeable flashlight is mounted on the left side of
the cargo area. The flashlight snaps out of the bezel when
needed. The flashlight features two bright LED light
bulbs and is powered by rechargeable lithium batteries
that recharge when snapped back into place.Lower Storage Compartment CD/DVD Player — If
Equipped
3
UNDERSTANDING THE FEATURES OF YOUR VEHICLE 275
Page 294 of 717

INSTRUMENT CLUSTER DESCRIPTIONS
1. Tachometer
Indicates the engine speed in revolutions per minute
(RPM x 1000).
2. Seat Belt Reminder Light
When the ignition switch is first turned to the
ON/RUN position, this light will turn on for four
to eight seconds as a bulb check. During the bulb
check, if the driver’s seat belt is unbuckled, a chime will
sound. After the bulb check or when driving, if the driver
or front passenger seat belt remains unbuckled, the Seat
Belt Indicator Light will flash or remain on continuously.
Refer to “Occupant Restraints” in “Things To Know
Before Starting Your Vehicle” for further information.
3. Anti-Lock Brake (ABS) Light
This light monitors the Anti-Lock Brake System
(ABS). The light will turn on when the ignition
switch is turned to the ON/RUN position and
may stay on for as long as four seconds.
If the ABS light remains on or turns on while driving, it
indicates that the Anti-Lock portion of the brake system
is not functioning and that service is required. However,
the conventional brake system will continue to operate
normally if the BRAKE warning light is not on.
If the ABS light is on, the brake system should be serviced
as soon as possible to restore the benefits of Anti-Lock
brakes. If the ABS light does not turn on when the
ignition switch is turned to the ON/RUN position, have
the light inspected by an authorized dealer.
4. High Beam Indicator
Indicates that headlights are on high beam.
292 UNDERSTANDING YOUR INSTRUMENT PANEL
Page 295 of 717

5. Front Fog Light Indicator — If Equipped
This indicator will illuminate when the front fog
lights are on.
6. Upper Left Selectable DID
This area of the cluster will display selectable informa-
tion such as compass, outside temperature, etc. For
further information, refer to “Driver Information Display
(DID)” in this section.
7. Turn Signal Indicator
The arrows will flash with the exterior turn
signals when the turn signal lever is operated.
A tone will chime, and a DID message will
appear if either turn signal is left on for more
than 1 mile (1.6 km).
NOTE:If either indicator flashes at a rapid rate, check
for a defective outside light bulb.
8. Speedometer
Indicates vehicle speed.
9. Upper Right Selectable DID
This area of the cluster will display selectable informa-
tion such as compass, outside temperature, etc. For
further information, refer to “Driver Information Display
(DID)” in this section.
10. Malfunction Indicator Light (MIL)
The Malfunction Indicator Light (MIL) is part of
an onboard diagnostic system called OBD II that
monitors engine and automatic transmission con-
trol systems. The light will illuminate when the key is in
the ON/RUN position before engine start. If the bulb
does not come on when turning the key from OFF to
ON/RUN, have the condition checked promptly.
Certain conditions, poor fuel quality, etc., may illuminate
the light after engine start. The vehicle should be serviced
4
UNDERSTANDING YOUR INSTRUMENT PANEL 293
Page 301 of 717

odometer needs to be repaired or serviced, the repair
technician should leave the odometer reading the same
as it was before the repair or service. If she/he cannot do
so, then the odometer must be set at zero, and a sticker
must be placed in the door jamb stating what the mileage
was before the repair or service. It is a good idea for you
to make a record of the odometer reading before the
repair/service, so that you can be sure that it is properly
reset, or that the door jamb sticker is accurate if the
odometer must be reset at zero.
When the appropriate conditions exist, this Driver Infor-
mation Display (DID) messages. Refer to “Driver Infor-
mation Display” of your owners manual for more
information.
16. Selectable DID Menu
This area of the cluster will display the DID selectable
menu. For further information, refer to “Driver Informa-
tion Display (DID)” in this section.
17. Air Bag Warning Light
This light will turn on for four to eight seconds
as a bulb check when the ignition switch is first
turned to the ON/RUN position. If the light is
either not on during starting, stays on, or turns
on while driving, have the system inspected at an autho-
rized dealer as soon as possible. Refer to “Occupant
Restraints” in “Things To Know Before Starting Your
Vehicle” of your owners manual for further information.
18. Vehicle Security Light
This light will flash rapidly for approximately
15 seconds when the vehicle theft alarm is
arming. The light will flash at a slower speed
continuously after the alarm is set. The security
light will also come on for about three seconds when the
ignition is first turned on.
4
UNDERSTANDING YOUR INSTRUMENT PANEL 299