Page 177 of 717
second time. The lights will also turn on when the
UNLOCK button on the Remote Keyless Entry (RKE) is
pressed.
Courtesy Lights
The courtesy lights can be turned on by pressing the top
corner of the lens. To turn the lights off, press the lens a
second time.
Front Map/Reading Light Switches
Courtesy Lights
3
UNDERSTANDING THE FEATURES OF YOUR VEHICLE 175
Page 178 of 717
Ambient Light — If Equipped
The overhead console is equipped with an ambient light
feature. This light casts illumination for improved visibil-
ity of the floor and center console area.
Multifunction Lever
The multifunction lever is located on the left side of the
steering column.
Ambient Light
Multifunction Lever
176 UNDERSTANDING THE FEATURES OF YOUR VEHICLE
Page 179 of 717

Turn Signals
Move the multifunction lever up or down and the arrows
on each side of the instrument cluster flash to show
proper operation of the front and rear turn signal lights.
NOTE:If either light remains on and does not flash, or
there is a very fast flash rate, check for a defective outside
light bulb. If an indicator fails to light when the lever is
moved, it would suggest that the indicator bulb is
defective.
Lane Change Assist
Tap the lever up or down once, without moving beyond
the detent, and the turn signal (right or left) will flash
three times then automatically turn off.
Flash-To-Pass
You can signal another vehicle with your headlights by
partially pulling the multifunction lever toward the steer-
ing wheel. This will cause the high beam headlights to
turn on until the lever is released.
High/Low Beam Switch
Push the multifunction lever toward the instrument
panel to switch the headlights to high beam. Pulling the
multifunction back toward the steering wheel will turn
the low beams back on, or shut the high beams off.
3
UNDERSTANDING THE FEATURES OF YOUR VEHICLE 177
Page 193 of 717

To Decrease Speed
When the Electronic Speed Control is set, you can de-
crease speed by pushing the SET-button.
The speed decrement shown is dependant on the chosen
speed unit of U.S. (mph) or Metric (km/h):
U.S. Speed (mph)
•Pressing the SET-button once will result ina1mph
decrease in set speed. Each subsequent tap of the
button results in a decrease of 1 mph.
•If the button is continually pressed, the set speed will
continue to decrease until the button is released, then
the new set speed will be established.
Metric Speed (km/h)
•Pressing the SET-button once will result in a 1 km/h
decrease in set speed. Each subsequent tap of the
button results in a decrease of 1 km/h.
•If the button is continually pressed, the set speed will
continue to decrease until the button is released, then
the new set speed will be established.
To Accelerate For Passing
Press the accelerator as you would normally. When the
pedal is released, the vehicle will return to the set speed.
Using Electronic Speed Control On Hills
The transmission may downshift on hills to maintain the
vehicle set speed.
NOTE:The Electronic Speed Control system maintains
speed up and down hills. A slight speed change on
moderate hills is normal.
On steep hills, a greater speed loss or gain may occur so
it may be preferable to drive without Electronic Speed
Control.
3
UNDERSTANDING THE FEATURES OF YOUR VEHICLE 191
Page 194 of 717

WARNING!
Electronic Speed Control can be dangerous where the
system cannot maintain a constant speed. Your ve-
hicle could go too fast for the conditions, and you
could lose control and have an accident. Do not use
Electronic Speed Control in heavy traffic or on roads
that are winding, icy, snow-covered or slippery.
ADAPTIVE CRUISE CONTROL (ACC) — IF
EQUIPPED
Adaptive Cruise Control (ACC) increases the driving
convenience provided by cruise control while traveling
on highways and major roadways. However, it is not a
safety system and not designed to prevent collisions.
ACC will allow you to keep cruise control engaged in
light to moderate traffic conditions without the constant
need to reset your cruise control. ACC utilizes a radar
sensor and a forward facing camera designed to detect a
vehicle directly ahead of you.
NOTE:
•If the sensor does not detect a vehicle ahead of you,
ACC will maintain a fixed set speed.
•If the ACC sensor detects a vehicle ahead, ACC will
apply limited braking or acceleration (not to exceed
the original set speed) automatically to maintain a
preset following distance, while matching the speed of
the vehicle ahead.
192 UNDERSTANDING THE FEATURES OF YOUR VEHICLE
Page 204 of 717

•The ACC system applies the brake down to a full stop
when following a target vehicle. If an ACC host vehicle
follows a target vehicle to a standstill, the host vehicle
will release the vehicle brakes two seconds after com-
ing to a full stop.
•The ACC system maintains set speed when driving up
hill and down hill. However, a slight speed change on
moderate hills is normal. In addition, downshifting
may occur while climbing uphill or descending down-
hill. This is normal operation and necessary to main-
tain set speed. When driving up hill and down hill, the
ACC system will cancel if the braking temperature
exceeds normal range (overheated).
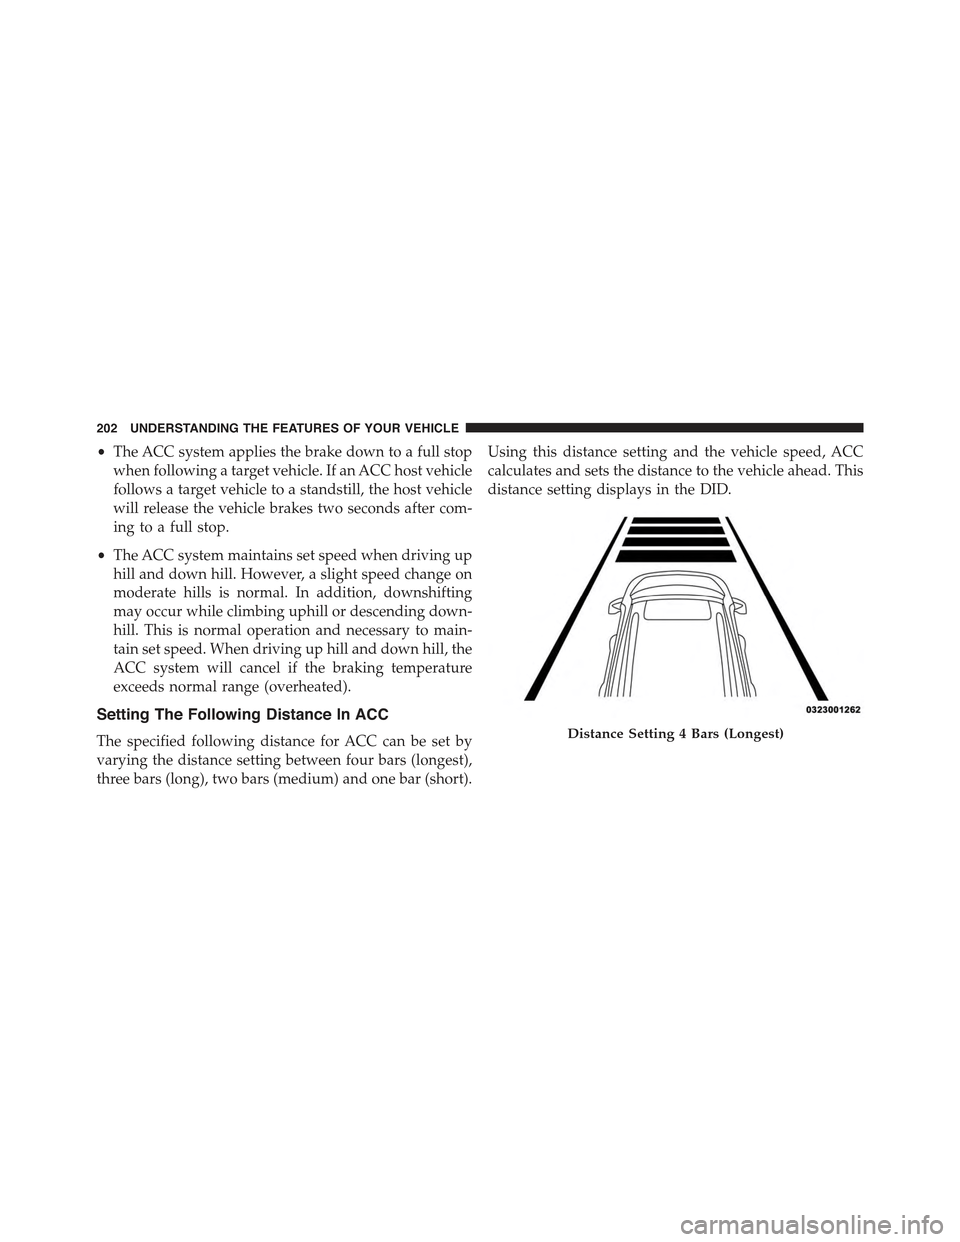
Setting The Following Distance In ACC
The specified following distance for ACC can be set by
varying the distance setting between four bars (longest),
three bars (long), two bars (medium) and one bar (short).
Using this distance setting and the vehicle speed, ACC
calculates and sets the distance to the vehicle ahead. This
distance setting displays in the DID.
Distance Setting 4 Bars (Longest)
202 UNDERSTANDING THE FEATURES OF YOUR VEHICLE
Page 207 of 717
•The system disengages. (Refer to the information on
ACC Activation).
The maximum braking applied by ACC is limited; how-
ever, the driver can always apply the brakes manually, if
necessary.
NOTE:The brake lights will illuminate whenever the
ACC system applies the brakes.
A Proximity Warning will alert the driver if ACC predicts
that its maximum braking level is not sufficient to
maintain the set distance. If this occurs, a visual alert
“BRAKE” will flash in the DID and a chime will sound
while ACC continues to apply its maximum braking
capacity.NOTE:The “Brake!” Screen in the DID is a warning for
the driver to take action and does not necessarily mean
that the Forward Collision Warning system is applying
the brakes autonomously.
Brake Alert
3
UNDERSTANDING THE FEATURES OF YOUR VEHICLE 205
Page 218 of 717

WARNING!
In the normal Cruise Control mode, the system will
not react to vehicles ahead. In addition, the proximity
warning does not activate and no alarm will sound
even if you are too close to the vehicle ahead since
neither the presence of the vehicle ahead nor the
vehicle-to vehicle distance is detected. Be sure to
maintain a safe distance between your vehicle and
the vehicle ahead. Always be aware which mode is
selected.
To Set A Desired Speed
Turn the Normal (Fixed Speed) Electronic
Speed Control ON. When the vehicle has
reached the desired speed, press the SET (+) or
SET (-) button and release. Release the accel-
erator and the vehicle will operate at the selected speed.
Once a speed has been set a message (CRUISE CON-
TROL SET TO MPH/KM) will appear indicating what
speed was set. This light will turn on when the electronic
speed control is SET.
To Vary The Speed Setting
To Increase Speed
When the Normal (Fixed Speed) Electronic Speed Con-
trol is set, you can increase speed by pressing the SET+
button.
The speed increment shown is dependant on the speed of
U.S. (mph) or Metric (km/h) units:
U.S. Speed (mph)
•Pressing the SET+button once will result ina1mph
increase in set speed. Each subsequent tap of the
button results in an increase of 1 mph.
216 UNDERSTANDING THE FEATURES OF YOUR VEHICLE