Page 168 of 717
CAUTION!
To prevent possible damage, do not slam the hood to
close it. Use a firm downward push at the front center
of the hood to ensure that both latches engage.
WARNING!
Be sure the hood is fully latched before driving your
vehicle. If the hood is not fully latched, it could open
when the vehicle is in motion and block your vision.
Failure to follow this warning could result in serious
injury or death.
LIGHTS
Headlight Switch
The headlight switch is located on the left side of the
instrument panel, next to the steering wheel. The head-
light switch controls the operation of the headlights,
parking lights, instrument panel lights, cargo lights and
fog lights (if equipped).
166 UNDERSTANDING THE FEATURES OF YOUR VEHICLE
Page 179 of 717

Turn Signals
Move the multifunction lever up or down and the arrows
on each side of the instrument cluster flash to show
proper operation of the front and rear turn signal lights.
NOTE:If either light remains on and does not flash, or
there is a very fast flash rate, check for a defective outside
light bulb. If an indicator fails to light when the lever is
moved, it would suggest that the indicator bulb is
defective.
Lane Change Assist
Tap the lever up or down once, without moving beyond
the detent, and the turn signal (right or left) will flash
three times then automatically turn off.
Flash-To-Pass
You can signal another vehicle with your headlights by
partially pulling the multifunction lever toward the steer-
ing wheel. This will cause the high beam headlights to
turn on until the lever is released.
High/Low Beam Switch
Push the multifunction lever toward the instrument
panel to switch the headlights to high beam. Pulling the
multifunction back toward the steering wheel will turn
the low beams back on, or shut the high beams off.
3
UNDERSTANDING THE FEATURES OF YOUR VEHICLE 177
Page 183 of 717
Windshield Washer Operation
To use the washer, push on the end of the lever (toward
the steering wheel) and hold while spray is desired. If the
lever is pushed while in the intermittent setting, the
wipers will turn on and operate for several wipe cycles
after the end of the lever is released, and then resume the
intermittent interval previously selected.
If the end of the lever is pushed while the wipers are in
the off position, the wipers will operate for several wipe
cycles, then turn off.
Windshield Washer Operation
3
UNDERSTANDING THE FEATURES OF YOUR VEHICLE 181
Page 186 of 717

not operate until the wiper switch is moved, vehicle
speed is greater than 5 mph (8 km/h), or the shift
lever/gear selector is moved out of the NEUTRAL
position.
Remote Start Mode Inhibit— On vehicles equipped
with Remote Starting system, Rain Sensing wipers are
not operational when the vehicle is in the remote start
mode. Once the operator is in the vehicle and has placed
the ignition switch in the RUN position, rain sensing
wiper operation can resume, if it has been selected, and
no other inhibit conditions (mentioned previously) exist.
TILT/TELESCOPING STEERING COLUMN
This feature allows you to tilt the steering column
upward or downward. It also allows you to lengthen or
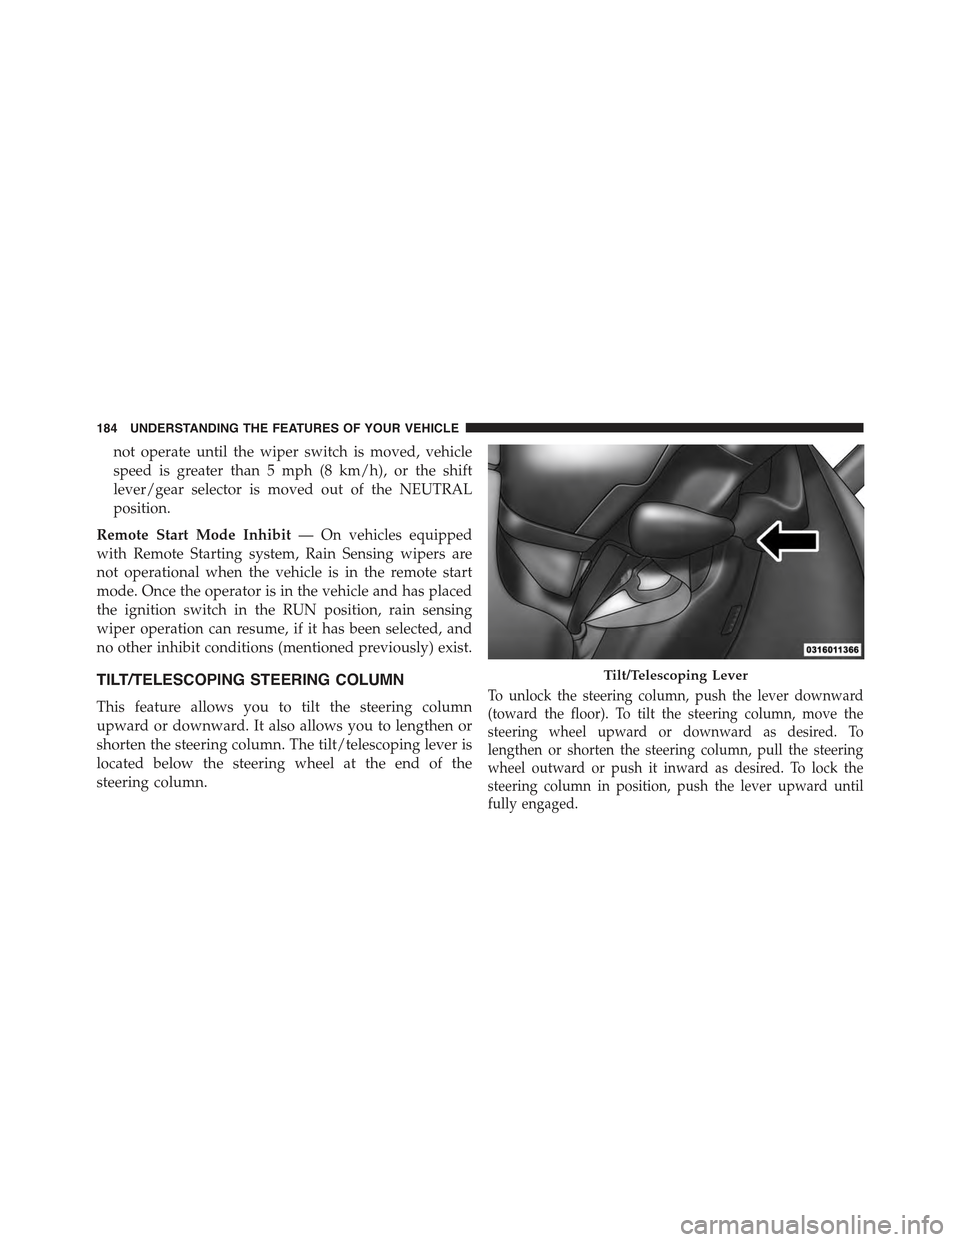
shorten the steering column. The tilt/telescoping lever is
located below the steering wheel at the end of the
steering column.
To unlock the steering column, push the lever downward
(toward the floor). To tilt the steering column, move the
steering wheel upward or downward as desired. To
lengthen or shorten the steering column, pull the steering
wheel outward or push it inward as desired. To lock the
steering column in position, push the lever upward until
fully engaged.
Tilt/Telescoping Lever
184 UNDERSTANDING THE FEATURES OF YOUR VEHICLE
Page 188 of 717

NOTE:For vehicles equipped with Driver Memory Seat,
you can use your Remote Keyless Entry (RKE) transmit-
ter or the memory switch on the driver’s door trim panel
to return the tilt/telescopic steering column to pre-
programmed positions. Refer to “Driver Memory Seat”
in this section for further information.
WARNING!
Do not adjust the steering column while driving.
Adjusting the steering column while driving or driv-
ing with the steering column unlocked, could cause
the driver to lose control of the vehicle. Failure to
follow this warning may result in serious injury or
death.
HEATED STEERING WHEEL — IF EQUIPPED
The steering wheel contains a heating element that helps
warm your hands in cold weather. The heated steering
wheel has only one temperature setting. Once the heated
steering wheel has been turned on it will operate for up
to 80 minutes before automatically shutting off. The
heated steering wheel can shut off early or may not turn
on when the steering wheel is already warm.
The heated steering wheel control button is located
within the Uconnect® system. You can gain access to the
control button through the climate screen or the controls
screen.
•Press the heated steering wheel buttononce to
turn the heating element ON.
•Press the heated steering wheel buttona second
time to turn the heating element OFF.
186 UNDERSTANDING THE FEATURES OF YOUR VEHICLE
Page 189 of 717
NOTE:The engine must be running for the heated
steering wheel to operate.
Vehicles Equipped With Remote Start
On models that are equipped with remote start, the
heated steering wheel can be programmed to come on
during a remote start through the Uconnect® system.
Refer to “Uconnect® Settings” in “Understanding Your
Instrument Panel” for further information.
WARNING!
•Persons who are unable to feel pain to the skin
because of advanced age, chronic illness, diabetes,
spinal cord injury, medication, alcohol use, exhaus-
tion, or other physical conditions must exercise
care when using the steering wheel heater. It may
cause burns even at low temperatures, especially if
used for long periods.
•Do not place anything on the steering wheel that
insulates against heat, such as a blanket or steering
wheel covers of any type and material. This may
cause the steering wheel heater to overheat.
3
UNDERSTANDING THE FEATURES OF YOUR VEHICLE 187
Page 190 of 717
ELECTRONIC SPEED CONTROL — IF EQUIPPED
When engaged, the Electronic Speed Control takes over
accelerator operations at speeds greater than 25 mph
(40 km/h).
The Electronic Speed Control buttons are located on the
right side of the steering wheel.
Electronic Speed Control Buttons
1—ON/OFF4—SET-/DECEL2—SET+/ACCEL5—CANCEL3—RESUME
188 UNDERSTANDING THE FEATURES OF YOUR VEHICLE
Page 197 of 717
Adaptive Cruise Control (ACC) Operation
The speed control buttons (located on the right side of the
steering wheel) operates the ACC system.
Adaptive Cruise Control Buttons1—NORMAL(FIXEDSPEED)CRUISECONTROLON/OFF2—SET+/ACCEL3—RESUME4—SET-/DECEL5—DISTANCESETTING—INCREASE6—ADAPTIVECRUISECONTROL(ACC)ON/OFF7—DISTANCESETTING—DECREASE8—CANCEL
3
UNDERSTANDING THE FEATURES OF YOUR VEHICLE 195