Page 188 of 653
3-102
Convenient features of your vehicle
AAUU TTOO MM AATTIICC CC LLIIMM AATTEE CC OO NNTTRR OO LL SS YY SSTT EEMM (( IIFF EE QQ UUIIPP PPEEDD ))
OLMB043120
1. AUTO (automatic control) button
2. Driver’s temperature control knob
3. Climate control display
4. Passenger’s temperature control knob
5. Dual temperature control selection button
6. OFF button 7. Front windshield defroster button
8. Air conditioning button
9. Fan speed control buttons
10. Air intake control button
11. Mode selection button
Page 193 of 653
3-107
Convenient features of your vehicle
3
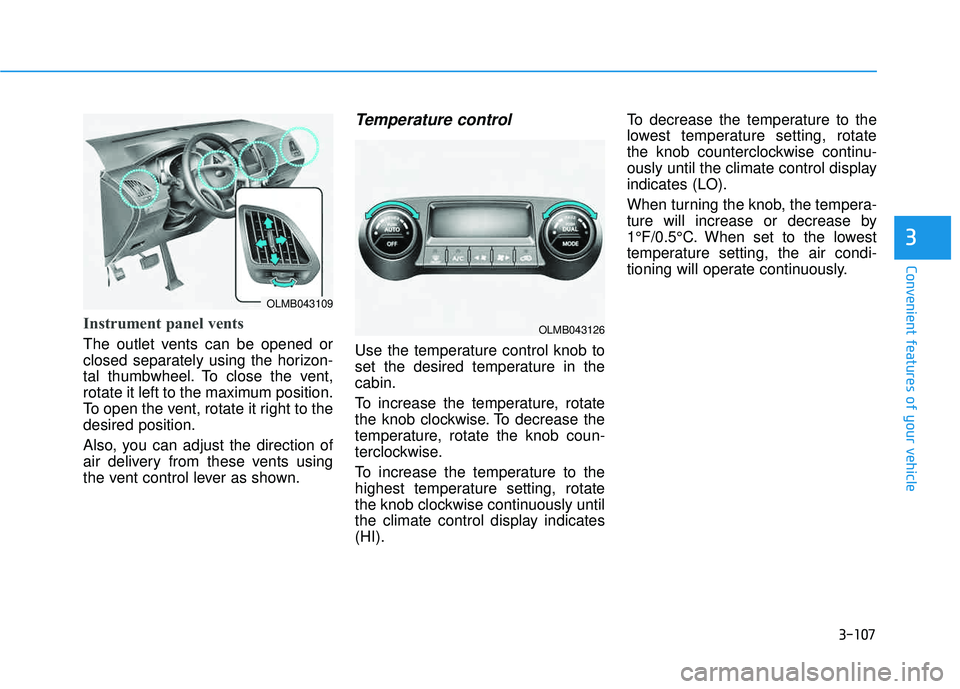
Instrument panel vents
The outlet vents can be opened or
closed separately using the horizon-
tal thumbwheel. To close the vent,
rotate it left to the maximum position.
To open the vent, rotate it right to thedesired position.
Also, you can adjust the direction of
air delivery from these vents using
the vent control lever as shown.
Temperature control
Use the temperature control knob to
set the desired temperature in thecabin.
To increase the temperature, rotate
the knob clockwise. To decrease the
temperature, rotate the knob coun-
terclockwise.
To increase the temperature to the
highest temperature setting, rotate
the knob clockwise continuously until
the climate control display indicates(HI).To decrease the temperature to the
lowest temperature setting, rotate
the knob counterclockwise continu-
ously until the climate control displayindicates (LO).
When turning the knob, the tempera-
ture will increase or decrease by
1°F/0.5°C. When set to the lowest
temperature setting, the air condi-
tioning will operate continuously.
OLMB043109
OLMB043126
Page 194 of 653
3-108
Convenient features of your vehicle
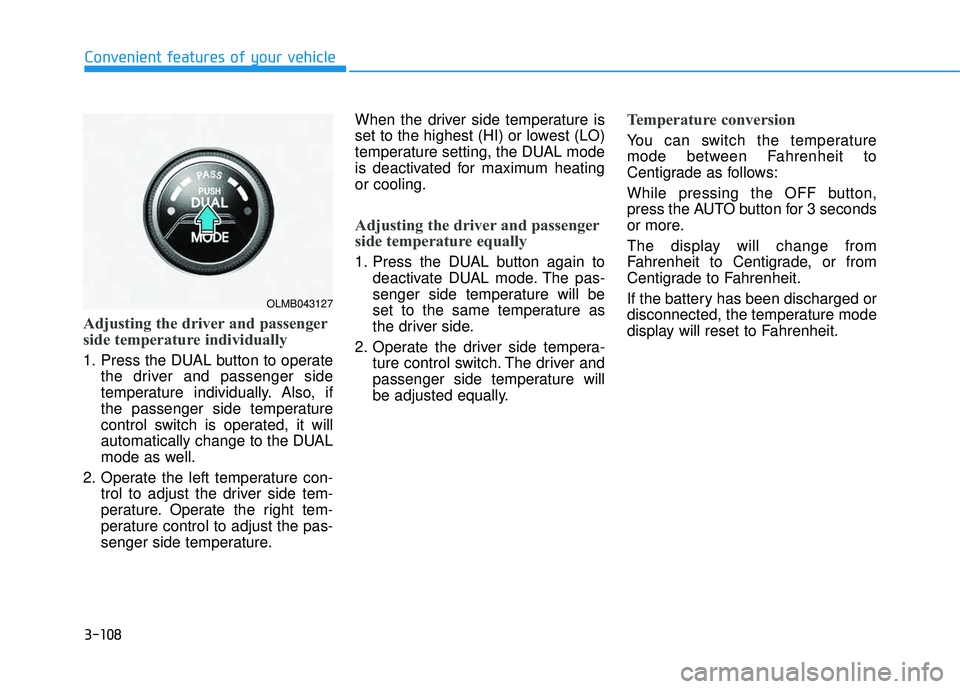
Adjusting the driver and passenger
side temperature individually
1. Press the DUAL button to operatethe driver and passenger side
temperature individually. Also, if
the passenger side temperature
control switch is operated, it will
automatically change to the DUAL
mode as well.
2. Operate the left temperature con- trol to adjust the driver side tem-
perature. Operate the right tem-
perature control to adjust the pas-
senger side temperature. When the driver side temperature is
set to the highest (HI) or lowest (LO)
temperature setting, the DUAL mode
is deactivated for maximum heatingor cooling.
Adjusting the driver and passenger
side temperature equally
1. Press the DUAL button again to
deactivate DUAL mode. The pas-
senger side temperature will be
set to the same temperature as
the driver side.
2. Operate the driver side tempera- ture control switch. The driver and
passenger side temperature will
be adjusted equally.
Temperature conversion
You can switch the temperature
mode between Fahrenheit to
Centigrade as follows:
While pressing the OFF button,
press the AUTO button for 3 seconds
or more.
The display will change from
Fahrenheit to Centigrade, or from
Centigrade to Fahrenheit.
If the battery has been discharged or
disconnected, the temperature mode
display will reset to Fahrenheit.
OLMB043127
Page 195 of 653
3-109
Convenient features of your vehicle
3
Outside thermometer
The current outside temperature is
displayed in 1°F (1°C) increments.
The temperature range is between -40°F ~ 140°F (-40°C ~ 60°C).
The outside temperature on the dis-play may not change immediately.
Air intake control
The air intake control button is used to select the outside (fresh) air posi-tion or recirculated air position.
To change the air intake control posi-
tion, push the control button.
Recirculated air position
With the recirculated airposition selected, air from the passenger
compartment will be
drawn through the venti-lation system and heat-
ed or cooled accordingto the function selected.
Outside (fresh) air position
With the outside (fresh) air position selected, air
enters the vehicle fromoutside and is heated orcooled according to thefunction selected.OLMB043054OLMB043129
Page 201 of 653
3-115
Convenient features of your vehicle
3
If the battery has been discharged or disconnected, the system resets to
the preprogrammed defogging logic.Automatic climate control system
1. Turn the ignition switch to the ONposition.
2. Select the defroster position press- ing the defroster button ( ).
3. While pressing the air conditioning button (A/C), press the air intake
control button at least 5 times
within 3 seconds.
The A/C display blinks 3 times with
0.5 second of interval. It indicates that
the defogging logic is canceled or
returned to the programmed status. If the battery has been discharged ordisconnected, the system resets to
the preprogrammed defogging logic.
OLMB043141
Page 207 of 653
3-121
Convenient features of your vehicle
3
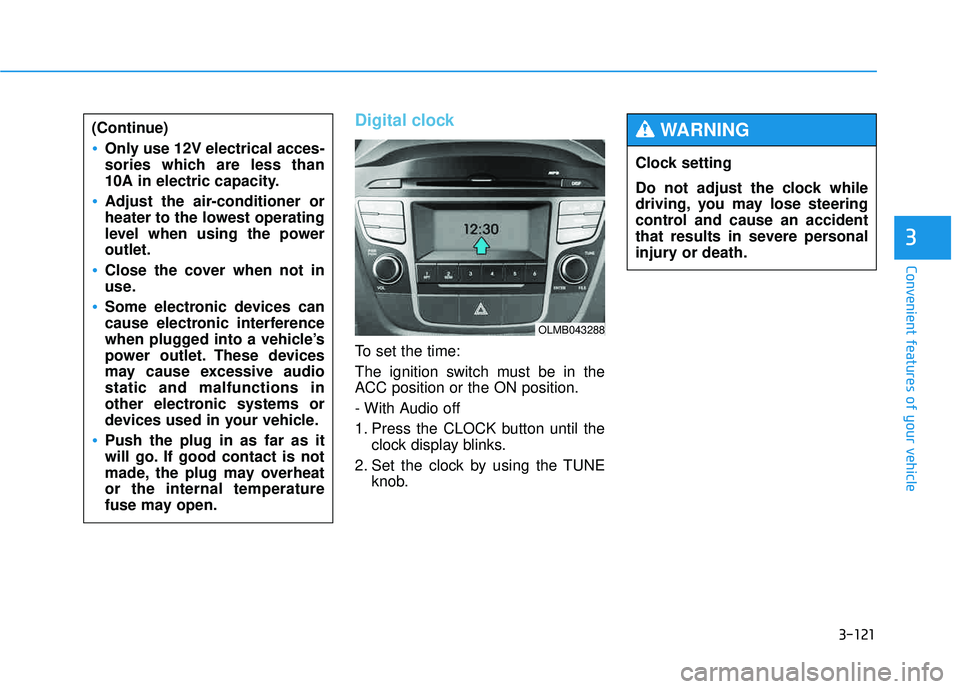
Digital clock
To set the time:
The ignition switch must be in the
ACC position or the ON position.
- With Audio off
1. Press the CLOCK button until theclock display blinks.
2. Set the clock by using the TUNE knob.
(Continue)
Only use 12V electrical acces-
sories which are less than
10A in electric capacity.
Adjust the air-conditioner or
heater to the lowest operating
level when using the poweroutlet.
Close the cover when not in
use.
Some electronic devices can
cause electronic interference
when plugged into a vehicle’s
power outlet. These devices
may cause excessive audiostatic and malfunctions in
other electronic systems or
devices used in your vehicle.
Push the plug in as far as it
will go. If good contact is not
made, the plug may overheator the internal temperature
fuse may open.
OLMB043288
Clock setting
Do not adjust the clock while
driving, you may lose steering
control and cause an accident
that results in severe personal
injury or death.
WARNING
Page 218 of 653
4-7
Multimedia System
4
Caring for disc
If the temperature inside the car is toohigh, open the car windows to venti-
late before using the system.
It is illegal to copy and use MP3/WMA files without permission.
Use CDs that are created only by
lawful means.
Do not apply volatile agents, such as benzene, or thinner, normal
cleaners, magnetic sprays made
for analogue disc onto CDs.
To prevent the disc surface from getting damaged, hold CDs by the
edges or the center hole only.
Clean the disc surface with a piece of soft cloth before playback (wipe it from the center to the outsideedge).
Do not damage the disc surface or attach pieces of sticky tape or
paper.
Make certain only CDs are insert- ed into the CD player (Do not insert more than one CD at a time).
Keep CDs in their cases after use to protect them from scratches or dirt. Depending on the type of CD-
R/CD-RW CDs, certain CDs may
not operate normally according to
the manufacturing companies. In
such circumstances, continued
use may cause malfunctions to
your audio system.
✽✽ NOTICE
- Playing an Incompatible
Copy Protected Audio CD
Some copy protected CDs, which do
not comply with international audio
CD standards (Red Book), may not
play on your car audio. Please note
that inabilities to properly play a
copy protected CD may indicate
that the CD is defective, not the CD
player.
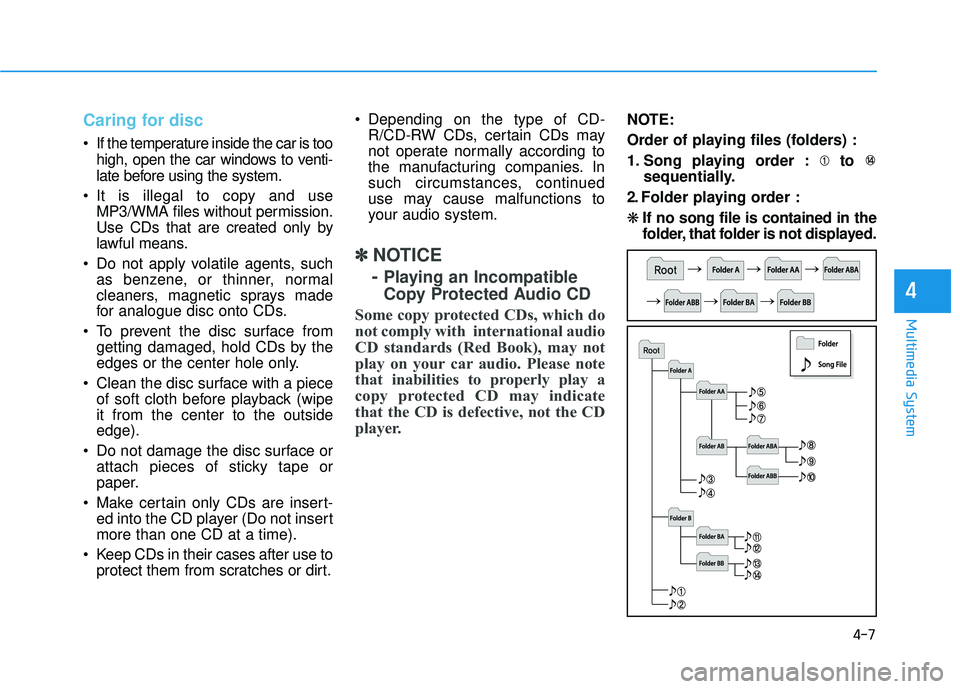
NOTE:
Order of playing files (folders) :
1. Song playing order : to sequentially.
2. Folder playing order : ❋ If no song file is contained in the
folder, that folder is not displayed.
Page 228 of 653
4-17
Multimedia System
4
SSYY SSTT EEMM CC OO NNTTRR OO LLLL EE RR SS AA NN DD
F
F UU NNCCTT IIOO NNSS
❈ Display and settings may differ
depending on the selected audio.
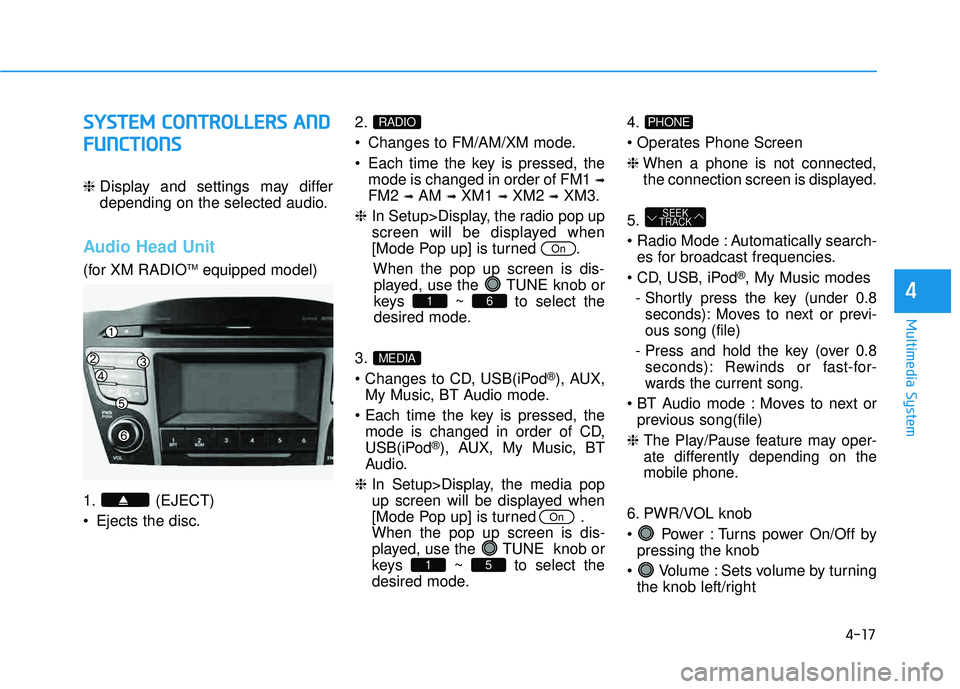
Audio Head Unit
(for XM RADIO TM
equipped model)
1. (EJECT)
Ejects the disc. 2.
Changes to FM/AM/XM mode.
Each time the key is pressed, the
mode is changed in order of FM1 ➟
FM2 ➟AM ➟XM1 ➟XM2 ➟XM3.
❈ In Setup>Display, the radio pop up
screen will be displayed when
[Mode Pop up] is turned .
When the pop up screen is dis-played, use the TUNE knob or
keys ~ to select the
desired mode.
3.
®), AUX,
My Music, BT Audio mode.
mode is changed in order of CD,
USB(iPod
®), AUX, My Music, BT
Audio.
❈ In Setup>Display, the media pop
up screen will be displayed when
[Mode Pop up] is turned .When the pop up screen is dis-
played, use the TUNE knob or
keys ~ to select the
desired mode. 4.
❈
When a phone is not connected,
the connection screen is displayed.
5.
Automatically search- es for broadcast frequencies.
®, My Music modes
- Shortly press the key (under 0.8 seconds): Moves to next or previ- ous song (file)
- Press and hold the key (over 0.8 seconds): Rewinds or fast-for-
wards the current song.
Moves to next or previous song(file)
❈
The Play/Pause feature may oper-
ate differently depending on the
mobile phone.
6. PWR/VOL knob
Power : Turns power On/Off by pressing the knob
Volume : Sets volume by turning the knob left/right
SEEK
TRACK
PHONE
51
On
MEDIA
61
On
RADIO