2015 Hyundai Sonata ESP
[x] Cancel search: ESPPage 61 of 504
2-44
Safety system of your vehicle
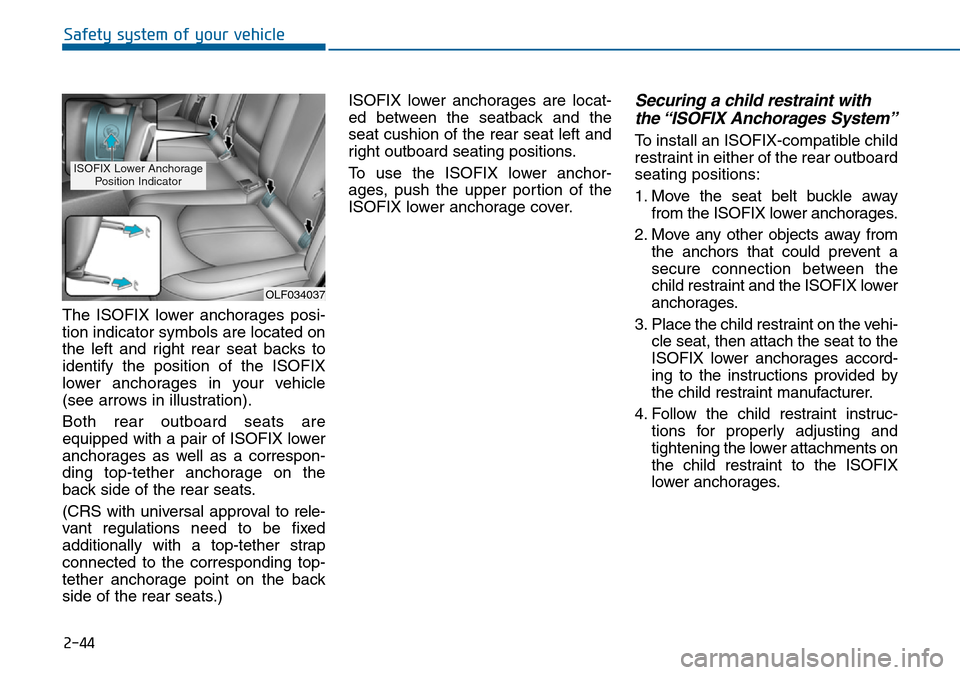
The ISOFIX lower anchorages posi-
tion indicator symbols are located on
the left and right rear seat backs to
identify the position of the ISOFIX
lower anchorages in your vehicle
(see arrows in illustration).
Both rear outboard seats are
equipped with a pair of ISOFIX lower
anchorages as well as a correspon-
ding top-tether anchorage on the
back side of the rear seats.
(CRS with universal approval to rele-
vant regulationsneed to be fixed
additionally with a top-tether strap
connected to the corresponding top-
tether anchorage point on the back
side of the rear seats.)ISOFIX lower anchorages are locat-
ed between the seatback and the
seat cushion of the rear seat left and
right outboard seating positions.
To use the ISOFIX lower anchor-
ages, push the upper portion of the
ISOFIX lower anchorage cover.
Securing a child restraint with
the “ISOFIX Anchorages System”
To install an ISOFIX-compatible child
restraint in either of the rear outboard
seating positions:
1. Move the seat belt buckle away
from the ISOFIX lower anchorages.
2. Move any other objects away from
the anchors that could prevent a
secure connection between the
child restraint and the ISOFIX lower
anchorages.
3. Place the child restraint on the vehi-
cle seat, then attach the seat to the
ISOFIX lower anchorages accord-
ing to the instructions provided by
the child restraint manufacturer.
4. Follow the child restraint instruc-
tions for properly adjusting and
tightening the lower attachments on
the child restraint to the ISOFIX
lower anchorages.
OLF034037
ISOFIX Lower Anchorage
Position Indicator
Page 72 of 504
2-55
Safety system of your vehicle
2
During a frontal collision, sensors will
detect the vehicle’s deceleration. If the
rate of deceleration is high enough,
the control unit will inflate the front air
bags, at the time and with the force
needed.
The front air bags help protect the
driver and front passenger by
responding to frontal impacts in
which seat belts alone cannot provide
adequate restraint. When needed,
the side air bags help provide protec-
tion in the event of a side impact.
• Air bags are activated (able to
inflate if necessary) only when the
ignition switch is in the ON position.
• Air bags inflate in the event of cer-
tain frontal or side collisions to help
protect the occupants from serious
physical injury.
• There is no single speed at which
the air bags will inflate. Generally,
air bags are designed to inflate
based upon the severity of a colli-
sion and its direction. These two
factors determine whether the sen-
sors produce an electronic deploy-
ment/inflation signal..• Air bag deployment depends on a
number of factors including vehicle
speed, angles of impact and the
density and stiffness of the vehicles
or objects which your vehicle
impacts during a collision. The
determining factors are not limited
to those mentioned above.
• The front air bags will completely
inflate and deflate in an instant. It is
virtually impossible for you to see
the air bags inflate during an acci-
dent. It is much more likely that you
will simply see the deflated air bags
hanging out of their storage com-
partments after the collision. (Continued)
•The light stays on after illumi-
nating for approximately 6
seconds.
•The light comes on whilst the
vehicle is in motion.
•The light blinks when the
engine is running.
We recommend that an autho-
rised HYUNDAI dealer inspect
the SRS as soon as possible if
any of these conditions occur.
Page 73 of 504
2-56
Safety system of your vehicle
• To help provide protection, the air
bags must inflate rapidly. The
speed of air bag inflation is a con-
sequence of the extremely short
time in which to inflate the air bag
between the occupant and the
vehicle structures before the occu-
pant impacts those structures. This
speed of inflation reduces the risk
of serious or life-threatening
injuries and is thus a necessary
part of air bag design.
However, the rapid air bag inflation
can also cause injuries which can
include facial abrasions, bruises
and broken bones because the
inflation speed also causes the air
bags to expand with a great deal of
force.
• There are even circumstances
under which contact with the air
bag can cause fatal injuries, espe-
cially if the occupant is positioned
excessively close to the air bag.You can take steps to reduce the risk
of being injured by an inflating air
bag. The greatest risk is sitting too
close to the air bag. An air bag needs
space to inflate. It is recommended
that drivers sit as far as possible
from the centre of the steering wheel
whilst still maintaining control of the
vehicle.
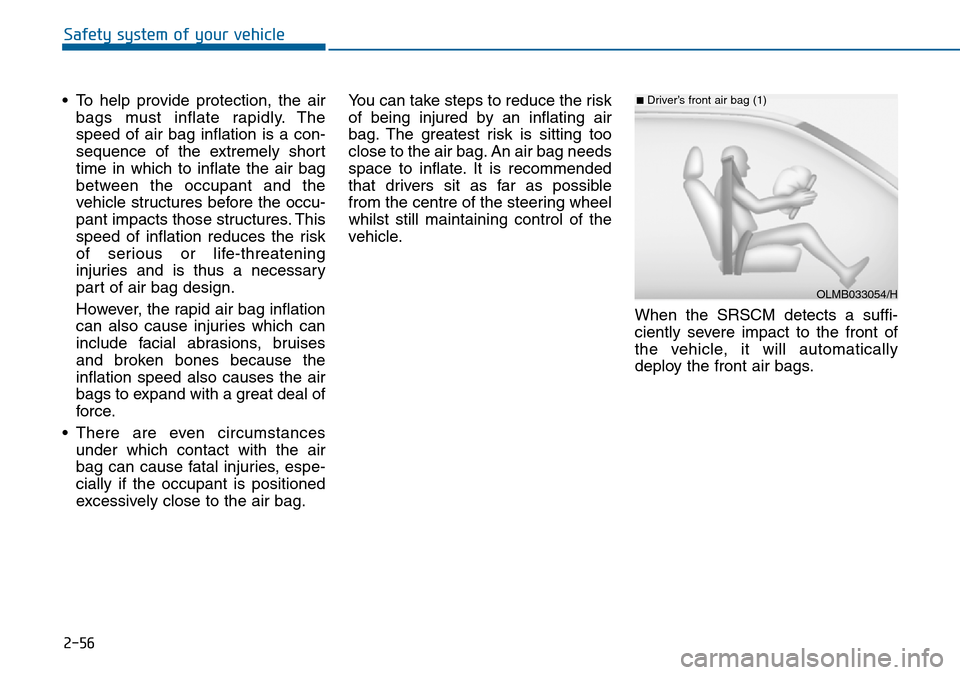
When the SRSCM detects a suffi-
ciently severe impact to the front of
the vehicle, it will automatically
deploy the front air bags.
OLMB033054/H
■Driver’s front air bag (1)
Page 90 of 504
3-6
Ty p e C
To unfold the key, press the release
button then the key will unfold auto-
matically.
To fold the key, fold the key manually
whilst pressing the release button.
Do not fold the key without press-
ing the release button. This may
damage the key.
Remote key precautions
The remote key will not work if any of
the following occur:
• The key is in the ignition switch.
• You exceed the operating distance
limit (about 30 m [90 feet]).
• The remote key battery is weak.
• Other vehicles or objects may be
blocking the signal.
• The weather is extremely cold.
• The remote key is close to a radio
transmitter such as a radio station
or an airport which can interfere
with normal operation of the
remote key.
When the remote key does not work
correctly, open and close the door
with the mechanical key. If you have
a problem with the remote key, it is
recommended that you contact an
authorised HYUNDAI dealer.If the remote key is in close proximi-
ty to your mobile phone, the signal
could be blocked by your mobile
phone’s normal operational signals.
This is especially important when the
phone is active such as making and
receiving calls, text messaging,
and/or sending/receiving emails.
Avoid placing the remote key and
your mobile phone in the same loca-
tion and always try to maintain an
adequate distance between the two
devices.
NOTICE
Convenient features of your vehicle
Page 91 of 504
3-7
Convenient features of your vehicle
Information
Changes or modifications not express-
ly approved by the party responsible
for compliance could void the user’s
authority to operate the equipment. If
the keyless entry system is inoperative
due to changes or modifications not
expressly approved by the party
responsible for compliance, it will not
be covered by your manufacturer’s
vehicle warranty.
Keep the remote key away from
electromagnetic materials that
block electromagnetic waves to
the key surface.
Battery replacement
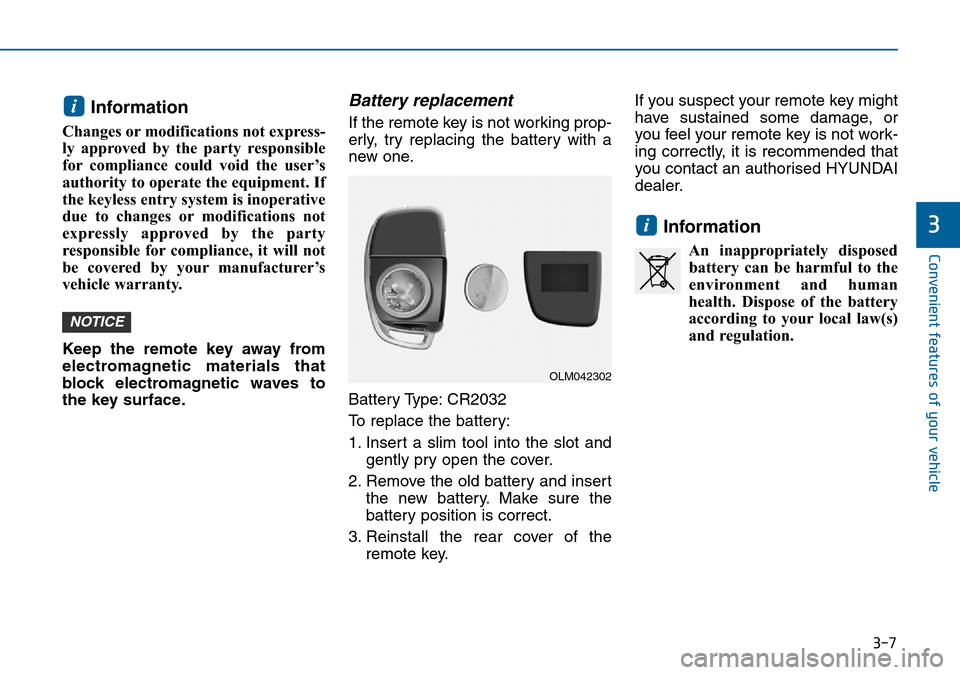
If the remote key is not working prop-
erly, try replacing the battery with a
new one.
Battery Type: CR2032
To replace the battery:
1. Insert a slim tool into the slot and
gently pry open the cover.
2. Remove the old battery and insert
the new battery. Make sure the
battery position is correct.
3. Reinstall the rear cover of the
remote key.If you suspect your remote key might
have sustained some damage, or
you feel your remote key is not work-
ing correctly, it is recommended that
you contact an authorised HYUNDAI
dealer.
Information
An inappropriately disposed
battery can be harmful to the
environment and human
health. Dispose of the battery
according to your local law(s)
and regulation.
i
NOTICE
i
3
OLM042302
Page 95 of 504
3-11
Convenient features of your vehicle
3
Loss of a smart key
A maximum of two smart keys can
be registered to a single vehicle. If
you happen to lose your smart key, it
is recommended that you should
immediately take the vehicle and
remaining key to your authorised
HYUNDAI dealer or tow the vehicle,
if necessary.
Smart key precautions
The smart key will not work if any of
the following occur:
• The smart key is close to a radio
transmitter such as a radio station
or an airport which can interfere
with normal operation of the trans-
mitter.
• The smart key is near a mobile two
way radio system or a mobile
phone.
• Another vehicle’s smart key is
being operated close to your vehi-
cle.
When the smart key does not work
correctly, open and close the door
with the mechanical key. If you have
a problem with the smart key, it is
recommended that you contact an
authorised HYUNDAI dealer.If the smart key is in close proximity
to your mobile phone, the signal
could be blocked by your mobile
phone’s normal operational signals.
This is especially important when the
phone is active such as making and
receiving calls, text messaging,
and/or sending/receiving emails.
Avoid placing the smart key and your
mobile phone in the same location
and always try to maintain an ade-
quate distance between the two
devices.
Information
Changes or modifications not express-
ly approved by the party responsible
for compliance could void the user’s
authority to operate the equipment. If
the keyless entry system is inoperative
due to changes or modifications not
expressly approved by the party
responsible for compliance, it will not
be covered by your manufacturer’s
vehicle warranty.
i
Page 135 of 504
3-51
Convenient features of your vehicle
3
(Continued)
•When refuelling, always move
the shift lever to the P (Park)
position (for automatic
transaxle) or first gear or R
(Reverse, for manual
transaxle), set the parking
brake, and place the ignition
switch to the LOCK/OFF posi-
tion. Sparks produced by
electrical components related
to the engine can ignite fuel
vapours causing a fire.
•When using an approved
portable fuel container, be sure
to place the container on the
ground prior to refuelling. Static
electricity discharge from the
container can ignite fuel
vapours causing a fire. Once
refuelling has begun, contact
between your bare hand and
the vehicle should be main-
tained until the filling is com-
plete.
(Continued)
(Continued)
•If pressurized fuel sprays out,
it can cover your clothes or
skin and thus subject you to
the risk of fire and burns.
Always remove the fuel cap
carefully and slowly. If the cap
is venting fuel or if you hear a
hissing sound, wait until the
condition stops before com-
pletely removing the cap.
•Always check that the fuel cap
is installed securely to pre-
vent fuel spillage in the event
of an accident.
(Continued)
•Use only approved portable
plastic fuel containers designed
to carry and store petrol.
•Do not use matches or a
lighter and do not smoke or
leave a lit cigarette in your
vehicle whilst at a gas station,
especially during refuelling.
•Do not over-fill or top-off your
vehicle tank, which can cause
petrol spillage.
•If a fire breaks out during refu-
elling, leave the vicinity of the
vehicle, and immediately con-
tact the manager of the gas
station and then contact the
local fire department. Follow
any safety instructions they
provide.
(Continued)
Page 180 of 504
3-96
Convenient features of your vehicle
Headlamp delay function
(if equipped)
If you place the ignition switch in to
the ACC or OFF position with the
headlamps ON, the headlamps
(and/or parking lamps) remain on for
about 5 minutes. However, with the
engine off if the driver’s door is
opened and closed, the headlamps
(and/or parking lamps) are turned off
after 15 seconds.
The headlamps (and/or parking
lamps) can be turned off by pressing
the lock button on the smart key
twice or turning the light switch to the
OFF or AUTO position. However, if
you turn the light switch to the AUTO
position when it is dark outside, the
headlamps will not be turned off.
You can activate or deactivate the
Headlamp Delay function from the
User Settings Mode on the LCD dis-
play.For more details, refer to
"LCD Display" in this chapter.If the driver gets out of the vehicle
through other doors (except dri-
ver's door), the battery saver func-
tion does not operate and the
headlamp delay function does not
turn off automatically. Therefore, It
causes the battery to be dis-
charged. In this case, make sure to
turn off the lamp before getting out
of the vehicle.
Daytime running light (DRL)
(if equipped)
The Daytime Running Lights (DRL)
can make it easier for others to see
the front of your vehicle during the
day, especially after dawn and before
sunset.
The DRL system will turn the dedi-
cated lamp OFF when:
1. The headlights or front fog lights
are in the ON position.
2. The parking switch is in the ON
position.
3. The engine is turned off.
NOTICE