Page 397 of 504
6-6
What to do in an emergency
To prevent damage to your vehi-
cle:
• Only use a 12-volt power supply
(battery or jumper system) to
jump start your vehicle.
• Do not attempt to jump start
your vehicle by push-starting.
Information
An inappropriately disposed
of battery can be harmful to
the environment and human
health. Dispose of the battery
according to your local law(s)
or regulations.
Jump starting procedure
1. Position the vehicles close enough
that the jumper cables will reach,
but do not allow the vehicles to
touch.
2. Avoid fans or any moving parts in
the engine compartment at all
times, even when the vehicles are
turned off.
3. Turn off all electrical devices such
as radios, lights, air conditioning,
etc. Put the vehicles in P (Park, for
automatic transaxle vehicle) or
neutral (for manual transaxle vehi-
cle), and set the parking brakes.
Turn both vehicles OFF.
i
NOTICE
Pb
(Continued)
•NEVER attempt to recharge
the battery when the vehicle’s
battery cables are connected
to the battery.
•The electrical ignition system
works with high voltage.
NEVER touch these compo-
nents with the engine running
or when the Engine Start/Stop
button is in the ON position.
•Do not allow the (+) and (-)
jumper cables to touch. It may
cause sparks.
•The battery may rupture or
explode when you jump start
with a low or frozen battery.
Page 413 of 504
7
Light bulbs.............................................................7-63
Headlamp, position lamp, turn signal lamp and
fog lamp bulb replacement ...........................................7-64
Side repeater lamp replacement .................................7-66
Rear combination light bulb replacement .................7-67
High mounted stop lamp replacement .......................7-71
Licence plate light bulb replacement ........................7-71
Interior light bulb replacement ....................................7-71
Appearance care ..................................................7-73
Exterior care ....................................................................7-73
Interior care......................................................................7-79
Emission control system .....................................7-81
Crankcase emission control system ...........................7-81
Evaporative emission control system.........................7-81
Exhaust emission control system ...............................7-82
Page 418 of 504
7-7
7
Maintenance
Owner maintenance schedule
When you stop for fuel:
• Check the engine oil level.
• Check coolant level in the engine
coolant reservoir.
• Check the windscreen washer fluid
level.
• Check for low or under-inflated
tyres.
Whilst operating your vehicle:
• Note any changes in the sound of
the exhaust or any smell of exhaust
fumes in the vehicle.
• Check for vibrations in the steering
wheel. Notice if there is any
increased steering effort or loose-
ness in the steering wheel, or
change in its straight-ahead position.
• Notice if your vehicle constantly
turns slightly or “pulls” to one side
when travelling on smooth, level
road.
• When stopping, listen and check for
unusual sounds, pulling to one side,
increased brake pedal travel or
“hard-to-push” brake pedal.
• If any slipping or changes in the
operation of your transaxle occurs,
check the transaxle fluid level.
• Check the automatic transaxle
P (Park) function.
• Check the parking brake.
• Check for fluid leaks under your vehi-
cle (water dripping from the air con-
ditioning system during or after use
is normal).
At least monthly:
• Check coolant level in the engine
coolant reservoir.
• Check the operation of all exterior
lights, including the stoplights, turn
signals and hazard warning flashers.
• Check the inflation pressures of all
tyres including the spare for tyres
that are worn, show uneven wear,
or are damaged.
• Check for loose wheel nuts.
Be careful when checking your
engine coolant level when the
engine is hot. This may result in
coolant being blown out of the
opening and cause serious
burns and other injuries.
WARNING
Page 444 of 504
7-33
7
Maintenance
BATTERY
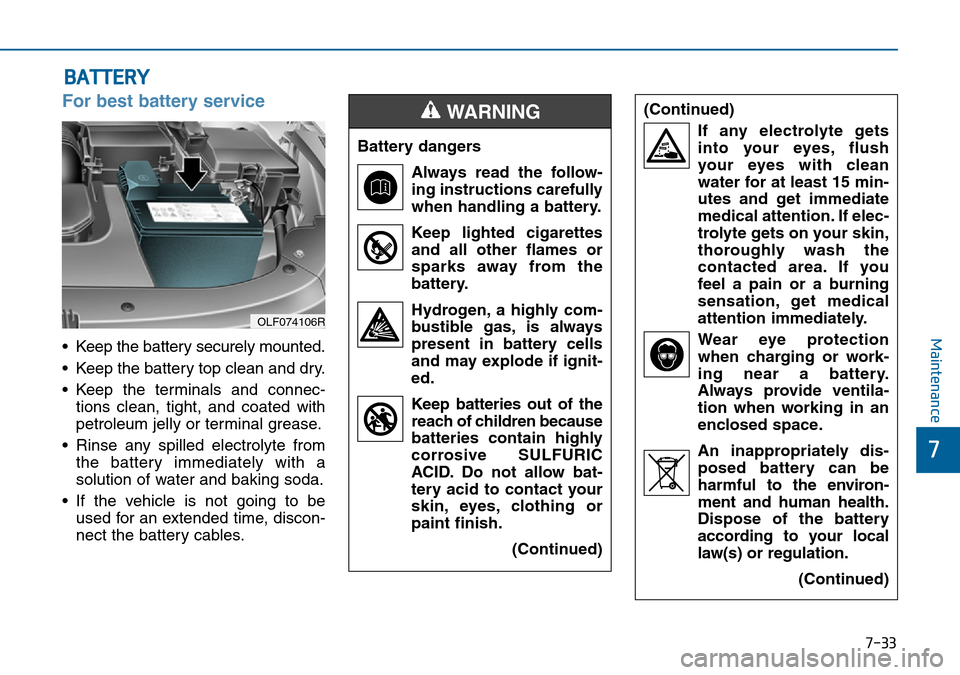
For best battery service
• Keep the battery securely mounted.
• Keep the battery top clean and dry.
• Keep the terminals and connec-
tions clean, tight, and coated with
petroleum jelly or terminal grease.
• Rinse any spilled electrolyte from
the battery immediately with a
solution of water and baking soda.
• If the vehicle is not going to be
used for an extended time, discon-
nect the battery cables.
OLF074106R
Battery dangers
Always read the follow-
ing instructions carefully
when handling a battery.
Keep lighted cigarettes
and all other flames or
sparks away from the
battery.
Hydrogen, a highly com-
bustible gas, is always
present in battery cells
and may explode if ignit-
ed.
Keep batteries out of the
reach of children because
batteries contain highly
corrosive SULFURIC
ACID. Do not allow bat-
tery acid to contact your
skin, eyes, clothing or
paint finish.
(Continued)
WARNING (Continued)
If any electrolyte gets
into your eyes, flush
your eyes with clean
water for at least 15 min-
utes and get immediate
medical attention. If elec-
trolyte gets on your skin,
thoroughly wash the
contacted area. If you
feel a pain or a burning
sensation, get medical
attention immediately.
Wear eye protection
when charging or work-
ing near a battery.
Always provide ventila-
tion when working in an
enclosed space.
An inappropriately dis-
posed battery can be
harmful to the environ-
ment and human health.
Dispose of the battery
according to your local
law(s) or regulation.
(Continued)
Page 459 of 504
7-48
Maintenance
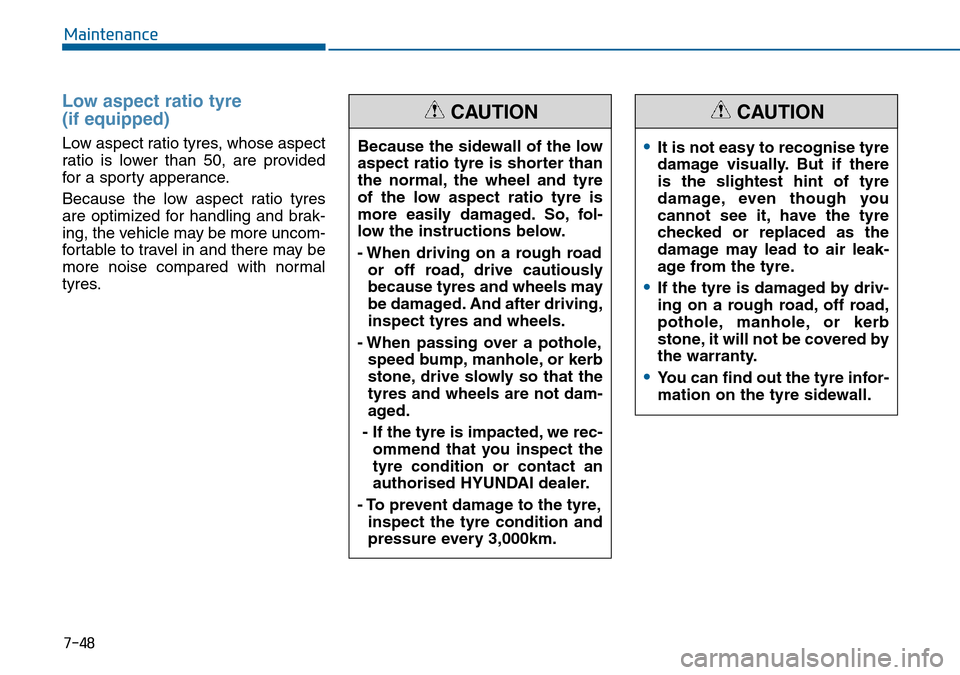
Low aspect ratio tyre
(if equipped)
Low aspect ratio tyres, whose aspect
ratio is lower than 50, are provided
for a sporty apperance.
Because the low aspect ratio tyres
are optimized for handling and brak-
ing, the vehicle may be more uncom-
fortable to travel in and there may be
more noise compared with normal
tyres.Because the sidewall of the low
aspect ratio tyre is shorter than
the normal, the wheel and tyre
of the low aspect ratio tyre is
more easily damaged. So, fol-
low the instructions below.
- When driving on a rough road
or off road, drive cautiously
because tyres and wheels may
be damaged. And after driving,
inspect tyres and wheels.
- When passing over a pothole,
speed bump, manhole, or kerb
stone, drive slowly so that the
tyres and wheels are not dam-
aged.
- If the tyre is impacted, we rec-
ommend that you inspect the
tyre condition or contact an
authorised HYUNDAI dealer.
- To prevent damage to the tyre,
inspect the tyre condition and
pressure every 3,000km.
CAUTION
•It is not easy to recognise tyre
damage visually. But if there
is the slightest hint of tyre
damage, even though you
cannot see it, have the tyre
checked or replaced as the
damage may lead to air leak-
age from the tyre.
•If the tyre is damaged by driv-
ing on a rough road, off road,
pothole, manhole, or kerb
stone, it will not be covered by
the warranty.
•You can find out the tyre infor-
mation on the tyre sidewall.
CAUTION
Page 460 of 504
7-49
7
Maintenance
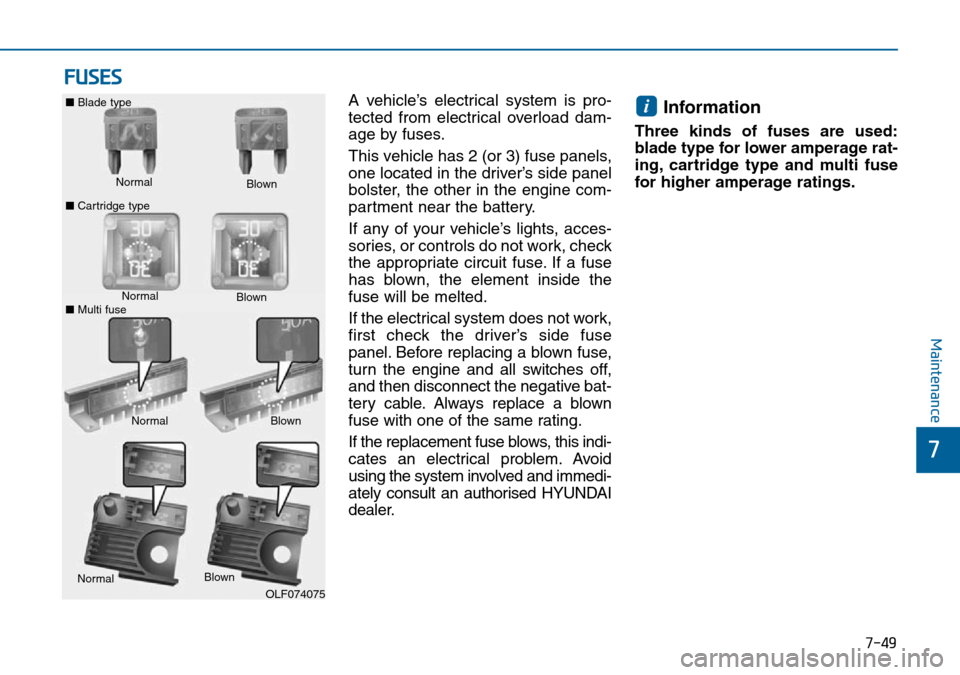
FUSES
A vehicle’s electrical system is pro-
tected from electrical overload dam-
age by fuses.
This vehicle has 2 (or 3) fuse panels,
one located in the driver’s side panel
bolster, the other in the engine com-
partment near the battery.
If any of your vehicle’s lights, acces-
sories, or controls do not work, check
the appropriate circuit fuse. If a fuse
has blown, the element inside the
fuse will be melted.
If the electrical system does not work,
first check the driver’s side fuse
panel. Before replacing a blown fuse,
turn the engine and all switches off,
and then disconnect the negative bat-
tery cable. Always replace a blown
fuse with one of the same rating.
If the replacement fuse blows, this indi-
cates an electrical problem. Avoid
using the system involved and immedi-
ately consult an authorised HYUNDAI
dealer.Information
Three kinds of fuses are used:
blade type for lower amperage rat-
ing, cartridge type and multi fuse
for higher amperage ratings.
i
Normal ■Blade type
■Cartridge typeBlown
NormalBlown
NormalBlown
OLF074075
Normal
Blown
■Multi fuse
Page 462 of 504
7-51
7
Maintenance
Inner panel fuse replacement
1. Turn the engine and all other
switches off.
2. Open the fuse panel cover.3. Pull the suspected fuse straight
out. Use the removal tool provided
in the engine compartment fuse
panel.
4. Check the removed fuse; replace it
if it is blown.
5. Push in a new fuse of the same
rating, and make sure it fits tightly
in the clips.
If it fits loosely, we recommend that
you consult an authorised HYUNDAI
dealer.
Information
If you do not have a spare, use a
fuse of the same rating from a cir-
cuit you may not need for operat-
ing the vehicle, such as the ciga-
rette lighter fuse.
If the headlamps or other electrical
components do not work and the
fuses are OK, check the fuse block in
the engine compartment. If a fuse is
blown, it must be replaced with the
same rating.
i
OLF074022
OLF074021R
Page 468 of 504
7-57
7
Maintenance
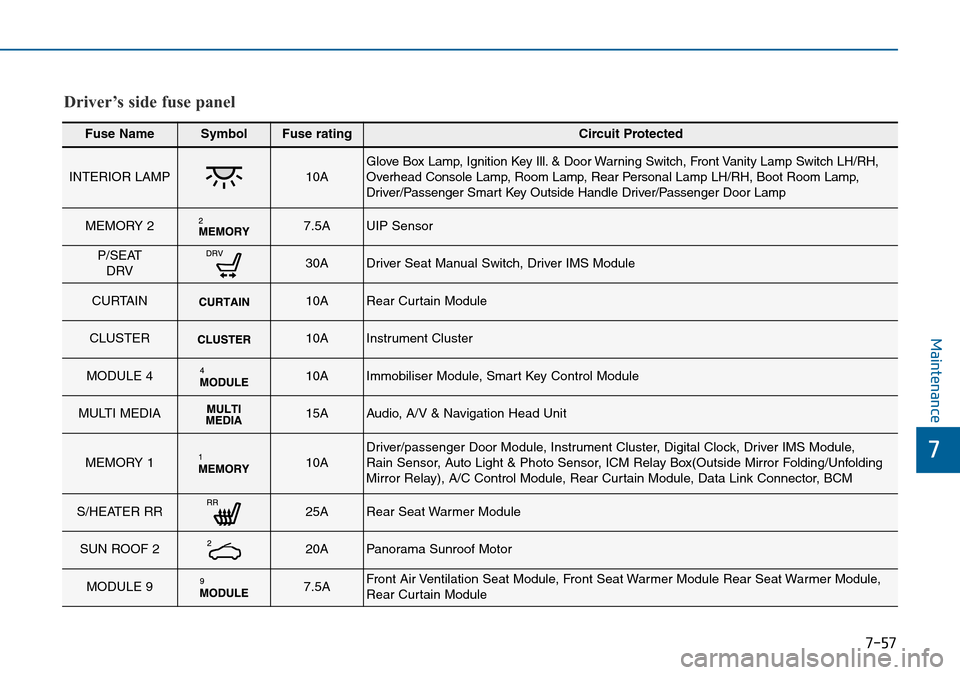
Fuse NameSymbolFuse ratingCircuit Protected
INTERIOR LAMP 10A Glove Box Lamp, Ignition Key Ill. & Door Warning Switch, Front Vanity Lamp Switch LH/RH,
Overhead Console Lamp, Room Lamp, Rear Personal Lamp LH/RH, Boot Room Lamp,
Driver/Passenger Smart Key Outside Handle Driver/Passenger Door Lamp
MEMORY 2 7.5A UIP Sensor
P/SEAT
DRV 30A Driver Seat Manual Switch, Driver IMS Module
CURTAIN 10A Rear Curtain Module
CLUSTER 10A Instrument Cluster
MODULE 4 10A Immobiliser Module, Smart Key Control Module
MULTI MEDIA 15A Audio, A/V & Navigation Head Unit
MEMORY 1 10A Driver/passenger Door Module, Instrument Cluster, Digital Clock, Driver IMS Module,
Rain Sensor, Auto Light & Photo Sensor, ICM Relay Box(Outside Mirror Folding/Unfolding
Mirror Relay), A/C Control Module, Rear Curtain Module, Data Link Connector, BCM
S/HEATER RR 25A Rear Seat Warmer Module
SUN ROOF 2 20A Panorama Sunroof Motor
MODULE 9 7.5A Front Air Ventilation Seat Module, Front Seat Warmer Module Rear Seat Warmer Module,
Rear Curtain Module
Driver’s side fuse panel