2015 Hyundai Santa Fe Sport driving vehicle
[x] Cancel search: driving vehiclePage 7 of 785
1
2
3
4
5
6
7
8
I
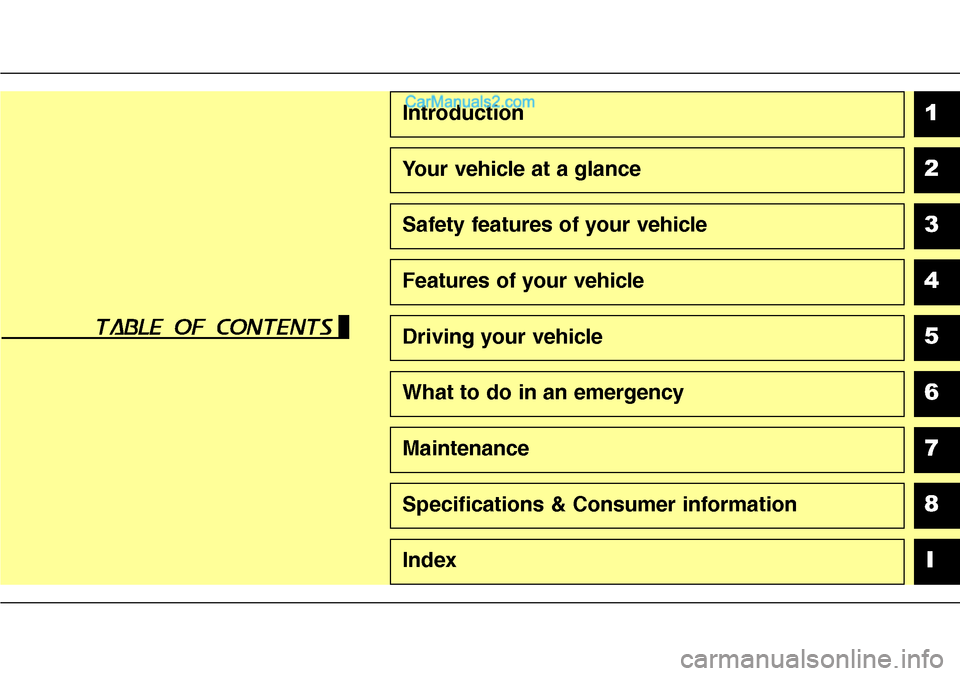
Introduction
Your vehicle at a glance
Safety features of your vehicle
Features of your vehicle
Driving your vehicle
What to do in an emergency
Maintenance
Specifications & Consumer information
Index
table of contents
Page 9 of 785
Introduction
2 1
We want to help you get the greatest
possible driving experience from
your vehicle. Your Owner’s Manual
can assist you in many ways. We
strongly recommend that you read
the entire manual. In order to mini-
mize the chance of death or injury,
you must read the WARNING and
CAUTION sections in the manual.
Illustrations complement the text in
this manual to best explain how to
use your vehicle. By reading your
manual, you will learn about fea-
tures, important safety information,
and driving tips under various road
conditions.The general layout of the manual is
provided in the Table of Contents. A
good place to start is the index; it has
an alphabetical listing of all informa-
tion in your manual.
Sections: This manual has eight sec-
tions plus an index. Each section
begins with a brief list of contents so
you can tell at a glance if that section
has the information you want.
You will find various WARNINGS,
CAUTIONS, and NOTICES in this
manual. These WARNINGS were pre-
pared to enhance your personal safe-
ty. You should carefully read and fol-
low ALL procedures and recommen-
dations provided in these WARN-
INGS, CAUTIONS and NOTICES.Symbols used in this manual
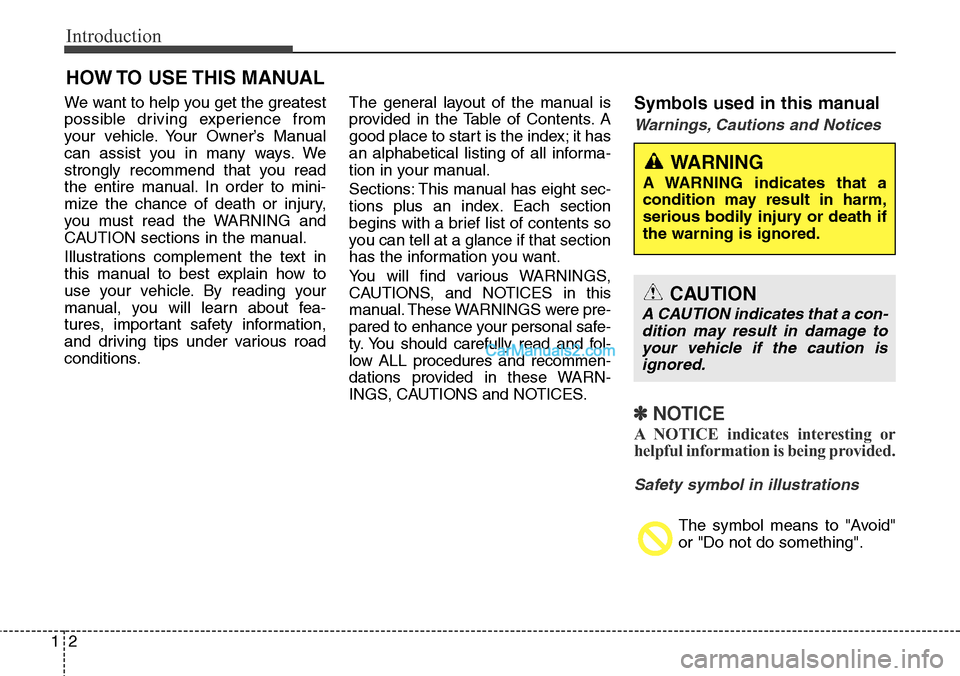
Warnings, Cautions and Notices
✽NOTICE
A NOTICE indicates interesting or
helpful information is being provided.
Safety symbol in illustrations
The symbol means to "Avoid"
or "Do not do something".
HOW TO USE THIS MANUAL
WARNING
A WARNING indicates that a
condition may result in harm,
serious bodily injury or death if
the warning is ignored.
CAUTION
A CAUTION indicates that a con-
dition may result in damage to
your vehicle if the caution is
ignored.
Page 12 of 785
15
Introduction
If TOP TIER Detergent Gasoline is
not available, one bottle of additive
added to the fuel tank at every
12,000km (7,500mile) or every
engine oil change is recommended.
Additives are available from your
authorized HYUNDAI dealer along
with information on how to use them.
Do not mix other additives.
Operation in foreign countries
If you are going to drive your vehicle
in another country, be sure to:
• Observe all regulations regarding
registration and insurance.
• Determine that acceptable fuel is
available.No special break-in period is needed.
By following a few simple precautions
for the first 1,000 km (600 miles) you
may add to the performance, econo-
my and life of your vehicle.
• Do not race the engine.
• While driving, keep your engine
speed (rpm, or revolutions per
minute) between 2,000 rpm and
4,000 rpm.
• Do not maintain a single speed for
long periods of time, either fast or
slow. Varying engine speed is
needed to properly break-in the
engine.
• Avoid hard stops, except in emer-
gencies, to allow the brakes to seat
properly.As with other vehicles of this type,
failure to operate this vehicle correct-
ly may result in loss of control, an
accident or vehicle rollover.
Specific design characteristics (high-
er ground clearance, track, etc.) give
this vehicle a higher center of gravity
than other types of vehicles. It is not
designed for cornering at the same
speeds as a conventional 2-wheel
drive sedans or sports coupe. Avoid
sharp turns or abrupt maneuvers.
Failure to operate this vehicle cor-
rectly may result in loss of control, an
accident or vehicle rollover.Be sure
to read the “Reducing the risk of a
rollover” driving guidelines, in
section 5 of this manual.
VEHICLE HANDLING
INSTRUCTIONS VEHICLE BREAK-IN
PROCESS
Page 13 of 785
Introduction
6 1
This vehicle is equipped with an
event data recorder (EDR). The
main purpose of an EDR is to
record, in certain crash or near
crash-like situations, such as an
air bag deployment or hitting a
road obstacle, data that will assist
in understanding how a vehicle's
systems performed. The EDR is
designed to record data related to
vehicle dynamics and safety sys-
tems for a short period of time,
typically 30 seconds or less. The
EDR in this vehicle is designed to
record such data as:
• How various systems in your
vehicle were operating;
• Whether or not the driver and
passenger safety belts were
buckled/fastened;
• How far (if at all) the driver was
depressing the accelerator
and/or brake pedal; and,
• How fast the vehicle was travel-
ing.These data can help provide a bet-
ter understanding of the circum-
stances in which crashes and
injuries occur. NOTE: EDR data are
recorded by your vehicle only if a
non-trivial crash situation occurs;
no data are recorded by the EDR
under normal driving conditions
and no personal data (e.g., name,
gender, age, and crash location)
are recorded. However, other par-
ties, such as law enforcement,
could combine the EDR data with
the type of personally identifying
data routinely acquired during a
crash investigation.To read data recorded by an EDR,
special equipment is required, and
access to the vehicle or the EDR is
needed. In addition to the vehicle
manufacturer, other parties, such
as law enforcement, that have the
special equipment, can read the
information if they have access to
the vehicle or the EDR.
VEHICLE DATA COLLECTION AND EVENT DATA RECORDERS
Page 26 of 785
35
Safety features of your vehicle
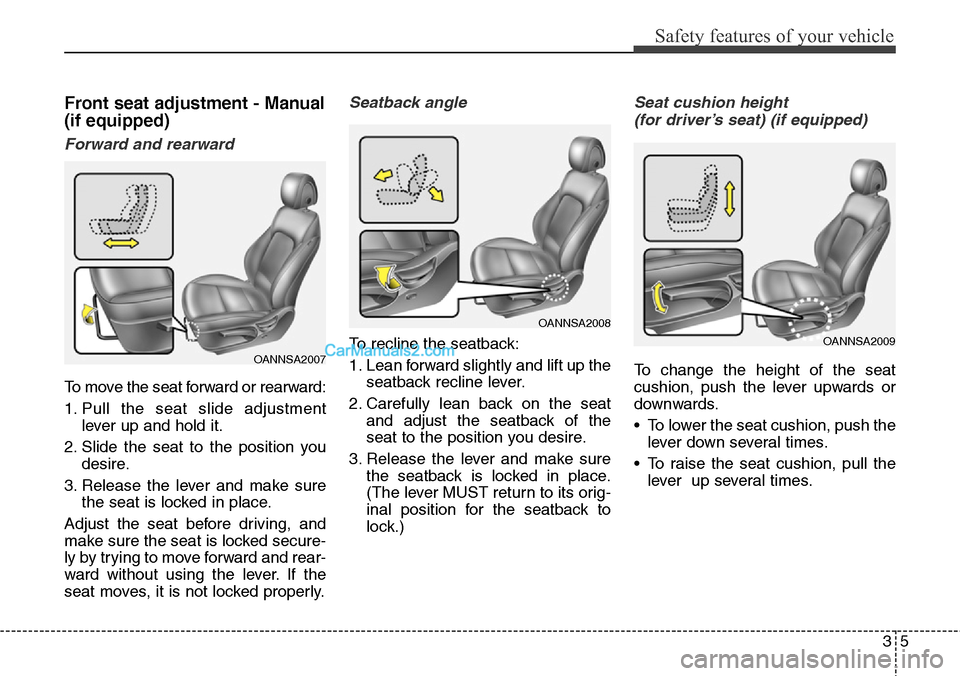
Front seat adjustment - Manual
(if equipped)
Forward and rearward
To move the seat forward or rearward:
1. Pull the seat slide adjustment
lever up and hold it.
2. Slide the seat to the position you
desire.
3. Release the lever and make sure
the seat is locked in place.
Adjust the seat before driving, and
make sure the seat is locked secure-
ly by trying to move forward and rear-
ward without using the lever. If the
seat moves, it is not locked properly.
Seatback angle
To recline the seatback:
1. Lean forward slightly and lift up the
seatback recline lever.
2. Carefully lean back on the seat
and adjust the seatback of the
seat to the position you desire.
3. Release the lever and make sure
the seatback is locked in place.
(The lever MUST return to its orig-
inal position for the seatback to
lock.)
Seat cushion height
(for driver’s seat) (if equipped)
To change the height of the seat
cushion, push the lever upwards or
downwards.
• To lower the seat cushion, push the
lever down several times.
• To raise the seat cushion, pull the
lever up several times.OANNSA2007
OANNSA2008
OANNSA2009
Page 27 of 785
Safety features of your vehicle
6 3
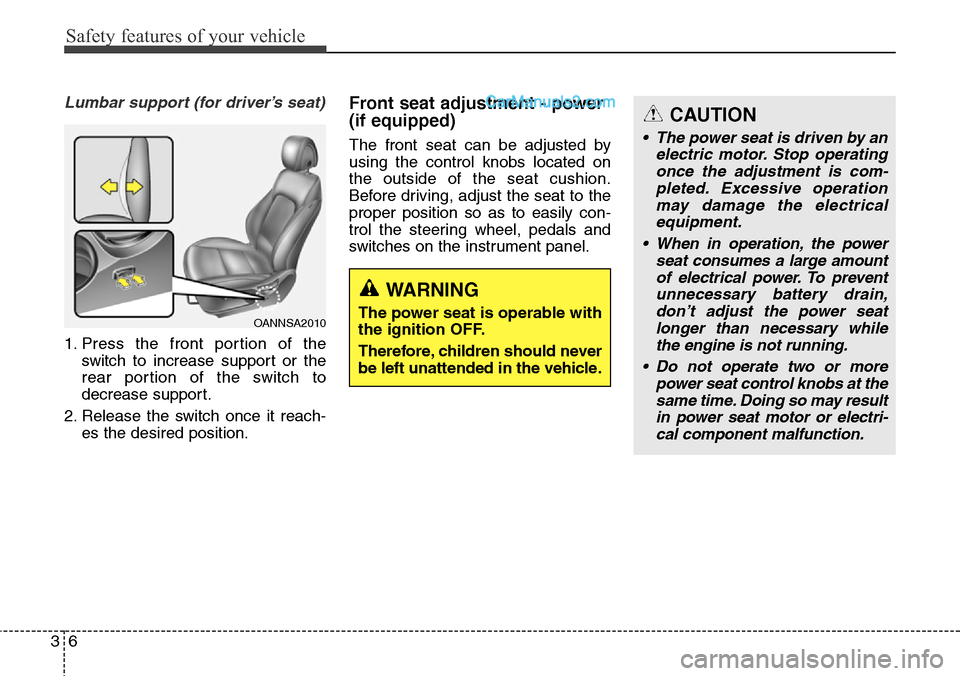
Lumbar support (for driver’s seat)
1. Press the front portion of the
switch to increase support or the
rear portion of the switch to
decrease support.
2. Release the switch once it reach-
es the desired position.
Front seat adjustment - power
(if equipped)
The front seat can be adjusted by
using the control knobs located on
the outside of the seat cushion.
Before driving, adjust the seat to the
proper position so as to easily con-
trol the steering wheel, pedals and
switches on the instrument panel.
OANNSA2010
WARNING
The power seat is operable with
the ignition OFF.
Therefore, children should never
be left unattended in the vehicle.
CAUTION
• The power seat is driven by an
electric motor. Stop operating
once the adjustment is com-
pleted. Excessive operation
may damage the electrical
equipment.
• When in operation, the power
seat consumes a large amount
of electrical power. To prevent
unnecessary battery drain,
don’t adjust the power seat
longer than necessary while
the engine is not running.
• Do not operate two or more
power seat control knobs at the
same time. Doing so may result
in power seat motor or electri-
cal component malfunction.
Page 29 of 785
Safety features of your vehicle
8 3
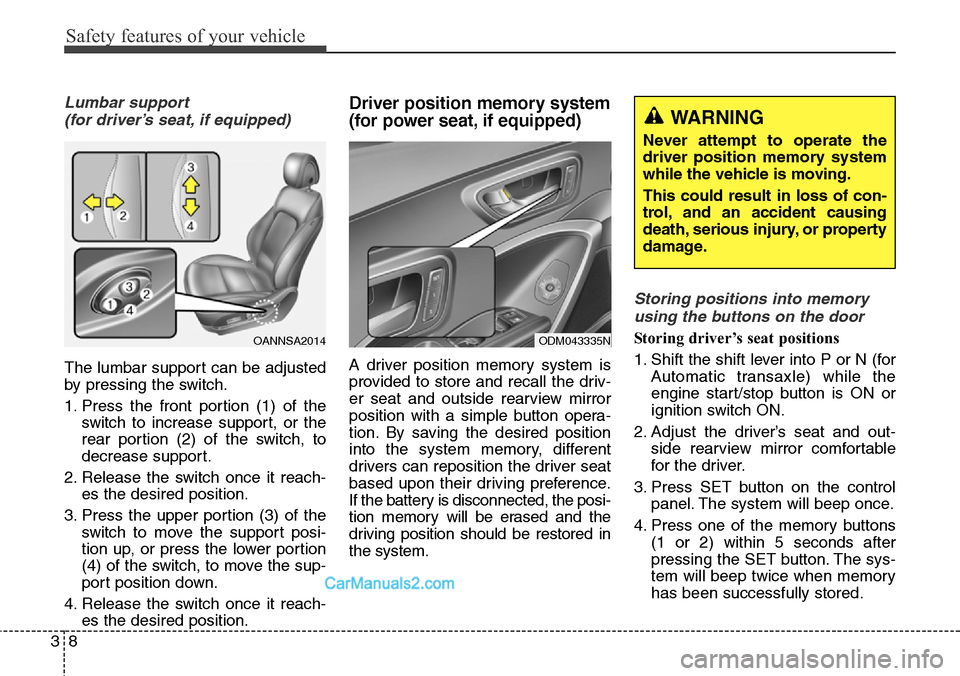
Lumbar support
(for driver’s seat, if equipped)
The lumbar support can be adjusted
by pressing the switch.
1. Press the front portion (1) of the
switch to increase support, or the
rear portion (2) of the switch, to
decrease support.
2. Release the switch once it reach-
es the desired position.
3. Press the upper portion (3) of the
switch to move the support posi-
tion up, or press the lower portion
(4) of the switch, to move the sup-
port position down.
4. Release the switch once it reach-
es the desired position.
Driver position memory system
(for power seat, if equipped)
A driver position memory system is
provided to store and recall the driv-
er seat and outside rearview mirror
position with a simple button opera-
tion. By saving the desired position
into the system memory, different
drivers can reposition the driver seat
based upon their driving preference.
If the battery is disconnected, the posi-
tion memory will be erased and the
driving position should be restored in
the system.
Storing positions into memory
using the buttons on the door
Storing driver’s seat positions
1. Shift the shift lever into P or N (for
Automatic transaxle) while the
engine start/stop button is ON or
ignition switch ON.
2. Adjust the driver’s seat and out-
side rearview mirror comfortable
for the driver.
3. Press SET button on the control
panel. The system will beep once.
4. Press one of the memory buttons
(1 or 2) within 5 seconds after
pressing the SET button. The sys-
tem will beep twice when memory
has been successfully stored.OANNSA2014ODM043335N
WARNING
Never attempt to operate the
driver position memory system
while the vehicle is moving.
This could result in loss of con-
trol, and an accident causing
death, serious injury, or property
damage.
Page 35 of 785
Safety features of your vehicle
14 3
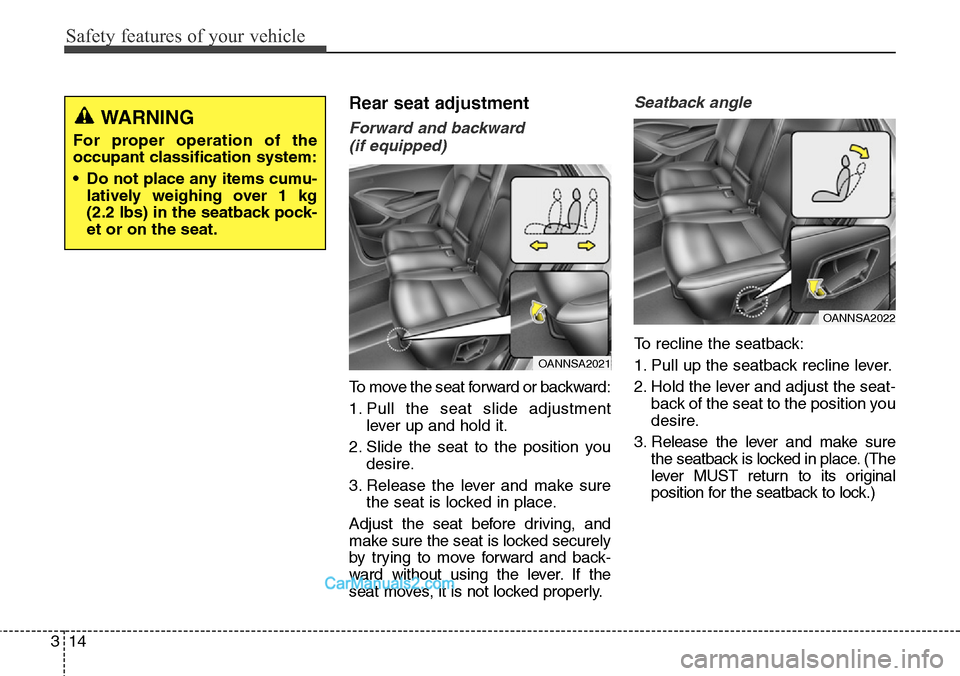
Rear seat adjustment
Forward and backward
(if equipped)
To move the seat forward or backward:
1. Pull the seat slide adjustment
lever up and hold it.
2. Slide the seat to the position you
desire.
3. Release the lever and make sure
the seat is locked in place.
Adjust the seat before driving, and
make sure the seat is locked securely
by trying to move forward and back-
ward without using the lever. If the
seat moves, it is not locked properly.
Seatback angle
To recline the seatback:
1. Pull up the seatback recline lever.
2. Hold the lever and adjust the seat-
back of the seat to the position you
desire.
3. Release the lever and make sure
the seatback is locked in place. (The
lever MUST return to its original
position for the seatback to lock.)
OANNSA2021
WARNING
For proper operation of the
occupant classification system:
• Do not place any items cumu-
latively weighing over 1 kg
(2.2 lbs) in the seatback pock-
et or on the seat.
OANNSA2022