Page 208 of 785
4115
Features of your vehicle
Immobilizer Indicator
Light (Without Smart Key)
This indicator light illuminates:
• When the vehicle detects the
immobilizer in your key properly
while the ignition switch is ON.
- At this time, you can start the
engine.
- The indicator light goes off after
starting the engine.
This indicator light blinks:
• When there is a malfunction with
the immobilizer system.
In this case, have your vehicle
inspected by an authorized
HYUNDAI dealer.
Immobilizer Indicator
Light (With Smart Key)
This indicator light illuminates for up
to 30 seconds:
• When the vehicle detects the
smart key in the vehicle properly
while the Engine Start/Stop Button
is ACC or ON.
- At this time, you can start the
engine.
- The indicator light goes off after
starting the engine.
This indicator light blinks for a few
seconds:
• When the smart key is not in the
vehicle.
- At this time, you can not start the
engine.This indicator light illuminates for 2
seconds and goes off:
• When the vehicle can not detect
the smart key which is in the vehi-
cle while the Engine Start/Stop
Button is ON.
In this case, have your vehicle
inspected by an authorized
HYUNDAI dealer.
This indicator light blinks:
• When the battery of the smart key
is weak.
- At this time, you can not start the
engine. However, you can start
the engine if you press the Engine
Start/Stop Button with the smart
key. (For more details, refer to
“Starting the Engine” in section 5).
• When there is a malfunction with
the immobilizer system.
In this case, have your vehicle
inspected by an authorized
HYUNDAI dealer.
Page 209 of 785
Features of your vehicle
116 4
Turn Signal Indicator
Light
This indicator light blinks:
• When you turn the turn signal light
on.
If any of the following occurs, there
may be a malfunction with the turn
signal system. In this case, have your
vehicle inspected by an authorized
HYUNDAI dealer.
- The indicator light does not blink
but illuminates.
- The indicator light blinks more
rapidly.
- The indicator light does not illumi-
nate at all.
High Beam Indicator
Light
This indicator light illuminates:
• When the headlights are on and in
the high beam position
• When the turn signal lever is pulled
into the Flash-to-Pass position.
Light ON Indicator Light
This indicator light illuminates:
• When the tail lights or headlights
are on.
Front Fog Indicator
Light (if equipped)
This indicator light illuminates:
• When the front fog lights are on.
All Wheel Drive (AWD)
LOCK Indicator Light
(if equipped)
This indicator light illuminates:
• Once you set the ignition switch or
Engine Start/Stop Button to the ON
position.
- It illuminates for approximately 3
seconds and then goes off.
• When you select AWD Lock mode
by pressing the AWD LOCK button.
- The AWD LOCK mode is to
increase the drive power when
driving on wet pavement, snow
covered roads and/or off-road.
CAUTION - AWD Lock
Mode
Do not use AWD LOCK mode on
dry paved roads or highway, it
can cause noise, vibration or
damage of AWD related parts.
Page 210 of 785
4117
Features of your vehicle
Cruise Indicator Light
(if equipped)
This indicator light illuminates:
• When the cruise control system is
enabled.
For more details, refer to “Cruise
Control System” in section 5.
Cruise SET Indicator
Light (if equipped)
This indicator light illuminates:
• When the cruise control speed is set.
For more details, refer to “Cruise
Control System” in section 5.
Downhill Brake Control
(DBC) Indicator Light
(if equipped)
This warning light illuminates:
• Once you set the ignition switch or
Engine Start/Stop Button to the ON
position.
- It illuminates for approximately 3
seconds and then goes off.
• When you activate the DBC sys-
tem by pressing the DBC button.
This warning light blinks:
• When the DBC is operating.
This warning light illuminates yellow:
• When there is a malfunction with
the DBC system.
In this case, we recommend that you
have the vehicle inspected by an
authorized HYUNDAI dealer.
For more details, refer to “Downhill
Brake Control (DBC) System” in
chapter 5.
CRUISE
SET
Page 212 of 785
4119
Features of your vehicle
• This system will activate when
backing up with the ignition switch
ON.
If the vehicle is moving at a speed
over 6 mph (10 km/h), the system
may not be activated correctly.
• The sensing distance while the
rear parking assist system is in
operation is approximately 120 cm
(47 in.).
• When more than two objects are
sensed at the same time, the clos-
est one will be recognized first.Types of warning sound
• When an object is 120 cm to 81 cm
(47 in. to 32 in.) from the rear
bumper: Buzzer beeps intermit-
tently.
• When an object is 80 cm to 41 cm
(31 in. to 16 in. ) from the rear
bumper: Buzzer beeps more fre-
quently.
• When an object is within 15 in. (40
cm) of the rear bumper:
Buzzer sounds continuously.
Non-operational conditions of
rear parking assist system
The rear parking assist system
may not operate properly when:
1. Moisture is frozen to the sensor. (It
will operate normally when the
moisture has been cleared.)
2. The sensor is covered with foreign
matter, such as snow or water, or
the sensor cover is blocked. (It will
operate normally when the materi-
al is removed or the sensor is no
longer blocked.)
3. Driving on uneven road surfaces
(unpaved roads, gravel, bumps,
gradient).
4. Objects generating excessive
noise (vehicle horns, loud motor-
cycle engines, or truck air brakes)
are within range of the sensor.
5. Heavy rain or water spray exists.
6. Wireless transmitters or mobile
phones are within range of the
sensor.
7. Trailer towing.
Page 217 of 785
Features of your vehicle
124 4
Battery saver function
• The purpose of this feature is to
prevent the battery from being dis-
charged. The system automatically
turns off the parking lights when
the driver removes the ignition key
(smart key : turns off the engine)
and opens the driver-side door.
• With this feature, the parking lights
will be turned off automatically if
the driver parks on the side of road
at night.
If necessary, to keep the lights on
when the ignition key is removed
(smart key : turns off the engine),
perform the following:
1) Open the driver-side door.
2) Turn the parking lights OFF and
ON again using the light switch
on the steering column.
Headlamp delay (if equipped)
If you turn the ignition switch to the
ACC or OFF position with the head-
lights ON, the headlights remain on
for about 5 minutes. However, if the
driver’s door is opened and closed,
the headlights are turned off after 15
seconds.
The headlights can be turned off by
pressing the lock button on the trans-
mitter (or smart key) twice or turning
the light switch to the OFF or Auto
position.
However, if you turn the light switch
to the Auto position when it is dark
outside, the headlights will not be
turned off.
You can activate or deactivate this
feature. Refer to “User Settings” in
this section.
LIGHTING
CAUTION
If the driver gets out of the vehi-
cle through other doors (other
than the driver's door), the bat-
tery saver function does not
operate and the headlamp delay
does not turn off automatically.
This will cause the battery to be
discharged. In this case, make
sure to turn off the lamp before
getting out of the vehicle.
Page 218 of 785
4125
Features of your vehicle
Daytime running light
(if equipped)
Daytime Running Lights (DRL) can
make it easier for others to see the
front of your vehicle during the day.
DRL can be helpful in many different
driving conditions, and it is especially
helpful after dawn and before sunset.
The DRL system will turn OFF when:
• The headlights are ON.
• Engine stops.
• The parking brake is applied.
Lighting control
The light switch has a Headlight and
a Parking light position.
To operate the lights, turn the knob at
the end of the control lever to one of
the following positions:(1) OFF position
(2) Auto light position (if equipped)
(3) Parking light position
(4) Headlight position
ODMECO2004
ODMECO2005 ■Type A
■Type B
Page 220 of 785
4127
Features of your vehicle
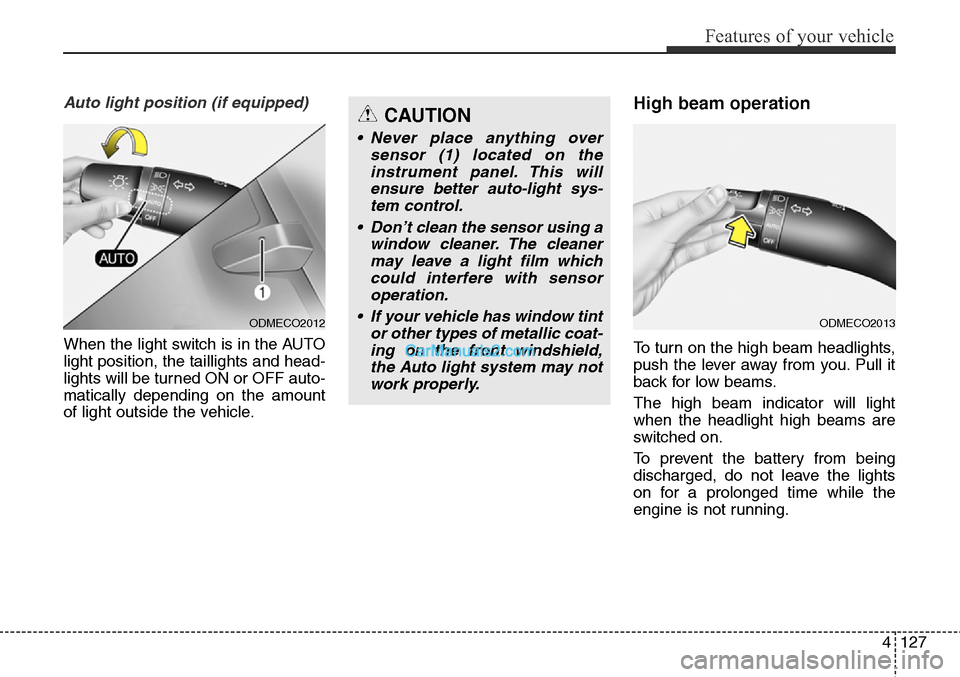
Auto light position (if equipped)
When the light switch is in the AUTO
light position, the taillights and head-
lights will be turned ON or OFF auto-
matically depending on the amount
of light outside the vehicle.
High beam operation
To turn on the high beam headlights,
push the lever away from you. Pull it
back for low beams.
The high beam indicator will light
when the headlight high beams are
switched on.
To prevent the battery from being
discharged, do not leave the lights
on for a prolonged time while the
engine is not running.
ODMECO2012
CAUTION
• Never place anything over
sensor (1) located on the
instrument panel. This will
ensure better auto-light sys-
tem control.
• Don’t clean the sensor using a
window cleaner. The cleaner
may leave a light film which
could interfere with sensor
operation.
• If your vehicle has window tint
or other types of metallic coat-
ing on the front windshield,
the Auto light system may not
work properly.
ODMECO2013
Page 225 of 785
Features of your vehicle
132 4
Windshield washers
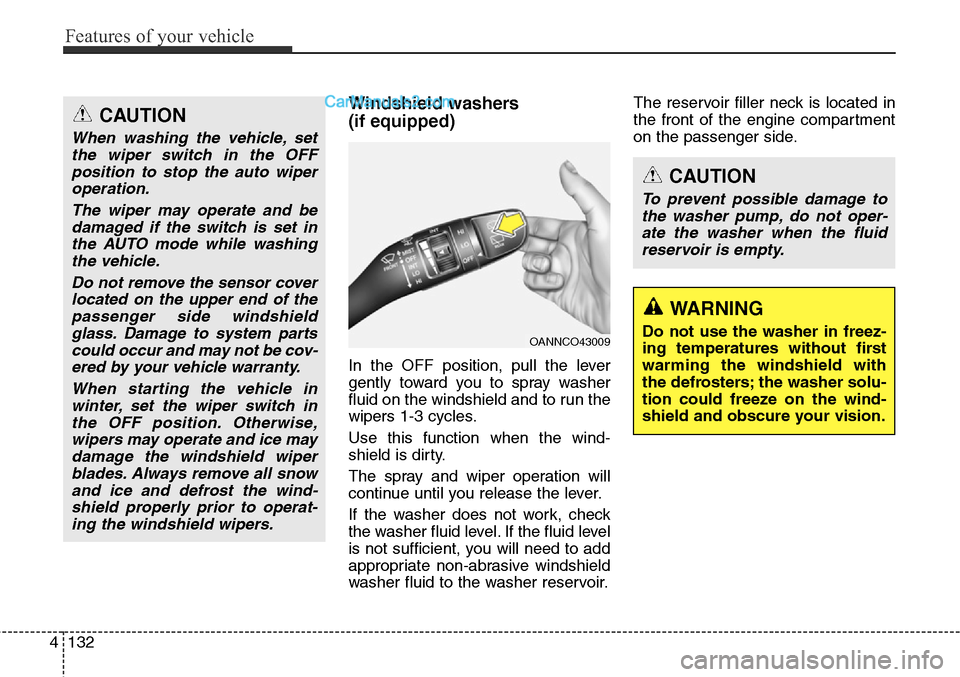
(if equipped)
In the OFF position, pull the lever
gently toward you to spray washer
fluid on the windshield and to run the
wipers 1-3 cycles.
Use this function when the wind-
shield is dirty.
The spray and wiper operation will
continue until you release the lever.
If the washer does not work, check
the washer fluid level. If the fluid level
is not sufficient, you will need to add
appropriate non-abrasive windshield
washer fluid to the washer reservoir.The reservoir filler neck is located in
the front of the engine compartment
on the passenger side.
OANNCO43009
CAUTION
To prevent possible damage to
the washer pump, do not oper-
ate the washer when the fluid
reservoir is empty.
WARNING
Do not use the washer in freez-
ing temperatures without first
warming the windshield with
the defrosters; the washer solu-
tion could freeze on the wind-
shield and obscure your vision.
CAUTION
When washing the vehicle, set
the wiper switch in the OFF
position to stop the auto wiper
operation.
The wiper may operate and be
damaged if the switch is set in
the AUTO mode while washing
the vehicle.
Do not remove the sensor cover
located on the upper end of the
passenger side windshield
glass. Damage to system parts
could occur and may not be cov-
ered by your vehicle warranty.
When starting the vehicle in
winter, set the wiper switch in
the OFF position. Otherwise,
wipers may operate and ice may
damage the windshield wiper
blades. Always remove all snow
and ice and defrost the wind-
shield properly prior to operat-
ing the windshield wipers.