Page 196 of 785
4103
Features of your vehicle
Overview
Description
The trip computer is a microcomput-
er-controlled driver information sys-
tem that displays information related
to driving.
✽NOTICE
Some driving information stored in
the trip computer (for example
Average Vehicle Speed) resets if the
battery is disconnected.
Trip Modes
TRIP COMPUTER
• Tripmeter [A]
• Average Vehicle Speed [A]
• Elapsed Time [A]
TRIP A
• Tripmeter [B]
• Average Vehicle Speed [B]
• Elapsed Time [B]
TRIP B
• Distance To Empty
• Average Fuel Economy
• Instant Fuel Economy
FUEL ECONOMY
Page 197 of 785
Features of your vehicle
104 4
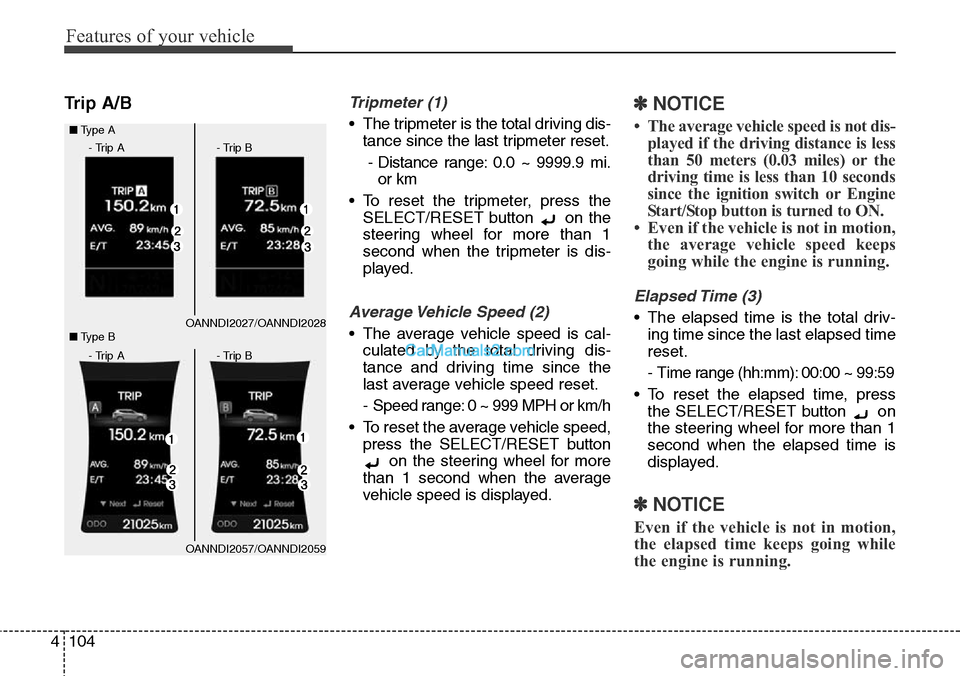
Trip A/BTripmeter (1)
• The tripmeter is the total driving dis-
tance since the last tripmeter reset.
- Distance range: 0.0 ~ 9999.9 mi.
or km
• To reset the tripmeter, press the
SELECT/RESET button on the
steering wheel for more than 1
second when the tripmeter is dis-
played.
Average Vehicle Speed (2)
• The average vehicle speed is cal-
culated by the total driving dis-
tance and driving time since the
last average vehicle speed reset.
- Speed range: 0 ~ 999 MPH or km/h
• To reset the average vehicle speed,
press the SELECT/RESET button
on the steering wheel for more
than 1 second when the average
vehicle speed is displayed.
✽NOTICE
• The average vehicle speed is not dis-
played if the driving distance is less
than 50 meters (0.03 miles) or the
driving time is less than 10 seconds
since the ignition switch or Engine
Start/Stop button is turned to ON.
• Even if the vehicle is not in motion,
the average vehicle speed keeps
going while the engine is running.
Elapsed Time (3)
• The elapsed time is the total driv-
ing time since the last elapsed time
reset.
- Time range (hh:mm): 00:00 ~ 99:59
• To reset the elapsed time, press
the SELECT/RESET button on
the steering wheel for more than 1
second when the elapsed time is
displayed.
✽NOTICE
Even if the vehicle is not in motion,
the elapsed time keeps going while
the engine is running.
OANNDI2027/OANNDI2028 ■Type A
OANNDI2057/OANNDI2059 ■Type B
- Trip A - Trip B
- Trip A - Trip B
Page 198 of 785
4105
Features of your vehicle
Fuel Economy
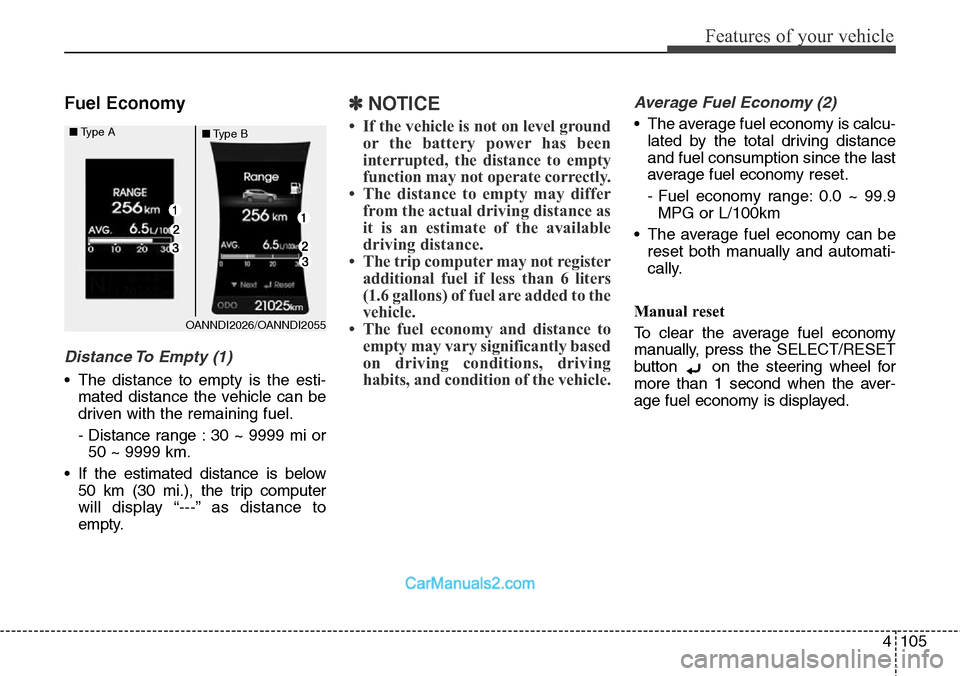
Distance To Empty (1)
• The distance to empty is the esti-
mated distance the vehicle can be
driven with the remaining fuel.
- Distance range : 30 ~ 9999 mi or
50 ~ 9999 km.
• If the estimated distance is below
50 km (30 mi.), the trip computer
will display “---” as distance to
empty.
✽NOTICE
• If the vehicle is not on level ground
or the battery power has been
interrupted, the distance to empty
function may not operate correctly.
• The distance to empty may differ
from the actual driving distance as
it is an estimate of the available
driving distance.
• The trip computer may not register
additional fuel if less than 6 liters
(1.6 gallons) of fuel are added to the
vehicle.
• The fuel economy and distance to
empty may vary significantly based
on driving conditions, driving
habits, and condition of the vehicle.
Average Fuel Economy (2)
• The average fuel economy is calcu-
lated by the total driving distance
and fuel consumption since the last
average fuel economy reset.
- Fuel economy range: 0.0 ~ 99.9
MPG or L/100km
• The average fuel economy can be
reset both manually and automati-
cally.
Manual reset
To clear the average fuel economy
manually, press the SELECT/RESET
button on the steering wheel for
more than 1 second when the aver-
age fuel economy is displayed.
OANNDI2026/OANNDI2055 ■Type A
■Type B
Page 199 of 785
Features of your vehicle
106 4
Automatic reset
To make the average fuel economy
be reset automatically whenever refu-
eling, select the “Auto Reset” mode in
User Setting menu of the LCD display
(Refer to “LCD Display”).
Under “Auto Reset” mode, the aver-
age fuel economy will be cleared to
zero (---) when the vehicle speed
exceeds 1 km/h after refueling more
than 6 liters (1.6 gallons).
✽NOTICE
The average fuel economy is not dis-
played for more accurate calculation
if the vehicle does not drive more
than 10 seconds or 50 meters (0.03
miles) since the ignition switch or
Engine Start/Stop button is turned
to ON.
Instant Fuel Economy (3)
• This mode displays the instant fuel
economy during the last few sec-
onds when the vehicle speed is
more than 10 km/h (6.2 MPH).
- Fuel economy range: 0 ~ 50 MPG
or 0 ~ 30 L/100km
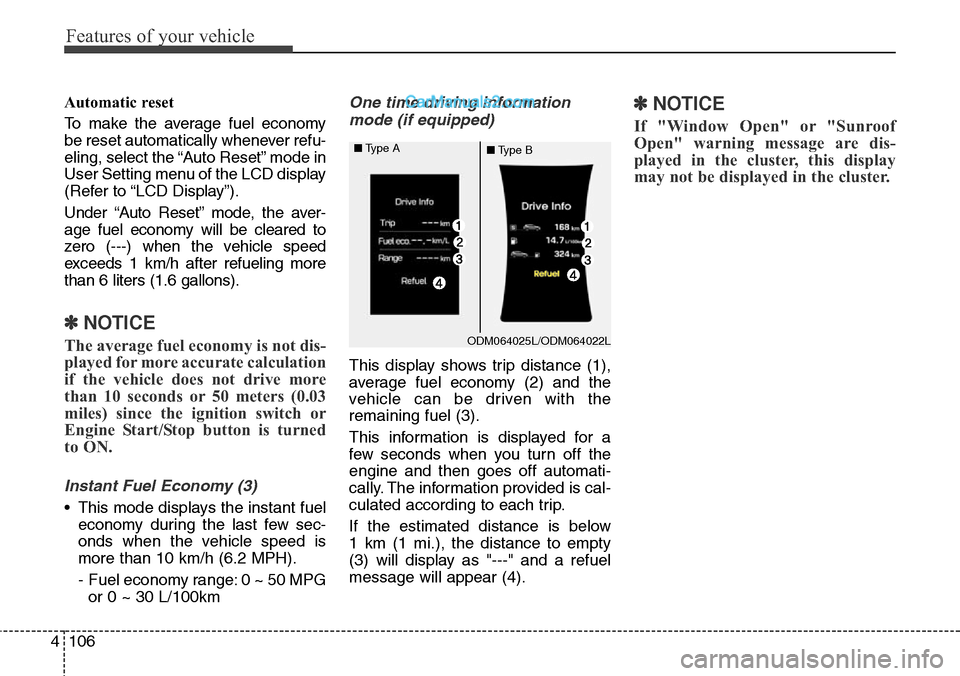
One time driving information
mode (if equipped)
This display shows trip distance (1),
average fuel economy (2) and the
vehicle can be driven with the
remaining fuel (3).
This information is displayed for a
few seconds when you turn off the
engine and then goes off automati-
cally. The information provided is cal-
culated according to each trip.
If the estimated distance is below
1 km (1 mi.), the distance to empty
(3) will display as "---" and a refuel
message will appear (4).
✽NOTICE
If "Window Open" or "Sunroof
Open" warning message are dis-
played in the cluster, this display
may not be displayed in the cluster.
ODM064025L/ODM064022L ■Type A
■Type B
Page 245 of 785
Features of your vehicle
152 4
Temperature control
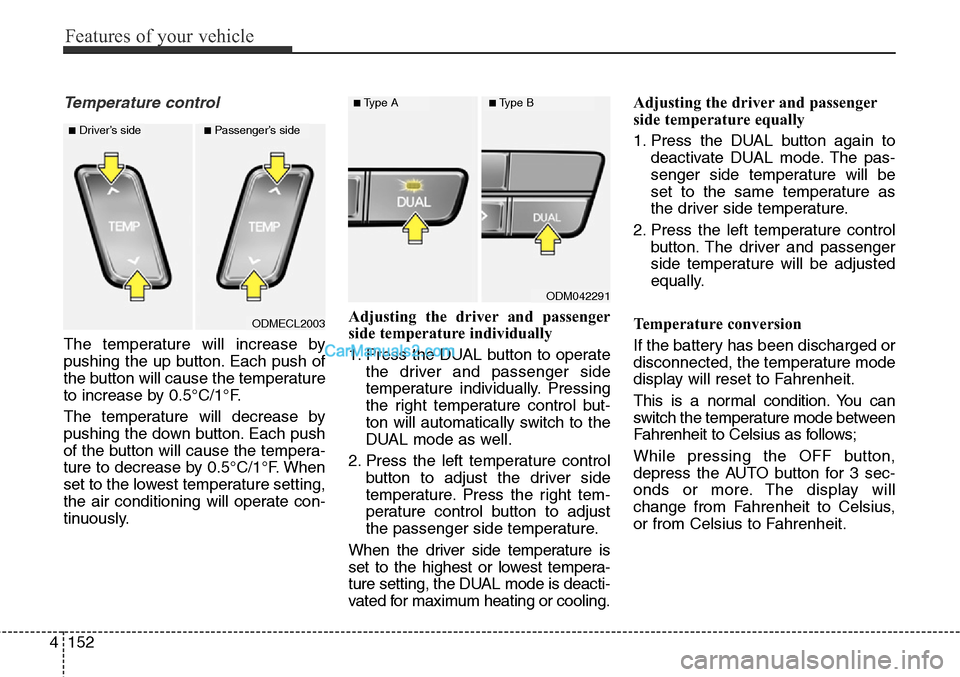
The temperature will increase by
pushing the up button. Each push of
the button will cause the temperature
to increase by 0.5°C/1°F.
The temperature will decrease by
pushing the down button. Each push
of the button will cause the tempera-
ture to decrease by 0.5°C/1°F. When
set to the lowest temperature setting,
the air conditioning will operate con-
tinuously.Adjusting the driver and passenger
side temperature individually
1. Press the DUAL button to operate
the driver and passenger side
temperature individually. Pressing
the right temperature control but-
ton will automatically switch to the
DUAL mode as well.
2. Press the left temperature control
button to adjust the driver side
temperature. Press the right tem-
perature control button to adjust
the passenger side temperature.
When the driver side temperature is
set to the highest or lowest tempera-
ture setting, the DUAL mode is deacti-
vated for maximum heating or cooling.Adjusting the driver and passenger
side temperature equally
1. Press the DUAL button again to
deactivate DUAL mode. The pas-
senger side temperature will be
set to the same temperature as
the driver side temperature.
2. Press the left temperature control
button. The driver and passenger
side temperature will be adjusted
equally.
Temperature conversion
If the battery has been discharged or
disconnected, the temperature mode
display will reset to Fahrenheit.
This is a normal condition. You can
switch the temperature mode between
Fahrenheit to Celsius as follows;
While pressing the OFF button,
depress the AUTO button for 3 sec-
onds or more. The display will
change from Fahrenheit to Celsius,
or from Celsius to Fahrenheit.
ODMECL2003
■Driver’s side■Passenger’s side
ODM042291
■Type A■Type B
Page 251 of 785
Features of your vehicle
158 4
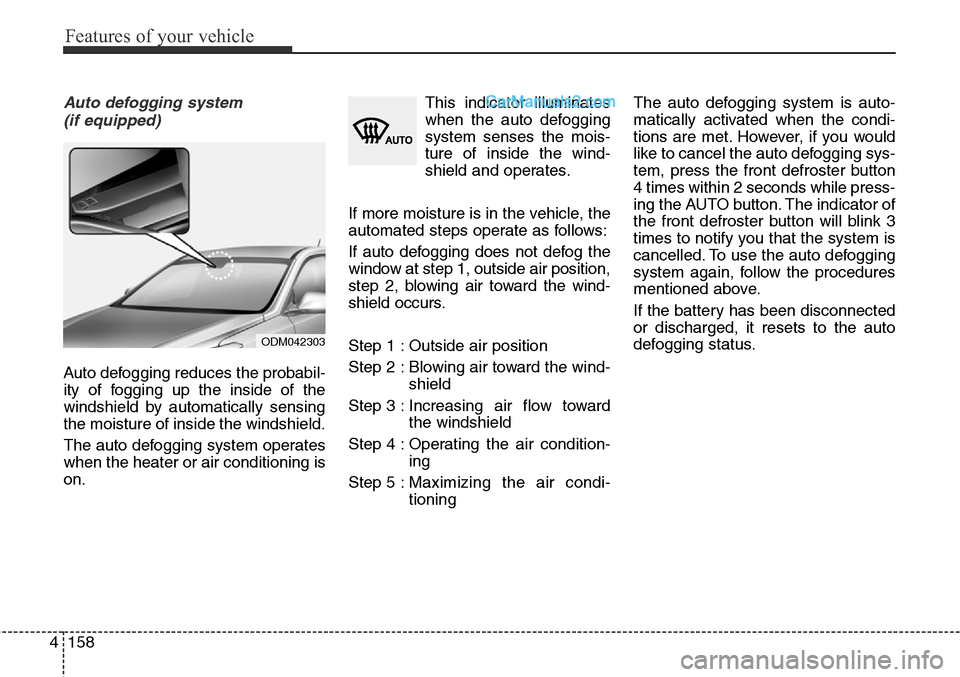
Auto defogging system
(if equipped)
Auto defogging reduces the probabil-
ity of fogging up the inside of the
windshield by automatically sensing
the moisture of inside the windshield.
The auto defogging system operates
when the heater or air conditioning is
on.This indicator illuminates
when the auto defogging
system senses the mois-
ture of inside the wind-
shield and operates.
If more moisture is in the vehicle, the
automated steps operate as follows:
If auto defogging does not defog the
window at step 1, outside air position,
step 2, blowing air toward the wind-
shield occurs.
Step 1 : Outside air position
Step 2 : Blowing air toward the wind-
shield
Step 3 : Increasing air flow toward
the windshield
Step 4 : Operating the air condition-
ing
Step 5 :Maximizing the air condi-
tioningThe auto defogging system is auto-
matically activated when the condi-
tions are met. However, if you would
like to cancel the auto defogging sys-
tem, press the front defroster button
4 times within 2 seconds while press-
ing the AUTO button. The indicator of
the front defroster button will blink 3
times to notify you that the system is
cancelled. To use the auto defogging
system again, follow the procedures
mentioned above.
If the battery has been disconnected
or discharged, it resets to the auto
defogging status.
ODM042303
Page 266 of 785
4173
Features of your vehicle
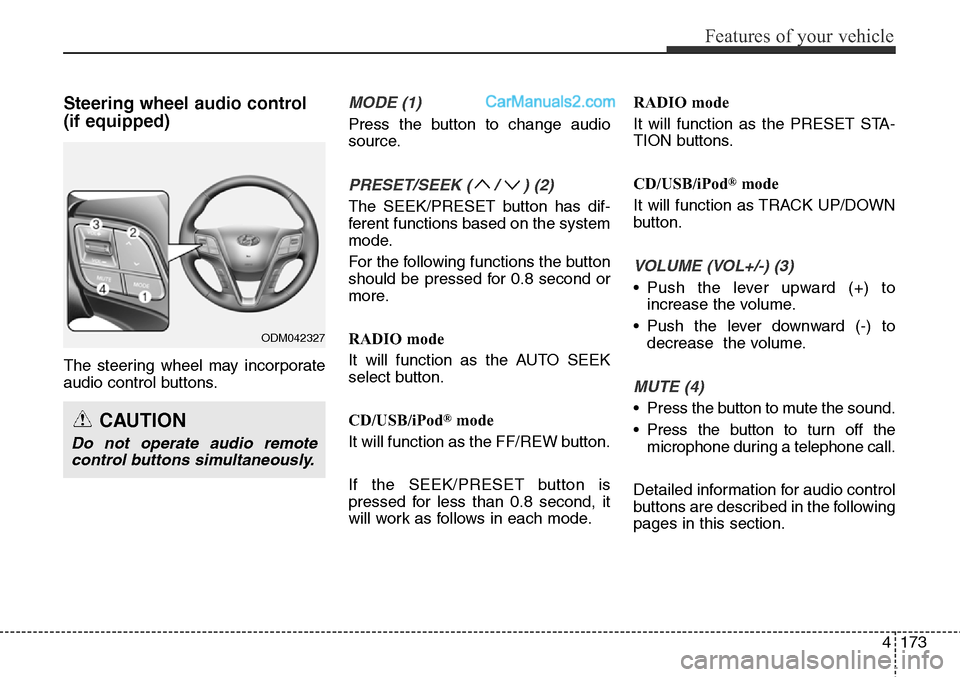
Steering wheel audio control
(if equipped)
The steering wheel may incorporate
audio control buttons.
MODE (1)
Press the button to change audio
source.
PRESET/SEEK ( / ) (2)
The SEEK/PRESET button has dif-
ferent functions based on the system
mode.
For the following functions the button
should be pressed for 0.8 second or
more.
RADIO mode
It will function as the AUTO SEEK
select button.
CD/USB/iPod
®mode
It will function as the FF/REW button.
If the SEEK/PRESET button is
pressed for less than 0.8 second, it
will work as follows in each mode.RADIO mode
It will function as the PRESET STA-
TION buttons.
CD/USB/iPod
®mode
It will function as TRACK UP/DOWN
button.
VOLUME (VOL+/-) (3)
• Push the lever upward (+) to
increase the volume.
• Push the lever downward (-) to
decrease the volume.
MUTE (4)
• Press the button to mute the sound.
• Press the button to turn off the
microphone during a telephone call.
Detailed information for audio control
buttons are described in the following
pages in this section.CAUTION
Do not operate audio remote
control buttons simultaneously.
ODM042327
Page 273 of 785
Features of your vehicle
180 4
(Continued)
• Some USB flash memory read-
ers (such as CF, SD, micro SD,
etc.) or external-HDD type
devices can be unrecognizable.
• Music files protected by DRM
(DIGITAL RIGHTS MANAGE-
MENT) are not recognizable.
• The data in the USB memory
may be lost while using this
audio. Always back up impor-
tant data on a personal storage
device.
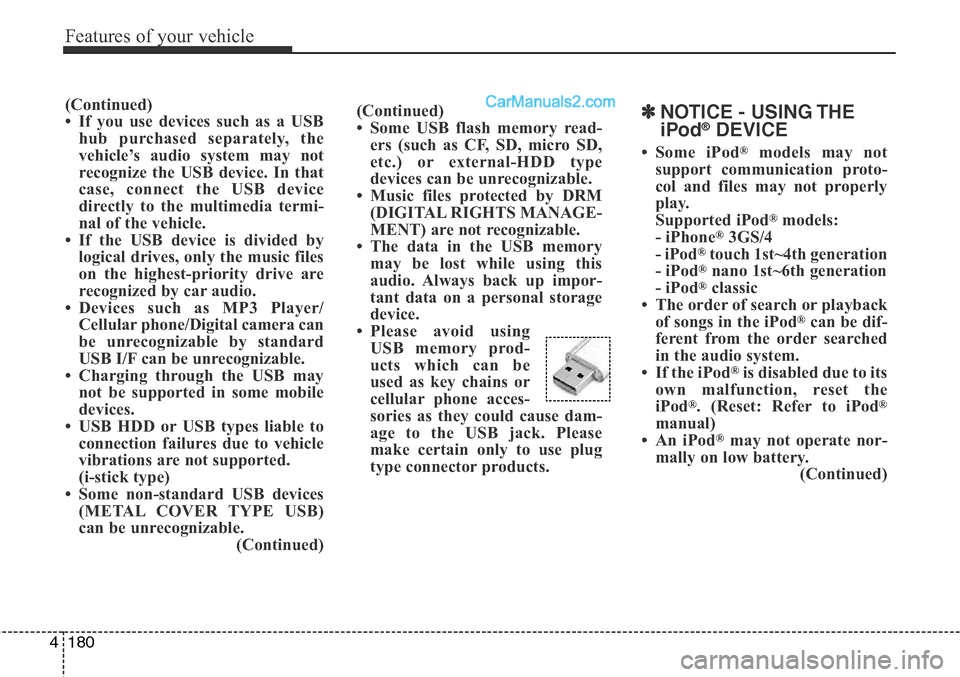
• Please avoid using
USB memory prod-
ucts which can be
used as key chains or
cellular phone acces-
sories as they could cause dam-
age to the USB jack. Please
make certain only to use plug
type connector products.(Continued)
• If you use devices such as a USB
hub purchased separately, the
vehicle’s audio system may not
recognize the USB device. In that
case, connect the USB device
directly to the multimedia termi-
nal of the vehicle.
• If the USB device is divided by
logical drives, only the music files
on the highest-priority drive are
recognized by car audio.
• Devices such as MP3 Player/
Cellular phone/Digital camera can
be unrecognizable by standard
USB I/F can be unrecognizable.
• Charging through the USB may
not be supported in some mobile
devices.
• USB HDD or USB types liable to
connection failures due to vehicle
vibrations are not supported.
(i-stick type)
• Some non-standard USB devices
(METAL COVER TYPE USB)
can be unrecognizable.
(Continued)✽NOTICE - USING THE
iPod®DEVICE
• Some iPod®models may not
support communication proto-
col and files may not properly
play.
Supported iPod
®models:
- iPhone®3GS/4
- iPod®touch 1st~4th generation
- iPod®nano 1st~6th generation
- iPod®classic
• The order of search or playback
of songs in the iPod
®can be dif-
ferent from the order searched
in the audio system.
• If the iPod
®is disabled due to its
own malfunction, reset the
iPod
®. (Reset: Refer to iPod®
manual)
• An iPod®may not operate nor-
mally on low battery.
(Continued)