2015 HYUNDAI I40 light
[x] Cancel search: lightPage 186 of 534
Downloaded from www.Manualslib.com manuals search engine 499
Features of your vehicle
Traffic change (for Europe) (vehicle’s equipped with AFLS)
Use this function when you visit a coun-
try with opposite traffic direction.
Follow the below procedure.
1. Stop the vehicle with the engine run- ning.
2. Change the switch from the park light ( ) position to the headlight position
( ) 10 times within 15 seconds.
3. A beep sound will be heard 3 times to notify you the change has been made
successfully.
4. To cancel the change, follow the above procedure again.
✽ ✽NOTICE
• If the traffic change function is acti-
vated, a beep sound will be heard 3
times.
• If the engine is turned off with the traffic change function activated, and
the engine turned on again, a beep
sound will be heard 3 times. It is to
notify the driver the function is acti-
vated.
• If the traffic change is activated when you visit a country with opposite traf-
fic direction, it will decrease the dazzle
on oncoming vehicle drivers.
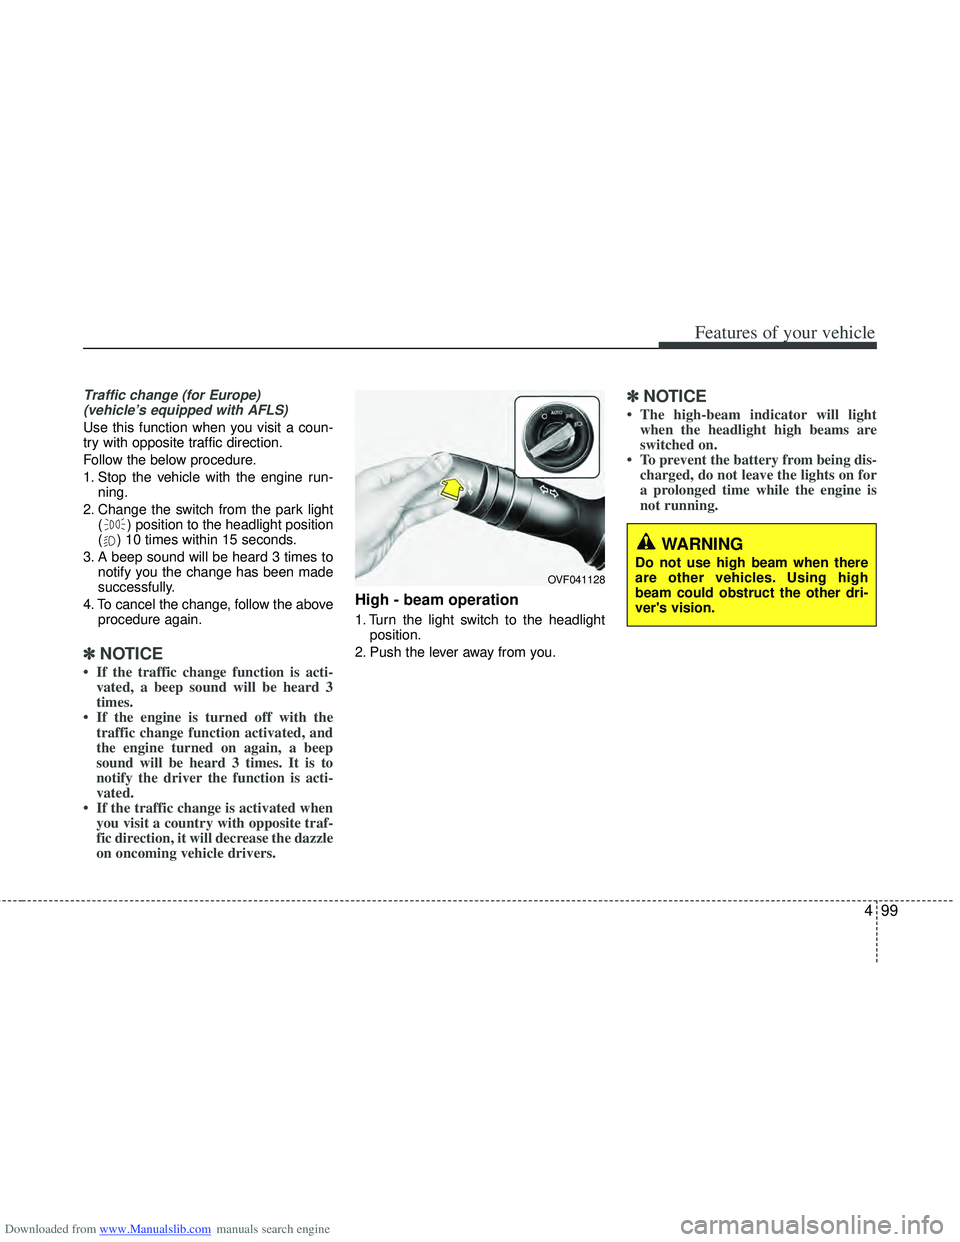
High - beam operation
1. Turn the light switch to the headlight
position.
2. Push the lever away from you.
✽ ✽ NOTICE
• The high-beam indicator will light
when the headlight high beams are
switched on.
• To prevent the battery from being dis- charged, do not leave the lights on for
a prolonged time while the engine is
not running.
WARNING
Do not use high beam when there
are other vehicles. Using high
beam could obstruct the other dri-
ver's vision.
OVF041128
Page 187 of 534
Downloaded from www.Manualslib.com manuals search engine Features of your vehicle
100
4
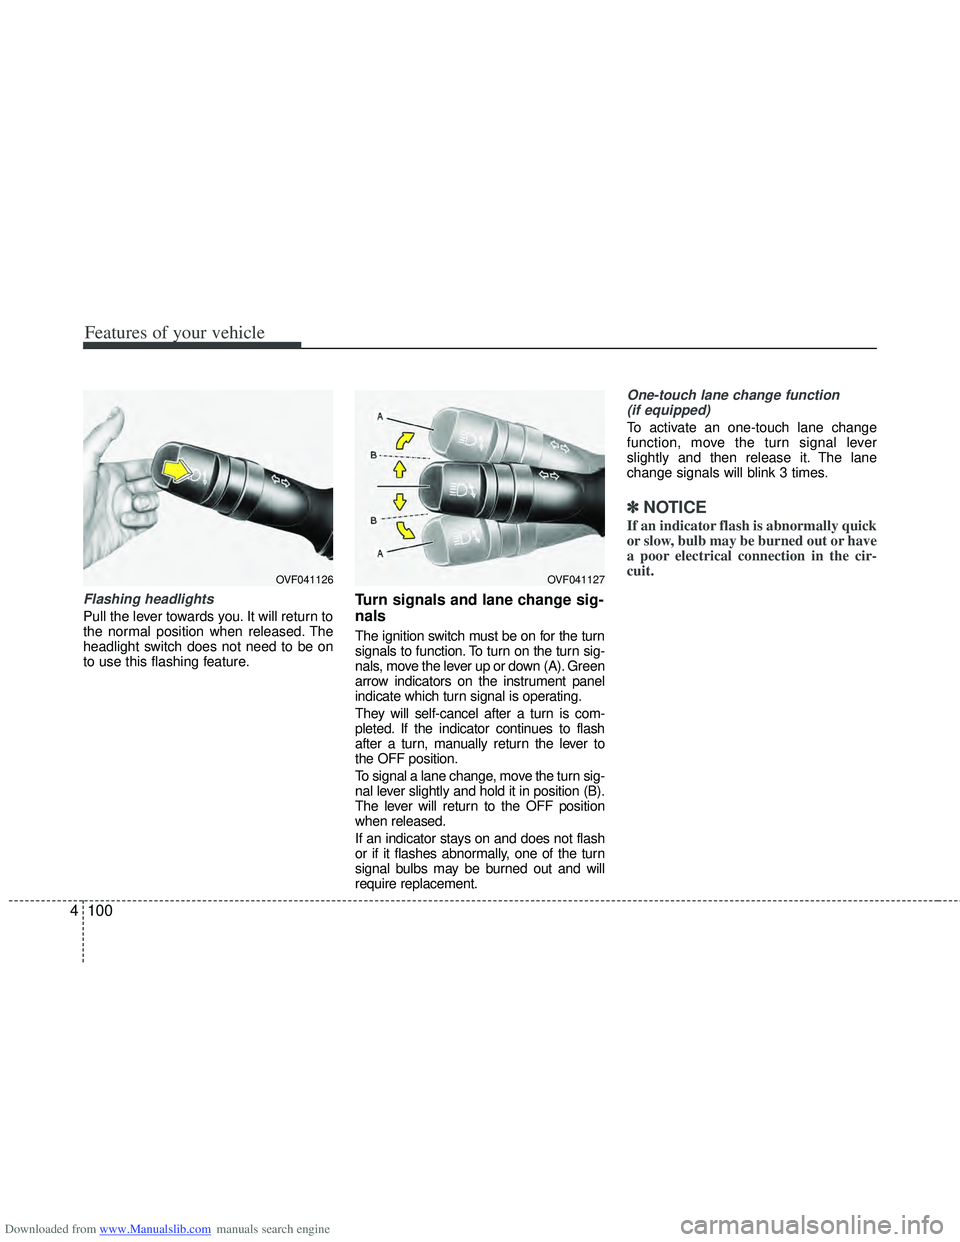
Flashing headlights
Pull the lever towards you. It will return to
the normal position when released. The
headlight switch does not need to be on
to use this flashing feature.
Turn signals and lane change sig-
nals
The ignition switch must be on for the turn
signals to function. To turn on the turn sig-
nals, move the lever up or down (A). Green
arrow indicators on the instrument panel
indicate which turn signal is operating.
They will self-cancel after a turn is com-
pleted. If the indicator continues to flash
after a turn, manually return the lever to
the OFF position.
To signal a lane change, move the turn sig-
nal lever slightly and hold it in position (B).
The lever will return to the OFF position
when released.
If an indicator stays on and does not flash
or if it flashes abnormally, one of the turn
signal bulbs may be burned out and will
require replacement.
One-touch lane change function
(if equipped)
To activate an one-touch lane change
function, move the turn signal lever
slightly and then release it. The lane
change signals will blink 3 times.
✽ ✽ NOTICE
If an indicator flash is abnormally quick
or slow, bulb may be burned out or have
a poor electrical connection in the cir-
cuit.
OVF041127OVF041126
Page 188 of 534
Downloaded from www.Manualslib.com manuals search engine 4101
Features of your vehicle
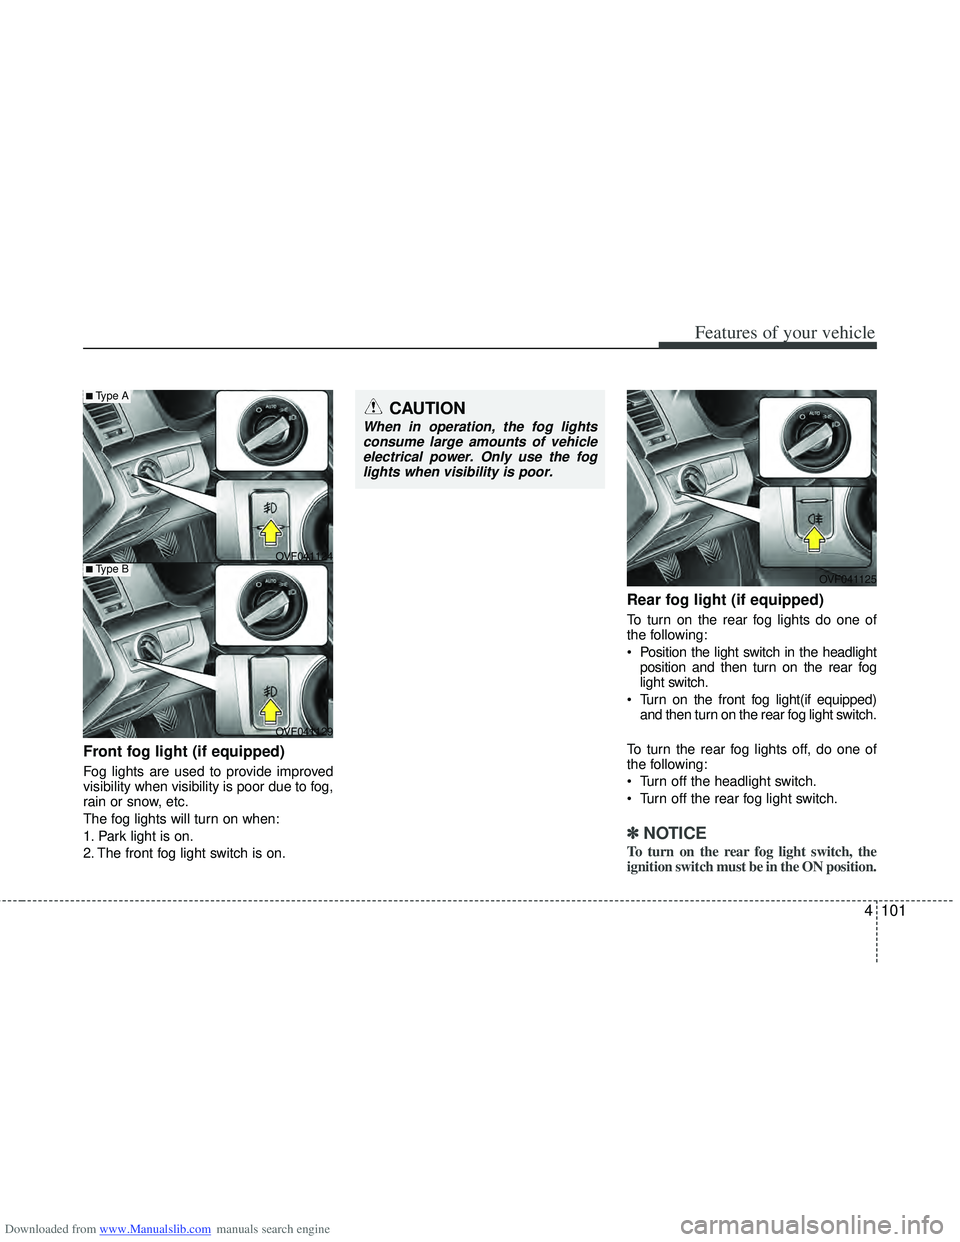
Front fog light (if equipped)
Fog lights are used to provide improved
visibility when visibility is poor due to fog,
rain or snow, etc.
The fog lights will turn on when:
1. Park light is on.
2. The front fog light switch is on.
Rear fog light (if equipped)
To turn on the rear fog lights do one of
the following:
Position the light switch in the headlightposition and then turn on the rear fog
light switch.
Turn on the front fog light(if equipped) and then turn on the rear fog light switch.
To turn the rear fog lights off, do one of
the following:
Turn off the headlight switch.
Turn off the rear fog light switch.
✽ ✽ NOTICE
To turn on the rear fog light switch, the
ignition switch must be in the ON position.
OVF041124
OVF041125
OVF041129
■Type A
■Type B
CAUTION
When in operation, the fog lights consume large amounts of vehicleelectrical power. Only use the foglights when visibility is poor.
Page 189 of 534
Downloaded from www.Manualslib.com manuals search engine Features of your vehicle
102
4
Daytime running light
(if equipped)
Daytime Running Lights (DRL) can make
it easier for others to see the front of your
vehicle during the day. DRL can be help-
ful in many different driving conditions,
and it is especially helpful after dawn and
before sunset.
The DRL system will turn off the dedicat-
ed lamp when:
1. The parklight or headlight (low beam)
switch is ON.
2. The engine is OFF.
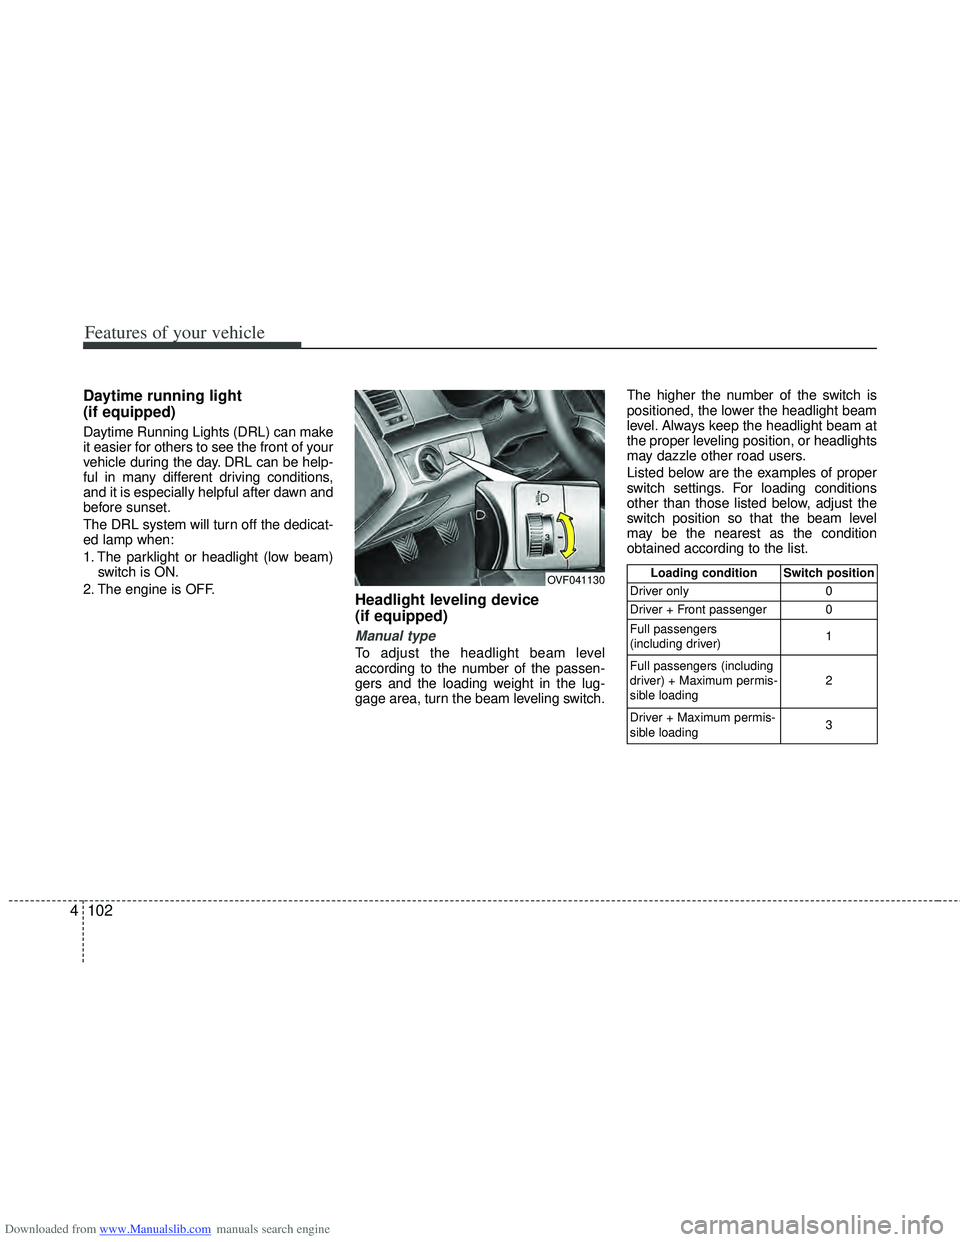
Headlight leveling device
(if equipped)
Manual type
To adjust the headlight beam level
according to the number of the passen-
gers and the loading weight in the lug-
gage area, turn the beam leveling switch. The higher the number of the switch is
positioned, the lower the headlight beam
level. Always keep the headlight beam at
the proper leveling position, or headlights
may dazzle other road users.
Listed below are the examples of proper
switch settings. For loading conditions
other than those listed below, adjust the
switch position so that the beam level
may be the nearest as the condition
obtained according to the list.
OVF041130Loading condition Switch position
Driver only 0
Driver + Front passenger 0
Full passengers
(including driver) 1
Full passengers (including
driver) + Maximum permis-
sible loading 2
Driver + Maximum permis-
sible loading 3
Page 190 of 534
Downloaded from www.Manualslib.com manuals search engine 4103
Features of your vehicle
Automatic type
It automatically adjusts the headlight
beam level according to the number of
passengers and loading weight in the
luggage area.
And it offers proper headlight beam
under various conditions.
AFLS (Adaptive Front Lighting
System) (if equipped)
Adaptive front lighting system uses the
steering angle and vehicle speed, to
keep your field of vision wide by swiveling
and leveling the headlamp.
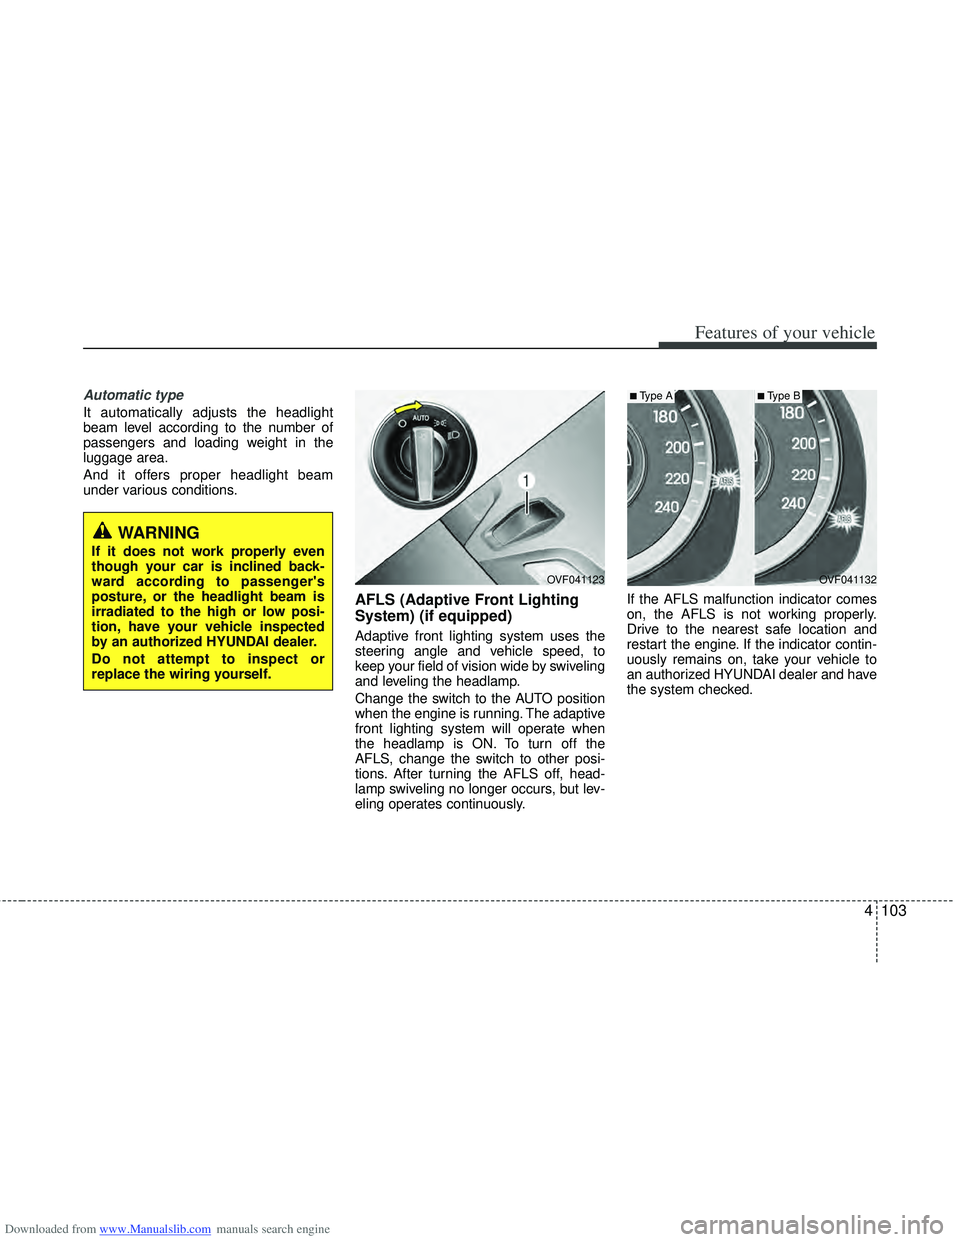
Change the switch to the AUTO position
when the engine is running. The adaptive
front lighting system will operate when
the headlamp is ON. To turn off the
AFLS, change the switch to other posi-
tions. After turning the AFLS off, head-
lamp swiveling no longer occurs, but lev-
eling operates continuously.If the AFLS malfunction indicator comes
on, the AFLS is not working properly.
Drive to the nearest safe location and
restart the engine. If the indicator contin-
uously remains on, take your vehicle to
an authorized HYUNDAI dealer and have
the system checked.
OVF041132
■Type A
OVF041123
■Type B
WARNING
If it does not work properly even
though your car is inclined back-
ward according to passenger's
posture, or the headlight beam is
irradiated to the high or low posi-
tion, have your vehicle inspected
by an authorized HYUNDAI dealer.
Do not attempt to inspect or
replace the wiring yourself.
Page 192 of 534
Downloaded from www.Manualslib.com manuals search engine 4105
Features of your vehicle
Windshield wipers
Operates as follows when the ignition
switch is turned ON./ MIST : For a single wiping cycle, move the lever to this ( /
MIST) position and release
it. The wipers will operate
continuously if the lever is
held in this position.
O / OFF : Wiper is not in operation
--- / INT : Wiper operates intermittently at the same wiping intervals. Use
this mode in light rain or mist.
To vary the speed setting, turn
the speed control knob.
1 / LO : Normal wiper speed
2 / HI : Fast wiper speed
✽ ✽ NOTICE
If there is heavy accumulation of snow
or ice on the windshield, defrost the
windshield for about 10 minutes, or
until the snow and/or ice is removed
before using the windshield wipers to
ensure proper operation.
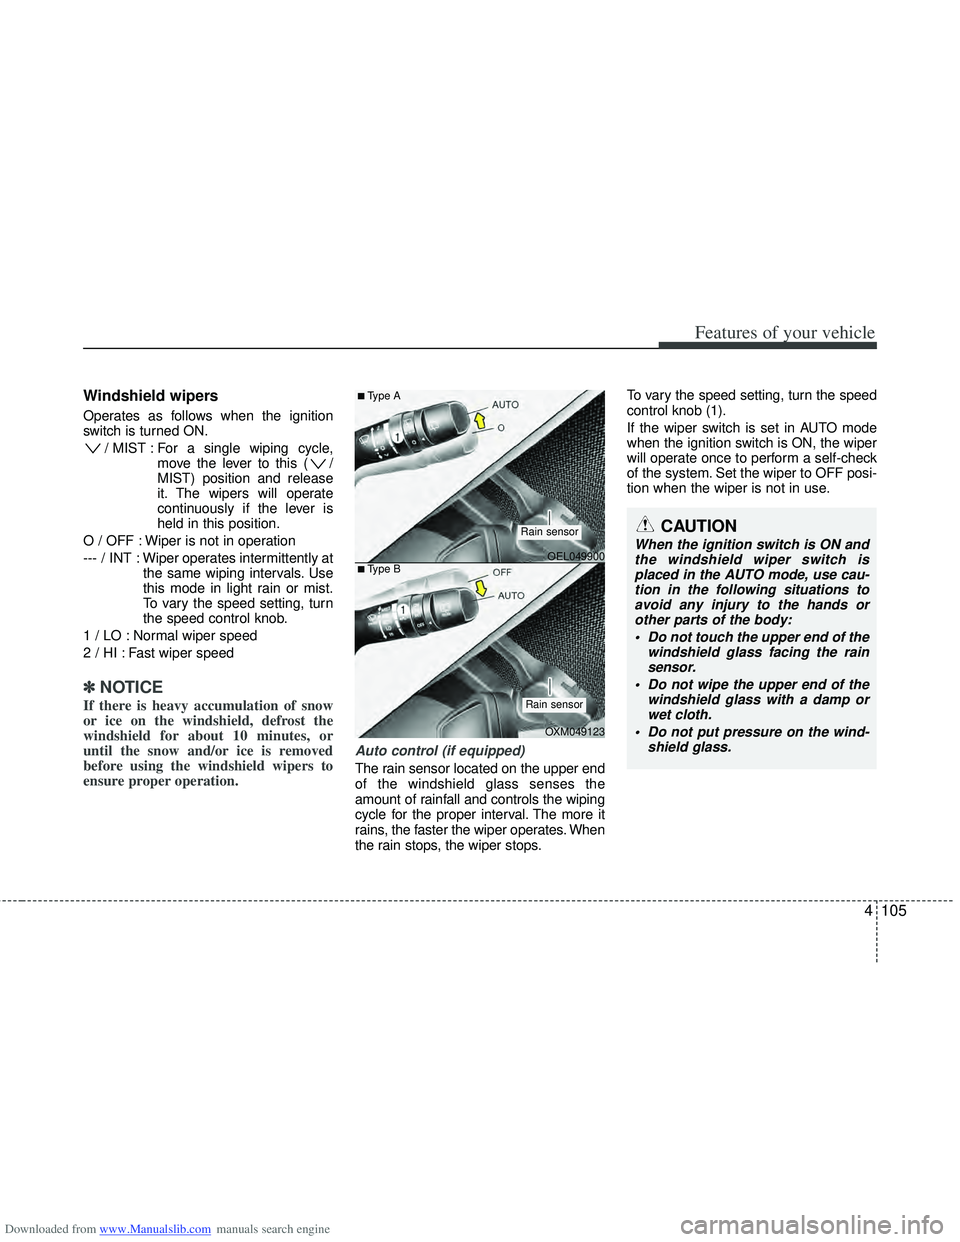
Auto control (if equipped)
The rain sensor located on the upper end
of the windshield glass senses the
amount of rainfall and controls the wiping
cycle for the proper interval. The more it
rains, the faster the wiper operates. When
the rain stops, the wiper stops. To vary the speed setting, turn the speed
control knob (1).
If the wiper switch is set in AUTO mode
when the ignition switch is ON, the wiper
will operate once to perform a self-check
of the system. Set the wiper to OFF posi-
tion when the wiper is not in use.
CAUTION
When the ignition switch is ON and
the windshield wiper switch isplaced in the AUTO mode, use cau- tion in the following situations toavoid any injury to the hands orother parts of the body:
Do not touch the upper end of the windshield glass facing the rainsensor.
Do not wipe the upper end of the windshield glass with a damp orwet cloth.
Do not put pressure on the wind- shield glass.OEL049900
OXM049123
■Type A
■Type B
Rain sensor
Rain sensor
Page 194 of 534
Downloaded from www.Manualslib.com manuals search engine 4107
Features of your vehicle
Headlight washer (if equipped)
If your vehicle is equipped with the head-
light washer it will operate at the same
time when you operate the windshield
washer. It will operate when the headlight
switch is in the first or second position
and the ignition switch or engine
start/stop button is in the ON position.
The washer fluid will be sprayed on to the
headlights.
✽ ✽NOTICE
Check the headlight washers periodical-
ly to confirm that the washer fluid is
being sprayed properly onto the head-
light lenses.
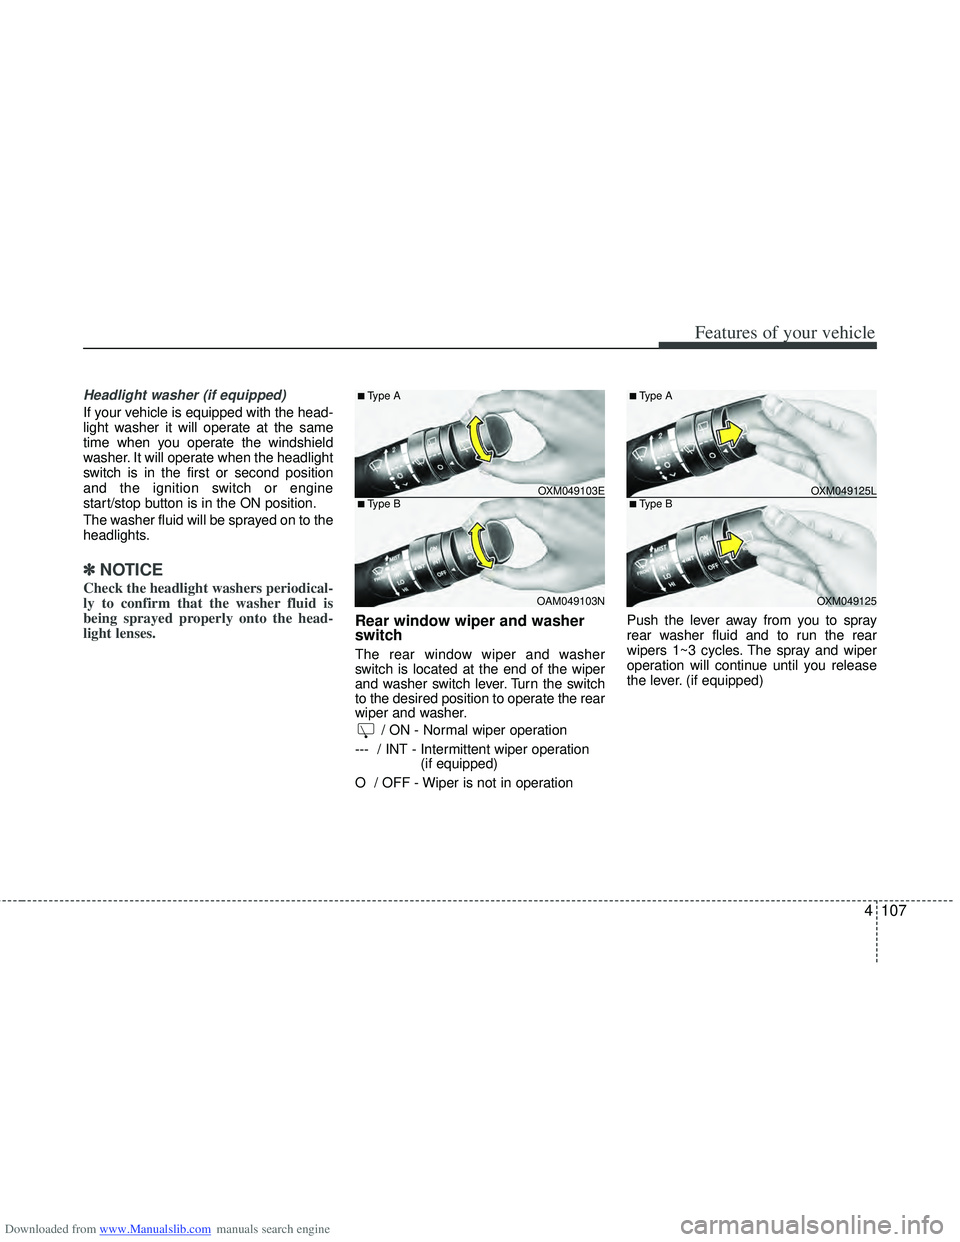
Rear window wiper and washer
switch
The rear window wiper and washer
switch is located at the end of the wiper
and washer switch lever. Turn the switch
to the desired position to operate the rear
wiper and washer.
/ ON - Normal wiper operation
--- / INT - Intermittent wiper operation (if equipped)
O / OFF - Wiper is not in operation Push the lever away from you to spray
rear washer fluid and to run the rear
wipers 1~3 cycles. The spray and wiper
operation will continue until you release
the lever. (if equipped)
OXM049103E
OAM049103N
■Type A
■Type BOXM049125L OXM049125
■Type A
■Type B
Page 195 of 534
Downloaded from www.Manualslib.com manuals search engine Features of your vehicle
108
4
Interior lamp AUTO cut
When all entrances are closed, if you
lock the vehicle by using the transmit-
ter or the smart key, all interior lamp
will be off within 5 seconds.
If you do not operate anything in the vehicle after turning off the engine, the
lights will turn off after 20 minutes.
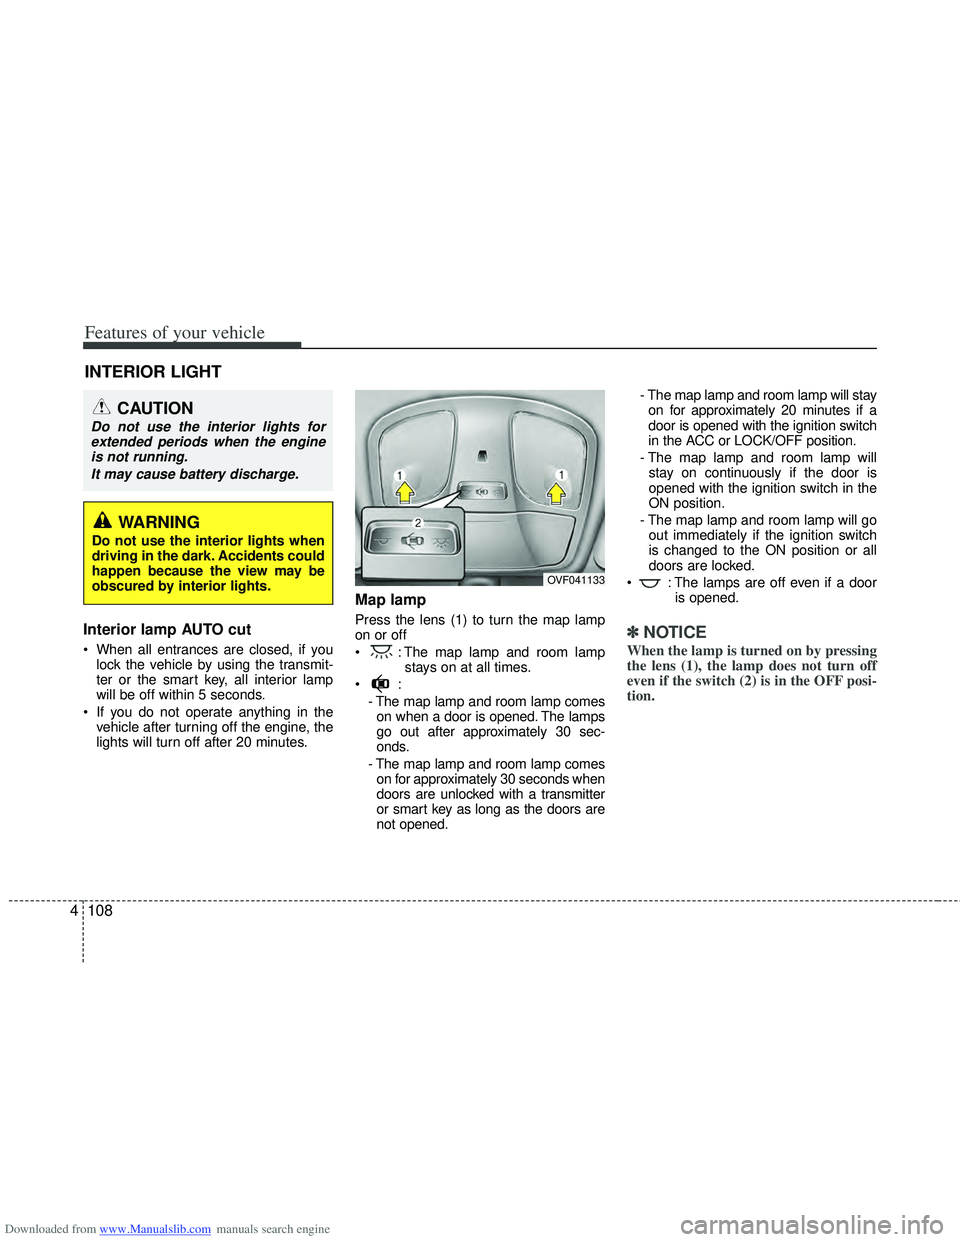
Map lamp
Press the lens (1) to turn the map lamp
on or off
: The map lamp and room lamp stays on at all times.
- The map lamp and room lamp comeson when a door is opened. The lamps
go out after approximately 30 sec-
onds.
- The map lamp and room lamp comes on for approximately 30 seconds when
doors are unlocked with a transmitter
or smart key as long as the doors are
not opened. - The map lamp and room lamp will stay
on for approximately 20 minutes if a
door is opened with the ignition switch
in the ACC or LOCK/OFF position.
- The map lamp and room lamp will stay on continuously if the door is
opened with the ignition switch in the
ON position.
- The map lamp and room lamp will go out immediately if the ignition switch
is changed to the ON position or all
doors are locked.
: The lamps are off even if a door is opened.✽ ✽NOTICE
When the lamp is turned on by pressing
the lens (1), the lamp does not turn off
even if the switch (2) is in the OFF posi-
tion.
INTERIOR LIGHT
CAUTION
Do not use the interior lights for
extended periods when the engineis not running.
It may cause battery discharge.
OVF041133
WARNING
Do not use the interior lights when
driving in the dark. Accidents could
happen because the view may be
obscured by interior lights.