2015 Hyundai Elantra tow
[x] Cancel search: towPage 176 of 498
Features of your vehicle
96 4
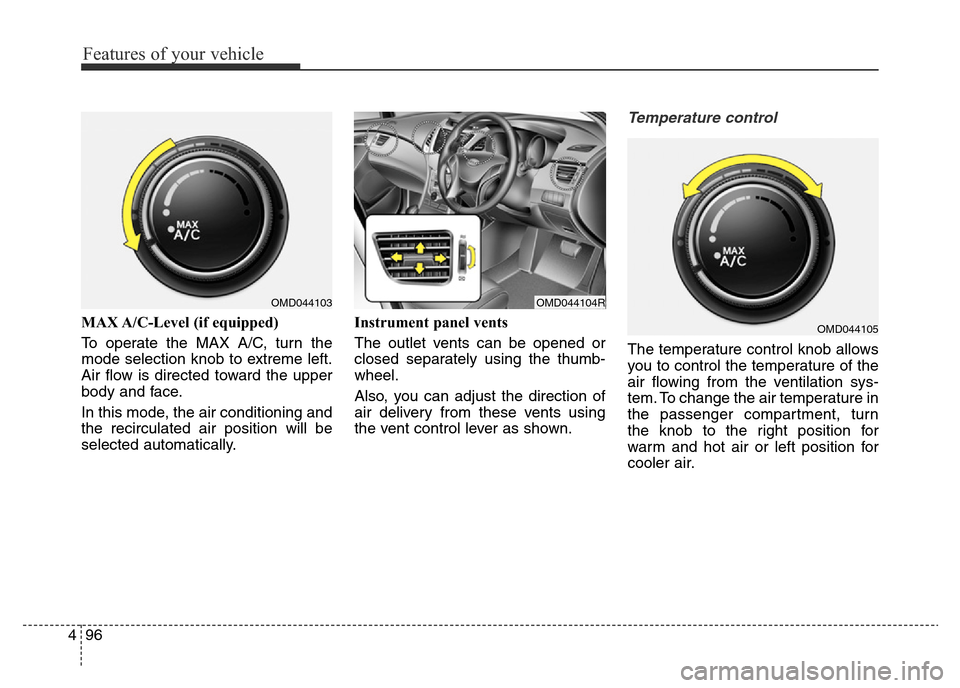
MAX A/C-Level (if equipped)
To operate the MAX A/C, turn the
mode selection knob to extreme left.
Air flow is directed toward the upper
body and face.
In this mode, the air conditioning and
the recirculated air position will be
selected automatically.Instrument panel vents
The outlet vents can be opened or
closed separately using the thumb-
wheel.
Also, you can adjust the direction of
air delivery from these vents using
the vent control lever as shown.
Temperature control
The temperature control knob allows
you to control the temperature of the
air flowing from the ventilation sys-
tem. To change the air temperature in
the passenger compartment, turn
the knob to the right position for
warm and hot air or left position for
cooler air.
OMD044103OMD044104R
OMD044105
Page 186 of 498
Features of your vehicle
106 4
Floor & Defrost
Most of the air flow is directed to the
floor and the windscreen with a small
amount directed to the side window
defrosters.
Floor-Level
Most of the air flow is directed to the
floor, with a small amount of the air
being directed to the windscreen and
side window defrosters.
Bi-Level
Air flow is directed towards the face
and the floor.
Face-Level
Air flow is directed toward the upper
body and face. Additionally, each
outlet can be controlled to direct the
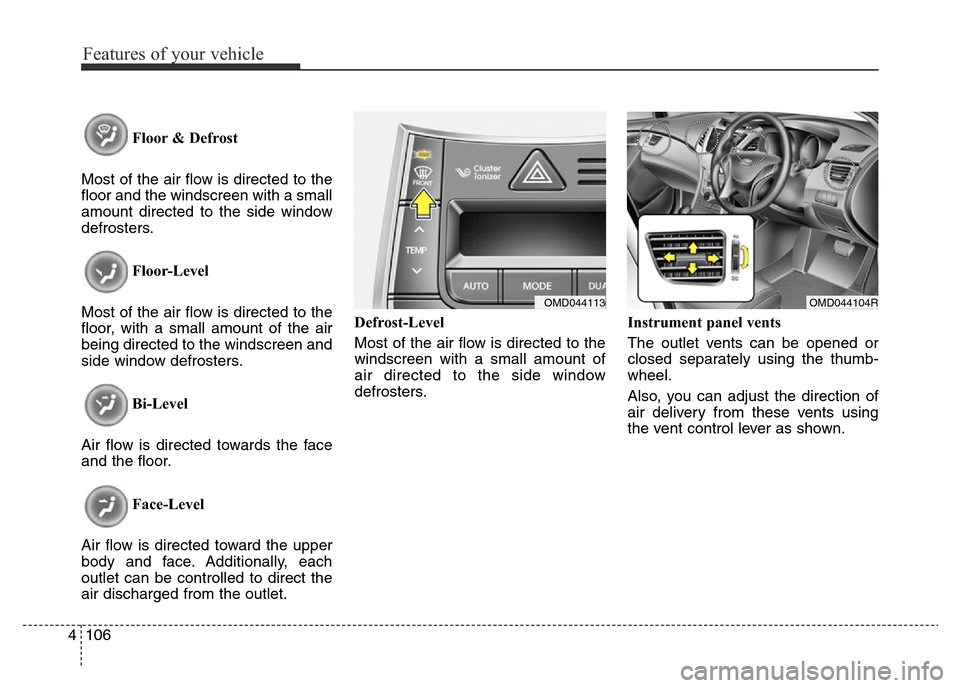
air discharged from the outlet.Defrost-Level
Most of the air flow is directed to the
windscreen with a small amount of
air directed to the side window
defrosters.Instrument panel vents
The outlet vents can be opened or
closed separately using the thumb-
wheel.
Also, you can adjust the direction of
air delivery from these vents using
the vent control lever as shown.
OMD044104ROMD044113
Page 196 of 498
Features of your vehicle
116 4
This indicator illuminates
when the auto defogging
system senses the mois-
ture of inside the wind-
screen.
If excess moisture is in the vehicle,
the system operates to clear the
windscreen, progressing from Step 1
through to Step 5, as required.
Step 1 :Operating the air conditioning
Step 2 : Outside air position
Step 3 : Blowing air toward the wind-
screen
Step 4 : Increasing air flow toward
the windscreen
Step 5 : Maximising the air condi-
tioningIf your vehicle is equipped with the
auto defogging system, it is automat-
ically activated when the conditions
are met. However, if you would like to
cancel the auto defogging system,
press the front defroster button for 3
seconds. The indicator of front
defroster button will blink 3 times to
notify you that the system is can-
celled. To use the auto defogging
system again, follow the procedures
mentioned above.
If the battery has been disconnected
or discharged, it resets to the auto
defogging status.✽NOTICE
• When the air conditioning is
turned on with the Auto defogging
system, if you try to turn off the
air conditioning, the indicator will
blink 3 times and the air condi-
tioning will not be turned off.
• For efficiency, do not select the
recirculated air position whilst the
Auto defogging system is operat-
ing.
CAUTION
Do not remove the sensor cover
located on the upper edge of the
windscreen. Damage to system
parts could occur and may not
be covered by your vehicle war-
ranty.
Page 211 of 498
4131
Features of your vehicle
How vehicle audio works
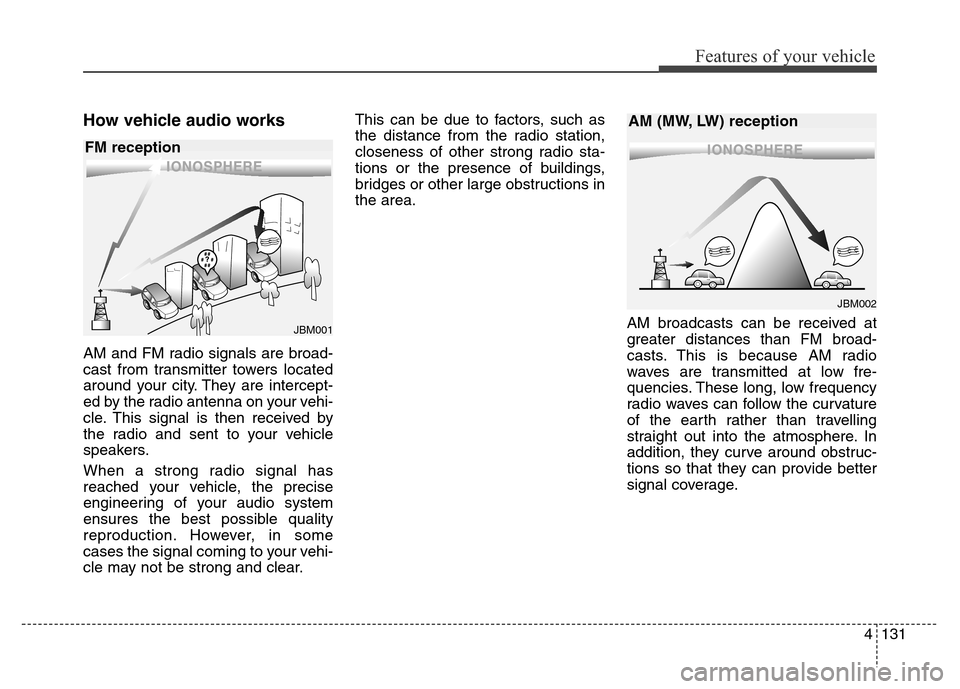
AM and FM radio signals are broad-
cast from transmitter towers located
around your city. They are intercept-
ed by the radio antenna on your vehi-
cle. This signal is then received by
the radio and sent to your vehicle
speakers.
When a strong radio signal has
reached your vehicle, the precise
engineering of your audio system
ensures the best possible quality
reproduction. However, in some
cases the signal coming to your vehi-
cle may not be strong and clear.This can be due to factors, such as
the distance from the radio station,
closeness of other strong radio sta-
tions or the presence of buildings,
bridges or other large obstructions in
the area.
AM broadcasts can be received at
greater distances than FM broad-
casts. This is because AM radio
waves are transmitted at low fre-
quencies. These long, low frequency
radio waves can follow the curvature
of the earth rather than travelling
straight out into the atmosphere. In
addition, they curve around obstruc-
tions so that they can provide better
signal coverage.
¢¢¢
JBM001
¢¢¢¢¢¢
JBM002
FM receptionAM (MW, LW) reception
Page 305 of 498
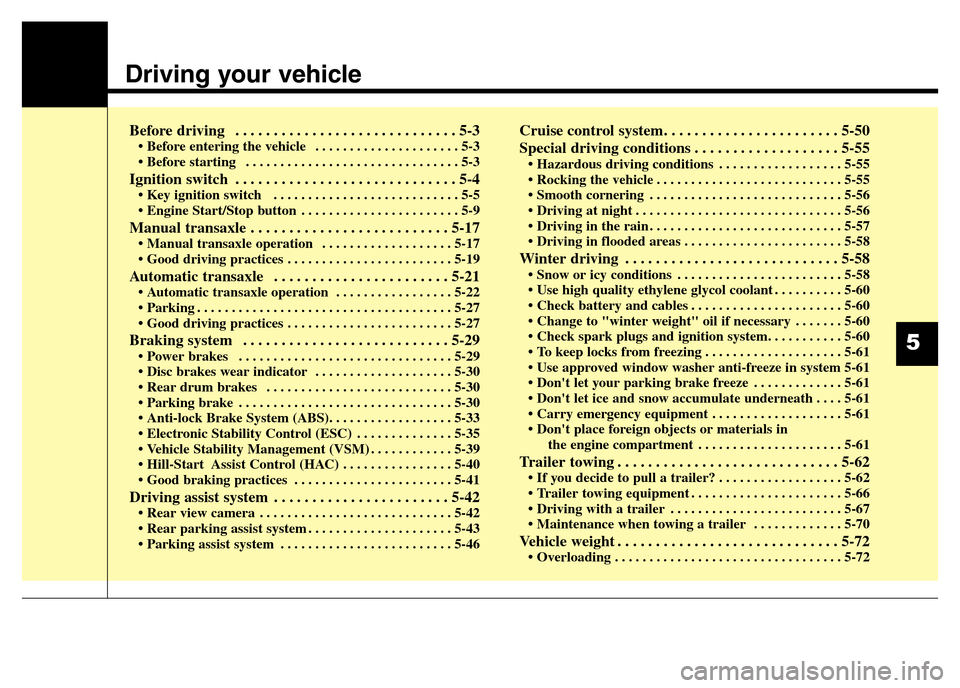
Driving your vehicle
Before driving . . . . . . . . . . . . . . . . . . . . . . . . . . . . . 5-3• Before entering the vehicle . . . . . . . . . . . . . . . . . . . . . 5-3
• Before starting . . . . . . . . . . . . . . . . . . . . . . . . . . . . . . . 5-3
Ignition switch . . . . . . . . . . . . . . . . . . . . . . . . . . . . . 5-4• Key ignition switch . . . . . . . . . . . . . . . . . . . . . . . . . . . 5-5
• Engine Start/Stop button . . . . . . . . . . . . . . . . . . . . . . . 5-9
Manual transaxle . . . . . . . . . . . . . . . . . . . . . . . . . . 5-17• Manual transaxle operation . . . . . . . . . . . . . . . . . . . 5-17
• Good driving practices . . . . . . . . . . . . . . . . . . . . . . . . 5-19
Automatic transaxle . . . . . . . . . . . . . . . . . . . . . . . 5-21• Automatic transaxle operation . . . . . . . . . . . . . . . . . 5-22
• Parking . . . . . . . . . . . . . . . . . . . . . . . . . . . . . . . . . . . . . 5-27
• Good driving practices . . . . . . . . . . . . . . . . . . . . . . . . 5-27
Braking system . . . . . . . . . . . . . . . . . . . . . . . . . . . 5-29• Power brakes . . . . . . . . . . . . . . . . . . . . . . . . . . . . . . . 5-29
• Disc brakes wear indicator . . . . . . . . . . . . . . . . . . . . 5-30
• Rear drum brakes . . . . . . . . . . . . . . . . . . . . . . . . . . . 5-30
• Parking brake . . . . . . . . . . . . . . . . . . . . . . . . . . . . . . . 5-30
• Anti-lock Brake System (ABS). . . . . . . . . . . . . . . . . . 5-33
• Electronic Stability Control (ESC) . . . . . . . . . . . . . . 5-35
• Vehicle Stability Management (VSM) . . . . . . . . . . . . 5-39
• Hill-Start Assist Control (HAC) . . . . . . . . . . . . . . . . 5-40
• Good braking practices . . . . . . . . . . . . . . . . . . . . . . . 5-41
Driving assist system . . . . . . . . . . . . . . . . . . . . . . . 5-42• Rear view camera . . . . . . . . . . . . . . . . . . . . . . . . . . . . 5-42
• Rear parking assist system . . . . . . . . . . . . . . . . . . . . . 5-43
• Parking assist system . . . . . . . . . . . . . . . . . . . . . . . . . 5-46
Cruise control system. . . . . . . . . . . . . . . . . . . . . . . 5-50
Special driving conditions . . . . . . . . . . . . . . . . . . . 5-55
• Hazardous driving conditions . . . . . . . . . . . . . . . . . . 5-55
• Rocking the vehicle . . . . . . . . . . . . . . . . . . . . . . . . . . . 5-55
• Smooth cornering . . . . . . . . . . . . . . . . . . . . . . . . . . . . 5-56
• Driving at night . . . . . . . . . . . . . . . . . . . . . . . . . . . . . . 5-56
• Driving in the rain . . . . . . . . . . . . . . . . . . . . . . . . . . . . 5-57
• Driving in flooded areas . . . . . . . . . . . . . . . . . . . . . . . 5-58
Winter driving . . . . . . . . . . . . . . . . . . . . . . . . . . . . 5-58• Snow or icy conditions . . . . . . . . . . . . . . . . . . . . . . . . 5-58
• Use high quality ethylene glycol coolant . . . . . . . . . . 5-60
• Check battery and cables . . . . . . . . . . . . . . . . . . . . . . 5-60
• Change to "winter weight" oil if necessary . . . . . . . 5-60
• Check spark plugs and ignition system. . . . . . . . . . . 5-60
• To keep locks from freezing . . . . . . . . . . . . . . . . . . . . 5-61
• Use approved window washer anti-freeze in system 5-61
• Don't let your parking brake freeze . . . . . . . . . . . . . 5-61
• Don't let ice and snow accumulate underneath . . . . 5-61
• Carry emergency equipment . . . . . . . . . . . . . . . . . . . 5-61
• Don't place foreign objects or materials in
the engine compartment . . . . . . . . . . . . . . . . . . . . . 5-61
Trailer towing . . . . . . . . . . . . . . . . . . . . . . . . . . . . . 5-62• If you decide to pull a trailer? . . . . . . . . . . . . . . . . . . 5-62
• Trailer towing equipment . . . . . . . . . . . . . . . . . . . . . . 5-66
• Driving with a trailer . . . . . . . . . . . . . . . . . . . . . . . . . 5-67
• Maintenance when towing a trailer . . . . . . . . . . . . . 5-70
Vehicle weight . . . . . . . . . . . . . . . . . . . . . . . . . . . . . 5-72• Overloading . . . . . . . . . . . . . . . . . . . . . . . . . . . . . . . . . 5-72
5
Page 310 of 498
Driving your vehicle
6 5
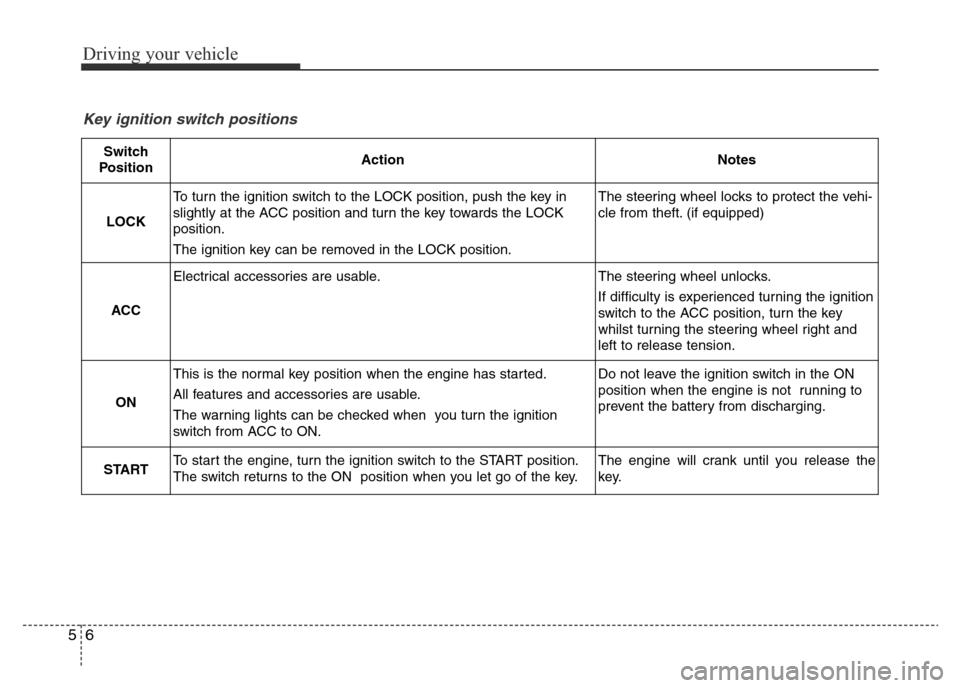
Key ignition switch positions
Switch
PositionActionNotes
LOCK
To turn the ignition switch to the LOCK position, push the key in
slightly at the ACC position and turn the key towards the LOCK
position.
The ignition key can be removed in the LOCK position.The steering wheel locks to protect the vehi-
cle from theft. (if equipped)
ACC
Electrical accessories are usable.The steering wheel unlocks.
If difficulty is experienced turning the ignition
switch to the ACC position, turn the key
whilst turning the steering wheel right and
left to release tension.
ON
This is the normal key position when the engine has started.
All features and accessories are usable.
The warning lights can be checked when you turn the ignition
switch from ACC to ON.Do not leave the ignition switch in the ON
position when the engine is not running to
prevent the battery from discharging.
STARTTo start the engine, turn the ignition switch to the START position.
The switch returns to the ON position when you let go of the key.The engine will crank until you release the
key.
Page 312 of 498
Driving your vehicle
8 5
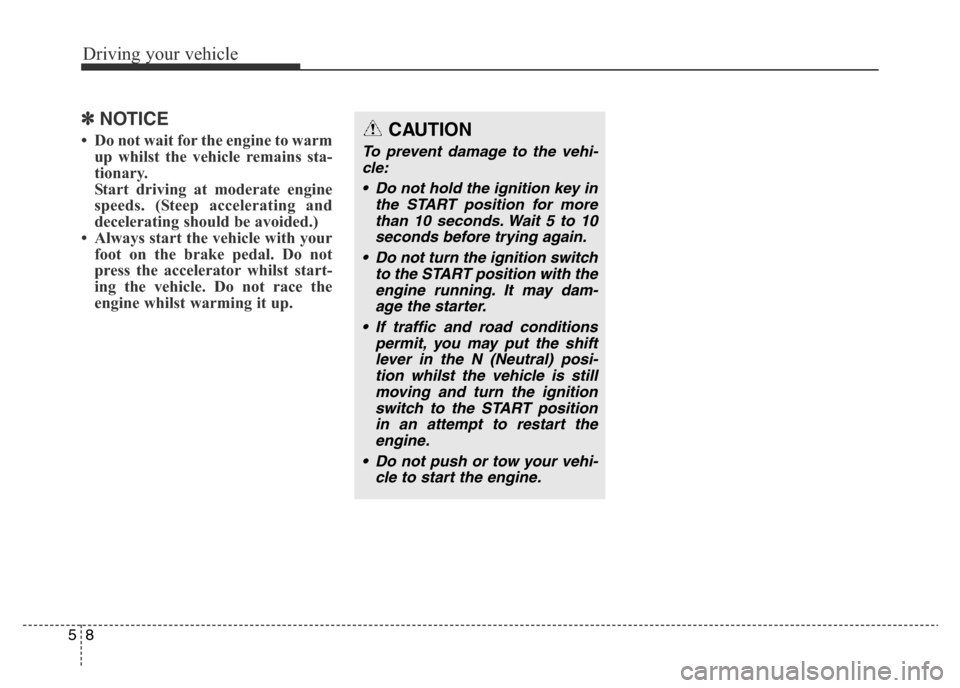
✽NOTICE
• Do not wait for the engine to warm
up whilst the vehicle remains sta-
tionary.
Start driving at moderate engine
speeds. (Steep accelerating and
decelerating should be avoided.)
• Always start the vehicle with your
foot on the brake pedal. Do not
press the accelerator whilst start-
ing the vehicle. Do not race the
engine whilst warming it up.CAUTION
To prevent damage to the vehi-
cle:
• Do not hold the ignition key in
the START position for more
than 10 seconds. Wait 5 to 10
seconds before trying again.
• Do not turn the ignition switch
to the START position with the
engine running. It may dam-
age the starter.
• If traffic and road conditions
permit, you may put the shift
lever in the N (Neutral) posi-
tion whilst the vehicle is still
moving and turn the ignition
switch to the START position
in an attempt to restart the
engine.
• Do not push or tow your vehi-
cle to start the engine.
Page 319 of 498
515
Driving your vehicle
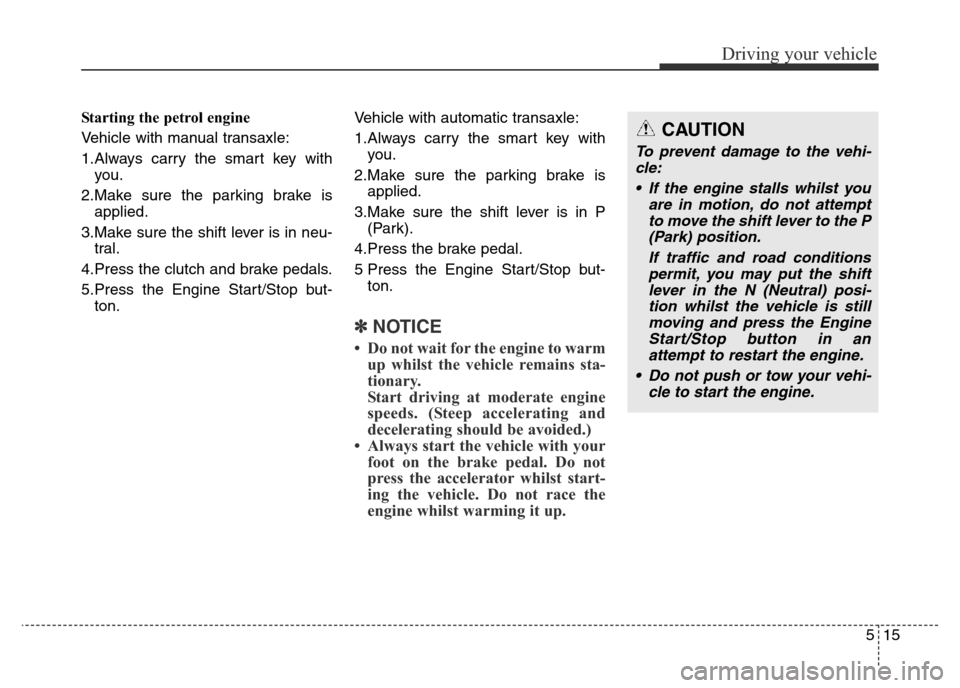
Starting the petrol engine
Vehicle with manual transaxle:
1.Always carry the smart key with
you.
2.Make sure the parking brake is
applied.
3.Make sure the shift lever is in neu-
tral.
4.Press the clutch and brake pedals.
5.Press the Engine Start/Stop but-
ton.Vehicle with automatic transaxle:
1.Always carry the smart key with
you.
2.Make sure the parking brake is
applied.
3.Make sure the shift lever is in P
(Park).
4.Press the brake pedal.
5 Press the Engine Start/Stop but-
ton.
✽NOTICE
• Do not wait for the engine to warm
up whilst the vehicle remains sta-
tionary.
Start driving at moderate engine
speeds. (Steep accelerating and
decelerating should be avoided.)
• Always start the vehicle with your
foot on the brake pedal. Do not
press the accelerator whilst start-
ing the vehicle. Do not race the
engine whilst warming it up.
CAUTION
To prevent damage to the vehi-
cle:
• If the engine stalls whilst you
are in motion, do not attempt
to move the shift lever to the P
(Park) position.
If traffic and road conditions
permit, you may put the shift
lever in the N (Neutral) posi-
tion whilst the vehicle is still
moving and press the Engine
Start/Stop button in an
attempt to restart the engine.
• Do not push or tow your vehi-
cle to start the engine.