Page 119 of 473

Features of your vehicle
42 4
Recalling memory position
1. Move the shift lever into P (for
Automatic transaxle) or Neutral (for
manual transaxle) while the ignition
switch or the Engine Start/Stop button
is in the ON position.
2. Press the desired memory button (1 or
2). The system will beep once, then the
driver’s seat position, outside rearview
mirror and instrument panel illumina-
tion will automatically adjust to the
stored position (if equipped).
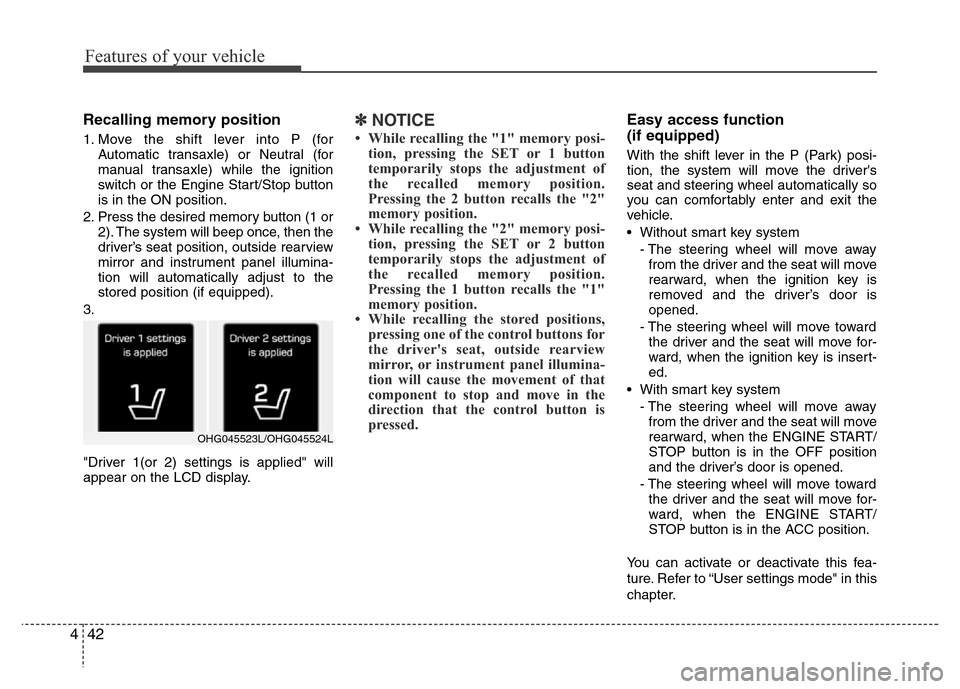
3.
"Driver 1(or 2) settings is applied" will
appear on the LCD display.
✽NOTICE
• While recalling the "1" memory posi-
tion, pressing the SET or 1 button
temporarily stops the adjustment of
the recalled memory position.
Pressing the 2 button recalls the "2"
memory position.
• While recalling the "2" memory posi-
tion, pressing the SET or 2 button
temporarily stops the adjustment of
the recalled memory position.
Pressing the 1 button recalls the "1"
memory position.
• While recalling the stored positions,
pressing one of the control buttons for
the driver's seat, outside rearview
mirror, or instrument panel illumina-
tion will cause the movement of that
component to stop and move in the
direction that the control button is
pressed.
Easy access function
(if equipped)
With the shift lever in the P (Park) posi-
tion, the system will move the driver's
seat and steering wheel automatically so
you can comfortably enter and exit the
vehicle.
• Without smart key system
- The steering wheel will move away
from the driver and the seat will move
rearward, when the ignition key is
removed and the driver’s door is
opened.
- The steering wheel will move toward
the driver and the seat will move for-
ward, when the ignition key is insert-
ed.
• With smart key system
- The steering wheel will move away
from the driver and the seat will move
rearward, when the ENGINE START/
STOP button is in the OFF position
and the driver’s door is opened.
- The steering wheel will move toward
the driver and the seat will move for-
ward, when the ENGINE START/
STOP button is in the ACC position.
You can activate or deactivate this fea-
ture. Refer to “User settings mode" in this
chapter.
OHG045523L/OHG045524L
Page 120 of 473

443
Features of your vehicle
Power steering
Power steering uses energy from the
engine to assist you in steering the vehi-
cle. If the engine is off or if the power
steering system becomes inoperative,
the vehicle may still be steered, but it will
require increased steering effort.
Should you notice any change in the
effort required to steer during normal
vehicle operation, we recommend that
the system be checked by an authorized
HYUNDAI dealer.
✽NOTICE
If the power steering drive belt breaks
or if the power steering pump malfunc-
tions, the steering effort will greatly
increase.
✽NOTICE
If the vehicle is parked for extended
periods outside in cold weather (below -
10°C/14°F), the power steering may
require increased effort when the engine
is first started. This is caused by
increased fluid viscosity due to the cold
weather and does not indicate a mal-
function.
When this happens, increase the engine
RPM by depressing accelerator until the
RPM reaches 1,500 rpm then release or
let the engine idle for two or three min-
utes to warm up the fluid.
Tilt steering
Tilt steering allows you to adjust the
steering wheel before you drive. You can
also raise it to give your legs more room
when you exit and enter the vehicle.
The steering wheel should be positioned
so that it is comfortable for you to drive,
while permitting you to see the instru-
ment panel warning lights and gauges.
STEERING WHEEL
CAUTION
Never hold the steering wheel
against a stop (extreme right or left
turn) for more than 5 seconds with
the engine running. Holding the
steering wheel for more than 5 sec-
onds in either position may cause
damage to the power steering
pump.
WARNING
• Never adjust the angle of the
steering wheel while driving. You
may lose steering control and
cause severe personal injury,
death or accidents.
• After adjusting, push the steering
wheel both up and down to be
certain it is locked in position.
Page 123 of 473

Features of your vehicle
46 4
Inside rearview mirror
Adjust the rearview mirror to center on
the view through the rear window. Make
this adjustment before you start driving.
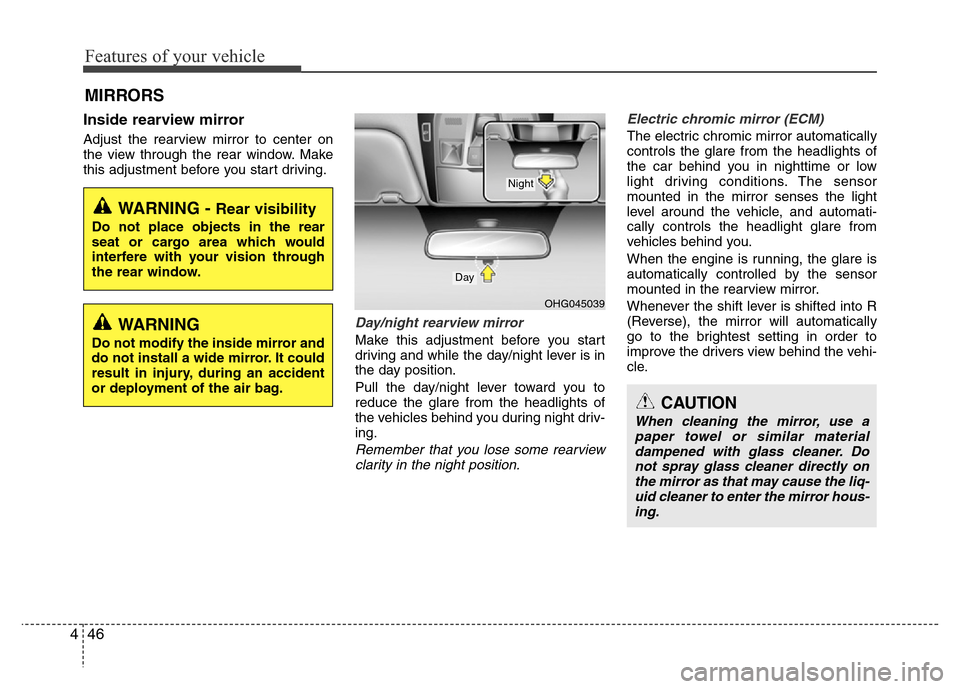
Day/night rearview mirror
Make this adjustment before you start
driving and while the day/night lever is in
the day position.
Pull the day/night lever toward you to
reduce the glare from the headlights of
the vehicles behind you during night driv-
ing.
Remember that you lose some rearview
clarity in the night position.Electric chromic mirror (ECM)
The electric chromic mirror automatically
controls the glare from the headlights of
the car behind you in nighttime or low
light driving conditions. The sensor
mounted in the mirror senses the light
level around the vehicle, and automati-
cally controls the headlight glare from
vehicles behind you.
When the engine is running, the glare is
automatically controlled by the sensor
mounted in the rearview mirror.
Whenever the shift lever is shifted into R
(Reverse), the mirror will automatically
go to the brightest setting in order to
improve the drivers view behind the vehi-
cle.
MIRRORS
CAUTION
When cleaning the mirror, use a
paper towel or similar material
dampened with glass cleaner. Do
not spray glass cleaner directly on
the mirror as that may cause the liq-
uid cleaner to enter the mirror hous-
ing.
WARNING - Rear visibility
Do not place objects in the rear
seat or cargo area which would
interfere with your vision through
the rear window.
OHG045039
Day
Night
WARNING
Do not modify the inside mirror and
do not install a wide mirror. It could
result in injury, during an accident
or deployment of the air bag.
Page 126 of 473

449
Features of your vehicle
- The mirror will fold or unfold when the
door is locked or unlocked by the but-
ton on the outside door handle.
- The mirror will unfold when you
approach the vehicle (all doors
closed and locked) with a smart key
in possession. (if equipped)
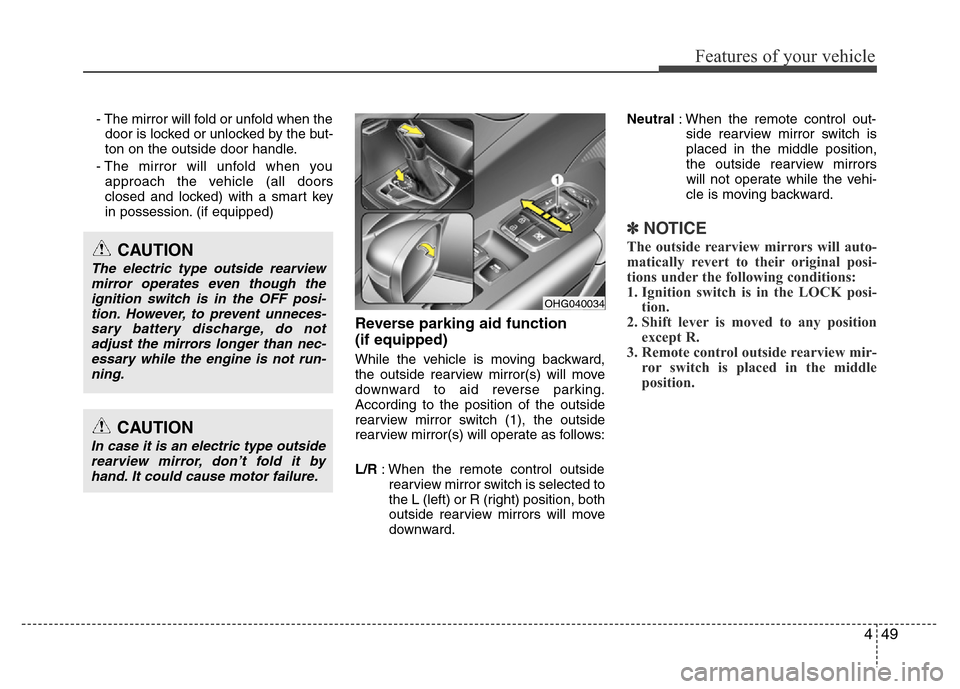
Reverse parking aid function
(if equipped)
While the vehicle is moving backward,
the outside rearview mirror(s) will move
downward to aid reverse parking.
According to the position of the outside
rearview mirror switch (1), the outside
rearview mirror(s) will operate as follows:
L/R: When the remote control outside
rearview mirror switch is selected to
the L (left) or R (right) position, both
outside rearview mirrors will move
downward.Neutral: When the remote control out-
side rearview mirror switch is
placed in the middle position,
the outside rearview mirrors
will not operate while the vehi-
cle is moving backward.
✽NOTICE
The outside rearview mirrors will auto-
matically revert to their original posi-
tions under the following conditions:
1. Ignition switch is in the LOCK posi-
tion.
2. Shift lever is moved to any position
except R.
3. Remote control outside rearview mir-
ror switch is placed in the middle
position.
CAUTION
In case it is an electric type outside
rearview mirror, don’t fold it by
hand. It could cause motor failure.
CAUTION
The electric type outside rearview
mirror operates even though the
ignition switch is in the OFF posi-
tion. However, to prevent unneces-
sary battery discharge, do not
adjust the mirrors longer than nec-
essary while the engine is not run-
ning.
OHG040034
Page 127 of 473
Features of your vehicle
50 4
INSTRUMENT CLUSTER
1. Tachometer
2. Turn signal indicators
3. Speedometer
4. Odometer/Trip computer*
5. Fuel gauge
6. Engine temperature gauge
7. Warning and indicator lights
* : if equipped
❈The actual cluster in the vehicle may differ
from the illustration.
For more details, refer to the "Gauges" in
the next pages.
OHG045510L/OHG045511L
■Type A
■Type B
Page 129 of 473
Features of your vehicle
52 4
Tachometer
The tachometer indicates the approxi-
mate number of engine revolutions per
minute (rpm).
Use the tachometer to select the correct
shift points and to prevent lugging and/or
over-revving the engine.
Engine coolant temperature gauge
This gauge shows the temperature of the
engine coolant when the ignition switch
is ON.
Do not continue driving with an overheat-
ed engine. If your vehicle overheats, refer
to “If the engine overheats” in section 6.
CAUTION
If the gauge pointer moves beyond
the normal range area toward the
“H” position, it indicates overheat-
ing that may damage the engine.
CAUTION
Do not operate the engine within
the tachometer's RED ZONE. This
may cause severe engine damage.
OHG040051
OHG040052
■Type A
■Type BOHG040053
■Type A■Type B
Page 130 of 473

453
Features of your vehicle
Fuel gauge
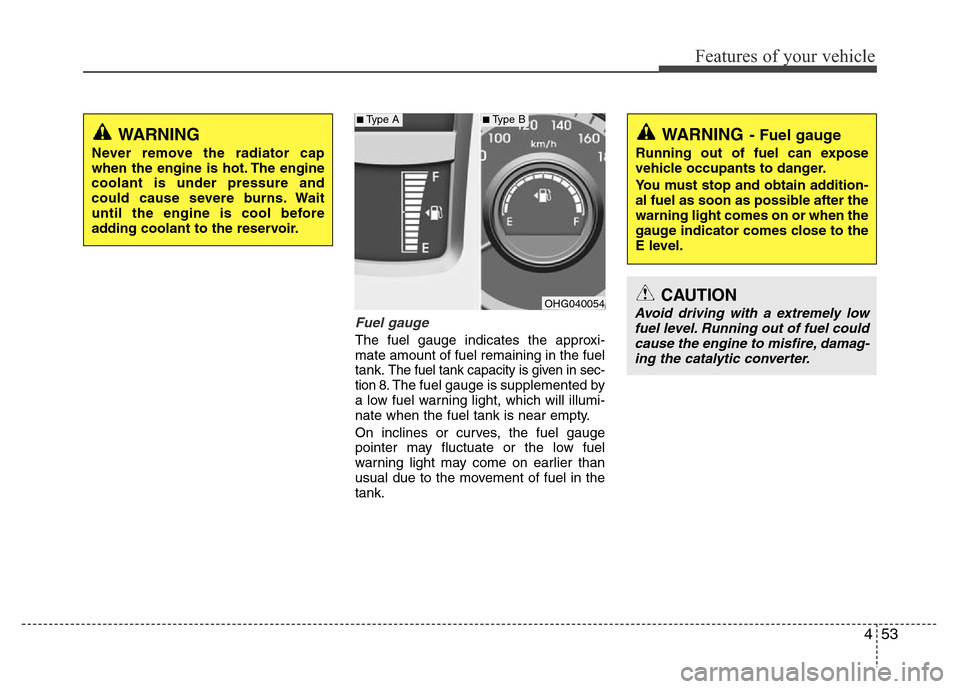
The fuel gauge indicates the approxi-
mate amount of fuel remaining in the fuel
tank.
The fuel tank capacity is given in sec-
tion 8.The fuel gauge is supplemented by
a low fuel warning light, which will illumi-
nate when the fuel tank is near empty.
On inclines or curves, the fuel gauge
pointer may fluctuate or the low fuel
warning light may come on earlier than
usual due to the movement of fuel in the
tank.
WARNING
Never remove the radiator cap
when the engine is hot. The engine
coolant is under pressure and
could cause severe burns. Wait
until the engine is cool before
adding coolant to the reservoir.
OHG040054
WARNING- Fuel gauge
Running out of fuel can expose
vehicle occupants to danger.
You must stop and obtain addition-
al fuel as soon as possible after the
warning light comes on or when the
gauge indicator comes close to the
E level.
CAUTION
Avoid driving with a extremely low
fuel level. Running out of fuel could
cause the engine to misfire, damag-
ing the catalytic converter.
■Type A■Type B
Page 134 of 473
457
Features of your vehicle
Turn By Turn (TBT) mode
(if equipped)
This mode displays the state of the navi-
gation.
A/V mode
This mode displays the state of the A/V
system.
Information mode
Service interval
Service in (Service interval)
It calculates and displays when you need
a scheduled maintenance service
(mileage or days).
If the remaining mileage or time reaches
1,500 km (900 miles) or 30 days,
"Service in (Service interval)" message
is displayed for several seconds each
time you set the ignition switch or Engine
Start/Stop button to the ON position.
For the setting of the service interval,
refer to "User Settings Mode" of the
LCD display.
OHG045257OHG045238LOHG045258L
■Type A■Type B