Page 358 of 473
6
Road warning / 6-2
In case of an emergency while driving / 6-3
If the engine will not start / 6-4
Emergency starting / 6-5
If the engine overheats / 6-7
If you have a flat tire / 6-8
Tire pressure monitoring system (TPMS) / 6-16
Towing / 6-21
Emergency commodity / 6-25
What to do in an emergency
Page 359 of 473
What to do in an emergency
2 6
ROAD WARNING
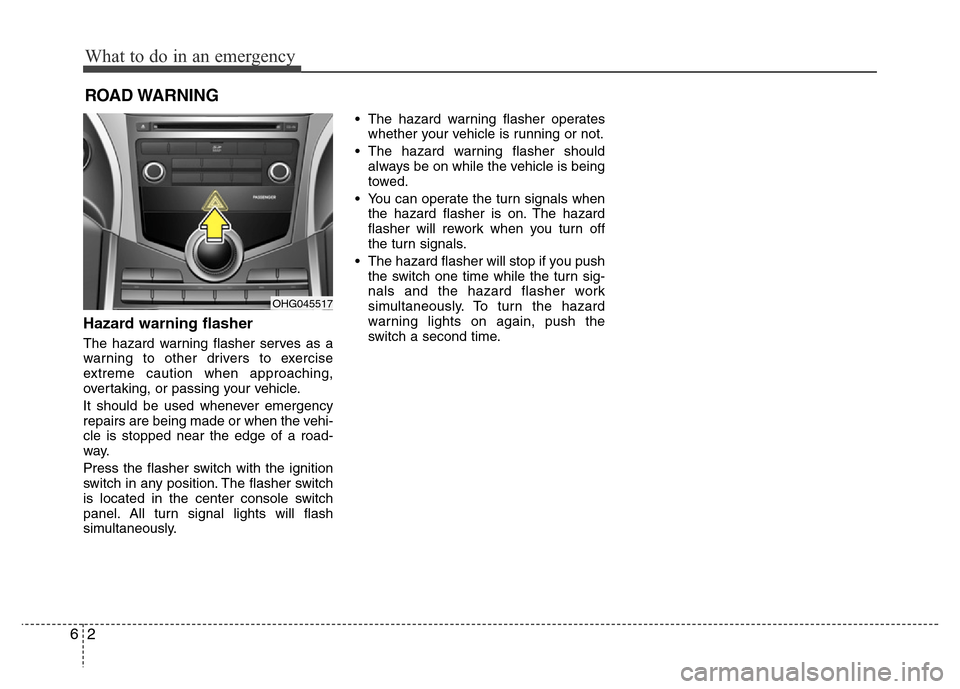
Hazard warning flasher
The hazard warning flasher serves as a
warning to other drivers to exercise
extreme caution when approaching,
overtaking, or passing your vehicle.
It should be used whenever emergency
repairs are being made or when the vehi-
cle is stopped near the edge of a road-
way.
Press the flasher switch with the ignition
switch in any position. The flasher switch
is located in the center console switch
panel. All turn signal lights will flash
simultaneously.• The hazard warning flasher operates
whether your vehicle is running or not.
• The hazard warning flasher should
always be on while the vehicle is being
towed.
• You can operate the turn signals when
the hazard flasher is on. The hazard
flasher will rework when you turn off
the turn signals.
• The hazard flasher will stop if you push
the switch one time while the turn sig-
nals and the hazard flasher work
simultaneously. To turn the hazard
warning lights on again, push the
switch a second time.
OHG045517
Page 362 of 473

65
What to do in an emergency
EMERGENCY STARTING
Connect cables in numerical order and
disconnect in reverse order.
Jump starting
Jump starting can be dangerous if done
incorrectly. Therefore, to avoid harm to
yourself or damage to your vehicle or
battery, follow the jump starting proce-
dures. If in doubt, we strongly recom-
mend that you have a competent techni-
cian or towing service jump start your
vehicle.
CAUTION
Use only a 12-volt jumper system.
You can damage a 12-volt starting
motor, ignition system, and other
electrical parts beyond repair by
use of a 24-volt power supply (either
two 12-volt batteries in series or a
24-volt motor generator set).
WARNING- Battery
• Keep all flames or sparks away
from the battery. The battery pro-
duces hydrogen gas which may
explode if exposed to flame or
sparks.
If these instructions are not fol-
lowed exactly, serious personal
injury and damage to the vehicle
may occur! If you are not sure
how to follow this procedure,
seek qualified assistance.
Automobile batteries contain sul-
furic acid. This is poisonous and
highly corrosive. When jump
starting, wear protective glasses
and be careful not to get acid on
yourself, your clothing or on the
car.
• Do not attempt to jump start the
vehicle if the discharged battery
is frozen or if the electrolyte level
is low; the battery may rupture or
explode.
• Do not allow the (+) and (-)
jumper cables to touch. It may
cause sparks.
• The battery may rupture or
explode when you jump start with
a low or frozen battery.
WARNING- Battery
Never attempt to check the elec-
trolyte level of the battery as this
may cause the battery to rupture or
explode causing serious injury.
1VQA4001
■Engine compartment
Page 363 of 473
What to do in an emergency
6 6
Jump starting procedure
1. Make sure the booster battery is 12-
volt and that its negative terminal is
grounded.
2. If the booster battery is in another
vehicle, do not allow the vehicles to
touch.
3. Turn off all unnecessary electrical
loads.
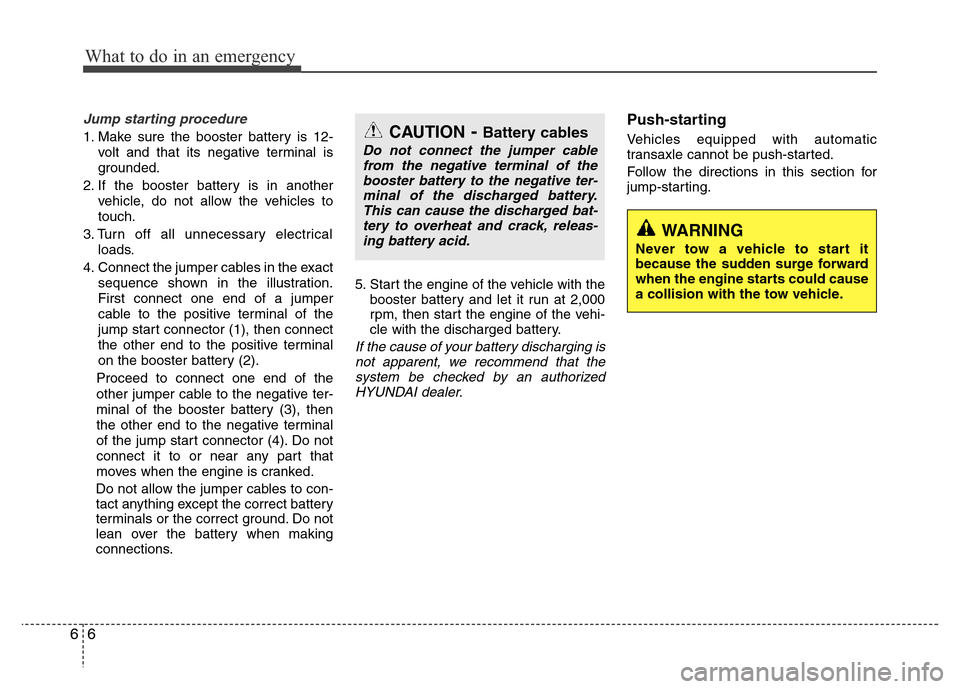
4. Connect the jumper cables in the exact
sequence shown in the illustration.
First connect one end of a jumper
cable to the positive terminal of the
jump start connector (1), then connect
the other end to the positive terminal
on the booster battery (2).
Proceed to connect one end of the
other jumper cable to the negative ter-
minal of the booster battery (3), then
the other end to the negative terminal
of the jump start connector (4). Do not
connect it to or near any part that
moves when the engine is cranked.
Do not allow the jumper cables to con-
tact anything except the correct battery
terminals or the correct ground. Do not
lean over the battery when making
connections.5. Start the engine of the vehicle with the
booster battery and let it run at 2,000
rpm, then start the engine of the vehi-
cle with the discharged battery.
If the cause of your battery discharging is
not apparent, we recommend that the
system be checked by an authorized
HYUNDAI dealer.
Push-starting
Vehicles equipped with automatic
transaxle cannot be push-started.
Follow the directions in this section for
jump-starting.CAUTION- Battery cables
Do not connect the jumper cable
from the negative terminal of the
booster battery to the negative ter-
minal of the discharged battery.
This can cause the discharged bat-
tery to overheat and crack, releas-
ing battery acid.
WARNING
Never tow a vehicle to start it
because the sudden surge forward
when the engine starts could cause
a collision with the tow vehicle.
Page 365 of 473

What to do in an emergency
8 6
IF YOU HAVE A FLAT TIRE
Jack and tools
The jack, jack handle, and wheel lug
nut wrench are stored in the luggage
compartment. Pull up the luggage
box cover to reach this equipment.
(1) Jack handle
(2) Jack
(3) Wheel lug nut wrench
Jacking instructions
The jack is provided for emergency
tire changing only.
To prevent the jack from “rattling”
while the vehicle is in motion, store it
properly.
Follow jacking instructions to reduce
the possibility of personal injury.
WARNING- Changing tires
• Never attempt vehicle repairs
in the traffic lanes of a public
road or highway.
• Always move the vehicle com-
pletely off the road and onto
the shoulder before trying to
change a tire. The jack should
be used on level firm ground.
If you cannot find a firm, level
place off the road, call a tow-
ing service company for
assistance.
(Continued)
OTF060002
(Continued)
• Be sure to use the correct
front and rear jacking posi-
tions on the vehicle; never
use the bumpers or any other
part of the vehicle for jacking
support.
• The vehicle can easily roll off
the jack causing serious
injury or death.
• Do not get under a vehicle
that is supported by a jack.
• Do not start or run the engine
while the vehicle is on the
jack.
• Do not allow anyone to remain
in the vehicle while it is on the
jack.
• Make sure any children pres-
ent are in a secure place away
from the road and from the
vehicle to be raised with the
jack.
Page 375 of 473
What to do in an emergency
18 6
TPMS (Tire Pressure
Monitoring System)
malfunction indicator
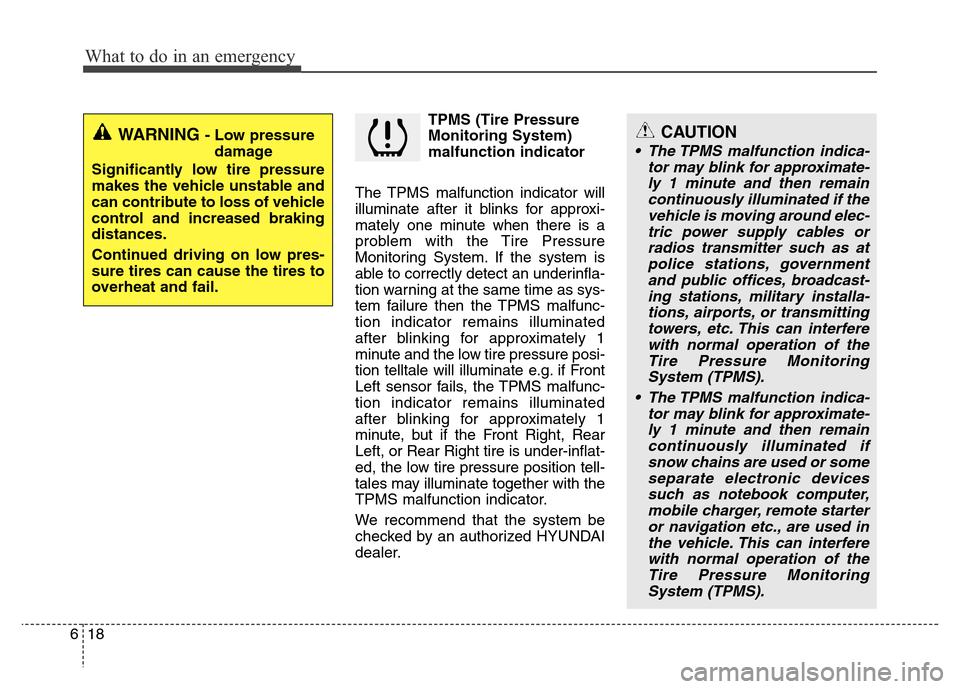
The TPMS malfunction indicator will
illuminate after it blinks for approxi-
mately one minute when there is a
problem with the Tire Pressure
Monitoring System. If the system is
able to correctly detect an underinfla-
tion warning at the same time as sys-
tem failure then the TPMS malfunc-
tion indicator remains illuminated
after blinking for approximately 1
minute and the low tire pressure posi-
tion telltale will illuminate e.g. if Front
Left sensor fails, the TPMS malfunc-
tion indicator remains illuminated
after blinking for approximately 1
minute, but if the Front Right, Rear
Left, or Rear Right tire is under-inflat-
ed, the low tire pressure position tell-
tales may illuminate together with the
TPMS malfunction indicator.
We recommend that the system be
checked by an authorized HYUNDAI
dealer.
WARNING - Low pressure
damage
Significantly low tire pressure
makes the vehicle unstable and
can contribute to loss of vehicle
control and increased braking
distances.
Continued driving on low pres-
sure tires can cause the tires to
overheat and fail.CAUTION
• The TPMS malfunction indica-
tor may blink for approximate-
ly 1 minute and then remain
continuously illuminated if the
vehicle is moving around elec-
tric power supply cables or
radios transmitter such as at
police stations, government
and public offices, broadcast-
ing stations, military installa-
tions, airports, or transmitting
towers, etc. This can interfere
with normal operation of the
Tire Pressure Monitoring
System (TPMS).
• The TPMS malfunction indica-
tor may blink for approximate-
ly 1 minute and then remain
continuously illuminated if
snow chains are used or some
separate electronic devices
such as notebook computer,
mobile charger, remote starter
or navigation etc., are used in
the vehicle. This can interfere
with normal operation of the
Tire Pressure Monitoring
System (TPMS).
Page 378 of 473

621
What to do in an emergency
Towing service
If emergency towing is necessary, we
recommend having it done by an author-
ized HYUNDAI dealer or a commercial
tow-truck service. Proper lifting and tow-
ing procedures are necessary to prevent
damage to the vehicle. The use of wheel
dollies or flatbed is recommended.It is acceptable to tow the vehicle with the
rear wheels on the ground (without dol-
lies) and the front wheels off the ground.
If any of the loaded wheels or suspen-
sion components are damaged or the
vehicle is being towed with the front
wheels on the ground, use a towing dolly
under the front wheels.
When being towed by a commercial tow
truck and wheel dollies are not used, the
front of the vehicle should always be lift-
ed, not the rear.
✽NOTICE
If the EPB does not release normally,
take your vehicle to an authorized
HYUNDAI dealer by loading the vehicle
on a flatbed tow truck and have the sys-
tem checked.
HXD02
HXD03
CAUTION
• Do not tow the vehicle with the
front wheels on the ground as
this may cause damage to the
vehicle.
• Do not tow with sling-type equip-
ment. Use wheel lift or flatbed
equipment.
OMC045012
A
B
Cdolly
TOWING
Page 379 of 473
What to do in an emergency
22 6
When towing your vehicle in an emer-
gency without wheel dollies :
1. Set the ignition switch in the ACC posi-
tion.
2. Place the shift lever in N (Neutral).
3. Release the parking brake.
Removable towing hook
(front, if equipped)
1. Open the trunk, and remove the tow-
ing hook from the tool case.
2. Remove the hole cover pressing the
lower part of the cover on the front
bumper.
3. Install the towing hook by turning it
clockwise into the hole until it is fully
secured.
4. Remove the towing hook and install
the cover after use.
Emergency towing
If towing is necessary, we recommend
you to have it done by an authorized
HYUNDAI dealer or a commercial tow
truck service.
OHG065008
OHG065009■Rear
CAUTION
Failure to place the shift lever in N
(Neutral) may cause internal dam-
age to the transaxle.
■Front
OHG065010

