Page 173 of 573

uuAudio System Basic Operation uPlaying AM/FM Radio
172
Features
Provides text data information related to your selected RDS-capable FM station.
■RDS INFO ON
Press the TITLE button while listening to an RDS capable station. RDS INFO ON
appears, and the station name is displayed.
■To find an RDS station from your selected program category 1.Press the FOLDER bar to display and select
an RDS category.
2. Use SKIP or SCAN to select an RDS station.
■Radio Data System (RDS)1Playing AM/FM Radio
The ST indicator appears on the display indicating
stereo FM broadcasts.
Stereo reproduction in AM is not available.
Switching the Audio Mode
Press the SOURCE button on the steering wheel.
2 Audio Remote Controls P. 168
You can store six AM stations and twelve FM stations
into the preset button memory. FM1 and FM2 let you
store six stations each.
Auto Select function scans and stores up to six AM
stations and twelve FM stat ions with a strong signal
into the preset button memory.
If you do not like the stati ons auto select has stored,
you can manually store your preferred frequencies.
RDS Category
15 CROSSTOUR-31TP66500.book 172 ページ 2014年7月31日 木曜日 午後3時23分
Page 195 of 573
uuAudio System Basic Operation uPlaying AM/FM Radio
194
Features
To store a station:
1. Tune to the selected station.
2. Press to switch to the Audio menu screen.
3. Rotate to select Save Preset, then press .
4. Rotate to select the preset number you want to store that station, then press
.
2. Select More.
3. Select Save Preset .
4. Select the preset number you wa nt to store that station.
■Preset Memory1Playing AM/FM Radio
The ST indicator appears on the display indicating
stereo FM broadcasts.
Stereo reproduction in AM is not available.
Switching the Audio Mode
Press the SOURCE button on the steering wheel.
2 Audio Remote Controls P. 168
You can also switch the mode by pressing and
selecting Change Source on the Audio menu
screen.
You can store 6 AM stations and 12 FM stations into
the preset memory.
MENU/SEL (Selector) Knob
Audio with Touch Screen
15 CROSSTOUR-31TP66500.book 194 ページ 2014年7月31日 木曜日 午後3時23分
Page 199 of 573

uuAudio System Basic Operation uPlaying SiriusXM ® Radio*
198
Features
1. Select the SiriusXM® mode.
2 Audio Remote Controls P. 168
2 Audio with Touch Screen P. 183
2.Press to switch to the Audio menu screen.
3. Rotate to select XM Tune Mode, then press .
4. Rotate to select Channel Mode or Category Mode , then press .
5. Rotate to select Channel List, then press .
6. Rotate to select a channel from a list, then press .
2. Select More.
3. Select XM Tune Mode .
4. Select Channel Mode or Category Mode .
5. Select a channel using the , , , icons on the tune mode screen or the
preset numbers ( 1-12 ) on the preset mode screen.
■To Play the SiriusXM ® Radio1 Playing SiriusXM ® Radio*
In the channel mode, all available channels are
selectable. In the categor y mode, you can select a
channel within a ca tegory (Jazz, Rock, Classical, etc.).
There may be instances when SiriusXM ® Radio does
not broadcast all the data fi elds (artist name, title).
This does not indicate a problem with your audio
system.
MENU/SEL (Selector) Knob
Audio with Touch Screen
* Not available on all models
15 CROSSTOUR-31TP66500.book 198 ページ 2014年7月31日 木曜日 午後3時23分
Page 234 of 573
Continued233
uuAudio System Basic Operation uPlaying AM/FM Radio
Features
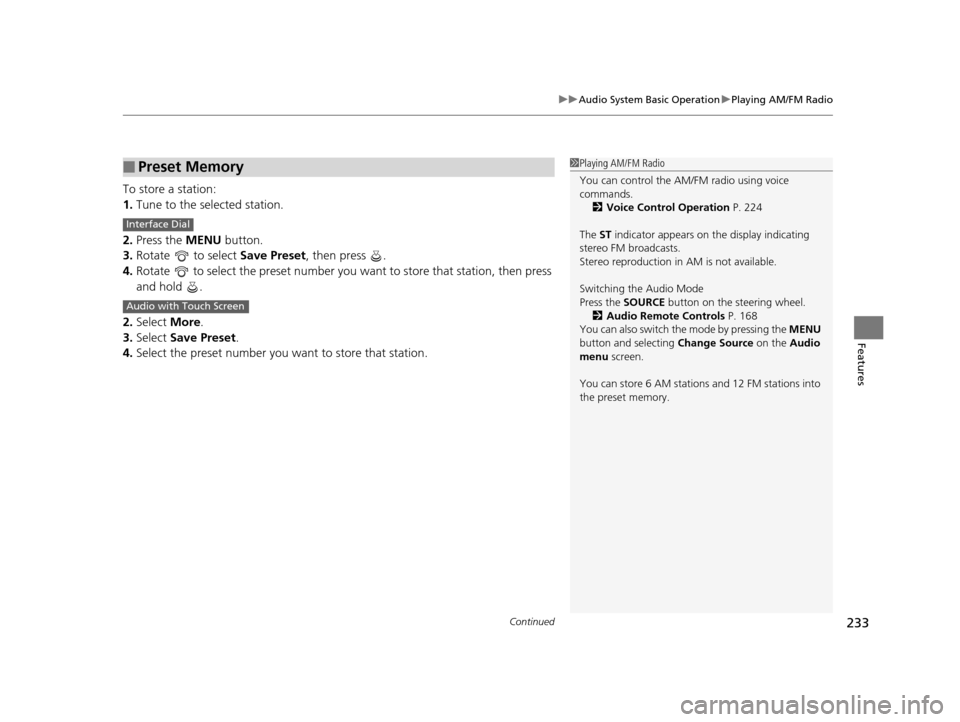
To store a station:
1. Tune to the selected station.
2. Press the MENU button.
3. Rotate to select Save Preset, then press .
4. Rotate to select the preset number you want to store that station, then press
and hold .
2. Select More.
3. Select Save Preset .
4. Select the preset number you want to store that station.
■Preset Memory1Playing AM/FM Radio
You can control the AM/FM radio using voice
commands.
2 Voice Control Operation P. 224
The ST indicator appears on the display indicating
stereo FM broadcasts.
Stereo reproduction in AM is not available.
Switching the Audio Mode
Press the SOURCE button on the steering wheel.
2 Audio Remote Controls P. 168
You can also switch the mode by pressing the MENU
button and selecting Change Source on the Audio
menu screen.
You can store 6 AM stations and 12 FM stations into
the preset memory.
Interface Dial
Audio with Touch Screen
15 CROSSTOUR-31TP66500.book 233 ページ 2014年7月31日 木曜日 午後3時23分
Page 238 of 573
Continued237
uuAudio System Basic Operation uPlaying SiriusXM ® Radio
Features
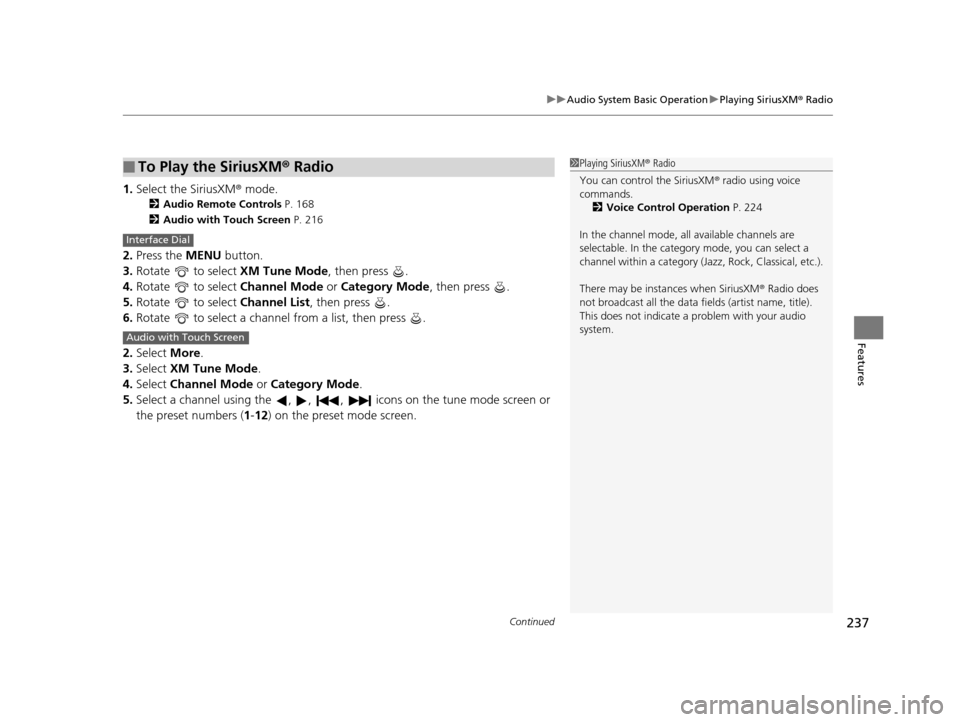
1. Select the SiriusXM ® mode.
2Audio Remote Controls P. 168
2 Audio with Touch Screen P. 216
2.Press the MENU button.
3. Rotate to select XM Tune Mode, then press .
4. Rotate to select Channel Mode or Category Mode , then press .
5. Rotate to select Channel List, then press .
6. Rotate to select a channel from a list, then press .
2. Select More.
3. Select XM Tune Mode .
4. Select Channel Mode or Category Mode .
5. Select a channel using the , , , ic ons on the tune mode screen or
the preset numbers ( 1-12) on the preset mode screen.
■To Play the SiriusXM ® Radio1 Playing SiriusXM ® Radio
You can control the SiriusXM ® radio using voice
commands.
2 Voice Control Operation P. 224
In the channel mode, all available channels are
selectable. In the categor y mode, you can select a
channel within a ca tegory (Jazz, Rock, Classical, etc.).
There may be instances when SiriusXM ® Radio does
not broadcast all the data fi elds (artist name, title).
This does not indicate a problem with your audio
system.
Interface Dial
Audio with Touch Screen
15 CROSSTOUR-31TP66500.book 237 ページ 2014年7月31日 木曜日 午後3時23分
Page 318 of 573
317Continued
Features
HomeLink® Universal Transceiver*
The HomeLink ® Universal Transceiver can be programmed to operate up to three
remote controlled devices around your home, such as garage doors, lighting, or
home security systems.
Refer to the safety information that came wi th your garage door opener to test that
the safety features are functioning prope rly. If you do not have the safety
information, contact the manufacturer.
Before programming HomeLink, make sure that people and objects are out of the
way of the garage or gate to prevent potential injury or damage.
When programming a garage door opener, park just outside the garage door’s
path.
Training HomeLink
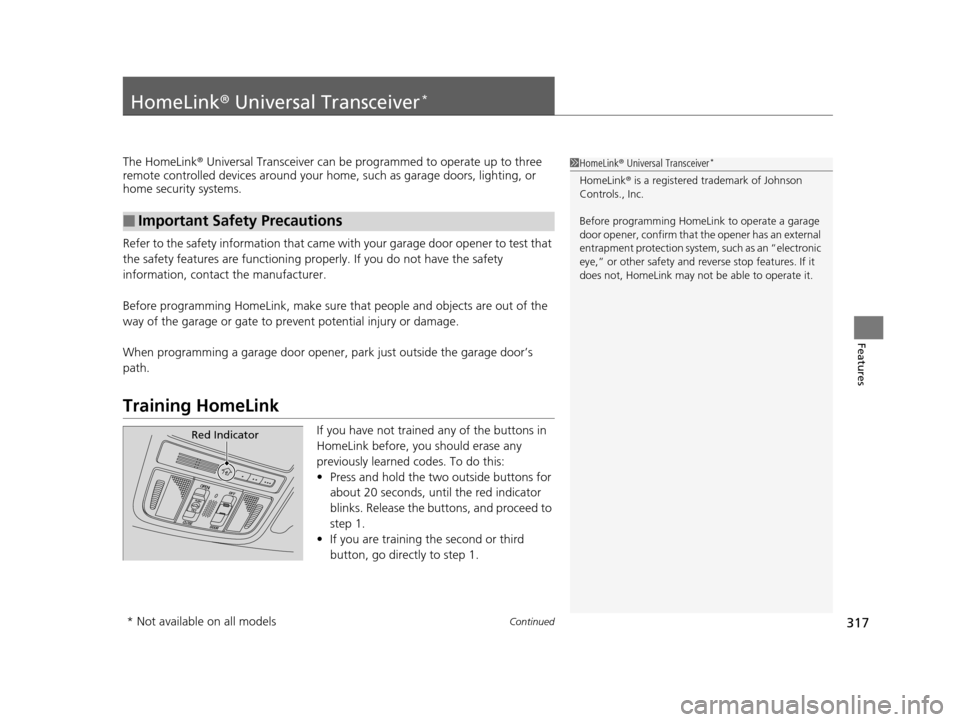
If you have not trained any of the buttons in
HomeLink before, you should erase any
previously learned codes. To do this:
• Press and hold the two outside buttons for
about 20 seconds, until the red indicator
blinks. Release the bu ttons, and proceed to
step 1.
• If you are training the second or third
button, go directly to step 1.
■Important Safety Precautions
1HomeLink ® Universal Transceiver*
HomeLink® is a registered tra demark of Johnson
Controls., Inc.
Before programming HomeLi nk to operate a garage
door opener, confirm that the opener has an external
entrapment protection system, such as an “electronic
eye,” or other safety and re verse stop features. If it
does not, HomeLink may not be able to operate it.
Red Indicator
* Not available on all models
15 CROSSTOUR-31TP66500.book 317 ページ 2014年7月31日 木曜日 午後3時23分
Page 319 of 573
uuHomeLink ® Universal Transceiver*u Training HomeLink
318
Features
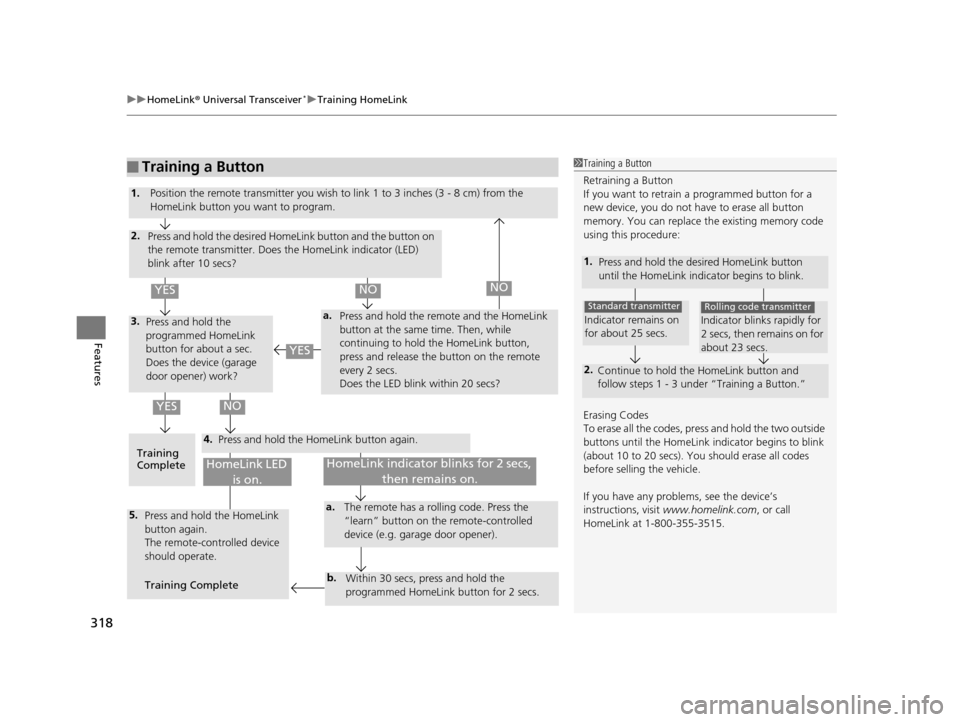
■Training a Button1Training a Button
Retraining a Button
If you want to retrain a programmed button for a
new device, you do not ha ve to erase all button
memory. You can replace the existing memory code
using this procedure:
Erasing Codes
To erase all the codes, press and hold the two outside
buttons until the HomeLink i ndicator begins to blink
(about 10 to 20 secs). You should erase all codes
before selling the vehicle.
If you have any problems, see the device’s
instructions, visit www.homelink.com , or call
HomeLink at 1-800-355-3515.
1. Press and hold the desired HomeLink button
until the HomeLink indi cator begins to blink.
2.
Continue to hold the HomeLink button and
follow steps 1 - 3 unde r “Training a Button.”
Indicator remains on
for about 25 secs.
Standard transmitter
Indicator blinks rapidly for
2 secs, then remains on for
about 23 secs.
Rolling code transmitter
4.
a.3.
2.
5.a.
b.
1.
Position the remote transmitter you wish to link 1 to 3 inches (3 - 8 cm) from the
HomeLink button you want to program.
Press and hold the desired HomeLink button and the button on
the remote transmitter. Does the HomeLink indicator (LED)
blink after 10 secs?
Press and hold the
programmed HomeLink
button for about a sec.
Does the device (garage
door opener) work? Press and hold the remote and the HomeLink
button at the same time. Then, while
continuing to hold the HomeLink button,
press and release the button on the remote
every 2 secs.
Does the LED blink within 20 secs?
Training
Complete Press and hold the HomeLink button again.
Press and hold the HomeLink
button again.
The remote-controlled device
should operate.
Training Complete The remote has a ro
lling code. Press the
“learn” button on the remote-controlled
device (e.g. garage door opener).
Within 30 secs, press and hold the
programmed HomeLink button for 2 secs.
HomeLink indicator blinks for 2 secs, then remains on.HomeLink LED is on.
YESNO
YES
YESNONO
15 CROSSTOUR-31TP66500.book 318 ページ 2014年7月31日 木曜日 午後3時23分
Page 320 of 573
319Continued
Features
Bluetooth® HandsFreeLink ®
Bluetooth® HandsFreeLink ® (HFL) allows you to place and receive phone calls using
your vehicle’s audio system, without handling your cell phone.
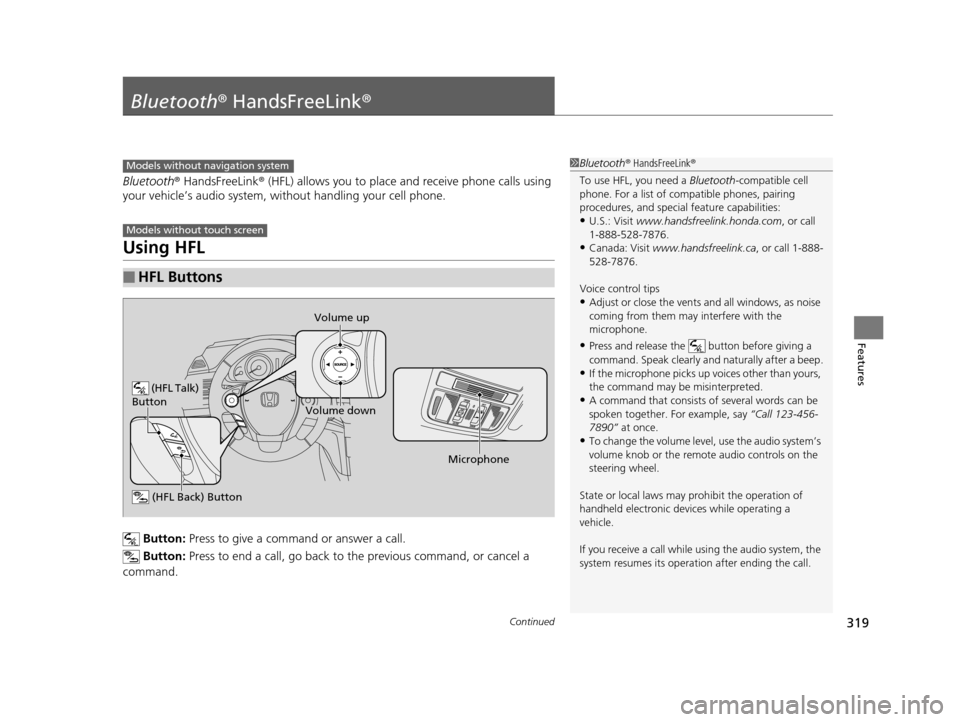
Using HFL
Button: Press to give a command or answer a call.
Button: Press to end a call, go back to the previous command, or cancel a
command.
■HFL Buttons
1 Bluetooth ® HandsFreeLink ®
To use HFL, you need a Bluetooth-compatible cell
phone. For a list of compatible phones, pairing
procedures, and special feature capabilities:
•U.S.: Visit www.handsfreelink.honda.com , or call
1-888-528-7876.
•Canada: Visit www.handsfreelink.ca , or call 1-888-
528-7876.
Voice control tips
•Adjust or close the vents and all windows, as noise
coming from them may interfere with the
microphone.
•Press and release the button before giving a
command. Speak clearly and naturally after a beep.
•If the microphone picks up vo ices other than yours,
the command may be misinterpreted.
•A command that consists of several words can be
spoken together. For example, say “Call 123-456-
7890” at once.
•To change the volume level, use the audio system’s
volume knob or the remote audio controls on the
steering wheel.
State or local laws may pr ohibit the operation of
handheld electronic devi ces while operating a
vehicle.
If you receive a call while using the audio system, the
system resumes its operati on after ending the call.
Models without navigation system
Models without touch screen
(HFL Talk)
Button
Volume up
Microphone
(HFL Back) Button
Volume down
15 CROSSTOUR-31TP66500.book 319 ページ 2014年7月31日 木曜日 午後3時23分