2015 GMC TERRAIN buttons
[x] Cancel search: buttonsPage 2 of 20

2
Turn Signal Lever/
Exterior Lamp Control Driver
Information Center
Tilt/Telescopic Steering Wheel Lever Windshield
Wipers Lever
Instrument Panel
Illumination Control
Cruise Control
Buttons
Instrument Panel
Safety Belt
Reminder
Check Engine
Low Tire Pressure
Brake System
Warning
Antilock Brake
System Warning
Charging System
Oil Pressure
Airbag Readiness
Security
Fog Lamps
Cruise Control On/Set
Traction Control Off
StabiliTrak/Traction
Control Off
StabiliTrak/Traction Control Warning
Lights On Audio Steering
Wheel Controls
F
Express-Down
Power
Windows (All) Power Door
Locks Button
Instrument Cluster Symbols
Page 3 of 20

3
Refer to your Owner Manual to learn about the information being relayed \
by the lights, gauges and
indicators of the instrument cluster.
See In Brief in your Owner Manual.
Infotainment System/
Navigation System
FPower Door
Locks Button
StabiliTrak Button
Center Vent
Open/Close Control Accessory
Power Outlet Rear Door
Safety Locks Button
Hazard Warning
Flashers Button
Driver
Information Center
Controls Climate Controls/
Heated Seat ButtonsF
Center Vent Open/Close Control
eco
Button
F Optional equipment
Page 6 of 20

6
exterIor/Inter Ior lIghtIng
Automatic Headlamp System
Rotate the outer band to operate the
exterior lamps. Headlamps
Manual operation of the headlamps.
Parking Lamps
Manual operation of the parking lamps.
AUTO Automatic Headlamp System
Activates the Daytime Running Lamps
(DRLs) in the daytime and the headlamps
and other exterior lamps at night or when
necessary.
Off/On
Fog Lamps
Rotate the inner band to turn the fog lamps
on or off. TIP: Push the lever to turn on the high beam
headlamps; pull the lever to return to low beam
operation. Pull the lever to activate the flash-to-
pass feature.
Instrument Panel Lighting
The control knob is located on the left
side of the instrument panel next to the
steering column. Instrument Panel Brightness
Turn the knob to increase or decrease
the instrument panel lighting.
Dome Lamp
The dome lamps are controlled by a
three-position switch on the front overhead
console.
Dome Lamp Override/Off
Door Open (Default position)
On
See Lighting in your Owner Manual.TIP: The second-row dome lamps also can be
turned on/off using the buttons by the lamps.
A. Seat Fore/Aft Adjustment
Lift the bar under the front of the seat
to manually slide the seat forward or
rearward.
B. Folding/Reclining Seatback
Unbuckle the rear safety belts and
place the front seatbacks in the upright
position. Lift the lever on top of each
seatback to fold down the seatback.
Lift and hold the lever to adjust the seat -
back to any of three recline positions.
See Seats and Restraints in your Owner Manual.
rear seat aDjustments
AB
Page 9 of 20

9
auDIo system
Setting the Time
1. Press the
Clock button.
2. Touch the Set Time screen button.
3. Touch the + (plus) or – (minus) screen button to adjust the hours, minutes or date.
4. Touch the OK screen button to confirm the setting.
Storing Favorite Stations
Radio stations from all bands (AM, FM or XM♦) can be stored, in any order, on up to six
pages of favorites.
1. Tune in the desired radio station.
2. Press the FAV button to display the page where the station is to be stored.
3. Press and hold one of the six preset screen buttons until a beep is hear\
d.
4. Repeat the steps for each desired station.
Portable Audio Devices
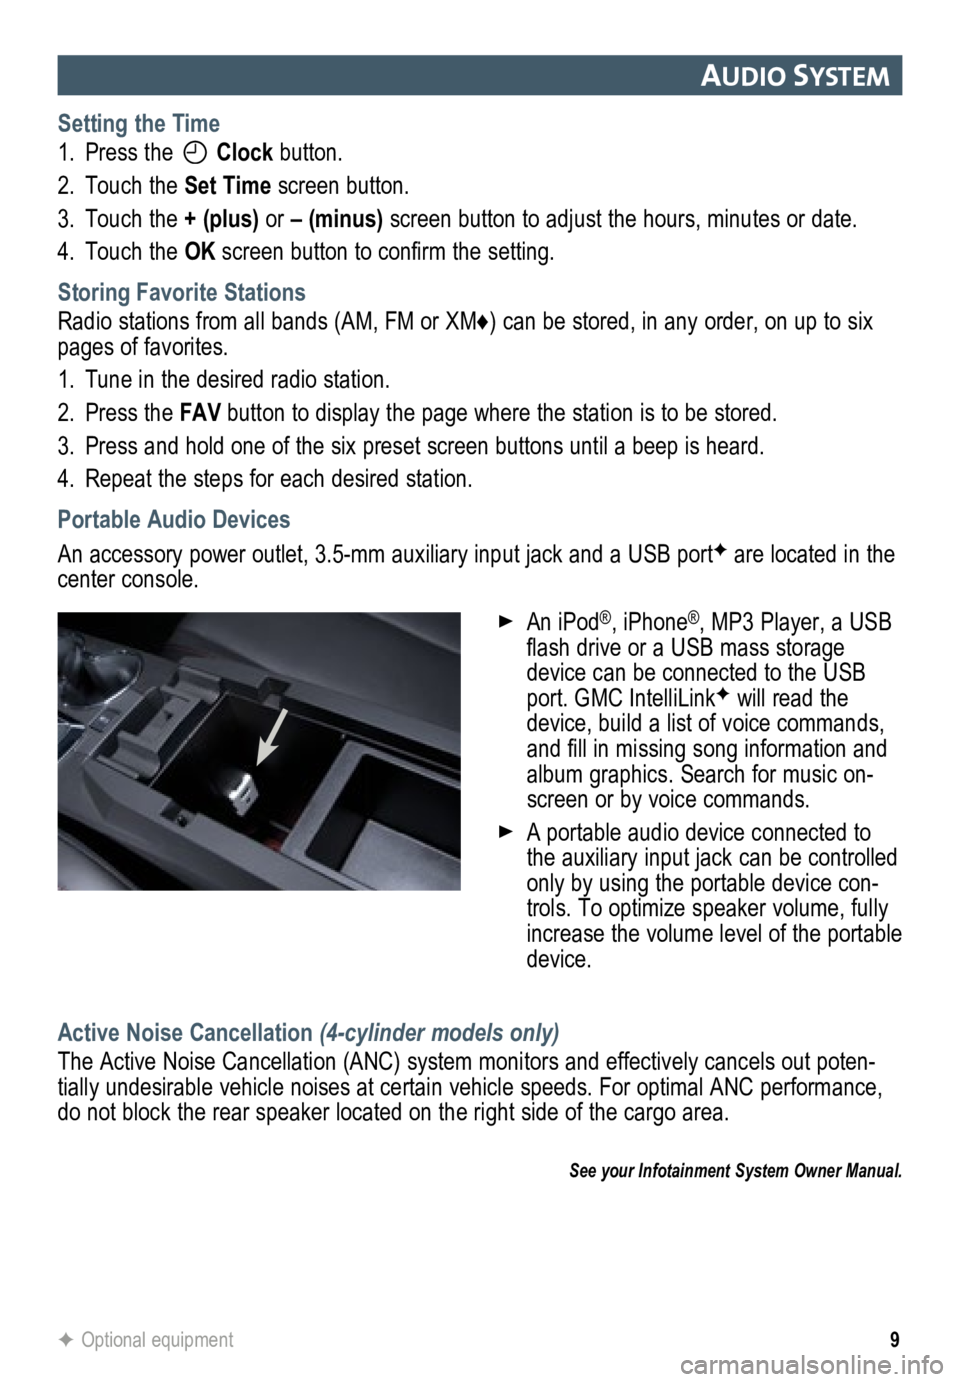
An accessory power outlet, 3.5-mm auxiliary input jack and a USB portF are located in the
center console.
Active Noise Cancellation (4-cylinder models only)
The Active Noise Cancellation (ANC) system monitors and effectively cancels out poten-
tially undesirable vehicle noises at certain vehicle speeds. For optimal ANC performance,
do not block the rear speaker located on the right side of the cargo are\
a.
See your Infotainment System Owner Manual.
F Optional equipment
An iPod®, iPhone®, MP3 Player, a USB
flash drive or a USB mass storage
device can be connected to the USB
port. GMC IntelliLink
F will read the
device, build a list of voice commands,
and fill in missing song information and
album graphics. Search for music on-
screen or by voice commands.
A portable audio device connected to
the auxiliary input jack can be controlled
only by using the portable device con-
trols. To optimize speaker volume, fully
increase the volume level of the portable
device.
Page 10 of 20

10F Optional equipment
bluetooth® system
Before using a Bluetooth-enabled device in the vehicle, it must be paired with the in-vehicle
Bluetooth system. Not all devices will support all functions. The pairing process is disabled
when the vehicle is moving. For more information about Bluetooth pairing\
, device compat-
ibility and text messaging, visit www.gmtotalconnect.com .
Pair a Phone
1. To use voice recognition, press the
Push to Talk button on the steering wheel;
after the beep, say “Pair.”
To use the screen buttons, press the CONFIG button and then touch Phone Settings >
Pair Device.
2. Start the pairing process on the phone. Locate your vehicle name or Inte\
lliLink on
the phone.
3. Enter the four-digit code that appears on the touch screen into the phone or confirm the
six-digit code on the phone.
4. If your phone prompts you to accept the connection or phone book download, click “yes”
and always allow.
Text Messaging
F
Text messages can be displayed or played back over the audio system; or a predefined
message can be sent. Only SMS text messages are supported.
1. Touch the Messages screen button on the home page.
2. Once all messages are retrieved, the Text Message Inbox displays.
3. Select a text message to view (available only if the vehicle is not in motion) or listen to.
A pop-up screen will display when there is an incoming text message.
See your Infotainment System Owner Manual.
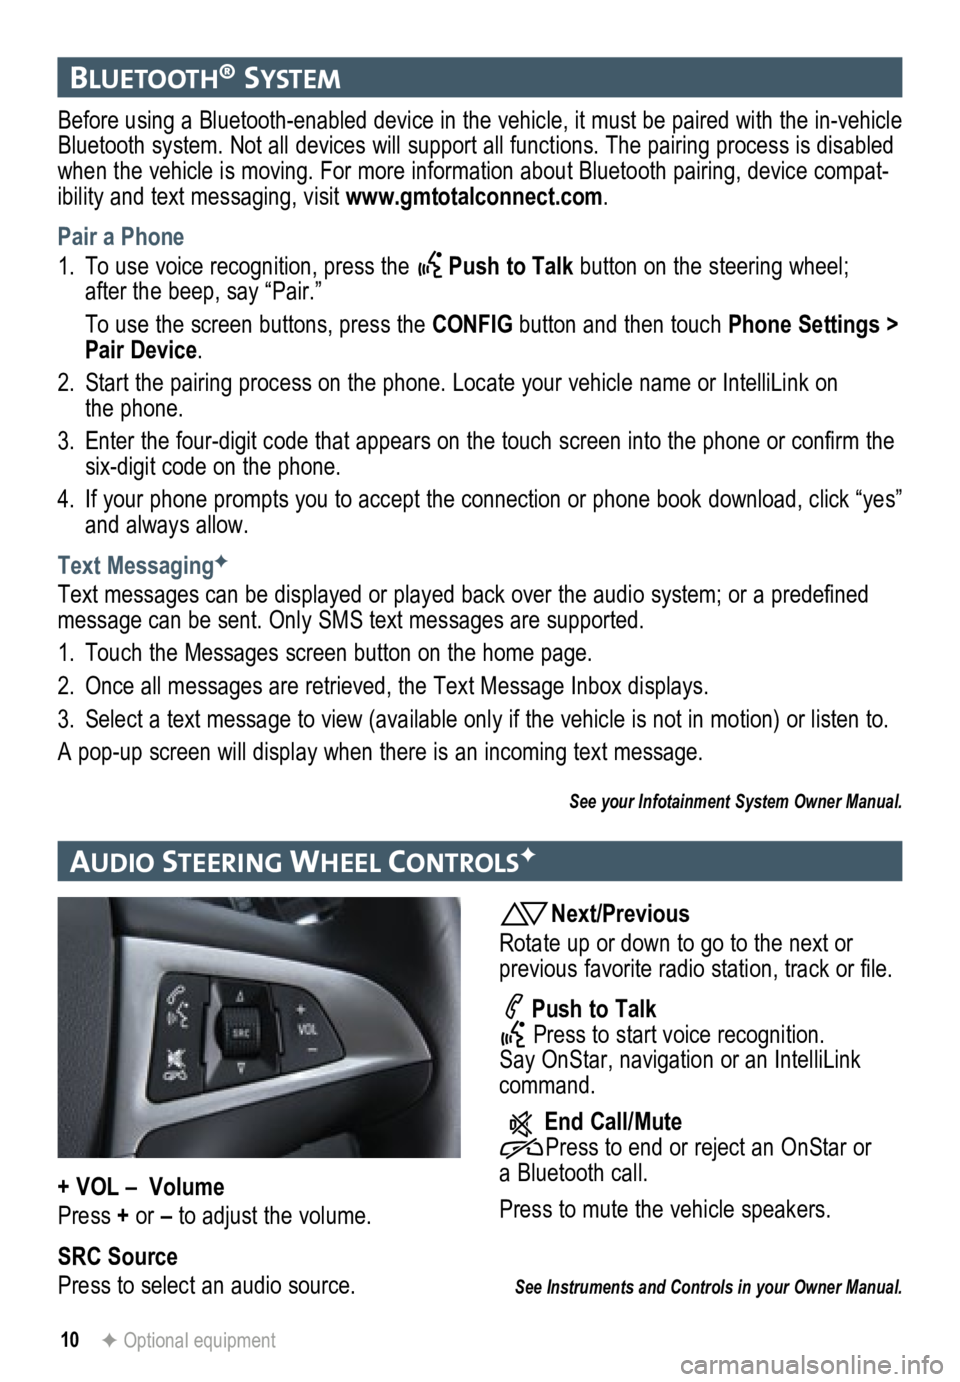
au DIo steer Ing Wheel controlsF
Next/Previous
Rotate up or down to go to the next or
previous favorite radio station, track or file.
Push to Talk
Press to start voice recognition.
Say OnStar, navigation or an IntelliLink
command.
End Call/Mute
Press to end or reject an OnStar or
a Bluetooth call.
Press to mute the vehicle speakers.
See Instruments and Controls in your Owner Manual.
+ VOL – Volume
Press + or – to adjust the volume.
SRC Source
Press to select an audio source.
Page 13 of 20

13
navIgatIon systemF
Note: When the vehicle is moving, various on-screen functions are disabled to reduce
driver distraction.
Controls
NAV Navigation
Press to view the vehicle’s current position on the map screen.
DEST Destination
Press to access the Route screen to enter a destination or plan a route.
RPT Repeat
Press to repeat the last voice guidance prompt.
To select various functions, touch the highlighted touch screen buttons in the on-screen
menus or use the MENU/SEL knob.
Entering a Destination
1. Press the DEST control button.
2. Touch one of the Select Destination menu options to plan a route. If you know the
specific address, touch the Address Entry screen button.
3. Enter the State/Province, City and Street name. Touch the List screen button to select
the desired name from the generated list for each entry.
4. Enter the house number. Touch the DONE screen button.
5. If the displayed address is correct, touch the GO screen button.
6. Select the route preference and touch the Start Guidance screen button.
See your Infotainment System Owner Manual.
rear seat entertaI nment systemF
Play a DVD Video
1. Press the release button on the seatback consoles to raise the screens.
2. Insert a DVD into the audio system.
3. Press the DVD screen button to select the DVD source. Sound will play through the
vehicle speakers.
4. To use the wireless headphones, press the On/Off button on the headphones, select
Channel 1, and adjust the volume using the headphone volume control.
5. To control DVD playback, use the audio controls or the remote control. For best
performance, aim the remote control at the driver-side seatback console.\
Changing the Source on the Video Screens
Continually press the AUX button on the remote control to play a DVD or an auxiliary
device, such as a video game, on both screens or a different source on e\
ach screen.
See your Infotainment System Owner Manual.
F Optional equipment
Page 15 of 20

15
DrIver Informat Ion center
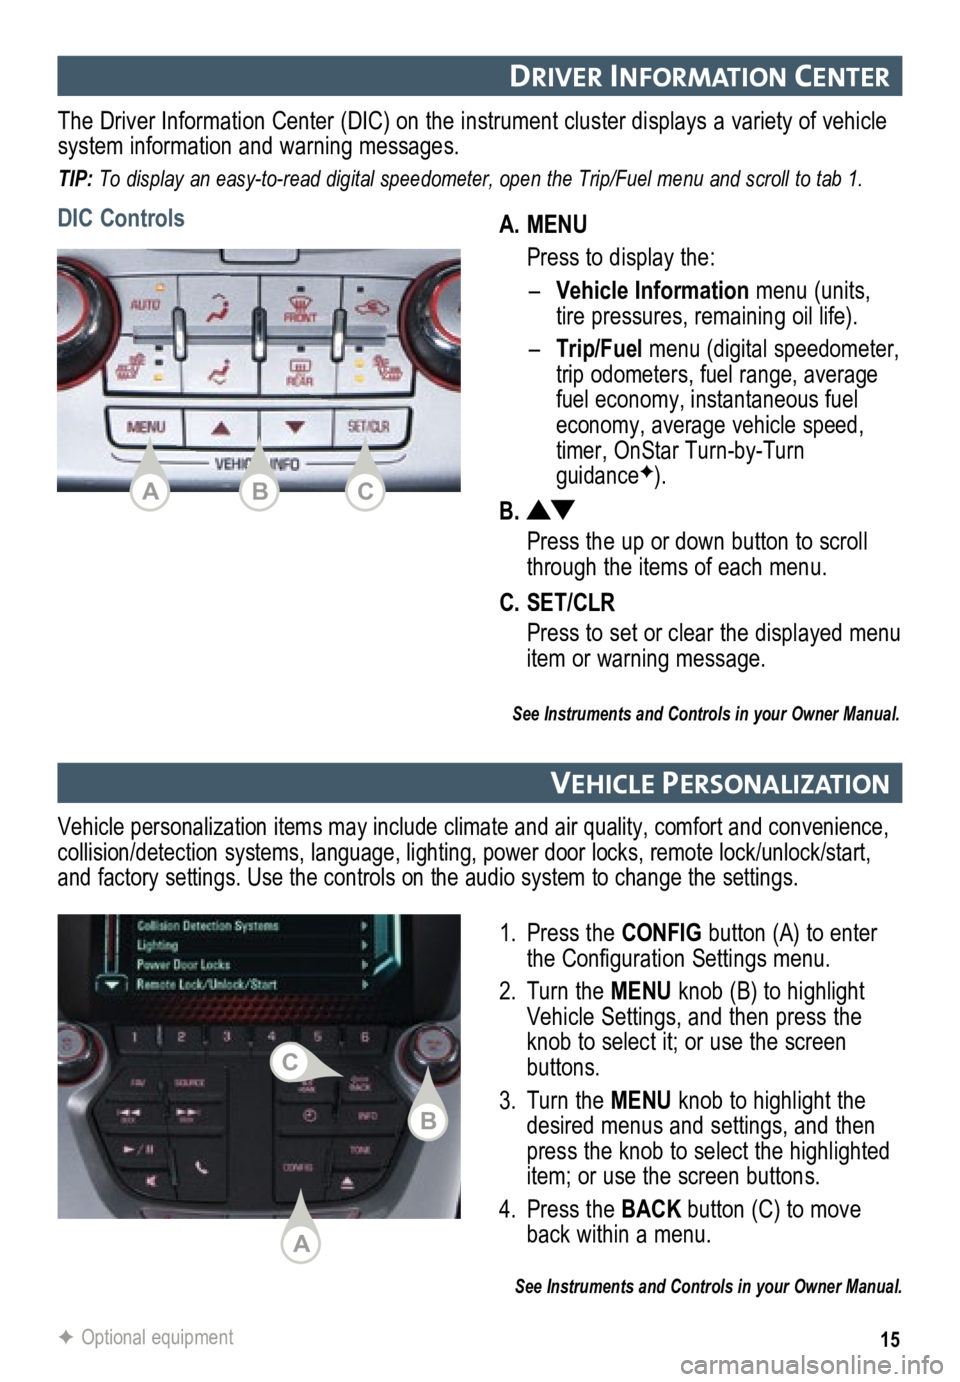
A. MENU
Press to display the:
– Vehicle Information menu (units,
tire pressures, remaining oil life).
–
Trip/Fuel menu (digital speed ometer,
trip odometers, fuel range, average
fuel economy, instantaneous fuel
economy, average vehicle speed,
timer, OnStar Turn-by-Turn
guidanceF).
B.
Press the up or down button to scroll
through the items of each menu.
C. SET/CLR
Press to set or clear the displayed menu
item or warning message.
The Driver Information Center (DIC) on the instrument cluster displays a variety of vehicle
system information and warning messages.
TIP: To display an easy-to-read digital speedometer, open the Trip/Fuel menu and scroll to tab 1.
DIC Controls
See Instruments and Controls in your Owner Manual.
vehIcle PersonalIzat Ion
1. Press the CONFIG button (A) to enter
the Configuration Settings menu.
2. Turn the MENU knob (B) to highlight
Vehicle Settings, and then press the
knob to select it; or use the screen
buttons.
3. Turn the MENU knob to highlight the
desired menus and settings, and then
press the knob to select the highlighted
item; or use the screen buttons.
4. Press the BACK button (C) to move
back within a menu.
See Instruments and Controls in your Owner Manual.
Vehicle personalization items may include climate and air quality, comfort and conven ience,
collision/detection systems, language, lighting, power door locks, remot\
e lock/unlock/start,
and factory settings. Use the controls on the audio system to change the settings.
F Optional equipment
ACB
A
B
C