2015 GMC SIERRA 1500 change time
[x] Cancel search: change timePage 170 of 539
Black plate (33,1)GMC Sierra Owner Manual (GMNA Localizing-U.S/Canada/Mexico-
7299746) - 2015 - crc - 11/11/13
Instruments and Controls 5-33
L/100 km (mpg) recorded since the
last time this menu item was reset.
This number reflects only the
approximate average fuel economy
that the vehicle has right now, and
will change as driving conditions
change.
Press and hold
Vwhile this display
is active to reset the trip odometer
and the average fuel economy. Trip
A and Trip B can also be reset by
pressing
pand choosing reset.
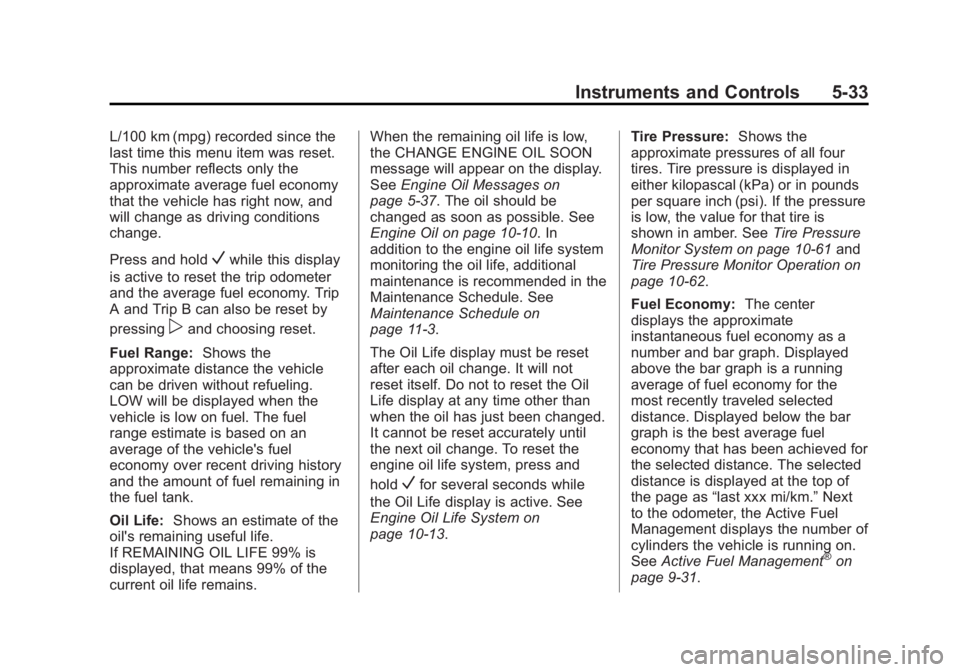
Fuel Range: Shows the
approximate distance the vehicle
can be driven without refueling.
LOW will be displayed when the
vehicle is low on fuel. The fuel
range estimate is based on an
average of the vehicle's fuel
economy over recent driving history
and the amount of fuel remaining in
the fuel tank.
Oil Life: Shows an estimate of the
oil's remaining useful life.
If REMAINING OIL LIFE 99% is
displayed, that means 99% of the
current oil life remains. When the remaining oil life is low,
the CHANGE ENGINE OIL SOON
message will appear on the display.
See
Engine Oil Messages on
page 5-37. The oil should be
changed as soon as possible. See
Engine Oil on page 10-10. In
addition to the engine oil life system
monitoring the oil life, additional
maintenance is recommended in the
Maintenance Schedule. See
Maintenance Schedule on
page 11-3.
The Oil Life display must be reset
after each oil change. It will not
reset itself. Do not to reset the Oil
Life display at any time other than
when the oil has just been changed.
It cannot be reset accurately until
the next oil change. To reset the
engine oil life system, press and
hold
Vfor several seconds while
the Oil Life display is active. See
Engine Oil Life System on
page 10-13. Tire Pressure:
Shows the
approximate pressures of all four
tires. Tire pressure is displayed in
either kilopascal (kPa) or in pounds
per square inch (psi). If the pressure
is low, the value for that tire is
shown in amber. See Tire Pressure
Monitor System on page 10-61 and
Tire Pressure Monitor Operation on
page 10-62.
Fuel Economy: The center
displays the approximate
instantaneous fuel economy as a
number and bar graph. Displayed
above the bar graph is a running
average of fuel economy for the
most recently traveled selected
distance. Displayed below the bar
graph is the best average fuel
economy that has been achieved for
the selected distance. The selected
distance is displayed at the top of
the page as “last xxx mi/km.” Next
to the odometer, the Active Fuel
Management displays the number of
cylinders the vehicle is running on.
See Active Fuel Management
®on
page 9-31.
Page 190 of 539
Black plate (53,1)GMC Sierra Owner Manual (GMNA Localizing-U.S/Canada/Mexico-
7299746) - 2015 - crc - 11/11/13
Instruments and Controls 5-53
2. At the same time, press andhold both the hand-held
transmitter button and one of the
three Universal Remote system
buttons to be used to operate
the garage door. Do not release
either button until the indicator
light goes from a slow to a rapid
flashing light. Then release both
buttons.
Some garage door openers may
require substitution of Step 2
with the procedure under “Radio
Signals for Canada and Some
Gate Operators” later in this
section.
3. Press and hold the newly programmed Universal Remote
system button for five seconds
while watching the indicator light
and garage door activation.
.If the indicator light stays on
continuously or the garage
door moves when the
button is pressed, then programming is complete.
There is no need to
complete Steps 4–6.
.If the indicator light does
not come on or the garage
door does not move, a
second button press may
be required. For a second
time, press and hold the
newly programmed button
for five seconds. If the light
stays on or the garage door
moves, programming is
complete.
.If the indicator light blinks
rapidly for two seconds,
then changes to a solid light
and the garage door does
not move, continue with
programming Steps 4–6.
Learn or Smart Button
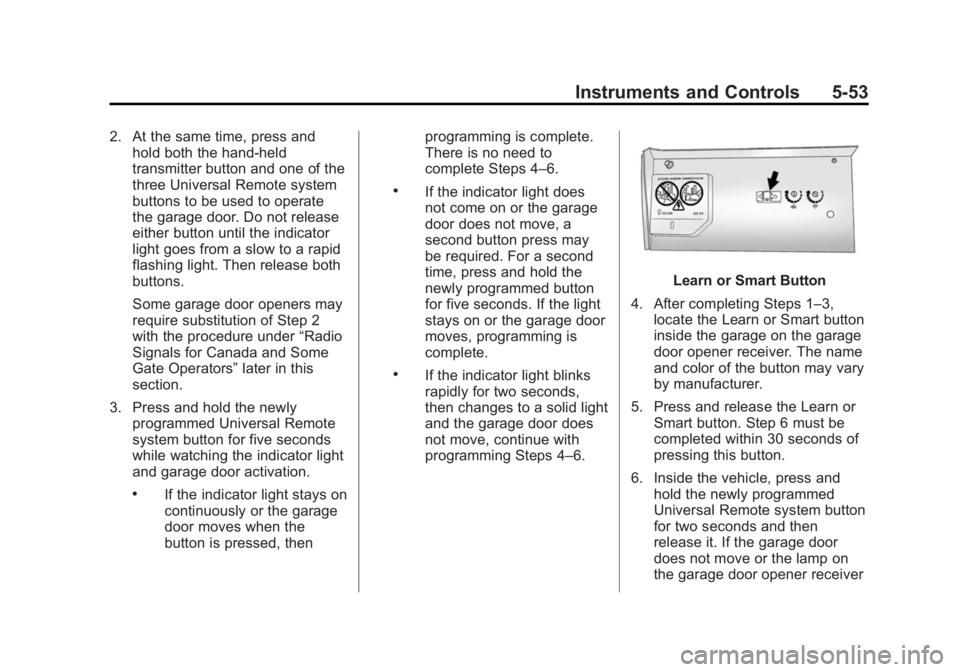
4. After completing Steps 1–3, locate the Learn or Smart button
inside the garage on the garage
door opener receiver. The name
and color of the button may vary
by manufacturer.
5. Press and release the Learn or Smart button. Step 6 must be
completed within 30 seconds of
pressing this button.
6. Inside the vehicle, press and hold the newly programmed
Universal Remote system button
for two seconds and then
release it. If the garage door
does not move or the lamp on
the garage door opener receiver
Page 194 of 539
Black plate (1,1)GMC Sierra Owner Manual (GMNA Localizing-U.S/Canada/Mexico-
7299746) - 2015 - crc - 11/11/13
Lighting 6-1
Lighting
Exterior Lighting
Exterior Lamp Controls . . . . . . . . 6-1
Exterior Lamps OffReminder . . . . . . . . . . . . . . . . . . . . 6-2
Headlamp High/Low-Beam Changer . . . . . . . . . . . . . . . . . . . . . 6-2
Flash-to-Pass . . . . . . . . . . . . . . . . . 6-3
Daytime Running Lamps (DRL) . . . . . . . . . . . . . . . . 6-3
Automatic Headlamp System . . . . . . . . . . . . . . . . . . . . . . 6-3
Hazard Warning Flashers . . . . . 6-4
Turn and Lane-Change Signals . . . . . . . . . . . . . . . . . . . . . . 6-4
Fog Lamps . . . . . . . . . . . . . . . . . . . . 6-5
Auxiliary Roof-Mounted Lamp . . . . . . . . . 6-5
Interior Lighting
Instrument Panel IlluminationControl . . . . . . . . . . . . . . . . . . . . . . 6-6
Cargo Lamp . . . . . . . . . . . . . . . . . . 6-6
Dome Lamps . . . . . . . . . . . . . . . . . 6-7
Reading Lamps . . . . . . . . . . . . . . . 6-7
Lighting Features
Entry Lighting . . . . . . . . . . . . . . . . . 6-8
Exit Lighting . . . . . . . . . . . . . . . . . . . 6-8
Battery Load Management . . . . 6-8
Battery Power Protection . . . . . . 6-9
Exterior Lighting
Exterior Lamp Controls
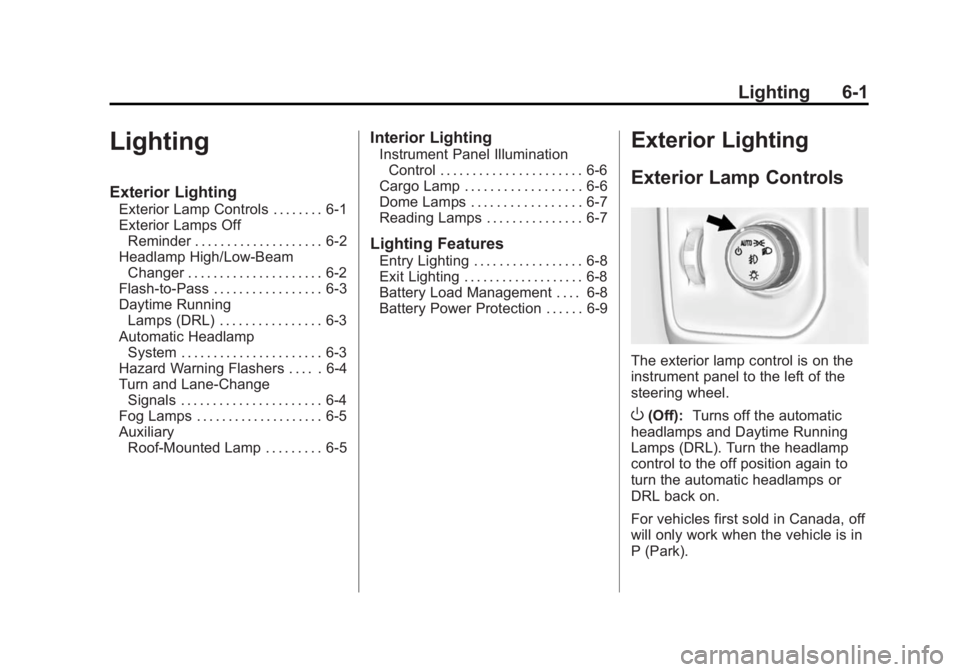
The exterior lamp control is on the
instrument panel to the left of the
steering wheel.
O(Off): Turns off the automatic
headlamps and Daytime Running
Lamps (DRL). Turn the headlamp
control to the off position again to
turn the automatic headlamps or
DRL back on.
For vehicles first sold in Canada, off
will only work when the vehicle is in
P (Park).
Page 195 of 539
Black plate (2,1)GMC Sierra Owner Manual (GMNA Localizing-U.S/Canada/Mexico-
7299746) - 2015 - crc - 11/11/13
6-2 Lighting
AUTO (Automatic):Automatically
turns on the headlamps at normal
brightness, together with the
following:
.Parking Lamps
.Instrument Panel Lights
.Taillamps
.License Plate Lamps
.Roof Marker Lamps (If
Equipped)
.Front/Rear Sidemarker Lamps
When the vehicle is turned off and
the headlamps are in AUTO, the
headlamps turn off. When the key is
removed, they automatically turn on
for a set time. The time of the delay
can be changed using the DIC. See
Driver Information Center (DIC)
(Base Level) on page 5-30 orDriver
Information Center (DIC) (Uplevel)
on page 5-32.
;(Parking Lamps): Turns on the
parking lamps including all lamps,
except the headlamps.
2(Headlamps): Turns on the
headlamps together with the parking
lamps and instrument panel lights.
When the headlamps are turned on
while the vehicle is on, the
headlamps turn off automatically
10 minutes after the ignition is
turned off. When the headlamps are
turned on while the vehicle is off,
the headlamps will stay on for
10 minutes before turning off to
prevent the battery from being
drained. Turn the headlamp control
off and then back to the headlamp
on position to make the headlamps
stay on for an additional 10 minutes.
To keep the lamps on for more than
10 minutes, the ignition must be in
the ACC/ACCESSORY or ON/RUN
position.
#(Fog Lamps) (If Equipped):
Turns on the fog lamps. See Fog
Lamps on page 6-5.
Exterior Lamps Off
Reminder
A reminder chime sounds when the
headlamps or parking lamps are
manually turned on, the ignition is
off, and a door is open. To disable
the chime, turn the lamps off.
Headlamp High/
Low-Beam Changer
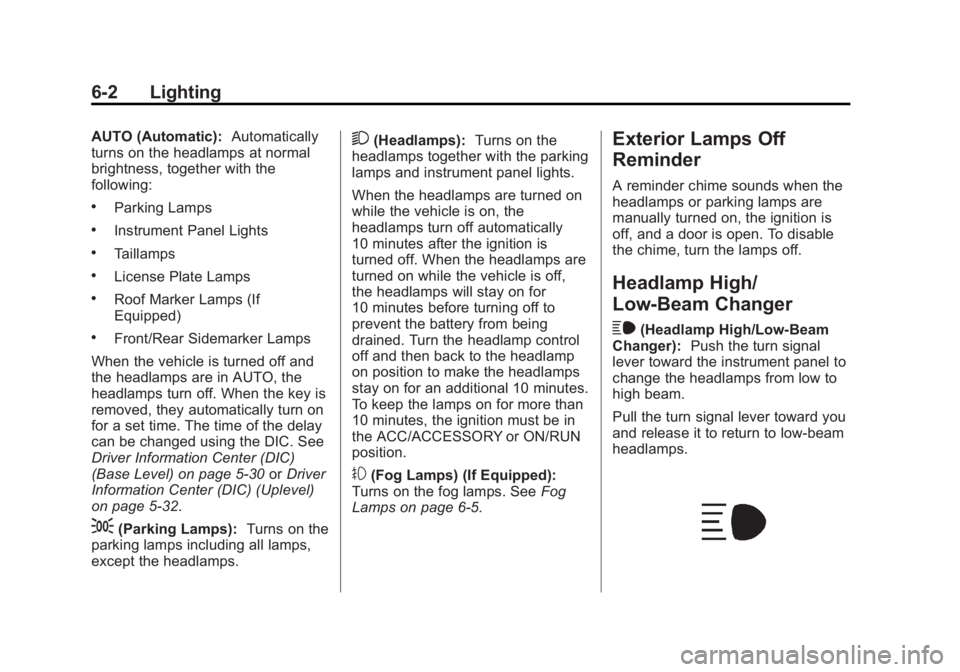
$
(Headlamp High/Low-Beam
Changer): Push the turn signal
lever toward the instrument panel to
change the headlamps from low to
high beam.
Pull the turn signal lever toward you
and release it to return to low-beam
headlamps.
Page 197 of 539
Black plate (4,1)GMC Sierra Owner Manual (GMNA Localizing-U.S/Canada/Mexico-
7299746) - 2015 - crc - 11/11/13
6-4 Lighting
The system may also turn on the
headlamps when driving through a
parking garage or tunnel.
When it is bright enough outside,
the headlamps will turn off or may
change to Daytime Running
Lamps (DRL).
The automatic headlamp system
turns off when the exterior lamp
control is turned to
Oor the ignition
is off.
Lights On with Wipers
If the windshield wipers are
activated in daylight with the engine
on, and the exterior lamp control is
in AUTO, the headlamps, parking
lamps, and other exterior lamps
come on. The transition time for the
lamps coming on varies based on
wiper speed. When the wipers are
not operating, these lamps turn off.
Move the exterior lamp control to
O
or;to disable this feature.
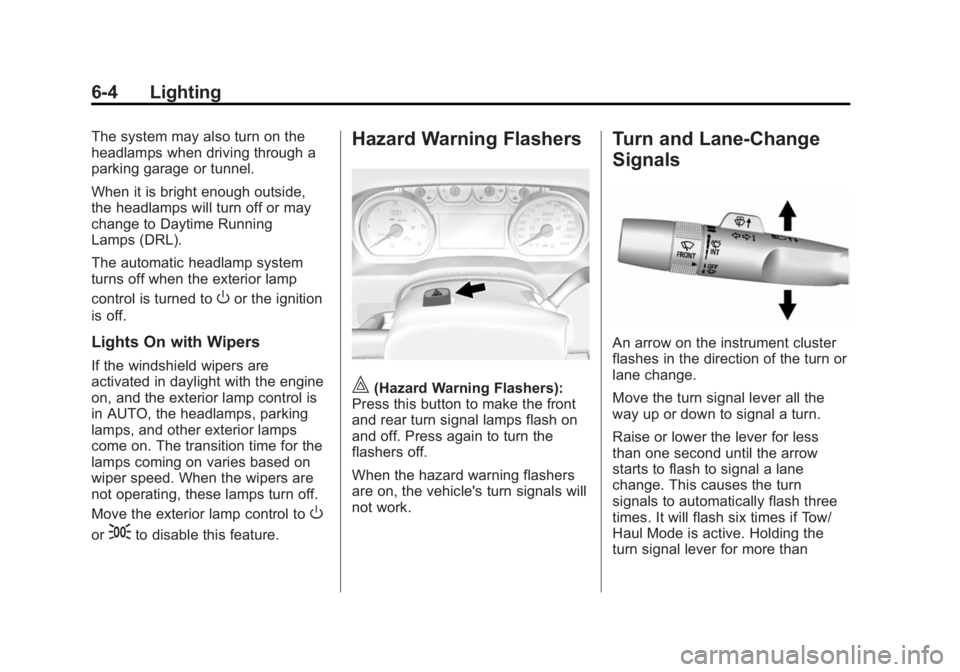
Hazard Warning Flashers
|(Hazard Warning Flashers):
Press this button to make the front
and rear turn signal lamps flash on
and off. Press again to turn the
flashers off.
When the hazard warning flashers
are on, the vehicle's turn signals will
not work.
Turn and Lane-Change
Signals
An arrow on the instrument cluster
flashes in the direction of the turn or
lane change.
Move the turn signal lever all the
way up or down to signal a turn.
Raise or lower the lever for less
than one second until the arrow
starts to flash to signal a lane
change. This causes the turn
signals to automatically flash three
times. It will flash six times if Tow/
Haul Mode is active. Holding the
turn signal lever for more than
Page 234 of 539
Black plate (31,1)GMC Sierra Owner Manual (GMNA Localizing-U.S/Canada/Mexico-
7299746) - 2015 - crc - 11/11/13
Infotainment System 7-31
How to Speak:Speak clearly in a
calm and natural voice.
Audio System
When using the Bluetooth system,
sound comes through the vehicle's
front audio system speakers and
overrides the audio system. Use the
Oknob during a call to change the
volume level. The system maintains
a minimum volume level.
Bluetooth Audio Quality
Turn off the Echo and Noise
cancellation feature on your phone,
if supported, for the best hands-free
performance.
See www.gm.com/bluetooth.
Bluetooth (Infotainment
Controls - Base Radio)
For information about how to
navigate the menu system using the
infotainment controls, see Overview
on page 7-2.
Switching to Handset or
Hands-Free Mode
To switch between handset mode
and hands-free mode, use the
OnStar command, “transfer call.”
Pairing
A Bluetooth-enabled cell phone
must be paired to the Bluetooth
system and then connected to the
vehicle before it can be used. See
your cell phone manufacturer's user
guide for Bluetooth functions before
pairing the cell phone. If a Bluetooth
phone is not connected, calls can
be made using OnStar Hands-Free
Calling, if available. See OnStar
Overview on page 14-1, if equipped.
Pairing Information
.Up to five cell phones can be
paired to the Bluetooth system.
.The pairing process is disabled
when the vehicle is moving.
.Pairing only needs to be
completed once per phone,
unless the pairing information on the cell phone changes or the
cell phone is deleted from the
system.
.Only one paired cell phone can
be connected to the Bluetooth
system at a time.
.If multiple paired cell phones are
within range of the system, the
system connects to the first
available paired cell phone in the
order that they were newly
paired to the system. To connect
to a different paired phone, see
“Connecting to a Different
Phone”
later in this section.
Pairing a Phone or Device
1. From the Home Page, turn the MENU knob to access the
PHONE screen button, then
press the MENU knob to select
the PHONE screen button. If a
device has been previously
paired, the main Phone menu
will be shown. If no devices
have been paired, Step 2 can be
skipped.
Page 239 of 539
Black plate (36,1)GMC Sierra Owner Manual (GMNA Localizing-U.S/Canada/Mexico-
7299746) - 2015 - crc - 11/11/13
7-36 Infotainment System
Listing All Paired and Connected
Phones
The system can list all cell phones
paired to it. If a paired cell phone is
also connected to the vehicle, the
system responds with“is connected”
after that phone name.
1. Press
g. The system responds
“Ready,” followed by a tone.
2. Say “Bluetooth.”
3. Say “List.”
Deleting a Paired Phone
If the phone name to delete is
unknown, see “Listing All Paired
and Connected Phones.”
1. Press
g. The system responds
“Ready,” followed by a tone.
2. Say “Bluetooth.”
3. Say “Delete.” The system asks
for which phone to delete.
4. Say the name of the phone to delete. Connecting to a Different Phone
To connect to a different cell phone,
the Bluetooth system looks for the
next available cell phone in the
order in which all available cell
phones were paired. This may need
to be repeated depending on how
many cell phones have been
connected.
1. Press
g. The system responds
“Ready,” followed by a tone.
2. Say “Bluetooth.”
3. Say “Change phone.”
.If another cell phone is
found, the response will be
“
connected.”
This can be repeated to
connect any of the up to
five paired phones.
.If another cell phone is not
found, the original phone
remains connected.
Storing and Deleting Phone
Numbers
The following commands are used
to delete and store phone numbers.
Store:This command will store a
phone number, or a group of
numbers as a name tag.
Digit Store: This command allows
a phone number to be stored as a
name tag by entering the digits one
at a time.
Delete: This command is used to
delete individual name tags.
Delete All Name Tags: This
command deletes all stored name
tags in the Hands-Free Calling
Directory and the Destinations
Directory.
Using the “Store”Command
1. Press
g. The system responds
“Ready,” followed by a tone.
2. Say “Store.”
Page 240 of 539
Black plate (37,1)GMC Sierra Owner Manual (GMNA Localizing-U.S/Canada/Mexico-
7299746) - 2015 - crc - 11/11/13
Infotainment System 7-37
3. Say the entire phone number ora group of digits all at once with
no pauses, then follow the
directions given by the system to
save a name tag for this number.
Using the “Digit Store” Command
If an unwanted number is
recognized by the system, say
“Correction” at any time to clear the
last number.
To hear all of the digits recognized
by the system, say “Verify”at
any time.
1. Press
g. The system responds
“Ready,” followed by a tone.
2. Say “Digit Store.”
3. Say each digit, one at a time. After each digit is entered, the
system repeats back the digit it
heard followed by a tone. After
the last digit has been entered,
say “Store,” and then follow the
directions given by the system to
save a name tag for this number. Using the
“Delete”Command
1. Press
g. The system responds
“Ready,” followed by a tone.
2. Say “Delete.”
3. Say the name tag you want to delete.
Using the “Delete All Name Tags”
Command
This command deletes all stored
name tags in the Hands-Free
Calling Directory and the
Destinations Directory.
To delete all name tags:
1. Press
g. The system responds
“Ready,” followed by a tone.
2. Say “Delete all name tags.”
Listing Stored Numbers
The list command will list all the
stored numbers and name tags.
Using the “List”Command
1. Press
g. The system responds
“Ready,” followed by a tone. 2. Say
“Directory.”
3. Say “Hands-Free Calling.”
4. Say “List.”
Making a Call
Calls can be made using the
following commands.
Dial or Call: The dial or call
command can be used
interchangeably to dial a phone
number or a stored name tag.
Digit Dial: This command allows a
phone number to be dialed by
entering the digits one at a time.
Re-dial: This command is used to
dial the last number used on the cell
phone.
Using the “Dial”or“Call”
Command
1. Press
g. The system responds
“Ready,” followed by a tone.
2. Say “Dial”or“Call.”
3. Say the entire number without pausing or say the name tag.