2015 GMC CANYON turn signal
[x] Cancel search: turn signalPage 279 of 433
Black plate (64,1)GMC Canyon Owner Manual (GMNA-Localizing-U.S./Canada-7587000) -
2015 - CRC - 3/17/15
9-64 Driving and Operating
When using a weight-distributing
hitch, the spring bars should be
adjusted so the distance (1) is the
same after coupling the trailer to the
tow vehicle and adjusting the hitch.
Safety Chains
Always attach chains between the
vehicle and the trailer. Cross the
safety chains under the tongue of
the trailer to help prevent the tongue
from contacting the road if it
becomes separated from the hitch.
Instructions about safety chains
may be provided by the hitch
manufacturer or by the trailer
manufacturer. Always leave just
enough slack so the combination
can turn. Never allow safety chains
to drag on the ground.
Trailer Brakes
A loaded trailer that weighs more
than 900 kg (2,000 lb) needs to have
its own brake system that is
adequate for the weight of the
trailer. Be sure to read and followthe instructions for the trailer brakes
so they are installed, adjusted, and
maintained properly.
Trailer Wiring Harness
For vehicles not equipped with
heavy-duty trailering, a harness is
secured underneath the left side of
the vehicle, next to the spare tire.
The harness requires the installation
of a trailer connector, which is
available through your dealer. The
seven-wire harness contains the
following trailer circuits:
.Yellow: Left Stop/Turn Signal
.Green: Right Stop/Turn Signal
.Brown: Taillamps/Parking Lamps
.Black: Ground
.Gray: Back-up Lamps
.Orange: Battery Feed
.Blue: Trailer Brake
If charging a remote (non-vehicle)
battery, press the Tow/Haul Mode
button, if equipped, on the center
stack. This will boost the vehicle system voltage and properly charge
the battery. If the trailer is too light
for Tow/Haul Mode, or the vehicle is
not equipped with Tow/Haul, turn on
the headlamps as a second way to
boost the vehicle system and
charge the battery.
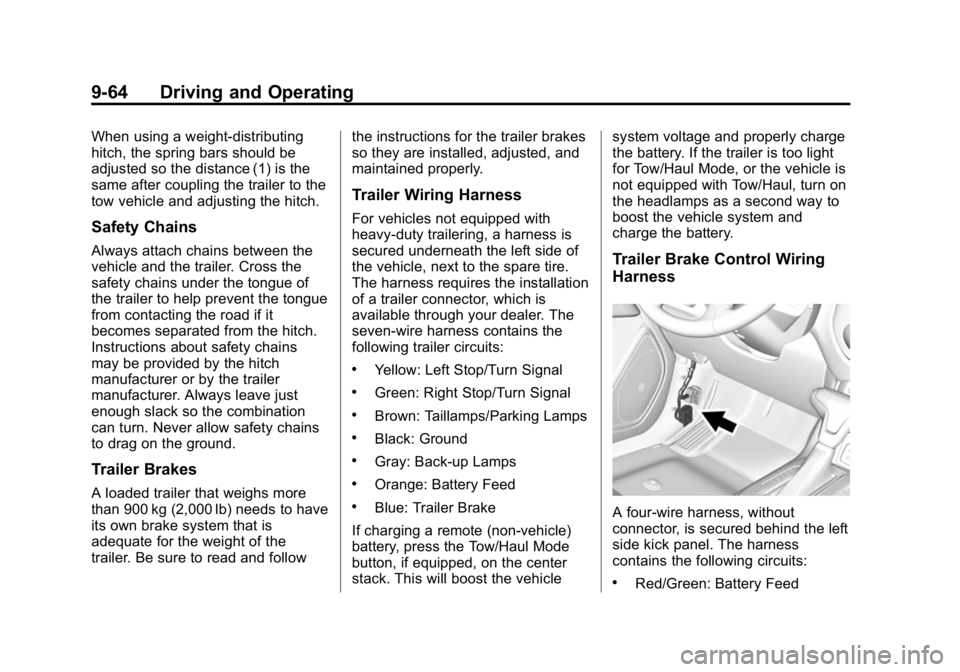
Trailer Brake Control Wiring
Harness
A four-wire harness, without
connector, is secured behind the left
side kick panel. The harness
contains the following circuits:
.Red/Green: Battery Feed
Page 280 of 433
Black plate (65,1)GMC Canyon Owner Manual (GMNA-Localizing-U.S./Canada-7587000) -
2015 - CRC - 3/17/15
Driving and Operating 9-65
.Black: Ground
.White/Blue: Brake signal to
controller
.Blue: Trailer Brake power to
trailer connector
To remove the left side kick panel,
start at the front of the panel pulling
toward the rear of the vehicle and lift
upward to disengage the integral
clips.
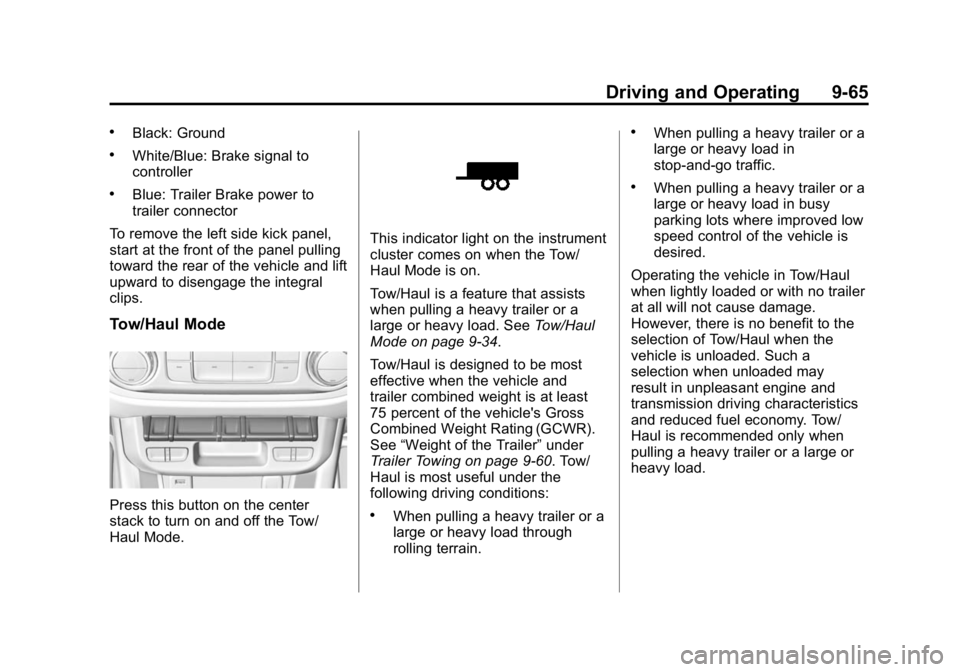
Tow/Haul Mode
Press this button on the center
stack to turn on and off the Tow/
Haul Mode.
This indicator light on the instrument
cluster comes on when the Tow/
Haul Mode is on.
Tow/Haul is a feature that assists
when pulling a heavy trailer or a
large or heavy load. See Tow/Haul
Mode on page 9-34.
Tow/Haul is designed to be most
effective when the vehicle and
trailer combined weight is at least
75 percent of the vehicle's Gross
Combined Weight Rating (GCWR).
See “Weight of the Trailer” under
Trailer Towing on page 9-60. Tow/
Haul is most useful under the
following driving conditions:
.When pulling a heavy trailer or a
large or heavy load through
rolling terrain.
.When pulling a heavy trailer or a
large or heavy load in
stop-and-go traffic.
.When pulling a heavy trailer or a
large or heavy load in busy
parking lots where improved low
speed control of the vehicle is
desired.
Operating the vehicle in Tow/Haul
when lightly loaded or with no trailer
at all will not cause damage.
However, there is no benefit to the
selection of Tow/Haul when the
vehicle is unloaded. Such a
selection when unloaded may
result in unpleasant engine and
transmission driving characteristics
and reduced fuel economy. Tow/
Haul is recommended only when
pulling a heavy trailer or a large or
heavy load.
Page 282 of 433

Black plate (1,1)GMC Canyon Owner Manual (GMNA-Localizing-U.S./Canada-7587000) -
2015 - CRC - 3/17/15
Vehicle Care 10-1
Vehicle Care
General Information
General Information . . . . . . . . . . 10-2
California Proposition65 Warning . . . . . . . . . . . . . . . . . 10-2
California Perchlorate Materials Requirements . . . . 10-3
Accessories and Modifications . . . . . . . . . . . . . . . 10-3
Vehicle Checks
Doing Your OwnService Work . . . . . . . . . . . . . . . 10-4
Hood . . . . . . . . . . . . . . . . . . . . . . . . 10-5
Engine Compartment Overview . . . . . . . . . . . . . . . . . . . 10-6
Engine Oil . . . . . . . . . . . . . . . . . . . 10-9
Engine Oil Life System . . . . . 10-11
Automatic Transmission Fluid . . . . . . . . . . . . . . . . . . . . . . 10-13
Manual Transmission Fluid . . . . . . . . . . . . . . . . . . . . . . 10-13
Hydraulic Clutch . . . . . . . . . . . . 10-13
Engine Air Cleaner/Filter . . . . 10-14
Cooling System . . . . . . . . . . . . 10-15
Engine Coolant . . . . . . . . . . . . . 10-17
Engine Overheating . . . . . . . . 10-19 Engine Fan . . . . . . . . . . . . . . . . . 10-21
Washer Fluid . . . . . . . . . . . . . . . 10-21
Brakes . . . . . . . . . . . . . . . . . . . . . 10-22
Brake Fluid . . . . . . . . . . . . . . . . . 10-22
Battery - North America . . . . 10-24
Four-Wheel Drive . . . . . . . . . . . 10-25
Front Axle . . . . . . . . . . . . . . . . . . 10-25
Rear Axle . . . . . . . . . . . . . . . . . . 10-26
Starter Switch Check . . . . . . . 10-27
Automatic Transmission Shift
Lock Control Function
Check . . . . . . . . . . . . . . . . . . . . . 10-28
Ignition Transmission Lock Check . . . . . . . . . . . . . . . . . . . . . 10-28
Park Brake and P (Park) Mechanism Check . . . . . . . . 10-28
Wiper Blade Replacement . . . . . . . . . . . . . . 10-29
Headlamp Aiming
Headlamp Aiming . . . . . . . . . . 10-30
Bulb Replacement
Bulb Replacement . . . . . . . . . . 10-30
Halogen Bulbs . . . . . . . . . . . . . . 10-30
Headlamps, Front TurnSignal, Sidemarker, and
Parking Lamps . . . . . . . . . . . . 10-30 Taillamps, Turn Signal,
Stoplamps, and Back-Up
Lamps . . . . . . . . . . . . . . . . . . . . 10-31
Center High-Mounted Stoplamp (CHMSL) and
Cargo Lamp . . . . . . . . . . . . . . 10-32
Replacement Bulbs . . . . . . . . . 10-32
Electrical System
Electrical System Overload . . . . . . . . . . . . . . . . . . 10-33
Fuses . . . . . . . . . . . . . . . . . . . . . . 10-34
Engine Compartment Fuse Block . . . . . . . . . . . . . . . . . . . . . 10-34
Instrument Panel Fuse Block . . . . . . . . . . . . . . . . . . . . . 10-38
Wheels and Tires
Tires . . . . . . . . . . . . . . . . . . . . . . . . 10-41
All-Season Tires . . . . . . . . . . . . 10-42
Winter Tires . . . . . . . . . . . . . . . . 10-42
All-Terrain Tires . . . . . . . . . . . . 10-43
Tire Sidewall Labeling . . . . . . 10-43
Tire Designations . . . . . . . . . . . 10-45
Tire Terminology andDefinitions . . . . . . . . . . . . . . . . 10-46
Tire Pressure . . . . . . . . . . . . . . . 10-49
Tire Pressure Monitor System . . . . . . . . . . . . . . . . . . . 10-50
Page 293 of 433
Black plate (12,1)GMC Canyon Owner Manual (GMNA-Localizing-U.S./Canada-7587000) -
2015 - CRC - 3/17/15
10-12 Vehicle Care
On some vehicles, when the system
has calculated that oil life has been
diminished, a CHANGE ENGINE
OIL SOON message comes on to
indicate that an oil change is
necessary. SeeEngine Oil
Messages on page 5-35. Change
the oil as soon as possible within
the next 1 000 km (600 mi). It is
possible that, if driving under the
best conditions, the oil life system
might indicate that an oil change is
not necessary for up to a year.
The engine oil and filter must be
changed at least once a year and,
at this time, the system must be
reset. For vehicles without the
CHANGE ENGINE OIL SOON
message, an oil change is needed
when the OIL LIFE REMAINING
percentage is near 0%. Your dealer
has trained service people who will
perform this work and reset the
system. It is also important to check
the oil regularly over the course of
an oil drain interval and keep it at
the proper level. If the system is ever reset
accidentally, the oil must be
changed at 5 000 km (3,000 mi)
since the last oil change.
Remember to reset the oil life
system whenever the oil is changed.
How to Reset the Engine Oil
Life System
Reset the system whenever the
engine oil is changed so that the
system can calculate the next
engine oil change. Always reset the
engine oil life to 100% after every oil
change. It will not reset itself. To
reset the engine oil life system:
1. Display OIL LIFE REMAINING
on the DIC. See Driver
Information Center (DIC) (Base
Level) on page 5-27 orDriver
Information Center (DIC)
(Uplevel) on page 5-29. If the
vehicle does not have DIC
buttons, the vehicle must be in
P (Park) to access this display. 2. Press and hold the
Vbutton on
the DIC, or the SET/CLR button
on the turn signal lever if the
vehicle does not have DIC
buttons, for several seconds.
The oil life will change to 100%.
The oil life system can also be reset
as follows:
1. Turn the ignition to ON/RUN with the engine off.
2. Fully press the accelerator pedal slowly three times within
five seconds.
3. Display OIL LIFE REMAINING on the DIC. If the display shows
100%, the system is reset.
If the vehicle has a CHANGE
ENGINE OIL SOON message and it
comes back on when the vehicle is
started and/or the OIL LIFE
REMAINING is near 0%, the engine
oil life system has not been reset.
Repeat the procedure.
Page 311 of 433
Black plate (30,1)GMC Canyon Owner Manual (GMNA-Localizing-U.S./Canada-7587000) -
2015 - CRC - 3/17/15
10-30 Vehicle Care
Headlamp Aiming
Headlamp aim has been preset and
should need no further adjustment.
If the vehicle is damaged in a crash,
the headlamp aim may be affected.
If adjustment to the headlamps is
necessary, see your dealer.
Bulb Replacement
For the proper type of replacement
bulbs, seeReplacement Bulbs on
page 10-32.
For any bulb-changing procedure
not listed in this section, contact
your dealer.
Halogen Bulbs
{Warning
Halogen bulbs have pressurized
gas inside and can burst if you
drop or scratch the bulb. You or
others could be injured. Be sure
to read and follow the instructions
on the bulb package.
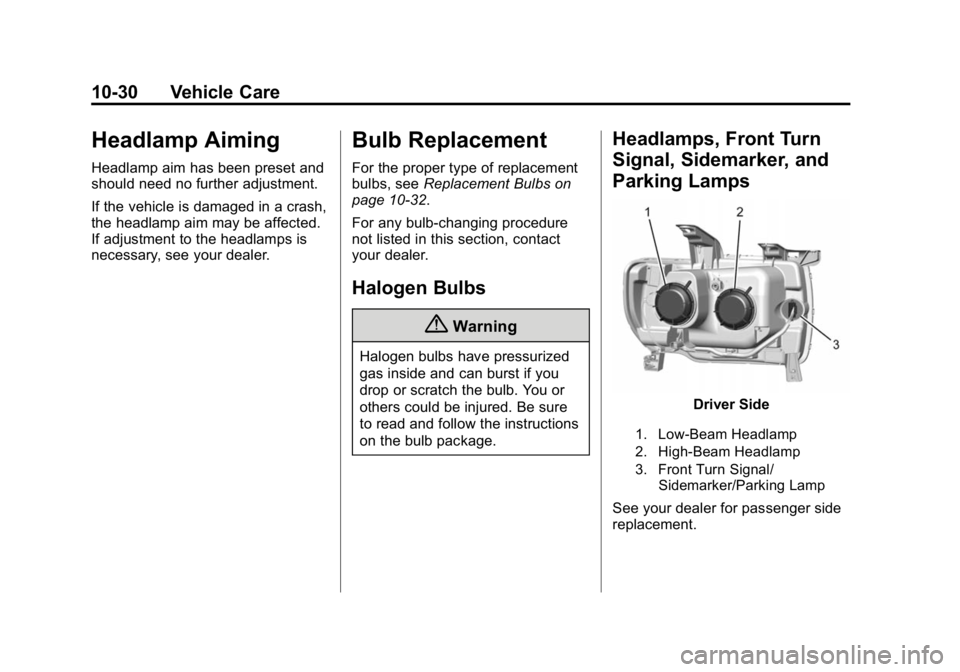
Headlamps, Front Turn
Signal, Sidemarker, and
Parking Lamps
Driver Side
1. Low-Beam Headlamp
2. High-Beam Headlamp
3. Front Turn Signal/
Sidemarker/Parking Lamp
See your dealer for passenger side
replacement.
Page 312 of 433
Black plate (31,1)GMC Canyon Owner Manual (GMNA-Localizing-U.S./Canada-7587000) -
2015 - CRC - 3/17/15
Vehicle Care 10-31
Headlamp
1. Open the hood.
2. Remove the headlamp bulbcover by turning it
counterclockwise.
3. Turn the bulb socket counterclockwise to remove it
from the headlamp assembly
and pull it straight out.
4. Unplug the electrical connector from the old bulb by releasing
the clip on the bulb socket.
Turn Signal/Sidemarker/
Parking Lamp
1. Open the hood.
2. Turn the bulb socket
counterclockwise to remove it
from the headlamp assembly
and pull it straight out.
3. Remove the bulb by pulling it straight out of the bulb socket.
Taillamps, Turn Signal,
Stoplamps, and Back-Up
Lamps
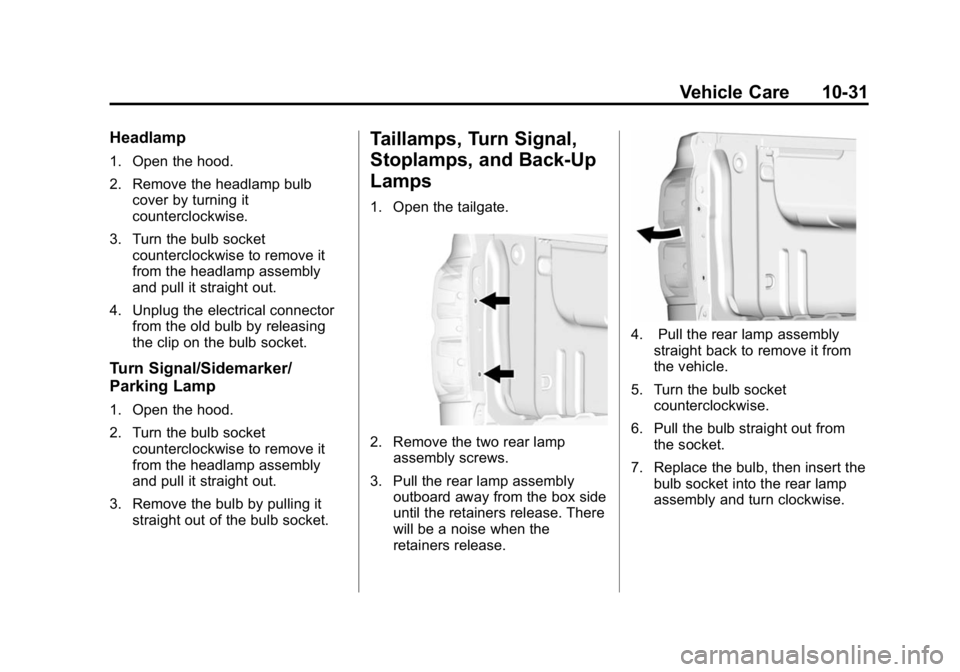
1. Open the tailgate.
2. Remove the two rear lampassembly screws.
3. Pull the rear lamp assembly outboard away from the box side
until the retainers release. There
will be a noise when the
retainers release.
4. Pull the rear lamp assembly
straight back to remove it from
the vehicle.
5. Turn the bulb socket counterclockwise.
6. Pull the bulb straight out from the socket.
7. Replace the bulb, then insert the bulb socket into the rear lamp
assembly and turn clockwise.
Page 314 of 433

Black plate (33,1)GMC Canyon Owner Manual (GMNA-Localizing-U.S./Canada-7587000) -
2015 - CRC - 3/17/15
Vehicle Care 10-33
Exterior Lamp BulbNumber
Back-up Lamp* 1156
Cargo Lamp 921 (W16W)
Center
High-Mounted
Stoplamp
(CHMSL) 921LL
Front Turn Signal,
Parking, and
Sidemarker Lamp 7443 W21/
5W LL-T
High-Beam
Headlamp 9005 LL
Low-Beam
Headlamp H11 LL
Stoplamp/Taillamp/
Turn Signal Lamp 7443 W21/
5W LL-T
Stoplamp/Turn
Signal Lamp/
Taillamp* 1157
* Chassis Cab Models
For replacement bulbs not listed
here, contact your dealer.Electrical System
Electrical System
Overload
The vehicle has fuses to protect
against an electrical system
overload. Fuses also protect power
devices in the vehicle.
Replace a bad fuse with a new one
of the identical size and rating.
If there is a problem on the road and
a fuse needs to be replaced, there
is a fuse puller in the Engine
Compartment Fuse Block. Replace
the fuse as soon as possible with
one of the same amperage rating.
Headlamp Wiring
An electrical overload may cause
the lamps to go on and off, or in
some cases to remain off. Have the
headlamp wiring checked right away
if the lamps go on and off or
remain off.
Windshield Wipers
If the wiper motor overheats due to
heavy snow or ice, the windshield
wipers will stop until the motor cools
and will then restart.
Although the circuit is protected
from electrical overload, overload
due to heavy snow or ice may
cause wiper linkage damage.
Always clear ice and heavy snow
from the windshield before using the
windshield wipers.
If the overload is caused by an
electrical problem and not snow or
ice, be sure to get it fixed.
Page 332 of 433
Black plate (51,1)GMC Canyon Owner Manual (GMNA-Localizing-U.S./Canada-7587000) -
2015 - CRC - 3/17/15
Vehicle Care 10-51
The TPMS malfunction indicator is
combined with the low tire pressure
telltale. When the system detects a
malfunction, the telltale will flash for
approximately one minute and then
remain continuously illuminated.
This sequence will continue upon
subsequent vehicle start-ups as
long as the malfunction exists.
When the malfunction indicator is
illuminated, the system may not be
able to detect or signal low tire
pressure as intended. TPMS
malfunctions may occur for a variety
of reasons, including the installation
of replacement or alternate tires or
wheels on the vehicle that prevent
the TPMS from functioning properly.
Always check the TPMS malfunction
telltale after replacing one or more
tires or wheels on your vehicle to
ensure that the replacement or
alternate tires and wheels allow the
TPMS to continue to function
properly.
SeeTire Pressure Monitor
Operation on page 10-51. See
Radio Frequency Statement on
page 13-12.
Tire Pressure Monitor
Operation
This vehicle may have a Tire
Pressure Monitor System (TPMS).
The TPMS is designed to warn the
driver when a low tire pressure
condition exists. TPMS sensors are
mounted onto each tire and wheel
assembly, excluding the spare tire
and wheel assembly. The TPMS
sensors monitor the air pressure in
the tires and transmit the tire
pressure readings to a receiver
located in the vehicle.
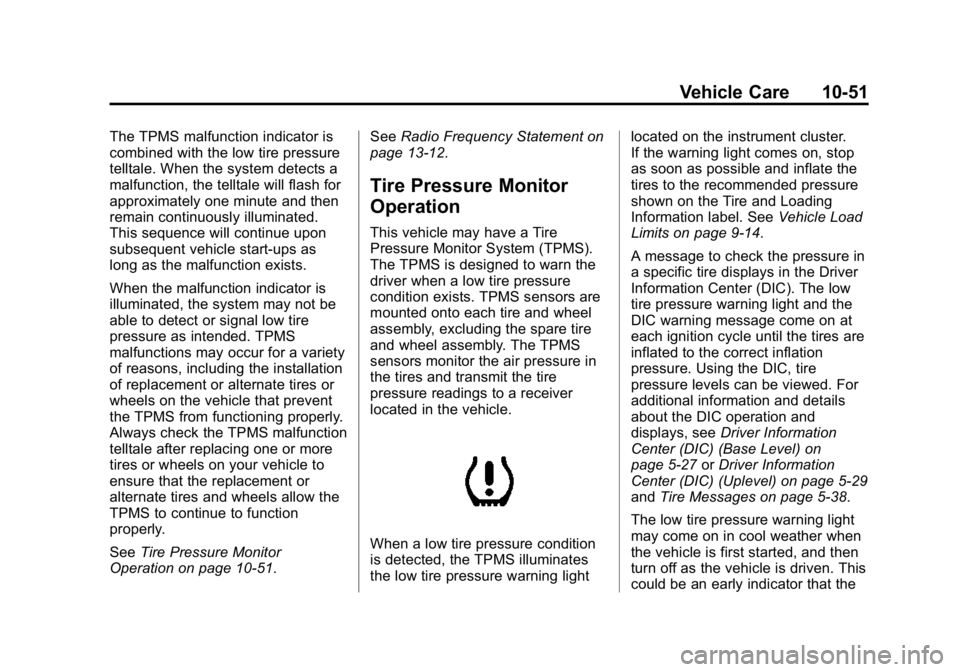
When a low tire pressure condition
is detected, the TPMS illuminates
the low tire pressure warning light located on the instrument cluster.
If the warning light comes on, stop
as soon as possible and inflate the
tires to the recommended pressure
shown on the Tire and Loading
Information label. See
Vehicle Load
Limits on page 9-14.
A message to check the pressure in
a specific tire displays in the Driver
Information Center (DIC). The low
tire pressure warning light and the
DIC warning message come on at
each ignition cycle until the tires are
inflated to the correct inflation
pressure. Using the DIC, tire
pressure levels can be viewed. For
additional information and details
about the DIC operation and
displays, see Driver Information
Center (DIC) (Base Level) on
page 5-27 orDriver Information
Center (DIC) (Uplevel) on page 5-29
and Tire Messages on page 5-38.
The low tire pressure warning light
may come on in cool weather when
the vehicle is first started, and then
turn off as the vehicle is driven. This
could be an early indicator that the