2015 GMC CANYON lock
[x] Cancel search: lockPage 244 of 433
Black plate (29,1)GMC Canyon Owner Manual (GMNA-Localizing-U.S./Canada-7587000) -
2015 - CRC - 3/17/15
Driving and Operating 9-29
Parking over Things
That Burn
{Warning
Things that can burn could touch
hot exhaust parts under the
vehicle and ignite. Do not park
over papers, leaves, dry grass,
or other things that can burn.
Engine Exhaust
{Warning
Engine exhaust contains carbon
monoxide (CO) which cannot be
seen or smelled. Exposure to CO
can cause unconsciousness and
even death.
Exhaust may enter the vehicle if:
.The vehicle idles in areas
with poor ventilation (parking
garages, tunnels, deep snow
that may block underbody
airflow or tail pipes).
.The exhaust smells or
sounds strange or different.
.The exhaust system leaks
due to corrosion or damage.
.The vehicle exhaust system
has been modified, damaged,
or improperly repaired.(Continued)
Warning (Continued)
.There are holes or openings
in the vehicle body from
damage or aftermarket
modifications that are not
completely sealed.
If unusual fumes are detected or
if it is suspected that exhaust is
coming into the vehicle:
.Drive it only with the windows
completely down.
.Have the vehicle repaired
immediately.
Never park the vehicle with the
engine running in an enclosed
area such as a garage or a
building that has no fresh air
ventilation.
Page 245 of 433
Black plate (30,1)GMC Canyon Owner Manual (GMNA-Localizing-U.S./Canada-7587000) -
2015 - CRC - 3/17/15
9-30 Driving and Operating
Running the Vehicle
While Parked
It is better not to park with the
engine running.
If the vehicle is left with the engine
running, follow the proper steps to
be sure the vehicle will not move.
SeeShifting Into Park on page 9-26
and Engine Exhaust on page 9-29.
If the vehicle has a manual
transmission, see Parking on
page 9-28.
If parking on a hill and pulling a
trailer, see Driving Characteristics
and Towing Tips on page 9-57.
Automatic
Transmission
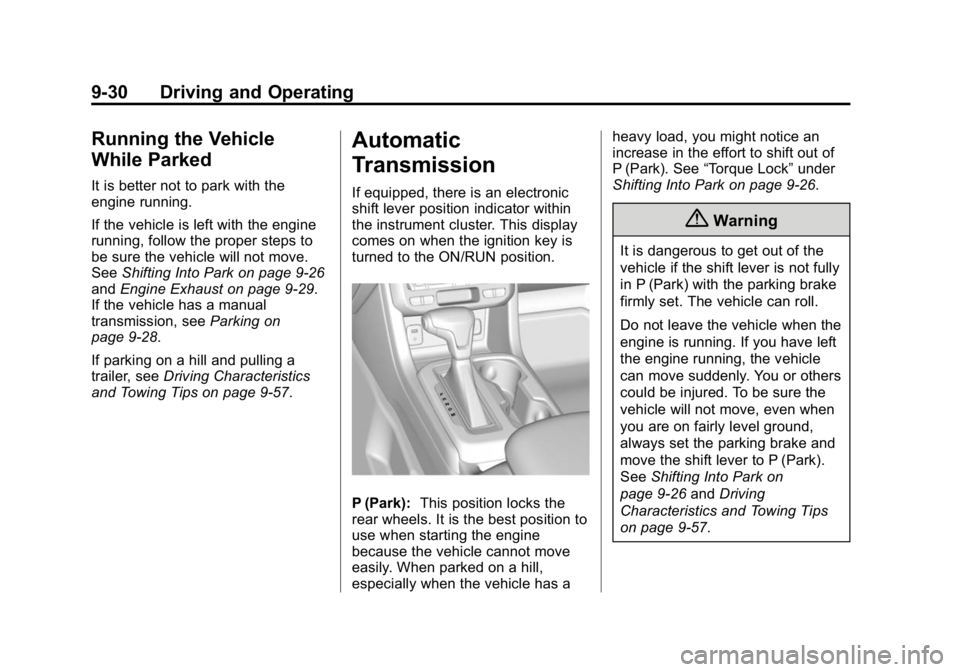
If equipped, there is an electronic
shift lever position indicator within
the instrument cluster. This display
comes on when the ignition key is
turned to the ON/RUN position.
P (Park): This position locks the
rear wheels. It is the best position to
use when starting the engine
because the vehicle cannot move
easily. When parked on a hill,
especially when the vehicle has a heavy load, you might notice an
increase in the effort to shift out of
P (Park). See
“Torque Lock” under
Shifting Into Park on page 9-26.
{Warning
It is dangerous to get out of the
vehicle if the shift lever is not fully
in P (Park) with the parking brake
firmly set. The vehicle can roll.
Do not leave the vehicle when the
engine is running. If you have left
the engine running, the vehicle
can move suddenly. You or others
could be injured. To be sure the
vehicle will not move, even when
you are on fairly level ground,
always set the parking brake and
move the shift lever to P (Park).
See Shifting Into Park on
page 9-26 andDriving
Characteristics and Towing Tips
on page 9-57.
Page 254 of 433
Black plate (39,1)GMC Canyon Owner Manual (GMNA-Localizing-U.S./Canada-7587000) -
2015 - CRC - 3/17/15
Driving and Operating 9-39
{Caution
Shifting the transmission into gear
before the requested mode
indicator light has stopped
flashing could damage the
transfer case.
If the transmission is in gear and/or
moving more than 5 km/h (3 mph),
the 4
nindicator light will flash for
30 seconds and not complete the
shift. After 30 seconds the transfer
case will shift to 4
m. Turn the knob
to 4
mto display the indicator. With
the vehicle moving less than 5 km/h
(3 mph), and the transmission in
N (Neutral), attempt the shift again.
Shifting Out of 4
n
To shift:
1. The vehicle must be stopped or moving less than 5 km/h (3 mph)
with the transmission in
N (Neutral) and the ignition in ON/RUN. It is best for the
vehicle to be moving
1.6 to 3.2 km/h (1 to 2 mph).
2. Turn the knob to 4
m, AUTO, or 2
m. Wait for the 4m, AUTO, or 2mindicator light to stop flashing
before shifting the transmission
into gear.
{Caution
Shifting the transmission into gear
before the requested mode
indicator light has stopped
flashing could damage the
transfer case.
If the transmission is in gear and/or
moving more than 5 km/h (3 mph),
the 4
m, AUTO, or 2mindicator light
will flash for 30 seconds but will not
complete the shift. With the vehicle
moving less than 5 km/h (3 mph),
and the transmission in N (Neutral),
attempt the shift again. Shifting Into N (Neutral)
To shift:
1. Park the vehicle on a level
surface.
2. Set the parking brake and press and hold the brake pedal. See
Parking Brake on page 9-41.
3. Start the vehicle or turn the ignition to ON/RUN.
4. Shift the transmission to N (Neutral).
5. Shift the transfer case to 2
m.
6. Turn the transfer case knob clockwise to N (Neutral) until it
stops and hold it there until the
N (Neutral) light starts blinking.
This will take at least
10 seconds. Then slowly release
the dial to the 4
nposition. The
N (Neutral) light will come on
when the transfer case shift to
N (Neutral) is complete.
Page 255 of 433

Black plate (40,1)GMC Canyon Owner Manual (GMNA-Localizing-U.S./Canada-7587000) -
2015 - CRC - 3/17/15
9-40 Driving and Operating
7. With the engine running, verifythat the transfer case is in
N (Neutral) by shifting the
transmission to R (Reverse),
then shift the transmission to
D (Drive). There should be no
movement of the vehicle while
shifting the transmission.
8. Turn the engine off, and the ignition to ACC/ACCESSORY.
9. Place the transmission shift lever in P (Park). See
Recreational Vehicle Towing on
page 10-78.
10. Turn the ignition to LOCK/OFF. Shifting Out of N (Neutral)
To shift:
1. Set the parking brake and apply
the brake pedal.
2. Turn the ignition to ON/RUN with the engine off.
3. Shift the transmission to N (Neutral).
4. Turn the transfer case knob to the desired setting.
After the transfer case has
shifted out of N (Neutral), the
N (Neutral) light will go out.
5. Release the parking brake.
6. Start the engine and shift the transmission to the desired gear.Brakes
Antilock Brake
System (ABS)
This vehicle has ABS, an advanced
electronic braking system that helps
prevent a braking skid.
When the vehicle begins to drive
away, ABS checks itself.
A momentary motor or clicking noise
might be heard while this test is
going on, and it might even be
noticed that the brake pedal moves
a little. This is normal.
If there is a problem with ABS, this
warning light stays on. See Antilock
Brake System (ABS) Warning Light
on page 5-21.
Page 264 of 433
Black plate (49,1)GMC Canyon Owner Manual (GMNA-Localizing-U.S./Canada-7587000) -
2015 - CRC - 3/17/15
Driving and Operating 9-49
Warning (Continued)
stopped vehicle ahead too rapidly,
or when following a vehicle too
closely, FCA may not provide a
warning with enough time to help
avoid a crash. FCA does not warn
of pedestrians, animals, signs,
guardrails, bridges, construction
barrels, or other objects. Be ready
to take action and apply the
brakes. For more information, see
Defensive Driving on page 9-3.
FCA can be disabled with the FCA
steering wheel control.
Detecting the Vehicle Ahead
FCA warnings will not occur unless
the FCA system detects a vehicle
ahead. When a vehicle is detected,
the vehicle ahead indicator will
display green. Vehicles may not be
detected on curves, highway exit
ramps, or hills; or due to poor
visibility. FCA will not detect another
vehicle ahead until it is completely
in the driving lane.
{Warning
FCA does not provide a warning
to help avoid a crash, unless it
detects a vehicle. FCA may not
detect a vehicle ahead if the FCA
sensor is blocked by dirt, snow,
or ice, or if the windshield is
damaged. It may also not detect a
vehicle on winding or hilly roads,
or in conditions that can limit
visibility such as fog, rain,
or snow, or if the headlamps or
windshield are not cleaned or in (Continued)
Warning (Continued)
proper condition. Keep the
windshield, headlamps, and FCA
sensors clean and in good repair.
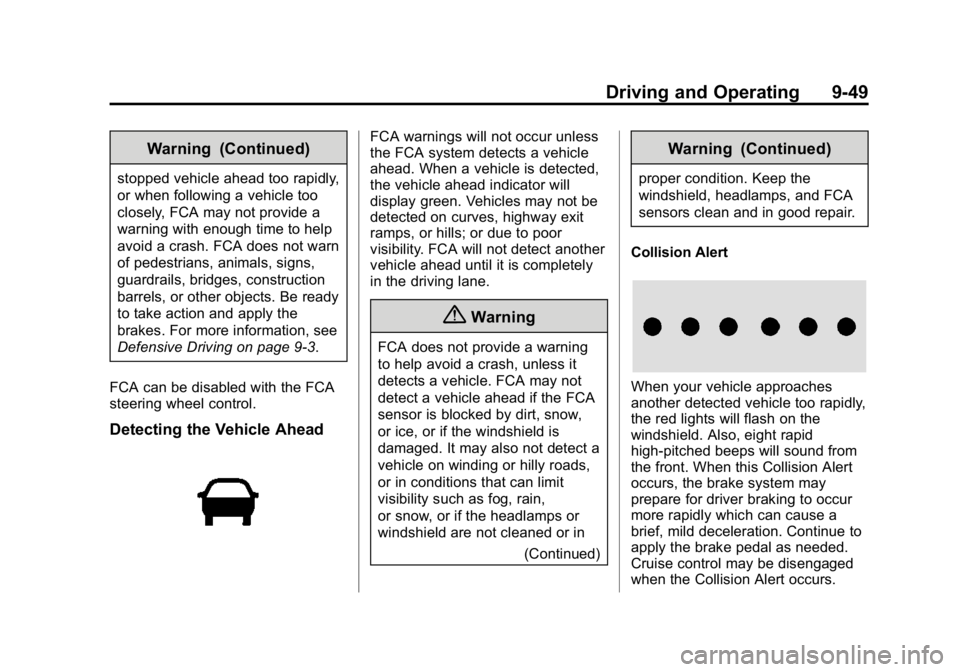
Collision Alert
When your vehicle approaches
another detected vehicle too rapidly,
the red lights will flash on the
windshield. Also, eight rapid
high-pitched beeps will sound from
the front. When this Collision Alert
occurs, the brake system may
prepare for driver braking to occur
more rapidly which can cause a
brief, mild deceleration. Continue to
apply the brake pedal as needed.
Cruise control may be disengaged
when the Collision Alert occurs.
Page 267 of 433
Black plate (52,1)GMC Canyon Owner Manual (GMNA-Localizing-U.S./Canada-7587000) -
2015 - CRC - 3/17/15
9-52 Driving and Operating
When the System Does Not
Seem to Work Properly
The RVC system may not work
properly or display a clear image if:
.It is dark.
.The sun or the beam of
headlamps are shining directly
into the camera lens.
.Ice, snow, mud, or anything else
builds up on the camera lens.
Clean the lens, rinse it with
water, and wipe it with a soft
cloth.
.The back of the vehicle is in an
accident. The position and
mounting angle of the camera
can change or the camera can
be affected. Be sure to have the
camera, its position, and
mounting angle checked at your
dealer.
Disconnecting the Rear Vision
Camera (RVC)
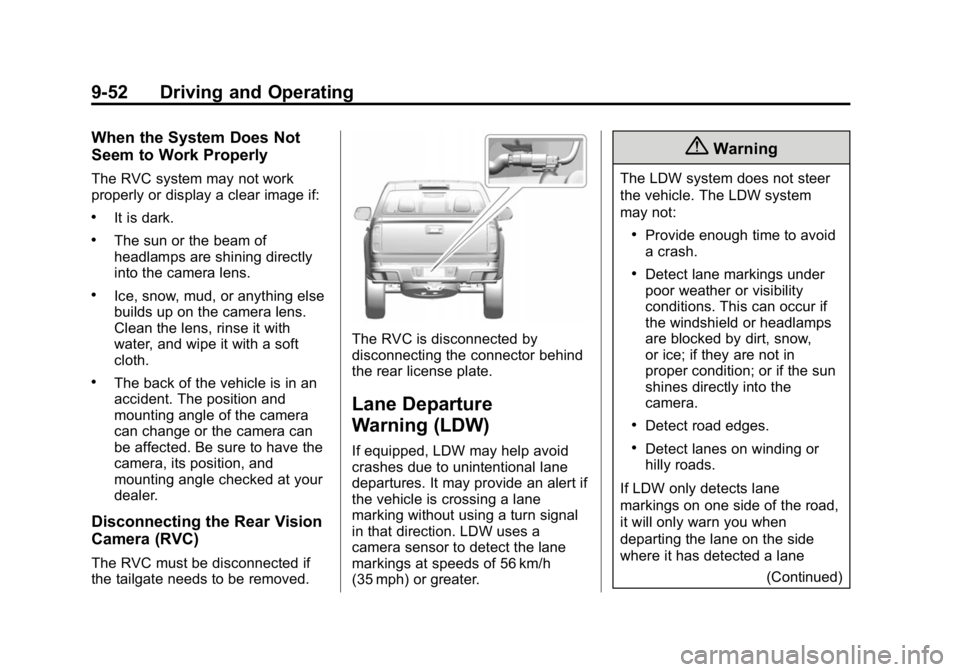
The RVC must be disconnected if
the tailgate needs to be removed.
The RVC is disconnected by
disconnecting the connector behind
the rear license plate.
Lane Departure
Warning (LDW)
If equipped, LDW may help avoid
crashes due to unintentional lane
departures. It may provide an alert if
the vehicle is crossing a lane
marking without using a turn signal
in that direction. LDW uses a
camera sensor to detect the lane
markings at speeds of 56 km/h
(35 mph) or greater.
{Warning
The LDW system does not steer
the vehicle. The LDW system
may not:
.Provide enough time to avoid
a crash.
.Detect lane markings under
poor weather or visibility
conditions. This can occur if
the windshield or headlamps
are blocked by dirt, snow,
or ice; if they are not in
proper condition; or if the sun
shines directly into the
camera.
.Detect road edges.
.Detect lanes on winding or
hilly roads.
If LDW only detects lane
markings on one side of the road,
it will only warn you when
departing the lane on the side
where it has detected a lane (Continued)
Page 271 of 433
Black plate (56,1)GMC Canyon Owner Manual (GMNA-Localizing-U.S./Canada-7587000) -
2015 - CRC - 3/17/15
9-56 Driving and Operating
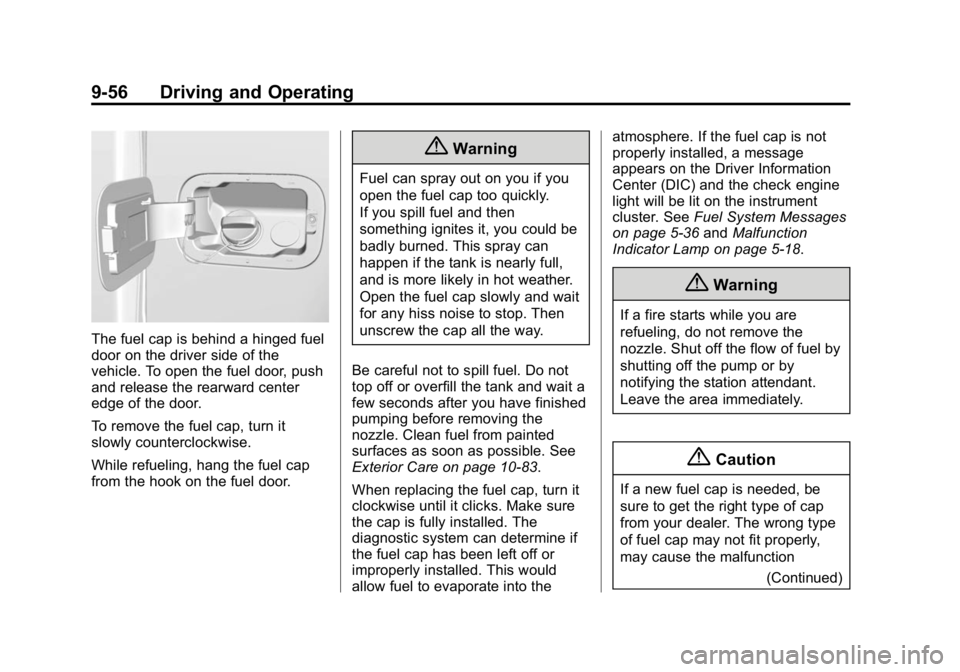
The fuel cap is behind a hinged fuel
door on the driver side of the
vehicle. To open the fuel door, push
and release the rearward center
edge of the door.
To remove the fuel cap, turn it
slowly counterclockwise.
While refueling, hang the fuel cap
from the hook on the fuel door.
{Warning
Fuel can spray out on you if you
open the fuel cap too quickly.
If you spill fuel and then
something ignites it, you could be
badly burned. This spray can
happen if the tank is nearly full,
and is more likely in hot weather.
Open the fuel cap slowly and wait
for any hiss noise to stop. Then
unscrew the cap all the way.
Be careful not to spill fuel. Do not
top off or overfill the tank and wait a
few seconds after you have finished
pumping before removing the
nozzle. Clean fuel from painted
surfaces as soon as possible. See
Exterior Care on page 10-83.
When replacing the fuel cap, turn it
clockwise until it clicks. Make sure
the cap is fully installed. The
diagnostic system can determine if
the fuel cap has been left off or
improperly installed. This would
allow fuel to evaporate into the atmosphere. If the fuel cap is not
properly installed, a message
appears on the Driver Information
Center (DIC) and the check engine
light will be lit on the instrument
cluster. See
Fuel System Messages
on page 5-36 andMalfunction
Indicator Lamp on page 5-18.
{Warning
If a fire starts while you are
refueling, do not remove the
nozzle. Shut off the flow of fuel by
shutting off the pump or by
notifying the station attendant.
Leave the area immediately.
{Caution
If a new fuel cap is needed, be
sure to get the right type of cap
from your dealer. The wrong type
of fuel cap may not fit properly,
may cause the malfunction
(Continued)
Page 282 of 433

Black plate (1,1)GMC Canyon Owner Manual (GMNA-Localizing-U.S./Canada-7587000) -
2015 - CRC - 3/17/15
Vehicle Care 10-1
Vehicle Care
General Information
General Information . . . . . . . . . . 10-2
California Proposition65 Warning . . . . . . . . . . . . . . . . . 10-2
California Perchlorate Materials Requirements . . . . 10-3
Accessories and Modifications . . . . . . . . . . . . . . . 10-3
Vehicle Checks
Doing Your OwnService Work . . . . . . . . . . . . . . . 10-4
Hood . . . . . . . . . . . . . . . . . . . . . . . . 10-5
Engine Compartment Overview . . . . . . . . . . . . . . . . . . . 10-6
Engine Oil . . . . . . . . . . . . . . . . . . . 10-9
Engine Oil Life System . . . . . 10-11
Automatic Transmission Fluid . . . . . . . . . . . . . . . . . . . . . . 10-13
Manual Transmission Fluid . . . . . . . . . . . . . . . . . . . . . . 10-13
Hydraulic Clutch . . . . . . . . . . . . 10-13
Engine Air Cleaner/Filter . . . . 10-14
Cooling System . . . . . . . . . . . . 10-15
Engine Coolant . . . . . . . . . . . . . 10-17
Engine Overheating . . . . . . . . 10-19 Engine Fan . . . . . . . . . . . . . . . . . 10-21
Washer Fluid . . . . . . . . . . . . . . . 10-21
Brakes . . . . . . . . . . . . . . . . . . . . . 10-22
Brake Fluid . . . . . . . . . . . . . . . . . 10-22
Battery - North America . . . . 10-24
Four-Wheel Drive . . . . . . . . . . . 10-25
Front Axle . . . . . . . . . . . . . . . . . . 10-25
Rear Axle . . . . . . . . . . . . . . . . . . 10-26
Starter Switch Check . . . . . . . 10-27
Automatic Transmission Shift
Lock Control Function
Check . . . . . . . . . . . . . . . . . . . . . 10-28
Ignition Transmission Lock Check . . . . . . . . . . . . . . . . . . . . . 10-28
Park Brake and P (Park) Mechanism Check . . . . . . . . 10-28
Wiper Blade Replacement . . . . . . . . . . . . . . 10-29
Headlamp Aiming
Headlamp Aiming . . . . . . . . . . 10-30
Bulb Replacement
Bulb Replacement . . . . . . . . . . 10-30
Halogen Bulbs . . . . . . . . . . . . . . 10-30
Headlamps, Front TurnSignal, Sidemarker, and
Parking Lamps . . . . . . . . . . . . 10-30 Taillamps, Turn Signal,
Stoplamps, and Back-Up
Lamps . . . . . . . . . . . . . . . . . . . . 10-31
Center High-Mounted Stoplamp (CHMSL) and
Cargo Lamp . . . . . . . . . . . . . . 10-32
Replacement Bulbs . . . . . . . . . 10-32
Electrical System
Electrical System Overload . . . . . . . . . . . . . . . . . . 10-33
Fuses . . . . . . . . . . . . . . . . . . . . . . 10-34
Engine Compartment Fuse Block . . . . . . . . . . . . . . . . . . . . . 10-34
Instrument Panel Fuse Block . . . . . . . . . . . . . . . . . . . . . 10-38
Wheels and Tires
Tires . . . . . . . . . . . . . . . . . . . . . . . . 10-41
All-Season Tires . . . . . . . . . . . . 10-42
Winter Tires . . . . . . . . . . . . . . . . 10-42
All-Terrain Tires . . . . . . . . . . . . 10-43
Tire Sidewall Labeling . . . . . . 10-43
Tire Designations . . . . . . . . . . . 10-45
Tire Terminology andDefinitions . . . . . . . . . . . . . . . . 10-46
Tire Pressure . . . . . . . . . . . . . . . 10-49
Tire Pressure Monitor System . . . . . . . . . . . . . . . . . . . 10-50