2015 FORD SUPER DUTY buttons
[x] Cancel search: buttonsPage 127 of 470
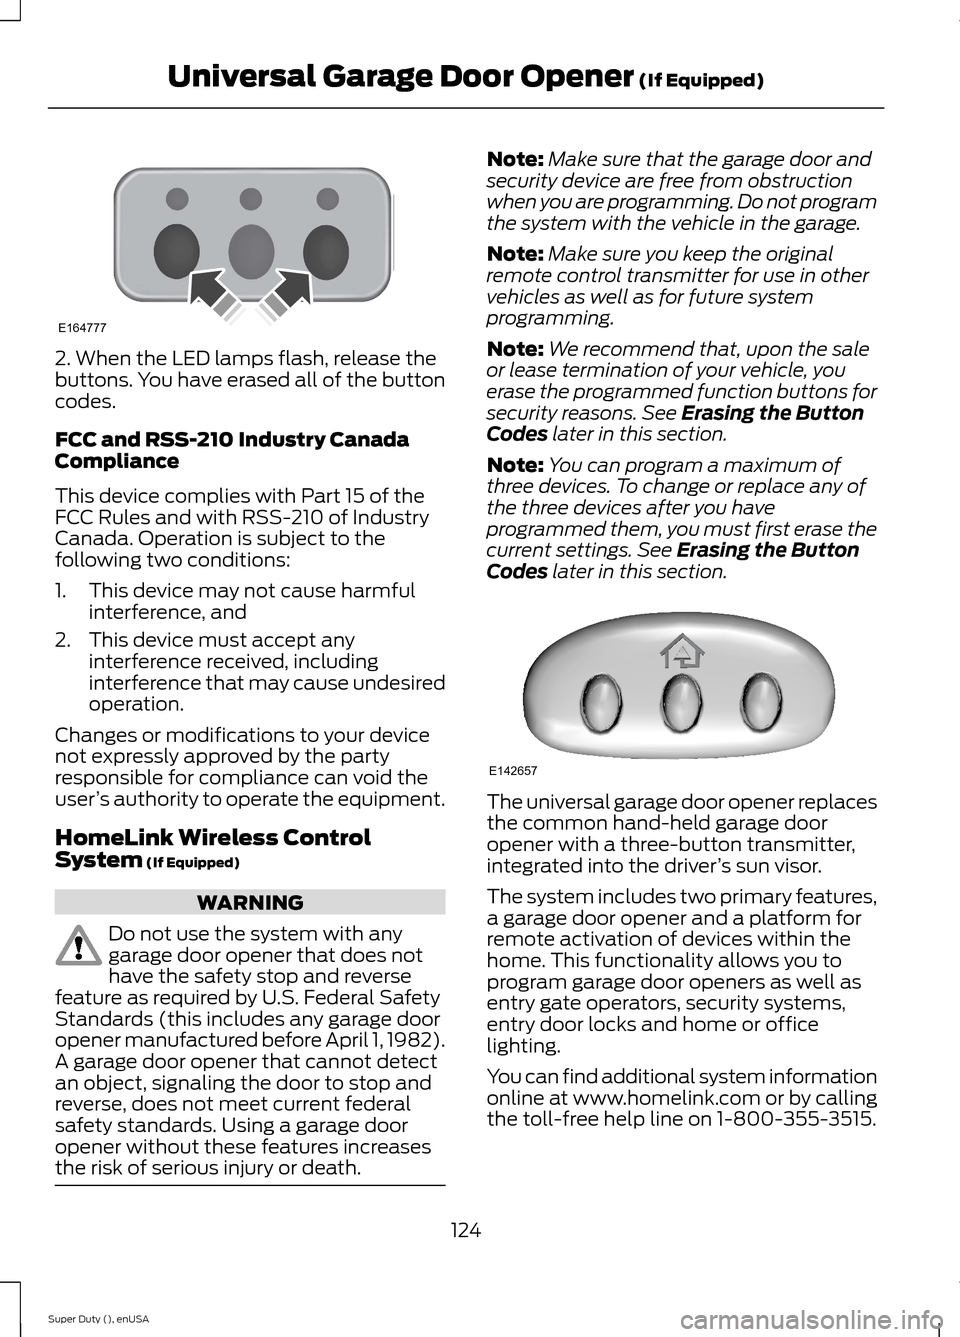
2. When the LED lamps flash, release thebuttons. You have erased all of the buttoncodes.
FCC and RSS-210 Industry CanadaCompliance
This device complies with Part 15 of theFCC Rules and with RSS-210 of IndustryCanada. Operation is subject to thefollowing two conditions:
1.This device may not cause harmfulinterference, and
2.This device must accept anyinterference received, includinginterference that may cause undesiredoperation.
Changes or modifications to your devicenot expressly approved by the partyresponsible for compliance can void theuser’s authority to operate the equipment.
HomeLink Wireless ControlSystem (If Equipped)
WARNING
Do not use the system with anygarage door opener that does nothave the safety stop and reversefeature as required by U.S. Federal SafetyStandards (this includes any garage dooropener manufactured before April 1, 1982).A garage door opener that cannot detectan object, signaling the door to stop andreverse, does not meet current federalsafety standards. Using a garage dooropener without these features increasesthe risk of serious injury or death.
Note:Make sure that the garage door andsecurity device are free from obstructionwhen you are programming. Do not programthe system with the vehicle in the garage.
Note:Make sure you keep the originalremote control transmitter for use in othervehicles as well as for future systemprogramming.
Note:We recommend that, upon the saleor lease termination of your vehicle, youerase the programmed function buttons forsecurity reasons. See Erasing the ButtonCodes later in this section.
Note:You can program a maximum ofthree devices. To change or replace any ofthe three devices after you haveprogrammed them, you must first erase thecurrent settings. See Erasing the ButtonCodes later in this section.
The universal garage door opener replacesthe common hand-held garage dooropener with a three-button transmitter,integrated into the driver’s sun visor.
The system includes two primary features,a garage door opener and a platform forremote activation of devices within thehome. This functionality allows you toprogram garage door openers as well asentry gate operators, security systems,entry door locks and home or officelighting.
You can find additional system informationonline at www.homelink.com or by callingthe toll-free help line on 1-800-355-3515.
124Super Duty (), enUSAUniversal Garage Door Opener (If Equipped)E164777 E142657
Page 128 of 470
In-vehicle Programming
This process is to program your hand-heldtransmitter and your in-vehicle HomeLinkbutton.
Note:Put a new battery in the hand-heldtransmitter. This will ensure quicker trainingand accurate transmission of theradio-frequency signal.
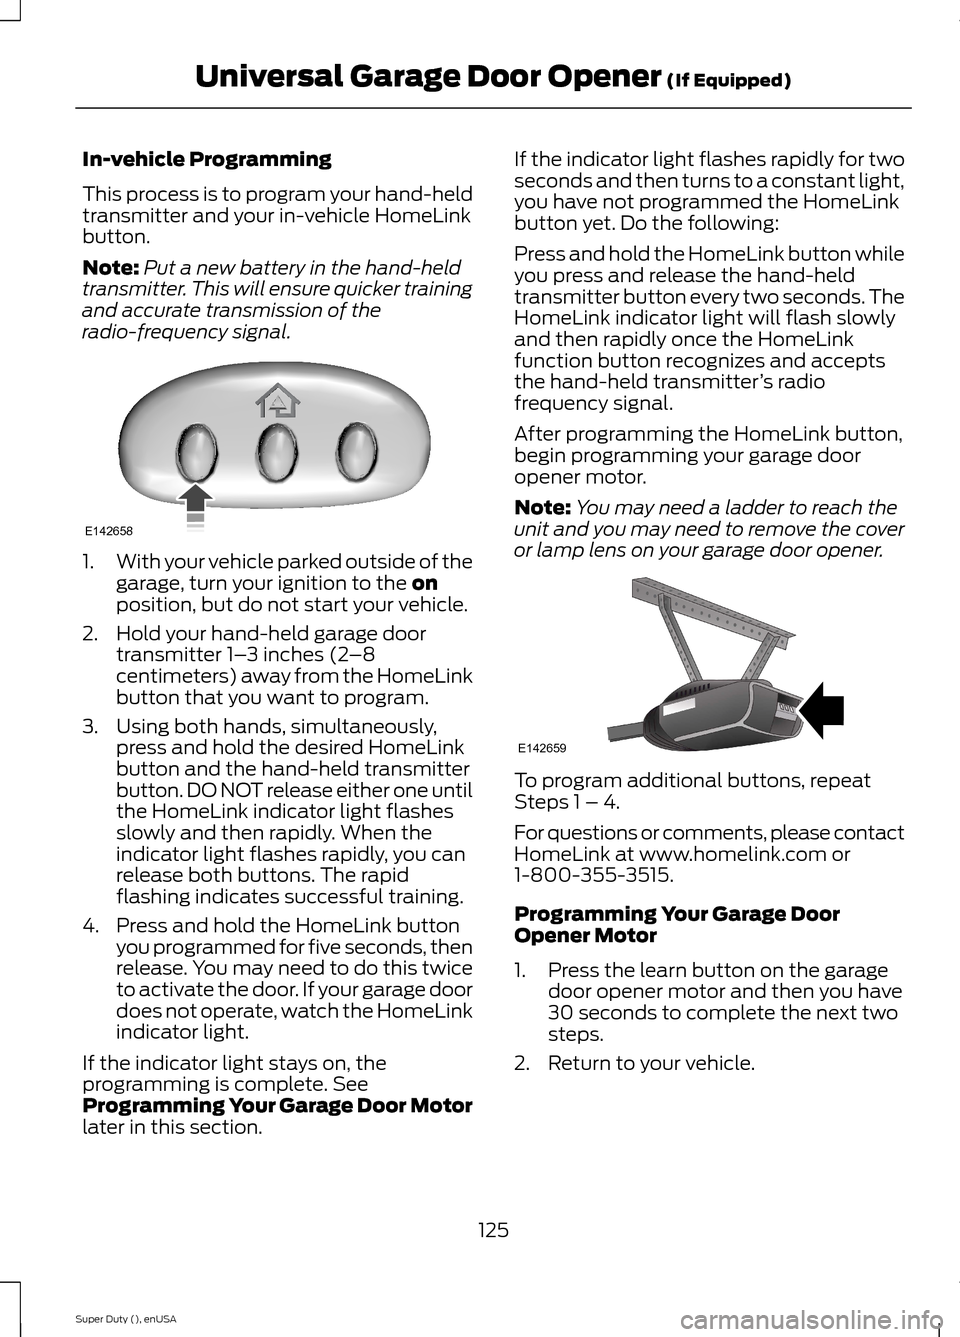
1.With your vehicle parked outside of thegarage, turn your ignition to the onposition, but do not start your vehicle.
2.Hold your hand-held garage doortransmitter 1–3 inches (2–8centimeters) away from the HomeLinkbutton that you want to program.
3.Using both hands, simultaneously,press and hold the desired HomeLinkbutton and the hand-held transmitterbutton. DO NOT release either one untilthe HomeLink indicator light flashesslowly and then rapidly. When theindicator light flashes rapidly, you canrelease both buttons. The rapidflashing indicates successful training.
4.Press and hold the HomeLink buttonyou programmed for five seconds, thenrelease. You may need to do this twiceto activate the door. If your garage doordoes not operate, watch the HomeLinkindicator light.
If the indicator light stays on, theprogramming is complete. SeeProgramming Your Garage Door Motorlater in this section.
If the indicator light flashes rapidly for twoseconds and then turns to a constant light,you have not programmed the HomeLinkbutton yet. Do the following:
Press and hold the HomeLink button whileyou press and release the hand-heldtransmitter button every two seconds. TheHomeLink indicator light will flash slowlyand then rapidly once the HomeLinkfunction button recognizes and acceptsthe hand-held transmitter’s radiofrequency signal.
After programming the HomeLink button,begin programming your garage dooropener motor.
Note:You may need a ladder to reach theunit and you may need to remove the coveror lamp lens on your garage door opener.
To program additional buttons, repeatSteps 1 – 4.
For questions or comments, please contactHomeLink at www.homelink.com or1-800-355-3515.
Programming Your Garage DoorOpener Motor
1.Press the learn button on the garagedoor opener motor and then you have30 seconds to complete the next twosteps.
2.Return to your vehicle.
125Super Duty (), enUSAUniversal Garage Door Opener (If Equipped)E142658 E142659
Page 129 of 470
3.Press and hold the function button youwant to program for two seconds, thenrelease. Repeat this step. Dependingon your brand of garage door opener,you may need to repeat this sequencea third time.
Erasing the Function Button Codes
Note:You cannot erase individual buttons.
1.Press and hold the outer two functionbuttons simultaneously forapproximately 20 seconds until theindicator lights above the buttons flashrapidly.
2.When the indicator lights flash, releasethe buttons. You have erased the codesfor all buttons.
Reprogramming a Single Button
To program a device to a previously trainedbutton, follow these steps:
1.Press and hold the desired button. DoNOT release the button.
2.The indicator light will begin to flashafter 20 seconds. Without releasing thebutton, follow Step 1 in theProgramming section.
For questions or comments, contactHomeLink at www.homelink.com or1-800-355-3515.
Programming to a Genie Intellicode 2Garage Door Opener
Note:You must program the GenieIntellicode 2 transmitter to operate it withthe garage door opener.
Note:To program HomeLink to thetransmitter, you must first put thetransmitter into programming mode.
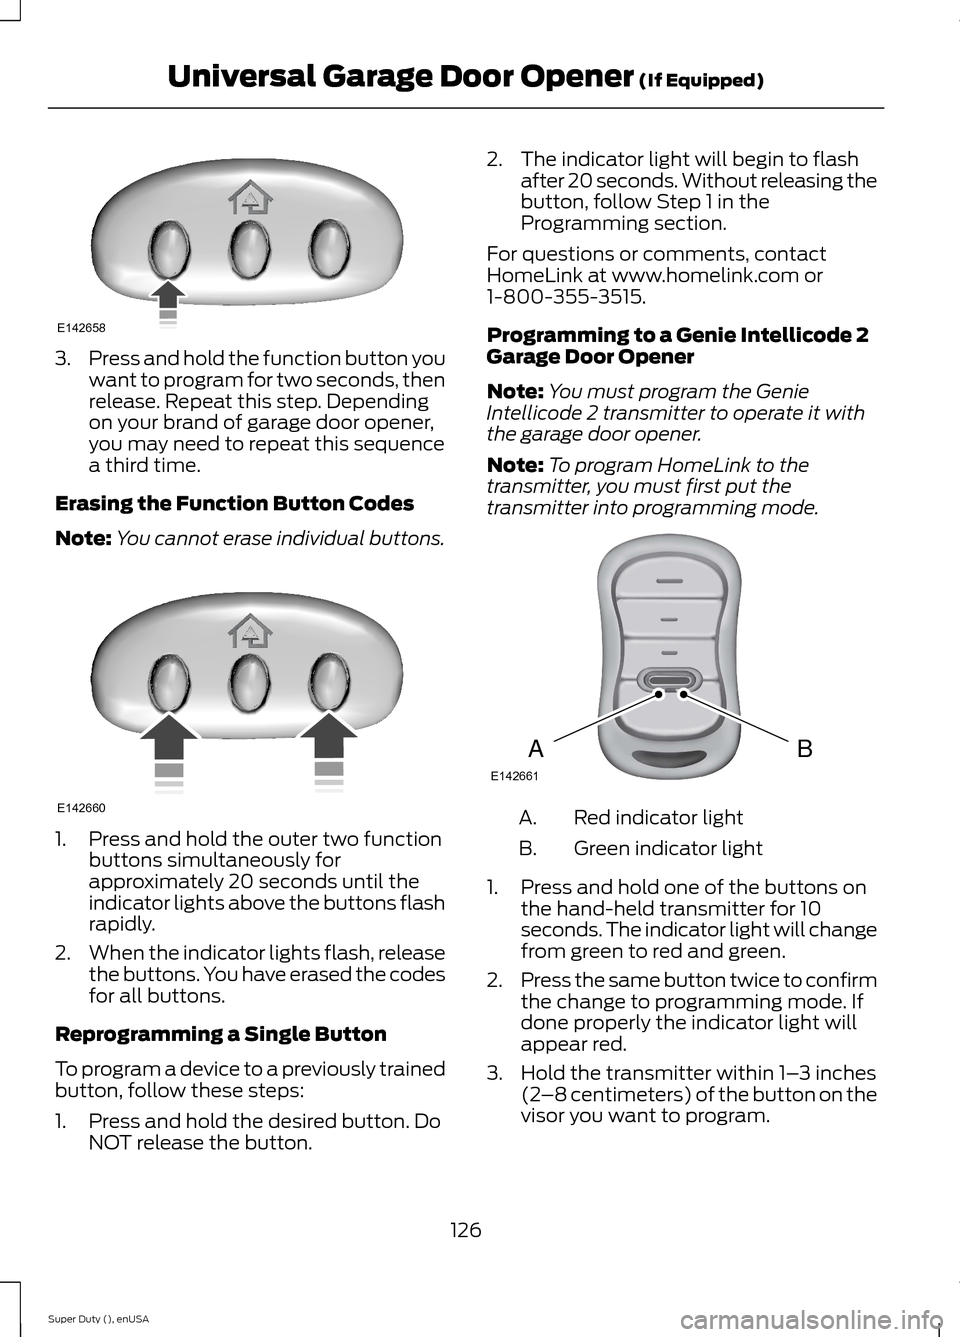
Red indicator lightA.
Green indicator lightB.
1.Press and hold one of the buttons onthe hand-held transmitter for 10seconds. The indicator light will changefrom green to red and green.
2.Press the same button twice to confirmthe change to programming mode. Ifdone properly the indicator light willappear red.
3.Hold the transmitter within 1–3 inches(2–8 centimeters) of the button on thevisor you want to program.
126Super Duty (), enUSAUniversal Garage Door Opener (If Equipped)E142658 E142660 BAE142661
Page 130 of 470
4.Press and hold both the programmedGenie button on the hand-heldtransmitter and the button you wantto program. The indicator light on thevisor will flash rapidly when theprogramming is successful.
Note:The Genie transmitter will transmitfor up to 30 seconds. If HomeLink does notprogram within 30 seconds you will need topress the Genie transmitter again. If theGenie transmitter indicator light displaysgreen and red, release the button until theindicator light turns off before pressing thebutton again.
Once you have programmed HomeLinksuccessfully, you must change the Genietransmitter out of program mode. To dothis:
1.Press and hold the previouslyprogrammed Genie button on thehand-held transmitter for 10 seconds.The indicator light will change from redto red and green.
2.Press the same button twice to confirmthe change. If done correctly theindicator light will turn green.
Programming HomeLink to the GenieIntellicode Garage Door Opener Motor
Note:You may need a ladder to access thegarage door opener motor.
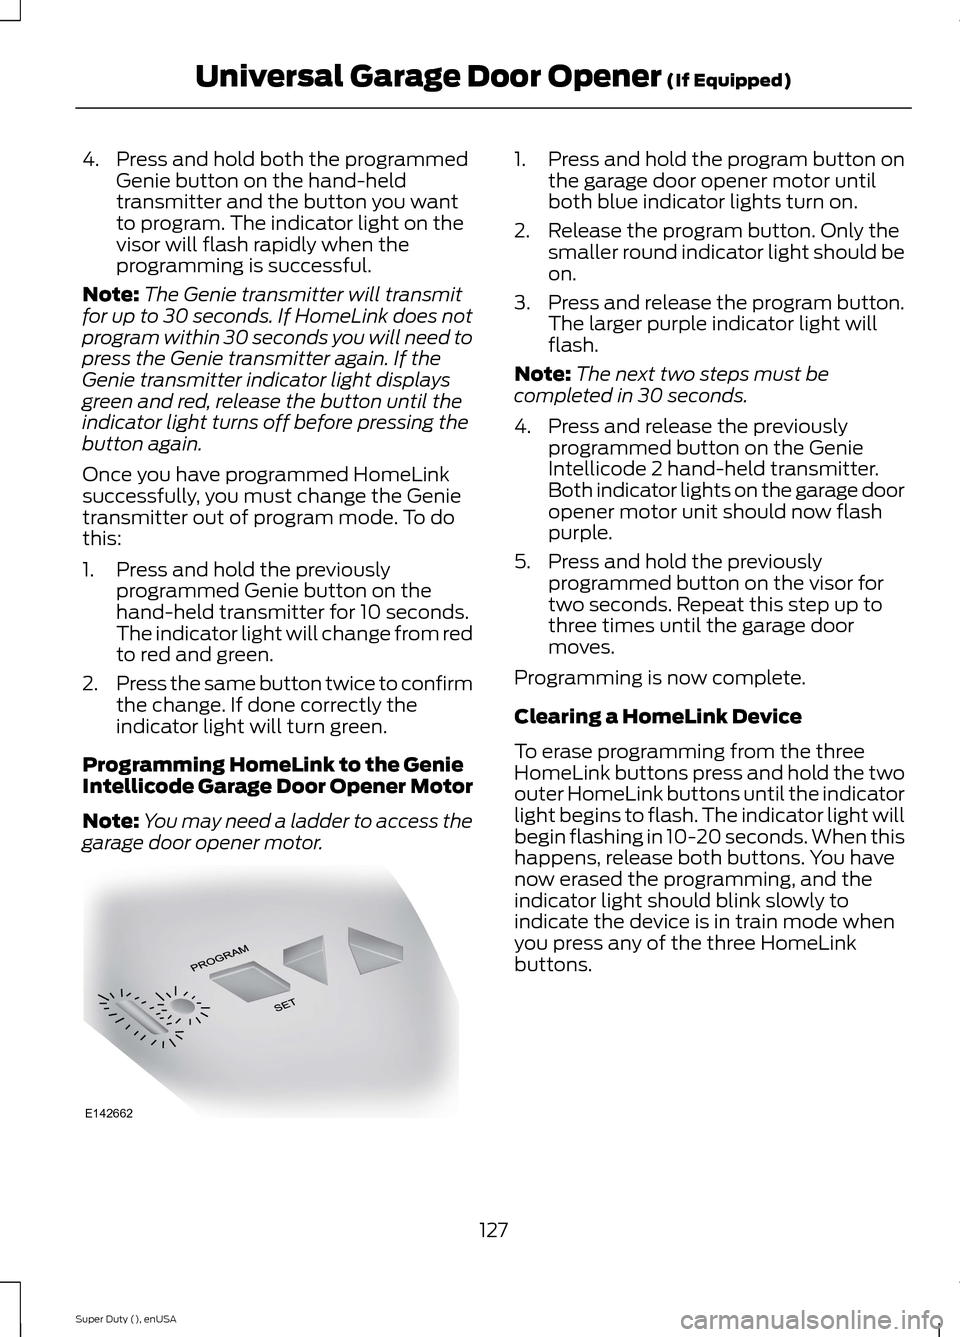
1.Press and hold the program button onthe garage door opener motor untilboth blue indicator lights turn on.
2.Release the program button. Only thesmaller round indicator light should beon.
3.Press and release the program button.The larger purple indicator light willflash.
Note:The next two steps must becompleted in 30 seconds.
4.Press and release the previouslyprogrammed button on the GenieIntellicode 2 hand-held transmitter.Both indicator lights on the garage dooropener motor unit should now flashpurple.
5.Press and hold the previouslyprogrammed button on the visor fortwo seconds. Repeat this step up tothree times until the garage doormoves.
Programming is now complete.
Clearing a HomeLink Device
To erase programming from the threeHomeLink buttons press and hold the twoouter HomeLink buttons until the indicatorlight begins to flash. The indicator light willbegin flashing in 10-20 seconds. When thishappens, release both buttons. You havenow erased the programming, and theindicator light should blink slowly toindicate the device is in train mode whenyou press any of the three HomeLinkbuttons.
127Super Duty (), enUSAUniversal Garage Door Opener (If Equipped)E142662
Page 150 of 470
M (Manual) without Overdrive
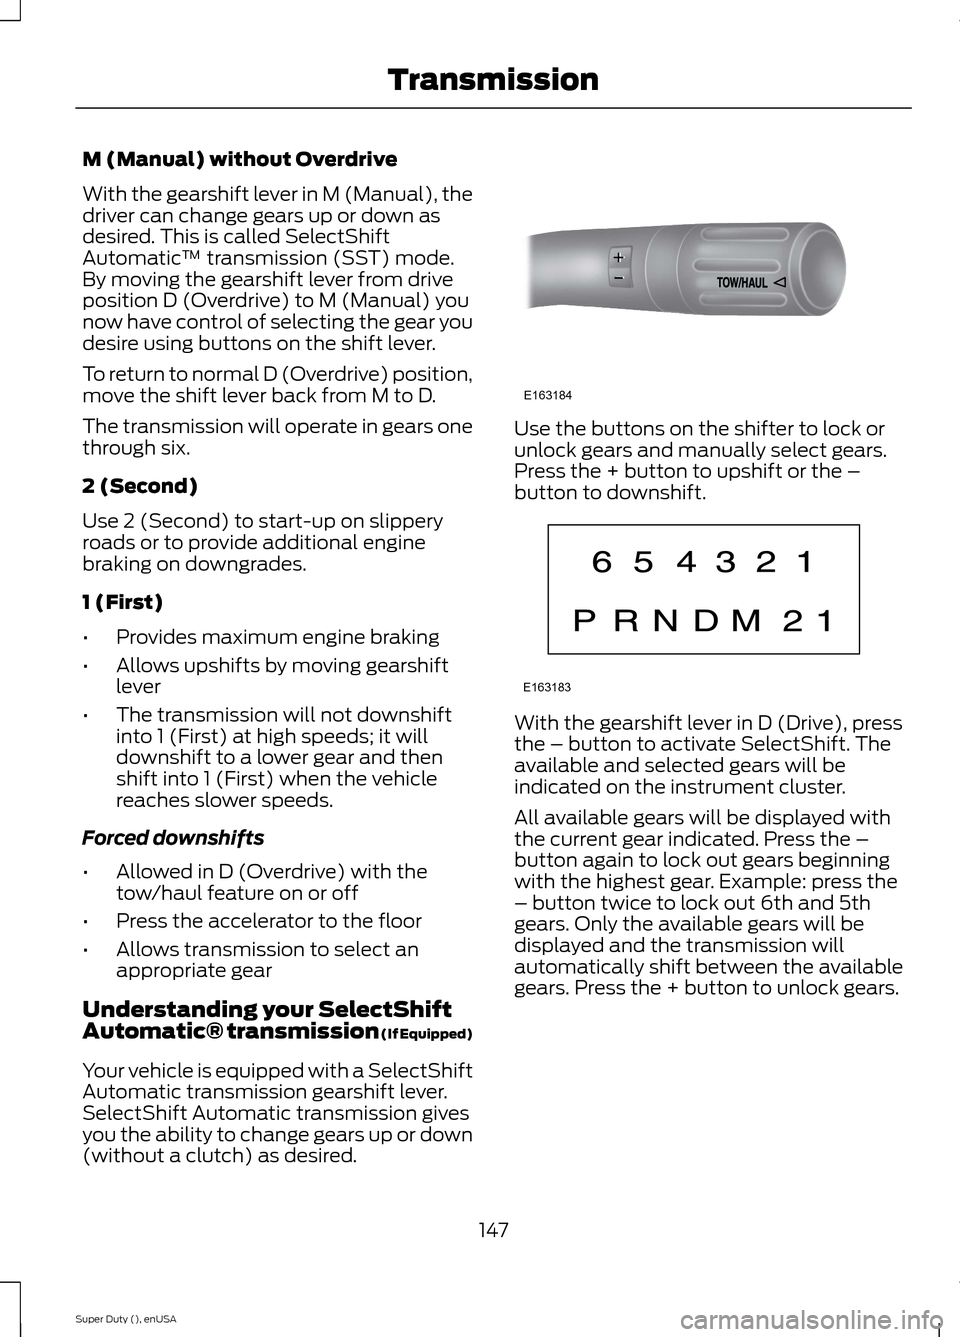
With the gearshift lever in M (Manual), thedriver can change gears up or down asdesired. This is called SelectShiftAutomatic™ transmission (SST) mode.By moving the gearshift lever from driveposition D (Overdrive) to M (Manual) younow have control of selecting the gear youdesire using buttons on the shift lever.
To return to normal D (Overdrive) position,move the shift lever back from M to D.
The transmission will operate in gears onethrough six.
2 (Second)
Use 2 (Second) to start-up on slipperyroads or to provide additional enginebraking on downgrades.
1 (First)
•Provides maximum engine braking
•Allows upshifts by moving gearshiftlever
•The transmission will not downshiftinto 1 (First) at high speeds; it willdownshift to a lower gear and thenshift into 1 (First) when the vehiclereaches slower speeds.
Forced downshifts
•Allowed in D (Overdrive) with thetow/haul feature on or off
•Press the accelerator to the floor
•Allows transmission to select anappropriate gear
Understanding your SelectShiftAutomatic® transmission (If Equipped)
Your vehicle is equipped with a SelectShiftAutomatic transmission gearshift lever.SelectShift Automatic transmission givesyou the ability to change gears up or down(without a clutch) as desired.
Use the buttons on the shifter to lock orunlock gears and manually select gears.Press the + button to upshift or the –button to downshift.
With the gearshift lever in D (Drive), pressthe – button to activate SelectShift. Theavailable and selected gears will beindicated on the instrument cluster.
All available gears will be displayed withthe current gear indicated. Press the –button again to lock out gears beginningwith the highest gear. Example: press the– button twice to lock out 6th and 5thgears. Only the available gears will bedisplayed and the transmission willautomatically shift between the availablegears. Press the + button to unlock gears.
147Super Duty (), enUSATransmissionE163184 E163183
Page 178 of 470
Fixed guideline: Yellow zoneD
Fixed guideline: Red zoneE
Rear bumperF
Fixed guidelines are always shown in thedisplay, but the active guidelines onlydisplay when the steering wheel is turned.To use active guidelines, turn the steeringwheel to point the guidelines toward anintended path. If the steering wheelposition is changed while reversing, thevehicle might deviate from the originalintended path.
The active guidelines fade in and outdepending on the steering wheel position.The active guidelines are not shown whenthe steering wheel position is straight.
Always use caution while reversing.Objects in the red zone are closest to yourvehicle and objects in the green zone arefarther away. Objects are getting closer toyour vehicle as they move from the greenzone to the yellow or red zones. Use theside view mirrors and rear view mirror toget better coverage on both sides and rearof your vehicle.
Enhanced Park Aids
Note:Enhanced park aids is only availablewhen the transmission is in reverse (R).
Note:The reverse sensing system is noteffective at speeds above 3 mph (5 km/h)and may not detect certain angular ormoving objects.
The system uses red, yellow and greenhighlights which appear on top of the videoimage when an object is detected by thereverse sensing system. The alert highlightsthe closest object detected. The reversesensing alert can be disabled and if visualpark aid alert is enabled, highlighted areasare still displayed.
Selectable settings for this feature are ONand OFF.
Manual Zoom
WARNING
When manual zoom is on, the fullarea behind your vehicle is notshown. Be aware of yoursurroundings when using the manual zoomfeature.
Note:Manual zoom is only available whenthe transmission is in reverse (R).
Note:When manual zoom is enabled, onlythe centerline is shown.
This feature allows you to get a closer viewof an object behind your vehicle (forexample, a trailer). The zoomed imagekeeps the bumper in the image to providea reference. The zoom is only active whilethe transmission is in reverse (R). Whenthe transmission is shifted out of reverse(R), the feature automatically turns offand must be reset when it is used again.
Selectable settings for this feature is OFF,Level 1, Level 2 and Level 3. The selectedlevel will appear between the buttons (forexample, Level 1) The default setting forthe manual zoom is OFF.
Rear Camera Delay
When shifting the transmission out ofreverse (R) and into any gear other thanpark (P), the camera image remains in thedisplay until your vehicle speed reaches 5mph (8 km/h). This occurs when the rearcamera delay feature is on or until a radiobutton is selected.
Selectable settings for this feature are ONand OFF. The default setting for the rearcamera delay is ON.
175Super Duty (), enUSAParking Aids
Page 202 of 470
You can adjust the amount ofinitial trailer brake output byselecting one of three settingsthrough the message center.
Ford has tested the trailer brakecontroller to be compatible withseveral major brands ofelectric-over-hydraulic trailerbrakes. Contact an authorizeddealer for information on whichbrands you can use.
The controller user interfaceconsists of the following:
A: + and - (Gain adjustmentbuttons): Pressing these buttonsadjusts the controller's poweroutput to the trailer brakes in 0.5increments. You can increase thegain setting to 10.0 (maximumtrailer braking) or decrease it to 0(no trailer braking). Pressing andholding a button raises or lowersthe setting continuously. The gainsetting displays in the messagecenter as follows: TBC GAIN =XX.X.
B: Manual control lever: Slide thecontrol lever to the left to switchon the trailer's electric brakesindependent of the tow vehicle's.See the following Procedure foradjusting gain section forinstructions on proper use of thisfeature. If you use the manualcontrol while the brake is alsoapplied, the greater of the twoinputs determines the power sentto the trailer brakes.
•Stop lamps: Using the manualcontrol lever lights both thetrailer brake lamps and yourvehicle brake lamps except thecenter high-mount stop lamp,if you make the properelectrical connection to thetrailer. Pressing your vehiclebrake pedal also lights bothtrailer and vehicle brake lamps.
The controller shows gain setting,output bar graph, and trailerconnectivity status in theinformation display. They appearin the information display asfollows:
•TBC GAIN = XX.X NOTRAILER: Shows the currentgain setting during a givenignition cycle and when
adjusting the gain. This alsodisplays if you use the manualcontrol lever or make gainadjustments with no trailerconnected.
•TBC GAIN = XX.XOUTPUT=/ / / / / /: Displayswhen you push your vehicle'sbrake pedal, or upon use of themanual control. Bar indicatorslight in the information displayto indicate the amount ofpower going to the trailerbrakes relative to the brakepedal or manual control input.One bar indicates the leastamount of output; six barsindicate maximum output.
199Super Duty (), enUSATowing
Page 203 of 470
•TRAILER CONNECTED:Displays when the systemsenses a correct trailer wiringconnection during a givenignition cycle.
•TRAILER DISCONNECTED:Displays, accompanied by asingle audible time, when thesystem senses a trailerconnection and then adisconnection, eitherintentional or unintentional,during a given ignition cycle. Italso displays if a truck ortrailer-wiring fault occurscausing the trailer to appeardisconnected. This messagecan also display if you use themanual control lever without atrailer connected.
Procedure for Adjusting Gain
Note:Only perform this procedurein a traffic-free environment atspeeds of approximately 20-25mph (30-40 km/h).
The gain setting sets the trailerbrake controller for the specifictowing condition. You shouldchange the setting as towingconditions change. Changes totowing conditions include trailerload, vehicle load, road conditionsand weather.
The gain should be set to providethe maximum trailer brakingassistance while making sure thetrailer wheels do not lock whenusing the brakes. Locked trailerwheels may lead to trailerinstability.
1.Make sure the trailer brakes arein good working condition,functioning normally andproperly adjusted. See yourtrailer dealer if necessary.
2.Hook up the trailer and makethe electrical connectionsaccording to the trailermanufacturer's instructions.
3.When you plug in a trailer withelectric orelectric-over-hydraulic brakes,TRAILER CONNECTEDappears in the informationdisplay.
4.Use the gain adjustment (+ and-) buttons to increase ordecrease the gain setting to thedesired starting point. A gainsetting of 6.0 is a good startingpoint for heavier loads.
5.In a traffic-free environment,tow the trailer on a dry, levelsurface at a speed of 20-25mph (30-40 km/h) andsqueeze the manual controllever completely.
6.If the trailer wheels lock up,indicated by squealing tires,reduce the gain setting. If thetrailer wheels turn freely,
increase the gain setting.Repeat Steps 5 and 6 until the
200Super Duty (), enUSATowing