2015 FORD SUPER DUTY maintenance schedule
[x] Cancel search: maintenance schedulePage 214 of 470
Follow the severe duty schedule in yourScheduled Maintenance information forengine oil and transmission fluid changeintervals.
Snowplowing with your AirbagEquipped Vehicle
WARNINGS
Do not attempt to service, repair, ormodify the airbag supplementalrestraint system (SRS) or its fuses.See your Ford or Lincoln Mercury dealer.
Additional equipment such assnowplow equipment may affect theperformance of the airbag sensorsincreasing the risk of injury. Please refer tothe Body Builders Layout Book forinstructions about the appropriateinstallation of additional equipment.
All occupants of the vehicle,including the driver, should alwaysproperly wear their safety belts, evenwhen provided with an airbagsupplemental restraint system (SRS).
Your vehicle is equipped with a driver andpassenger airbag supplemental restraintsystem. The supplemental restraint systemwill activate in certain frontal and offsetfrontal collisions when the vehicle sustainssufficient frontal deceleration.
Careless or high speed driving whileplowing snow that results in sufficientvehicle decelerations can deploy theairbag. Such driving also increases the riskof accidents
Never remove or defeat the trippingmechanisms designed into the snowremoval equipment by its manufacturer.Doing so may cause damage to the vehicleand the snow removal equipment as wellas possible airbag deployment.
Engine temperature while plowing
When driving with a plow, your engine mayrun at a higher temperature than normalbecause the attached snowplow blade willrestrict airflow to the radiator.
•If you are driving more than 14.91 mi(24 km) at temperatures abovefreezing, angle the plow blade eitherfull left or full right to providemaximum airflow to the radiator.
•If you are driving less than 14.91 mi(24 km) at speeds up to 44.7 mph(72 km/h) in cold weather, you will notneed to worry about blade position toprovide maximum airflow.
Transmission operation whileplowing
WARNING
Do not spin the wheels at over34.2 mph (55 km/h). The tires mayfail and injure a passenger orbystander.
•Shift transfer case to 4L (4WD Low)when plowing in small areas at speedsbelow 5 mph (8 km/h).
•Shift transfer case to 4H (4WD High)when plowing larger areas or light snowat higher speeds. Do not exceed 15 mph(24 km/h).
•Do not shift the transmission from aforward gear to R (Reverse) until theengine is at idle and the wheels havestopped.
211Super Duty (), enUSADriving Hints
Page 220 of 470
GETTING THE SERVICES YOU
NEED
Warranty repairs to your vehicle must beperformed by an authorized dealer. Whileany authorized dealer handling your vehicleline will provide warranty service, werecommend you return to your sellingauthorized dealer who wants to ensureyour continued satisfaction.
Please note that certain warranty repairsrequire special training and equipment, sonot all authorized dealers are authorizedto perform all warranty repairs. This meansthat, depending on the warranty repairneeded, you may have to take your vehicleto another authorized dealer.
A reasonable time must be allowed toperform a repair after taking your vehicleto the authorized dealer. Repairs will bemade using Ford or Motorcraft® parts, orremanufactured or other parts that areauthorized by Ford.
Away From Home
If you are away from home when yourvehicle needs service, contact the FordCustomer Relationship Center or use theonline resources listed below to find thenearest authorized dealer.
In the United States:
Mailing address
Ford Motor CompanyCustomer Relationship CenterP.O. Box 6248Dearborn, MI 48121
Telephone
1-800-392-3673 (FORD)(TDD for the hearing impaired:1-800-232-5952)
Online
Additional information and resources areavailable online at www.fordowner.com
These are some of the items that can befound online:
•U.S. dealer locator by Dealer Name,City/State, or Zip Code
•Owner Manuals
•Maintenance Schedules
•Recalls
•Ford Extended Service Plans
•Ford Genuine Accessories
•Service specials and promotions.
In Canada:
Mailing address
Customer Relationship CentreFord Motor Company of Canada, LimitedP.O. Box 2000Oakville, Ontario L6K 0C8
Telephone
1-800-565-3673 (FORD)
Online
www.ford.ca
Additional Assistance
If you have questions or concerns, or areunsatisfied with the service you arereceiving, follow these steps:
1.Contact your Sales Representative orService Advisor at your selling/servicingauthorized dealer.
2.If your inquiry or concern remainsunresolved, contact the Sales Manager,Service Manager or Customer RelationsManager.
3.If you require assistance or clarificationon Ford Motor Company policies,please contact the Ford CustomerRelationship Center.
217Super Duty (), enUSACustomer Assistance
Page 235 of 470
GENERAL INFORMATION
Have your vehicle serviced regularly to helpmaintain its roadworthiness and resalevalue. There is a large network of Fordauthorized dealers that are there to helpyou with their professional servicingexpertise. We believe that their speciallytrained technicians are best qualified toservice your vehicle properly and expertly.They are supported by a wide range ofhighly specialized tools developedspecifically for servicing your vehicle.
To help you service your vehicle, weprovide scheduled maintenanceinformation which makes tracking routineservice easy. See ScheduledMaintenance (page 440).
If your vehicle requires professional service,your authorized dealer can provide thenecessary parts and service. Check yourwarranty information to find out whichparts and services are covered.
Use only recommended fuels, lubricants,fluids and service parts conforming tospecifications. Motorcraft® parts aredesigned and built to provide the bestperformance in your vehicle.
Precautions
•Do not work on a hot engine.
•Make sure that nothing gets caught inmoving parts.
•Do not work on a vehicle with theengine running in an enclosed space,unless you are sure you have enoughventilation.
•Keep all open flames and other burningmaterial (such as cigarettes) awayfrom the battery and all fuel relatedparts.
Working with the Engine Off
1.Set the parking brake and shift to P(Park).
2.Turn off the engine and remove the key(if equipped).
3.Block the wheels.
Working with the Engine On
WARNING
To reduce the risk of vehicle damageand/or personal burn injuries, do notstart your engine with the air cleanerremoved and do not remove it while theengine is running.
1.Set the parking brake and shift to P(Park).
2.Block the wheels
OPENING AND CLOSING THE
HOOD
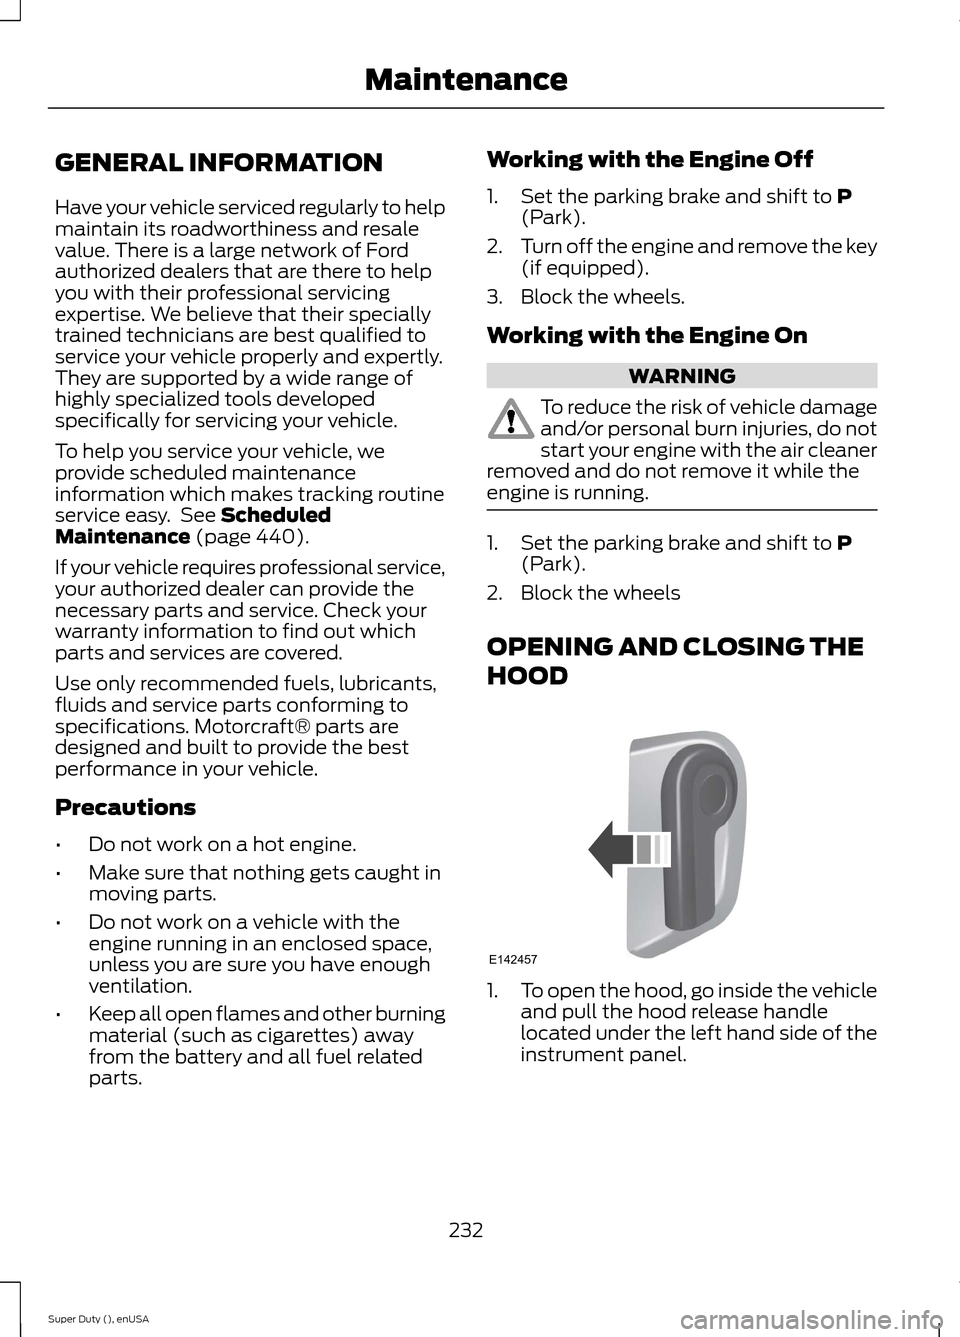
1.To open the hood, go inside the vehicleand pull the hood release handlelocated under the left hand side of theinstrument panel.
232Super Duty (), enUSAMaintenanceE142457
Page 239 of 470
Only use oils certified for gasoline enginesby the American Petroleum Institute (API).An oil with this trademark symbolconforms to the current engine andemission system protection standards andfuel economy requirements of theInternational Lubricants SpecificationAdvisory Council (ILSAC), comprised ofU.S. and Japanese automobilemanufacturers.
1.Check the engine oil level.
2.If the engine oil level is not within thenormal range, add engine oil thatmeets Ford specifications. SeeCapacities and Specifications for moreinformation.
3.Remove the engine oil filler cap anduse a funnel to pour the engine oil intothe opening.
4.Recheck the engine oil level. Make surethe oil level is not above the normaloperating range on the engine oil leveldipstick.
5.Install the engine oil level dipstick andensure it is fully seated.
6.Fully install the engine oil filler cap byturning the filler cap clockwise untilthree clicks are heard or until the capis fully seated.
ENGINE COOLANT CHECK
Checking the Engine Coolant
Note:If your vehicle is equipped with adiesel engine, refer to the DieselSupplement.
When the engine is cold, check theconcentration and level of the enginecoolant at the intervals listed in thescheduled maintenance information. SeeScheduled Maintenance (page 440).
Note:Make sure that the level is betweenthe MIN and MAX marks on the coolantreservoir.
Note:Coolant expands when it is hot. Thelevel may extend beyond the MAX mark
Note:If the level is at the MIN mark, belowthe MIN mark, or empty, add coolantimmediately. See Adding Engine Coolantin this chapter.
The coolant concentration should bemaintained within 48% to 50%, whichequates to a freeze point between -29°F(-34°C) and -35°F (-37°C).
Note:For best results, coolantconcentration should be tested with arefractometer such as Rotunda tool300-ROB75240 available from yourauthorized dealer. Ford does notrecommend the use of hydrometers orcoolant test strips for measuring coolantconcentrations.
Note:Automotive fluids are notinterchangeable. Do not use engine coolantor antifreeze or windshield washer fluidoutside of its specified function and vehiclelocation.
236Super Duty (), enUSAMaintenanceE142732
Page 243 of 470
•the engine coolant temperature gaugemoves fully into the red (hot) area
•the coolant temperature warning lightilluminates
•the service engine soon indicatorilluminates.
WARNING
Never remove the coolant reservoircap while the engine is running or hot.
1.Pull off the road as soon as safelypossible and place the vehicle in P(Park).
2.Leave the engine running until thecoolant temperature gauge needlemoves away from the H range. Afterseveral minutes, if this does nothappen, follow the remaining steps.
3.Turn the engine off and wait for it tocool before checking the coolant level.
4.If the coolant level is normal, you mayrestart your engine and continue on.
5.If the coolant is low, add coolant,restart the engine and take your vehicleto an authorized dealer. See Addingengine coolant in this chapter for moreinformation. Refer to fail-safe coolingfor additional information.
AUTOMATIC TRANSMISSION
FLUID CHECK
Have an authorized dealer check andchange the transmission fluid and filter atthe correct service interval. SeeScheduled Maintenance (page 440).
Do not use supplemental transmissionfluid additives, treatments or cleaningagents. The use of these materials mayaffect transmission operation and resultin damage to internal transmissioncomponents.
Checking Automatic TransmissionFluid (If Equipped)
For scheduled intervals of the fluid checksand changes, See ScheduledMaintenance (page 440). Yourtransmission does not consume fluid.However, the fluid level should be checkedif the transmission is not working properly,i.e., if the transmission slips or shifts slowlyor if you notice some sign of fluid leakage.
Automatic transmission fluid expandswhen warmed. To obtain an accurate fluidcheck, drive the vehicle until it is at normaloperating temperature (approximately19 mi (30 km)). Verify that thetransmission fluid temperature gauge,located on the instrument cluster, is withinnormal range.
1.Drive the vehicle 19 mi (30 km)until itreaches normal operating temperature.
2.Park the vehicle on a level surface andengage the parking brake.
3.With the engine running, parking brakeengaged and your foot on the brakepedal, move the gearshift lever throughall of the gear ranges. Allow sufficienttime for each gear to engage.
4.Latch the gearshift lever in P and leavethe engine running.
5.Remove the dipstick, wiping it cleanwith a clean, dry lint free rag. Ifnecessary, refer to the Under HoodOverview in this chapter for thelocation of the dipstick.
6.Install the dipstick making sure it is fullyseated in the filler tube.
7.Remove the dipstick and inspect thefluid level. The fluid should be in thedesignated area for normal operatingtemperature or ambient temperature.
Low Fluid Level
Type A
240Super Duty (), enUSAMaintenance
Page 246 of 470
TRANSFER CASE FLUID
CHECK
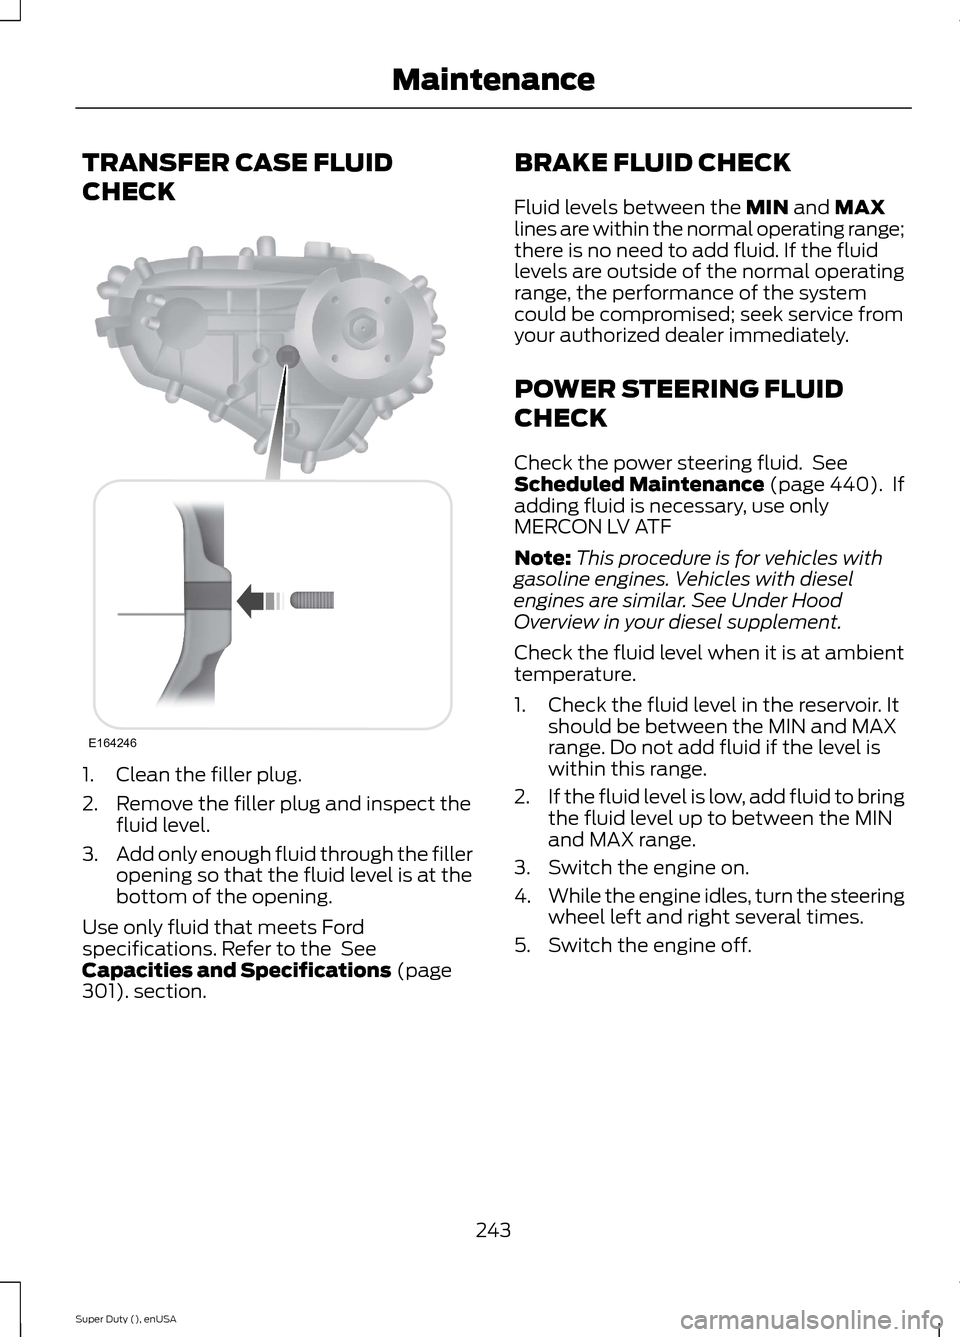
1.Clean the filler plug.
2.Remove the filler plug and inspect thefluid level.
3.Add only enough fluid through the filleropening so that the fluid level is at thebottom of the opening.
Use only fluid that meets Fordspecifications. Refer to the SeeCapacities and Specifications (page301).section.
BRAKE FLUID CHECK
Fluid levels between the MIN and MAXlines are within the normal operating range;there is no need to add fluid. If the fluidlevels are outside of the normal operatingrange, the performance of the systemcould be compromised; seek service fromyour authorized dealer immediately.
POWER STEERING FLUID
CHECK
Check the power steering fluid. SeeScheduled Maintenance (page 440). Ifadding fluid is necessary, use onlyMERCON LV ATF
Note:This procedure is for vehicles withgasoline engines. Vehicles with dieselengines are similar. See Under HoodOverview in your diesel supplement.
Check the fluid level when it is at ambienttemperature.
1.Check the fluid level in the reservoir. Itshould be between the MIN and MAXrange. Do not add fluid if the level iswithin this range.
2.If the fluid level is low, add fluid to bringthe fluid level up to between the MINand MAX range.
3.Switch the engine on.
4.While the engine idles, turn the steeringwheel left and right several times.
5.Switch the engine off.
243Super Duty (), enUSAMaintenanceE164246
Page 257 of 470
CHANGING THE ENGINE AIR
FILTER
WARNINGS
To reduce the risk of vehicle damageand personal burn injuries, do notstart your engine with the air cleanerremoved and do not remove it while theengine is running.
To reduce the risk of vehicle damageand personal burn injuries, do notstart your engine with the air cleanerremoved and do not remove it while theengine is running.
Note:Failure to use the correct air filterelement may result in severe enginedamage. The customer warranty may bevoid for any damage to the engine if thecorrect air filter element is not used.
When changing the air filter element, useonly the air filter element listed. SeeCapacities and Specifications (page301).
Change the air filter element at the properinterval. See Scheduled Maintenance(page 440).
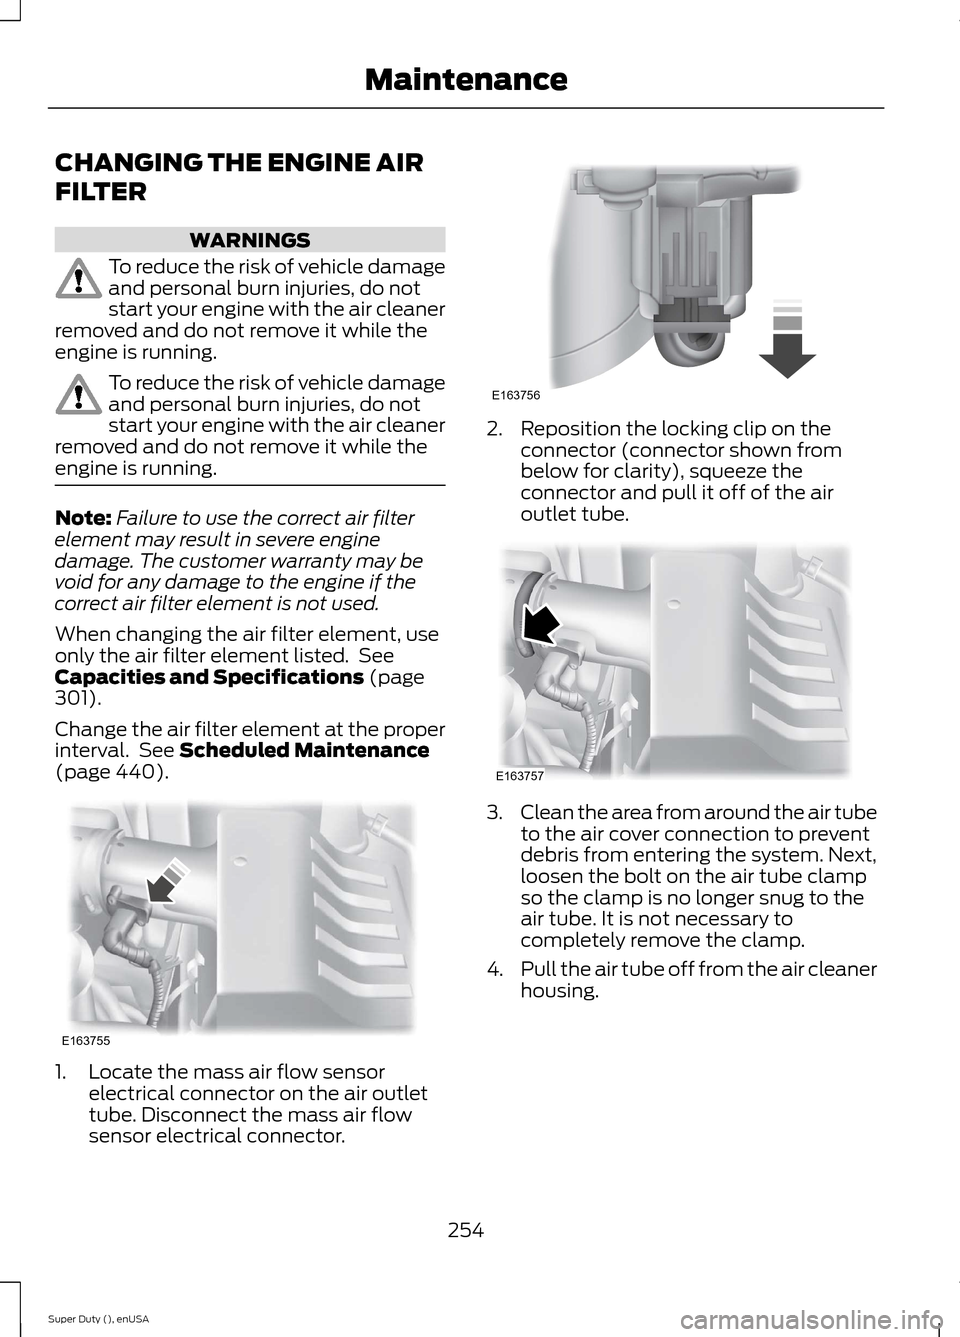
1.Locate the mass air flow sensorelectrical connector on the air outlettube. Disconnect the mass air flowsensor electrical connector.
2.Reposition the locking clip on theconnector (connector shown frombelow for clarity), squeeze theconnector and pull it off of the airoutlet tube.
3.Clean the area from around the air tubeto the air cover connection to preventdebris from entering the system. Next,loosen the bolt on the air tube clampso the clamp is no longer snug to theair tube. It is not necessary tocompletely remove the clamp.
4.Pull the air tube off from the air cleanerhousing.
254Super Duty (), enUSAMaintenanceE163755 E163756 E163757
Page 284 of 470
Note:If your tires show unevenwear ask an authorized dealer tocheck for and correct any wheelmisalignment, tire imbalance ormechanical problem involvedbefore tire rotation.
Note:Your vehicle may beequipped with a dissimilar sparewheel and tire assembly. Adissimilar spare wheel and tireassembly is defined as a sparewheel and tire assembly that isdifferent in brand, size orappearance from the road tires andwheels. If you have a dissimilarspare wheel and tire assembly it isintended for temporary use onlyand should not be used in a tirerotation.
Note:After having your tiresrotated, inflation pressure must bechecked and adjusted to thevehicle requirements.
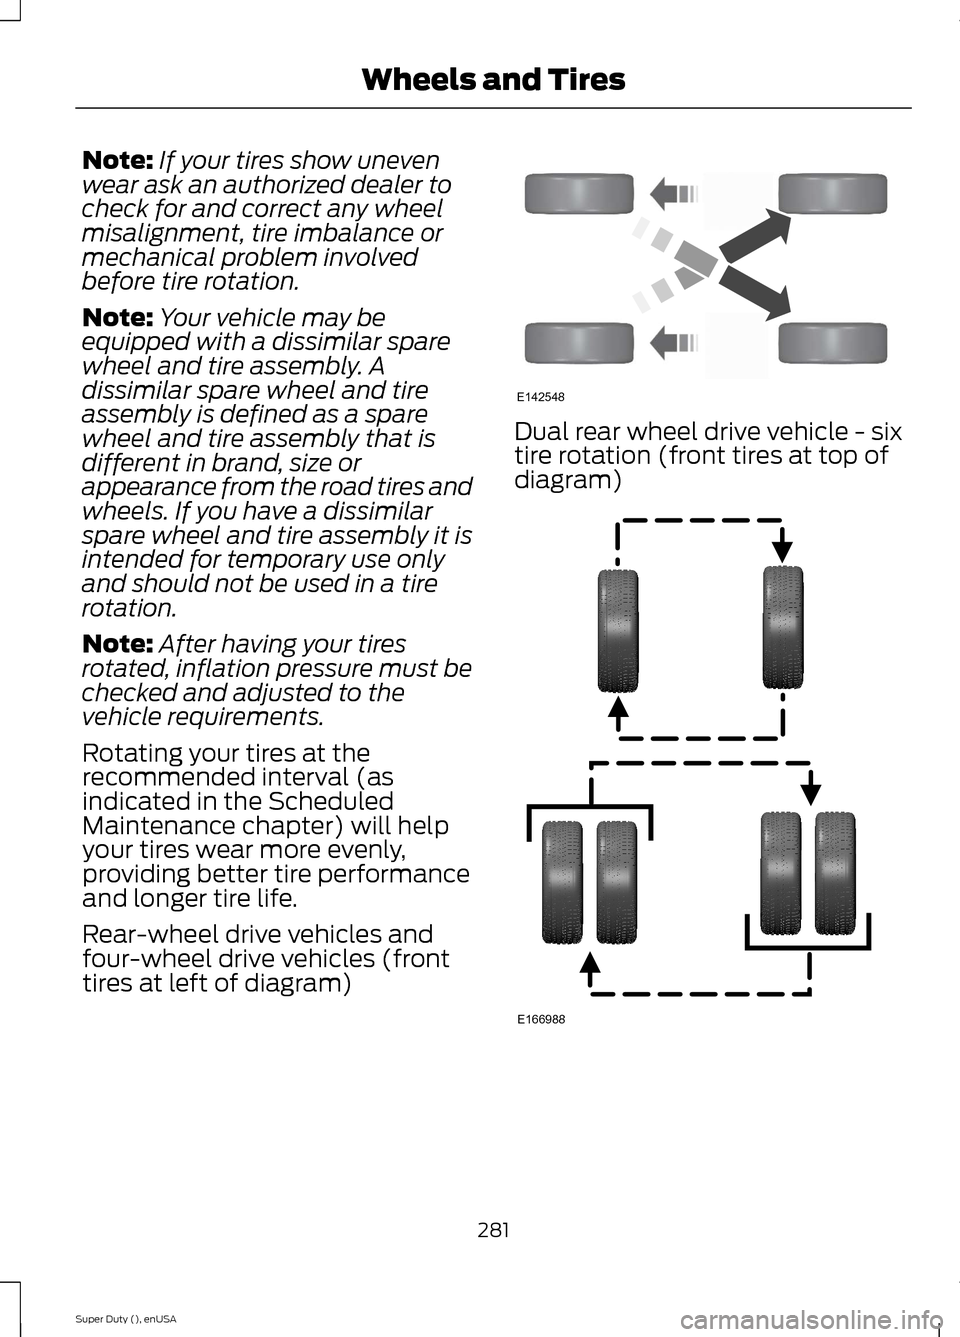
Rotating your tires at therecommended interval (asindicated in the ScheduledMaintenance chapter) will helpyour tires wear more evenly,providing better tire performanceand longer tire life.
Rear-wheel drive vehicles andfour-wheel drive vehicles (fronttires at left of diagram)
Dual rear wheel drive vehicle - sixtire rotation (front tires at top ofdiagram)
281Super Duty (), enUSAWheels and TiresE142548 E166988