2015 FORD MUSTANG clock
[x] Cancel search: clockPage 241 of 441
5. Remove the warning sticker found on
the casing/housing and place it on the
top of the instrument panel or the
center of the dash.
6. Start the vehicle and leave the engine running so the compressor does not
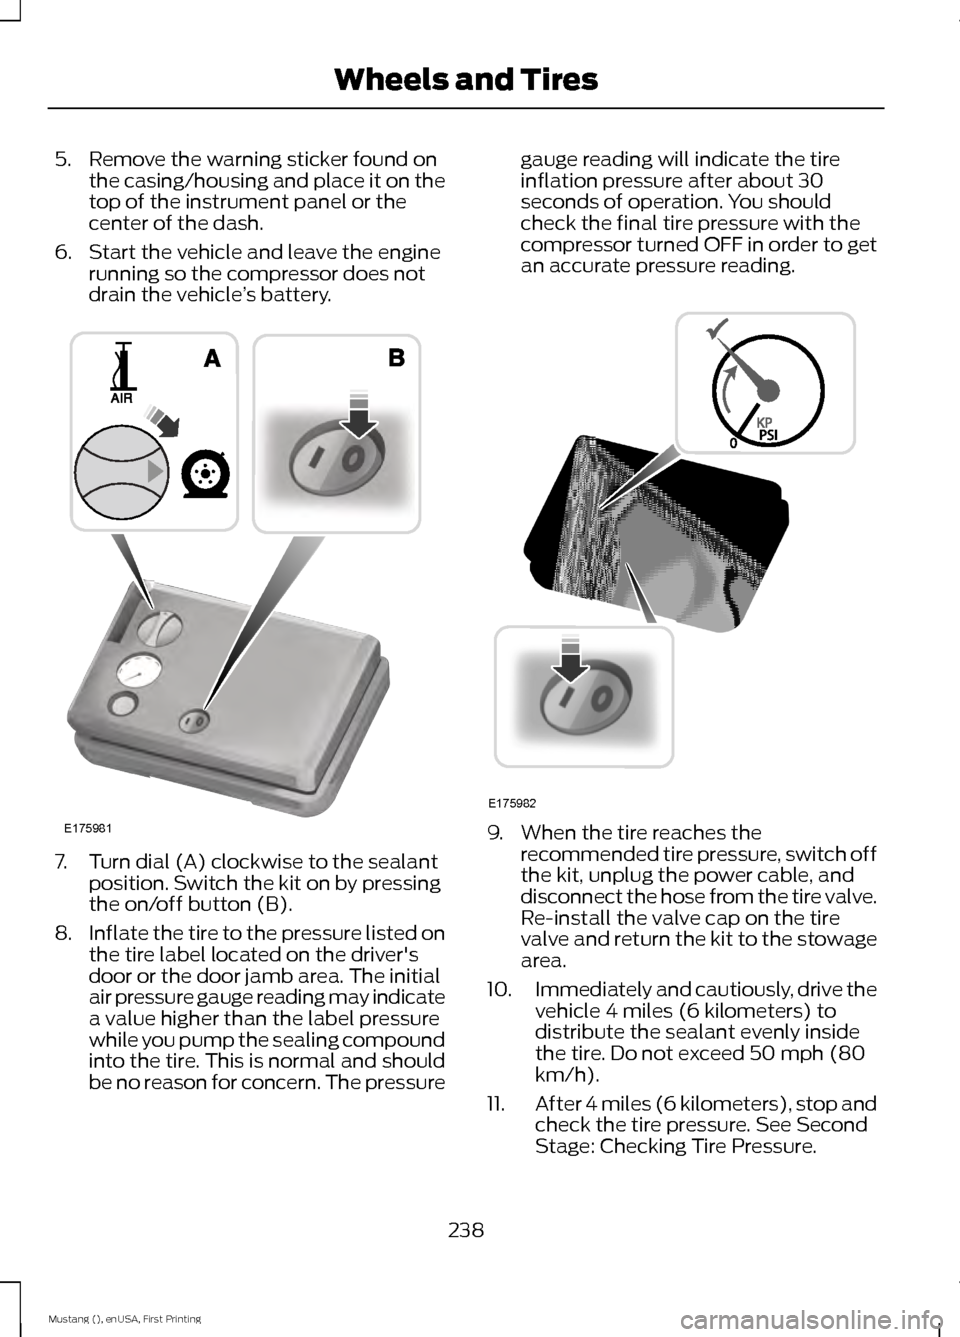
drain the vehicle ’s battery. 7. Turn dial (A) clockwise to the sealant
position. Switch the kit on by pressing
the on/off button (B).
8. Inflate the tire to the pressure listed on
the tire label located on the driver's
door or the door jamb area. The initial
air pressure gauge reading may indicate
a value higher than the label pressure
while you pump the sealing compound
into the tire. This is normal and should
be no reason for concern. The pressure gauge reading will indicate the tire
inflation pressure after about 30
seconds of operation. You should
check the final tire pressure with the
compressor turned OFF in order to get
an accurate pressure reading.
9. When the tire reaches the
recommended tire pressure, switch off
the kit, unplug the power cable, and
disconnect the hose from the tire valve.
Re-install the valve cap on the tire
valve and return the kit to the stowage
area.
10. Immediately and cautiously, drive the
vehicle 4 miles (6 kilometers) to
distribute the sealant evenly inside
the tire. Do not exceed 50 mph (80
km/h).
11. After 4 miles (6 kilometers), stop and
check the tire pressure. See Second
Stage: Checking Tire Pressure.
238
Mustang (), enUSA, First Printing Wheels and TiresE175981 E175982
Page 242 of 441
Note:
If you experience any unusual
vibration, ride disturbance or noise while
driving, reduce your speed until you can
safely pull off to the side of the road to call
for roadside assistance. Note: Do not
proceed to the second stage of this
operation.
Second Stage: Checking Tire
Pressure WARNINGS
If you are proceeding from the First
Stage: Re-inflating the Tire with
Sealing Compound and Air section
and have injected sealant in the tire and
the pressure is below 20 psi (1.4 bar),
continue to the next step. The power plug may get hot after use
and should be handled carefully
while unplugging.
Check the air pressure of your tires as
follows:
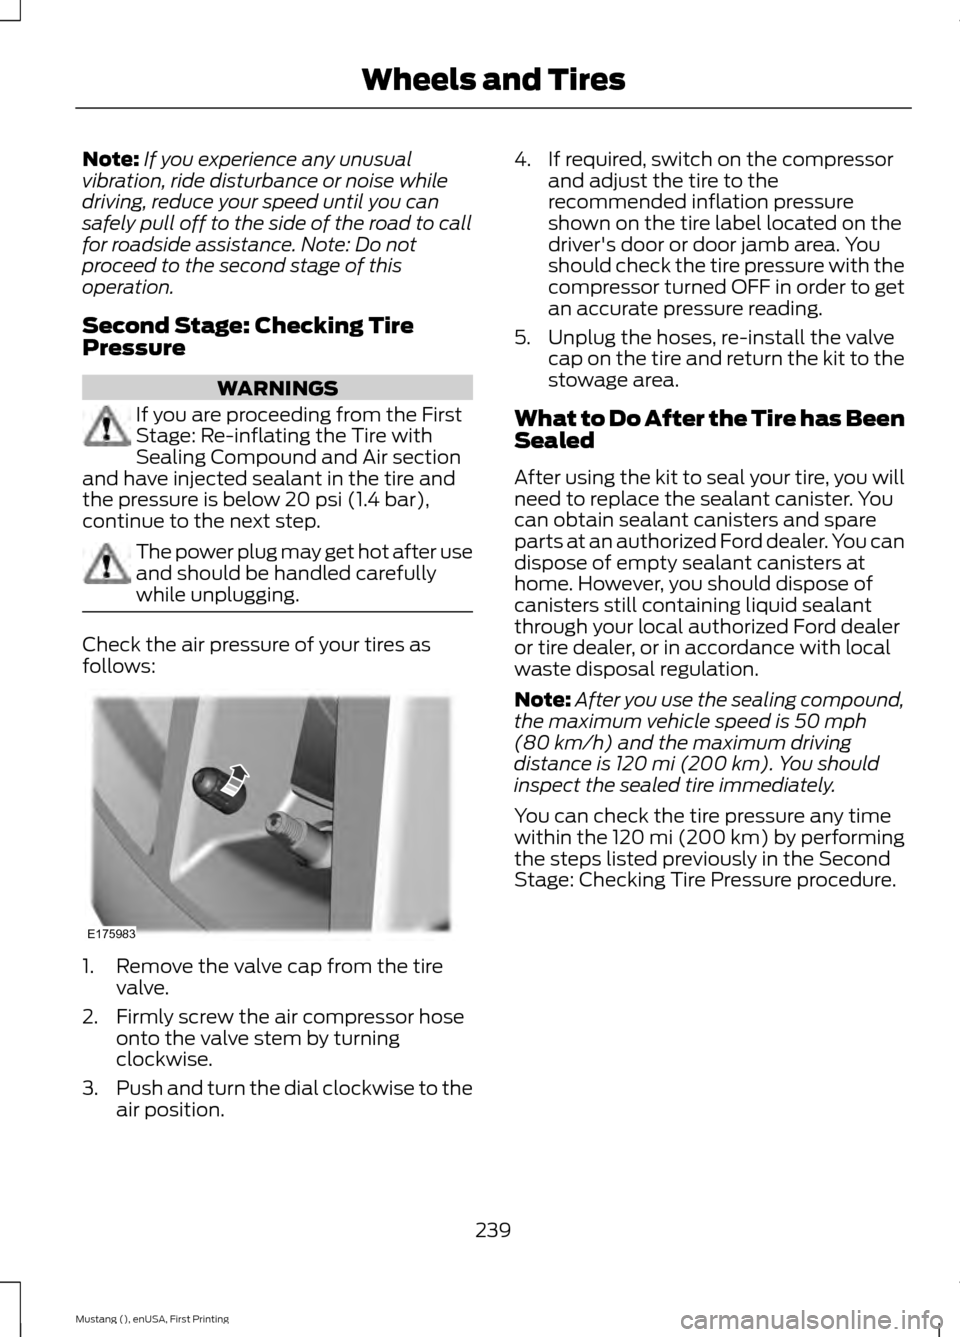
1. Remove the valve cap from the tire
valve.
2. Firmly screw the air compressor hose onto the valve stem by turning
clockwise.
3. Push and turn the dial clockwise to the
air position. 4. If required, switch on the compressor
and adjust the tire to the
recommended inflation pressure
shown on the tire label located on the
driver's door or door jamb area. You
should check the tire pressure with the
compressor turned OFF in order to get
an accurate pressure reading.
5. Unplug the hoses, re-install the valve cap on the tire and return the kit to the
stowage area.
What to Do After the Tire has Been
Sealed
After using the kit to seal your tire, you will
need to replace the sealant canister. You
can obtain sealant canisters and spare
parts at an authorized Ford dealer. You can
dispose of empty sealant canisters at
home. However, you should dispose of
canisters still containing liquid sealant
through your local authorized Ford dealer
or tire dealer, or in accordance with local
waste disposal regulation.
Note: After you use the sealing compound,
the maximum vehicle speed is
50 mph
(80 km/h) and the maximum driving
distance is 120 mi (200 km). You should
inspect the sealed tire immediately.
You can check the tire pressure any time
within the 120 mi (200 km) by performing
the steps listed previously in the Second
Stage: Checking Tire Pressure procedure.
239
Mustang (), enUSA, First Printing Wheels and TiresE175983
Page 266 of 441
4.
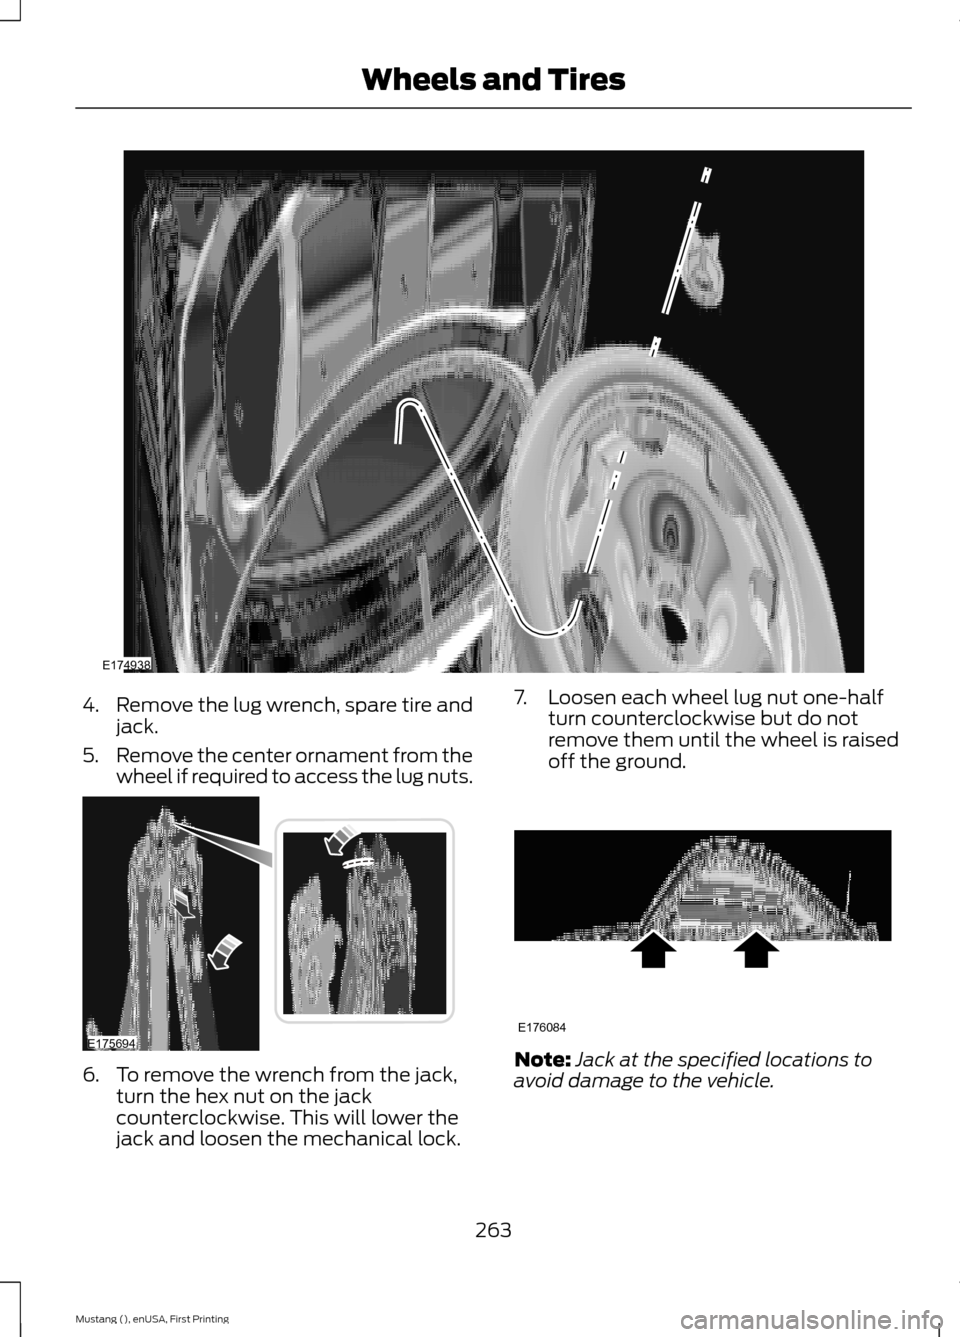
Remove the lug wrench, spare tire and
jack.
5. Remove the center ornament from the
wheel if required to access the lug nuts. 6. To remove the wrench from the jack,
turn the hex nut on the jack
counterclockwise. This will lower the
jack and loosen the mechanical lock. 7. Loosen each wheel lug nut one-half
turn counterclockwise but do not
remove them until the wheel is raised
off the ground. Note:
Jack at the specified locations to
avoid damage to the vehicle.
263
Mustang (), enUSA, First Printing Wheels and TiresE174938 E175694 E176084
Page 267 of 441

8. The vehicle jacking points are shown
here, and can be identified by the
triangle markings on the vehicle. Details
are depicted on the warning label on
the jack. 9.
Place the jack at the jacking point next
to the tire you are changing. Turn the
jack handle clockwise until the wheel
is completely off the ground.
10. Remove the lug nuts with the lug wrench.
11. Replace the flat tire with the spare tire, making sure the valve stem is
facing outward. Reinstall lug nuts
until the wheel is snug against the
hub. Do not fully tighten the lug nuts
until the wheel has been lowered. If
you are using the temporary tire, the
lug nut washers will not appear to be
flush with the rim. This is normal only
when using the temporary spare tire. 12. Lower the wheel by turning the jack
handle counterclockwise. 13.
Remove the jack and fully tighten the
lug nuts in the order shown. See
Technical Specifications (page
266).
14. To store the folded wrench on the jack, engage the bracket of the jack
base on the wrench feature as shown.
Swing the wrench upwards and
adjust the height of the jack until the
pin engages the hole. Tighten the hex
nut clockwise by hand until secure.
264
Mustang (), enUSA, First Printing Wheels and TiresE174939 12
3
4
5
E75442
Page 289 of 441
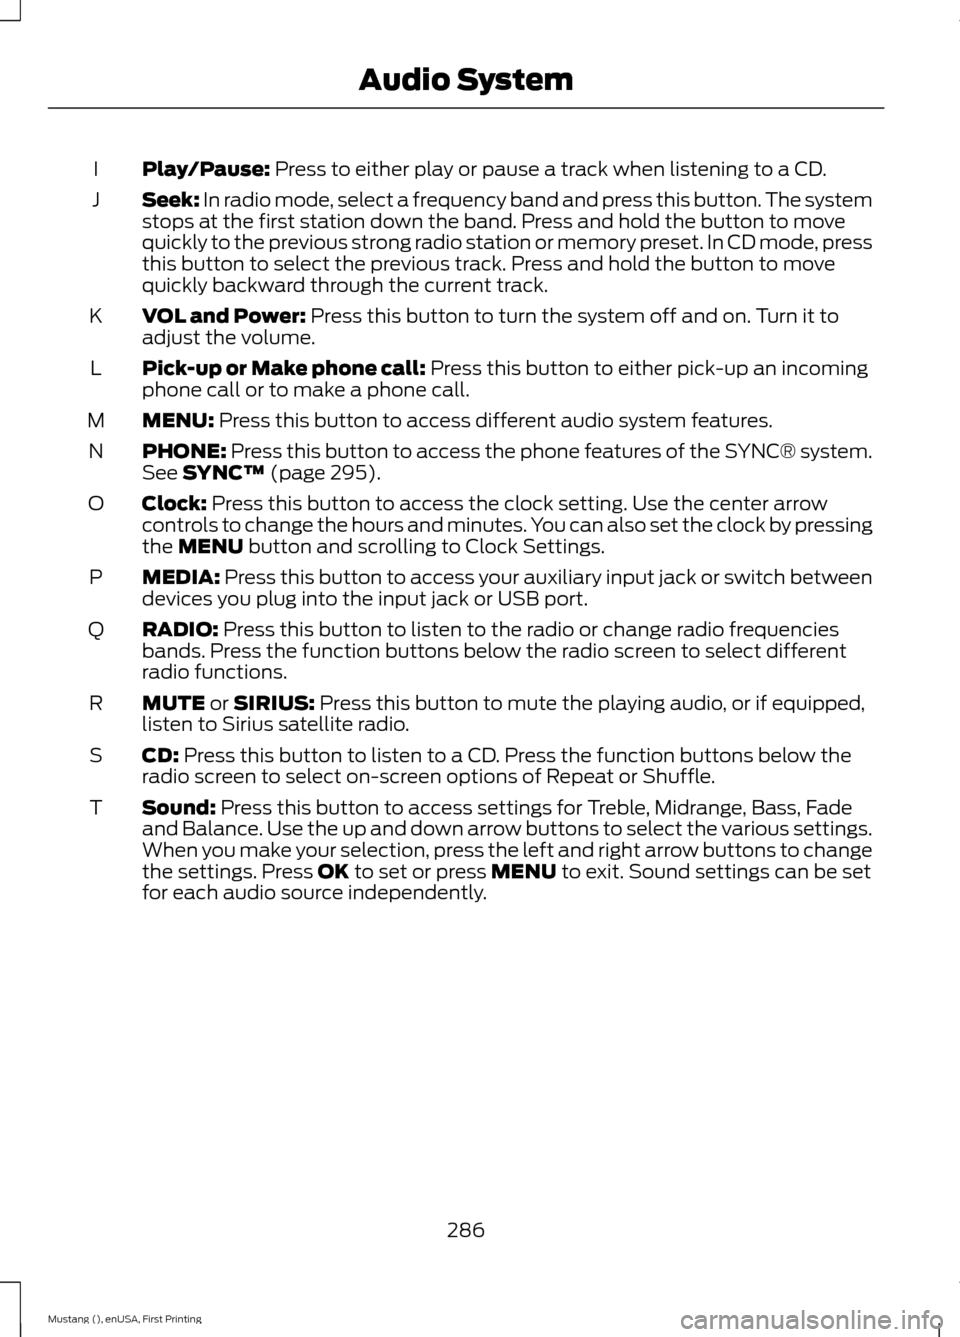
Play/Pause: Press to either play or pause a track when listening to a CD.
I
Seek:
In radio mode, select a frequency band and press this button. The system
stops at the first station down the band. Press and hold the button to move
quickly to the previous strong radio station or memory preset. In CD mode, press
this button to select the previous track. Press and hold the button to move
quickly backward through the current track.
J
VOL and Power:
Press this button to turn the system off and on. Turn it to
adjust the volume.
K
Pick-up or Make phone call:
Press this button to either pick-up an incoming
phone call or to make a phone call.
L
MENU:
Press this button to access different audio system features.
M
PHONE:
Press this button to access the phone features of the SYNC® system.
See SYNC™ (page 295).
N
Clock:
Press this button to access the clock setting. Use the center arrow
controls to change the hours and minutes. You can also set the clock by pressing
the
MENU button and scrolling to Clock Settings.
O
MEDIA:
Press this button to access your auxiliary input jack or switch between
devices you plug into the input jack or USB port.
P
RADIO:
Press this button to listen to the radio or change radio frequencies
bands. Press the function buttons below the radio screen to select different
radio functions.
Q
MUTE
or SIRIUS: Press this button to mute the playing audio, or if equipped,
listen to Sirius satellite radio.
R
CD:
Press this button to listen to a CD. Press the function buttons below the
radio screen to select on-screen options of Repeat or Shuffle.
S
Sound:
Press this button to access settings for Treble, Midrange, Bass, Fade
and Balance. Use the up and down arrow buttons to select the various settings.
When you make your selection, press the left and right arrow buttons to change
the settings. Press
OK to set or press MENU to exit. Sound settings can be set
for each audio source independently.
T
286
Mustang (), enUSA, First Printing Audio System
Page 338 of 441
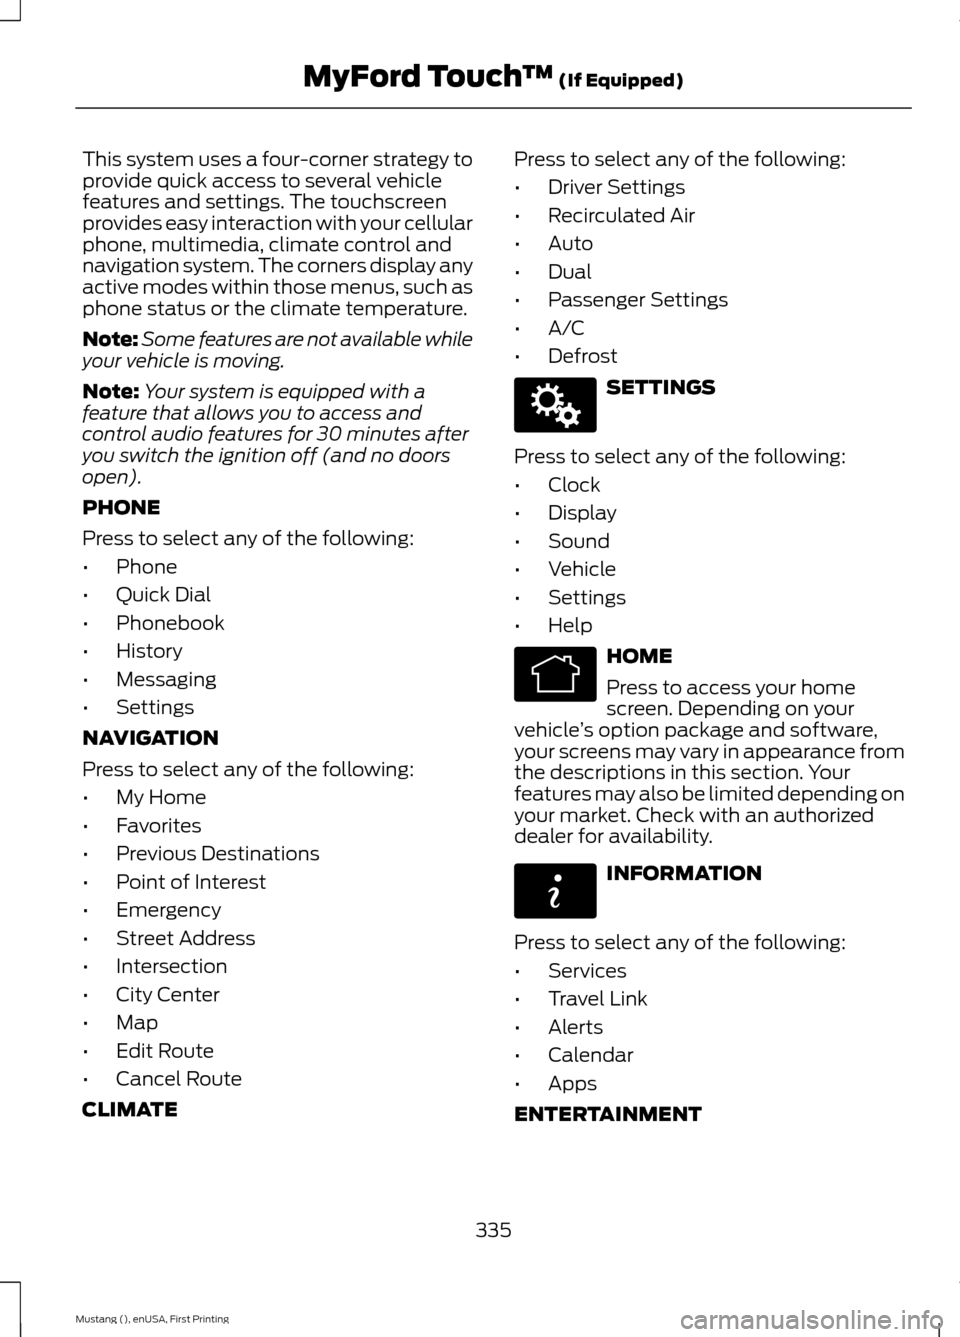
This system uses a four-corner strategy to
provide quick access to several vehicle
features and settings. The touchscreen
provides easy interaction with your cellular
phone, multimedia, climate control and
navigation system. The corners display any
active modes within those menus, such as
phone status or the climate temperature.
Note:
Some features are not available while
your vehicle is moving.
Note: Your system is equipped with a
feature that allows you to access and
control audio features for 30 minutes after
you switch the ignition off (and no doors
open).
PHONE
Press to select any of the following:
• Phone
• Quick Dial
• Phonebook
• History
• Messaging
• Settings
NAVIGATION
Press to select any of the following:
• My Home
• Favorites
• Previous Destinations
• Point of Interest
• Emergency
• Street Address
• Intersection
• City Center
• Map
• Edit Route
• Cancel Route
CLIMATE Press to select any of the following:
•
Driver Settings
• Recirculated Air
• Auto
• Dual
• Passenger Settings
• A/C
• Defrost SETTINGS
Press to select any of the following:
• Clock
• Display
• Sound
• Vehicle
• Settings
• Help HOME
Press to access your home
screen. Depending on your
vehicle ’s option package and software,
your screens may vary in appearance from
the descriptions in this section. Your
features may also be limited depending on
your market. Check with an authorized
dealer for availability. INFORMATION
Press to select any of the following:
• Services
• Travel Link
• Alerts
• Calendar
• Apps
ENTERTAINMENT
335
Mustang (), enUSA, First Printing MyFord Touch
™ (If Equipped)E142607 E142613 E142608
Page 344 of 441
Voice settings using voice commands
"Interaction mode novice"
"Media candidate lists off" "Media candidate lists on"
"Phone candidate lists off" "Phone candidate lists on" "Help" Using Voice Commands with the
Touchscreen Options
Your voice system has a dual mode feature
which allows you to switch between using
voice commands and making on-screen
selections. This is available only when the
system displays a list of candidates
generated during a voice session. For
example, when entering in a street address
or trying to call a contact from the phone
you paired to the system.
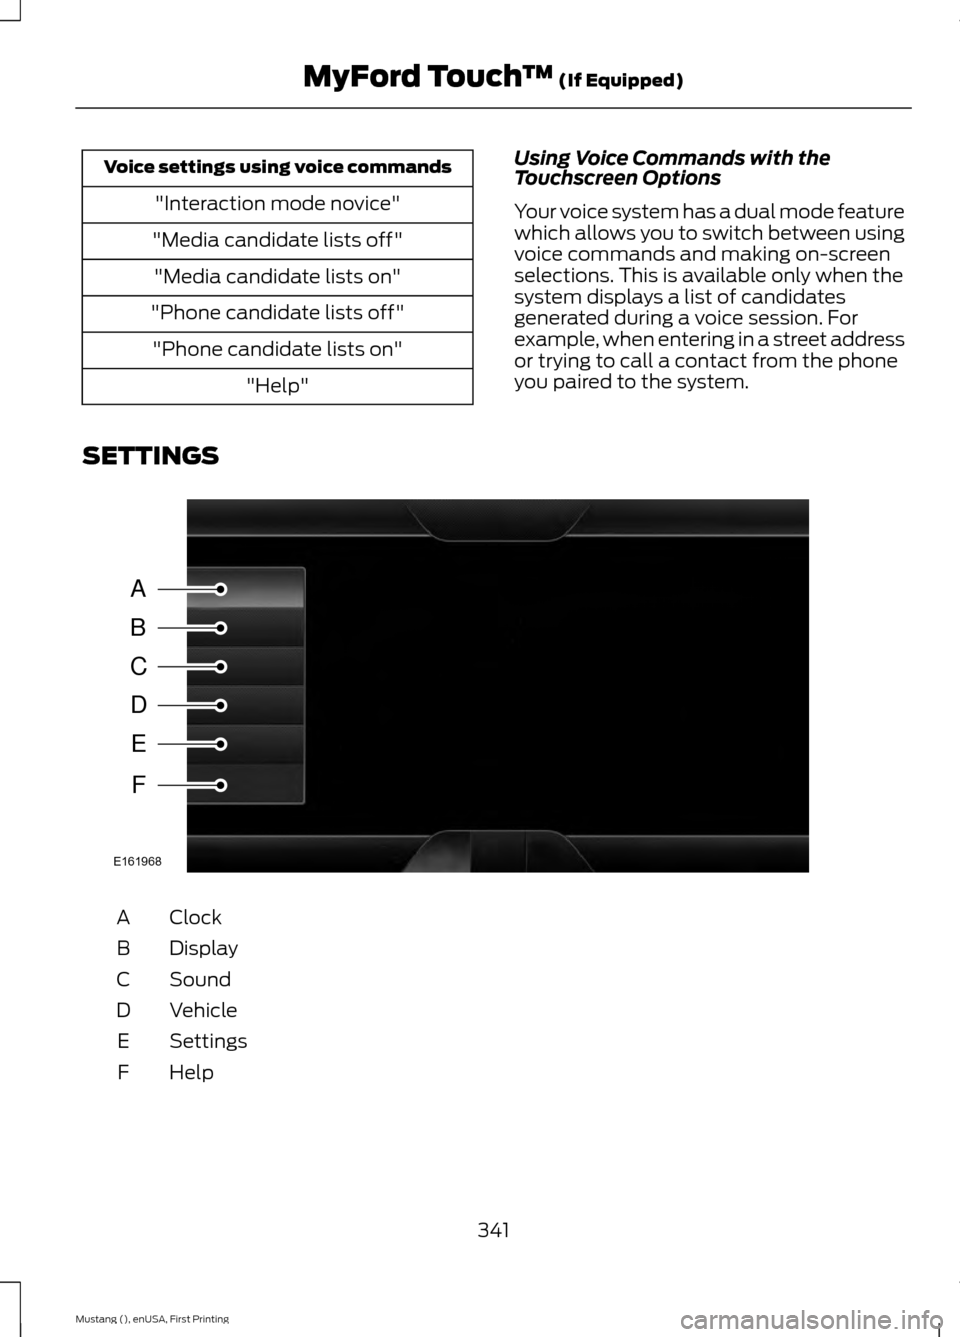
SETTINGS Clock
A
Display
B
Sound
C
Vehicle
D
Settings
E
HelpF
341
Mustang (), enUSA, First Printing MyFord Touch
™ (If Equipped)A
B
C
D
E
F
E161968
Page 345 of 441
Under this menu, you can set
your clock, access and adjust the
display, sound and vehicle
settings as well as access settings for
specific modes or the help feature.
Clock
Note: You cannot manually set the date.
Your vehicle ’s GPS does this for you.
Note: If the battery has been disconnected,
your vehicle needs to acquire a GPS signal
to update the clock. Once your vehicle
acquires the signal, it may take a few
minutes for the update to display the correct
time. 1. Press the Settings icon > Clock.
2. Press
+ and - to adjust the time.
From this screen, you can also make other
adjustments such as 12-hour or 24-hour
mode, activate GPS time synchronization
and have the system automatically update
new time zones.
You can also switch the outside air
temperature display off and on. It appears
at the top center of the touchscreen, next
to the time and date.
The system automatically saves any
updates you make to the settings.
Display
You can adjust the touchscreen display
through the touchscreen or by pressing the
voice button on your steering wheel
controls and when prompted, say, "Display
settings". Press the Settings icon >
Display
, to access and make
adjustments using the
touchscreen. •
Brightness
allows you to make the
screen display brighter or dimmer.
• Auto DIM
, when set to On, lets you use
the Auto Dim Manual Offset feature.
When set to
Off, screen brightness
does not change.
• Mode
allows you to set the screen to
a certain brightness or have the system
automatically change based on the
outside light level, or switch the display
off.
• If you select
AUTO or NIGHT, you
have the options of switching the
display's Auto Dim feature on or off
and changing the Auto Dim Manual
Offset feature.
• Auto Dim Manual Offset
allows you
to adjust screen dimming as the
outside lighting conditions change from
day to night. This feature also allows
you to adjust screen brightness using
the instrument panel dimming control.
• Edit Wallpaper
•You can have your touchscreen
display the default photo or upload
your own.
Uploading Photos for Your Home
Screen Wallpaper
Note: You cannot load photos directly from
your camera. You must access the photos
either from your USB mass storage device
or from an SD card.
Note: Photographs with extremely large
dimensions (such as 2048 x 1536) may not
be compatible and appear as a blank
(black) image on the display.
Your system allows you to upload and view
up to 32 photos. To access, press the Settings
icon >
Display > Edit
Wallpaper, and then follow the
system prompts to upload your
photographs.
342
Mustang (), enUSA, First Printing MyFord Touch
™
(If Equipped)E142607 E142607 E142607 E142607