2015 FORD FOCUS light
[x] Cancel search: lightPage 152 of 453
PARKING BRAKE
Vehicles With Automatic
Transmission
WARNING
Always set the parking brake fully
and leave your vehicle with the
transmission selector lever in
position P. Note:
If you park your vehicle on a hill and
facing uphill move the transmission selector
lever to position P and turn the steering
wheel away from the curb.
Note: If you park your vehicle on a hill and
facing downhill move the transmission
selector lever to position P and turn the
steering wheel toward the curb.
Vehicles With Manual
Transmission WARNING
Always set the parking brake fully.
Note:
If you park your vehicle on a hill and
facing uphill select first gear and turn the
steering wheel away from the curb.
Note: If you park your vehicle on a hill and
facing downhill select reverse gear and turn
the steering wheel toward the curb.
All Vehicles
Note: Do not press the release button while
pulling the lever up.
To apply the parking brake:
1. Press the foot brake pedal firmly.
2. Pull the parking brake lever up to its fullest extent.
To release the parking brake: 1. Press the brake pedal firmly.
2. Pull the lever up slightly.
3. Press the release button and push the
lever down.
HILL START ASSIST WARNINGS
The system does not replace the
parking brake. When you leave your
vehicle, always apply the parking
brake and shift the transmission into park
(P) for automatic transmission or first gear
for manual transmission. You must remain in your vehicle once
you have activated the system.
During all times, you are responsible
for controlling your vehicle,
supervising the system and
intervening, if required. If the engine is revved excessively, or
if a malfunction is detected, the
system will be deactivated.
The system makes it easier to pull away
when your vehicle is on a slope without the
need to use the parking brake.
When the system is active, your vehicle will
remain stationary on the slope for two to
three seconds after you release the brake
pedal. This allows you time to move your
foot from the brake to the accelerator
pedal. The brakes are released
automatically once the engine has
developed sufficient drive to prevent your
vehicle from rolling down the slope. This
is an advantage when pulling away on a
slope, for example from a car park ramp,
traffic lights or when reversing uphill into
a parking space.
149
Focus (CDH), enUSA, First Printing Brakes
Page 154 of 453
PRINCIPLE OF OPERATION
The traction control system helps avoid
drive wheel spin and loss of traction.
If your vehicle begins to slide, the system
applies the brakes to individual wheels
and, when needed, reduces engine power
at the same time. If the wheels spin when
accelerating on slippery or loose surfaces,
the system reduces engine power in order
to increase traction.
USING TRACTION CONTROL
In certain situations for example, stuck in
snow or mud, turning the traction control
off may be beneficial as this allows the
wheels to spin with full engine power.
Depending on the type of system you have
on your vehicle, you can either turn the
system off using the information display
or by pressing the button.
Switching the System Off Using
the Information Display Controls
(If Equipped)
Your vehicle comes with this feature
already enabled. If required, you can switch
this feature off using the information
display controls. See (page 96).
Switching the System Off Using a
Switch
(If Equipped)
The button is located in the instrument
panel.
Press the button. You will see a message
in conjunction with an illuminated icon in
the display. Press the button again to
return the system to normal mode.
When you switch the traction control
system off, stability control remains fully
active. System Indicator Lights and
Messages WARNING
If a failure has been detected within
the AdvanceTrac system, the
stability control light will illuminate
steadily. Verify that the AdvanceTrac
system was not manually disabled through
the information display. If the stability
control light still illuminates steadily, have
the system serviced by an authorized
dealer immediately. Operating your vehicle
with AdvanceTrac disabled could lead to
an increased risk of loss of vehicle control,
vehicle rollover, personal injury and death. The stability control light
temporarily illuminates on
engine start-up and flashes
when a driving condition activates the
stability system. The stability control off light
temporarily illuminates on
engine start-up and stays on
when you turn the traction control system
off.
When you turn the traction control system
off or on, a message appears in the
information display showing system status.
151
Focus (CDH), enUSA, First Printing Traction ControlE138639
Page 164 of 453
Always use caution while reversing.
Objects in the red zone are closest to your
vehicle and objects in the green zone are
farther away. Objects are getting closer to
your vehicle as they move from the green
zone to the yellow or red zones. Use the
side view mirrors and rear view mirror to
get better coverage on both sides and rear
of your vehicle.
Manual Zoom
WARNING
When manual zoom is on, the full
area behind your vehicle may not
show. Be aware of your surroundings
when using the manual zoom feature. Note:
Manual zoom is only available when
the transmission is in reverse (R).
Note: When you enable manual zoom, only
the centerline is shown.
Selectable settings for this feature are
Zoom in (+) and Zoom out (-). Press the
symbol in the camera screen to change the
view. The default setting is Zoom OFF.
This allows you to get a closer view of an
object behind your vehicle. The zoomed
image keeps the bumper in the image to
provide a reference. The zoom is only
active while the transmission is in reverse
(R).
Camera System Settings
To access any of the rear view camera
system settings, make the following
selections in the multifunctional display
when the transmission is not in reverse (R):
• With Touch Screen: Settings > Vehicle
> Camera Settings
• Without Touch Screen: Menu > Camera
Settings Enhanced Park Aids or Park Pilot (If
Equipped)
Selectable settings for this feature are ON
and OFF.
The system uses red, yellow and green
highlights that appear on top of the video
image when any of the sensing systems
detect an object.
Rear Camera Delay
Selectable settings for this feature are ON
and OFF.
The default setting for the rear camera
delay is OFF.
When shifting the transmission out of
reverse (R) and into any gear other than
park (P), the camera image remains in the
display until:
•
Your vehicle speed sufficiently
increases.
• You shift your vehicle into park (P).
• 10 seconds of time elapse.
161
Focus (CDH), enUSA, First Printing Parking Aids
Page 166 of 453
LANE KEEPING SYSTEM (If
Equipped) WARNINGS
The system does not relieve you of
your responsibility to drive with due
care and attention.
At all times you are responsible for
controlling your vehicle, supervising
the system and intervening if
required. If the sensor becomes blocked the
system may not function.
In cold and severe weather
conditions the system may not
function. Rain, snow, spray can all
limit sensor performance. Large contrasts in lighting can limit
sensor performance.
The system will not operate if the
sensor cannot track the road lane
markings.
Do not carry out windshield repairs
in the immediate area surrounding
the sensor.
Note:
The system works above
40 mph
(64 km/h).
Note: The system works as long as the
camera can detect one lane marking.
Note: The system may not function if the
camera is blocked or there is damage to the
windshield.
Note: When Aid mode is on and the system
detects no steering activity for a short
period, the system will alert you to put your
hands on the steering wheel. The system
may detect a light grip or touch on the
steering wheel as hands off driving. The system notifies you to stay in your lane
through the steering system and the
instrument cluster display when the front
camera detects an unintentional drift out
of your lane is likely to occur. The system
automatically detects and tracks the road
lane markings using a camera mounted
behind the interior rear view mirror.
Switching the System On and Off
Note:
The system on or off setting is stored
until it is manually changed, unless a MyKey
is detected. If the system detects a MyKey
it defaults to on and the mode is set to Alert.
Note: If a MyKey is detected, pressing the
button will not affect the on or off status of
the system. You can only change the Mode
and Intensity settings. Press the button located on the
left steering wheel stalk to
switch the system on or off.
System Settings
The system has optional setting menus
available. To view or adjust the settings,
See General Information (page 96). The
system stores the last-known selection for
each of these settings. You do not need to
readjust your settings each time you turn
on the system.
Mode: This setting allows you to select
which of the system features you can
enable.
163
Focus (CDH), enUSA, First Printing Driving AidsE144813
Page 169 of 453

Why is the feature not available (line markings are gray) when I can see the lane markings
on the road?
Ambiguous lane markings (mainly in construction zones)
Rapid transition from light to dark or vice versa
Sudden offset in lane markings
ABS or AdvanceTrac activation
Camera blockage due to dirt, grime, fog, frost or water on the windshield
Driving too close to the vehicle in front of you
Transitioning between no lane markings to lane markings or vice versa
Standing water on the road
Faint lane markings (partial yellow lane markings on concrete roads)
Lane width too narrow or too wide
Camera not calibrated after a windshield replacement
Driving on tight roads or on uneven roads Why does the vehicle not come back into the middle of the lane always, as expected, in
the Aid or Aid + Alert mode?
High cross winds
Large road crown
Rough roads, grooves, shoulder drop-offs
Heavy uneven loading of the vehicle or improper tire inflation pressure
If the tires have been exchanged (including snow tires), or the suspension has been
modified
166
Focus (CDH), enUSA, First Printing Driving Aids
Page 172 of 453

Zone coverage also decreases when
parking at shallow angles. Here, the left
sensor is mostly obstructed; zone coverage
on that side is severely limited.
System Lights and Messages
The Blind Spot Information and Cross
Traffic Alert systems illuminate a yellow
alert indicator in the outside mirror on the
side of your vehicle the approaching
vehicle is coming from.
Note:
The alert indicator dims when the
system detects nighttime darkness. Cross Traffic Alert also sounds a series of
tones and a message appears in the
information display indicating a vehicle is
coming from the right or left. Cross Traffic
Alert works with the reverse sensing
system that sounds its own series of tones.
See Rear Parking Aid (page 153).
System Sensors WARNING
Just prior to the system recognizing
a blocked condition and alerting the
driver, the number of missed objects
will increase. To help avoid injuries, NEVER
use the Blind Spot Information System as
a replacement for using the side and rear
view mirrors and looking over your shoulder
before changing lanes. The Blind Spot
Information System is not a replacement
for careful driving. Note:
It is possible to get a blockage
warning with no blockage present; this is
rare and known as a false blockage warning.
A false blocked condition either
self-corrects or clears after a key cycle.
169
Focus (CDH), enUSA, First Printing Driving AidsE142441 E142442
Page 189 of 453

BREAKING-IN
You need to break in new tires for
approximately 300 miles (480
kilometers). During this time, your vehicle
may exhibit some unusual driving
characteristics.
Avoid driving too fast during the first 1000
miles (1600 kilometers). Vary your speed
frequently and change up through the
gears early. Do not labor the engine.
Do not tow during the first 1000 miles
(1600 kilometers).
ECONOMICAL DRIVING
Fuel economy is affected by several things
such as how you drive, the conditions you
drive under and how you maintain your
vehicle.
There are some things to keep in mind that
may improve your fuel economy:
•
Accelerate and slow down in a smooth,
moderate fashion.
• Drive at steady speeds.
• Anticipate stops; slowing down may
eliminate the need to stop.
• Combine errands and minimize
stop-and-go driving.
•When running errands, go to the
furthest destination first and then
work your way back home.
• Close the windows for high-speed
driving.
• Drive at reasonable speeds. (Traveling
at 65 mph/105 kph uses about 15%
less fuel than traveling at 75 mph/121
kph).
• Keep the tires properly inflated and use
only the recommended size. •
Use the recommended engine oil.
• Perform all regularly scheduled
maintenance.
There are also some things you may want
to avoid doing because they reduce your
fuel economy:
• Avoid sudden or hard accelerations.
• Avoid revving the engine before turning
off the car.
• Avoid long idle periods.
• Do not warm up your vehicle on cold
mornings.
• Reduce the use of air conditioning and
heat.
• Avoid using speed control in hilly
terrain.
• Do not rest your foot on the brake
pedal while driving.
• Avoid carrying unnecessary weight
(approximately 1 mpg [0.4
kilometers/liter] is lost for every 400
lbs [180 kilograms] of weight carried).
• Avoid adding particular accessories to
your vehicle (e.g. bug deflectors,
rollbars/light bars, running boards, ski
racks).
• Avoid driving with the wheels out of
alignment.
COLD WEATHER
PRECAUTIONS
The functional operation of some
components and systems can be affected
at temperatures below -13°F (-25°C).
DRIVING THROUGH WATER WARNING
Do not drive through flowing or deep
water as you may lose control of your
vehicle.
186
Focus (CDH), enUSA, First Printing Driving Hints
Page 190 of 453
Note:
Driving through standing water can
cause vehicle damage.
Note: Engine damage can occur if water
enters the air filter.
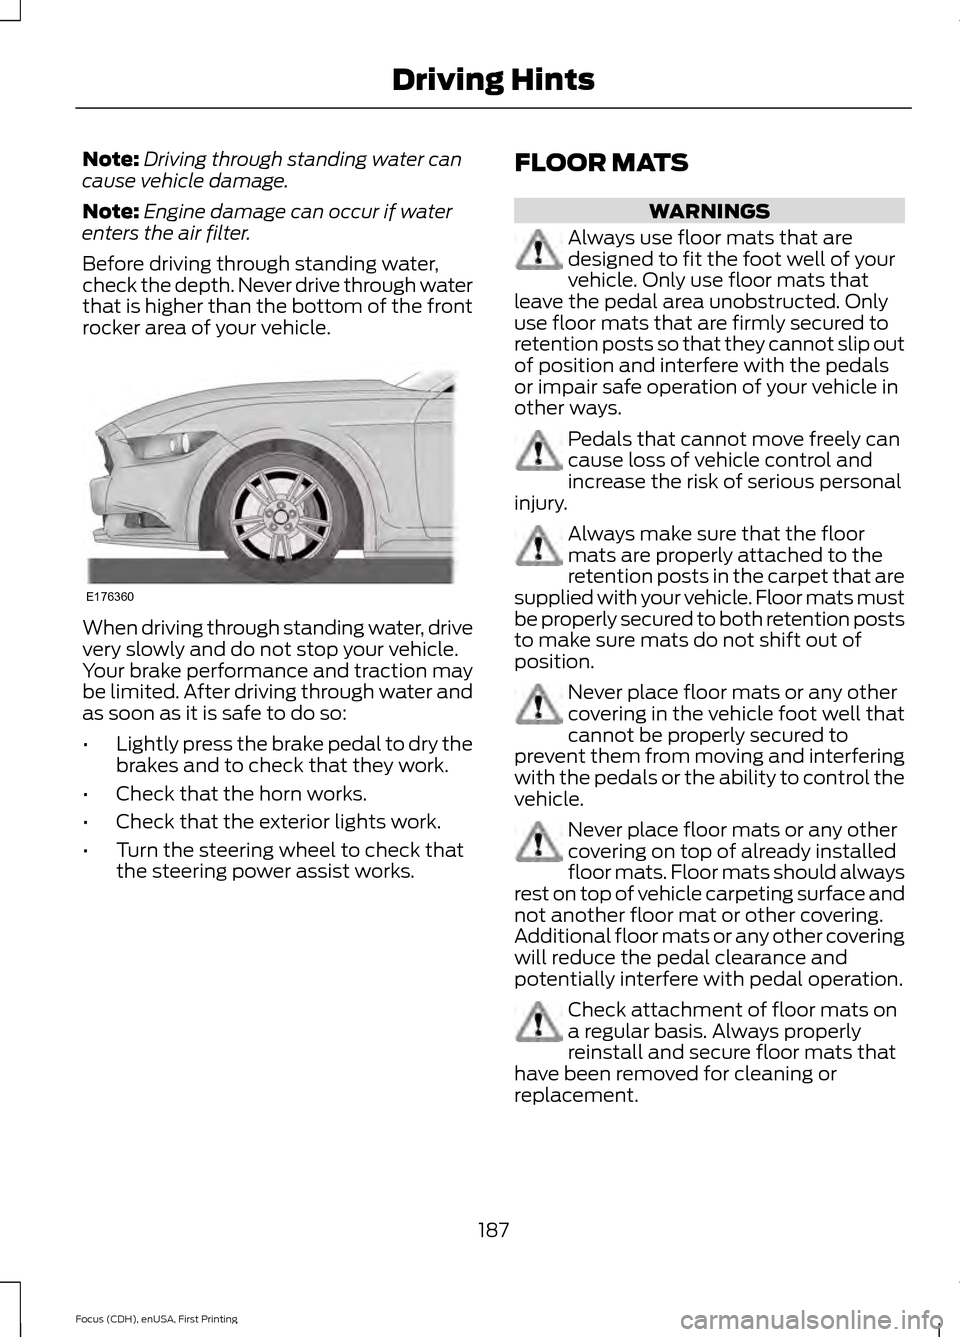
Before driving through standing water,
check the depth. Never drive through water
that is higher than the bottom of the front
rocker area of your vehicle. When driving through standing water, drive
very slowly and do not stop your vehicle.
Your brake performance and traction may
be limited. After driving through water and
as soon as it is safe to do so:
•
Lightly press the brake pedal to dry the
brakes and to check that they work.
• Check that the horn works.
• Check that the exterior lights work.
• Turn the steering wheel to check that
the steering power assist works. FLOOR MATS WARNINGS
Always use floor mats that are
designed to fit the foot well of your
vehicle. Only use floor mats that
leave the pedal area unobstructed. Only
use floor mats that are firmly secured to
retention posts so that they cannot slip out
of position and interfere with the pedals
or impair safe operation of your vehicle in
other ways. Pedals that cannot move freely can
cause loss of vehicle control and
increase the risk of serious personal
injury. Always make sure that the floor
mats are properly attached to the
retention posts in the carpet that are
supplied with your vehicle. Floor mats must
be properly secured to both retention posts
to make sure mats do not shift out of
position. Never place floor mats or any other
covering in the vehicle foot well that
cannot be properly secured to
prevent them from moving and interfering
with the pedals or the ability to control the
vehicle. Never place floor mats or any other
covering on top of already installed
floor mats. Floor mats should always
rest on top of vehicle carpeting surface and
not another floor mat or other covering.
Additional floor mats or any other covering
will reduce the pedal clearance and
potentially interfere with pedal operation. Check attachment of floor mats on
a regular basis. Always properly
reinstall and secure floor mats that
have been removed for cleaning or
replacement.
187
Focus (CDH), enUSA, First Printing Driving HintsE176360