2015 FORD FOCUS ELECTRIC window
[x] Cancel search: windowPage 178 of 369
CHECKING THE WIPER
BLADES
Run the tip of your fingers over the edge of
the blade to check for roughness.
Clean the wiper blades with washer fluid
or water applied with a soft sponge or
cloth.
CHANGING THE WIPER
BLADES
Note:
If streaks or smears appear on the
windshield, clean the windshield and the
wiper blades. See Cleaning the Windows
and Wiper Blades (page 184). If that does
not resolve the issue, install new wiper
blades.
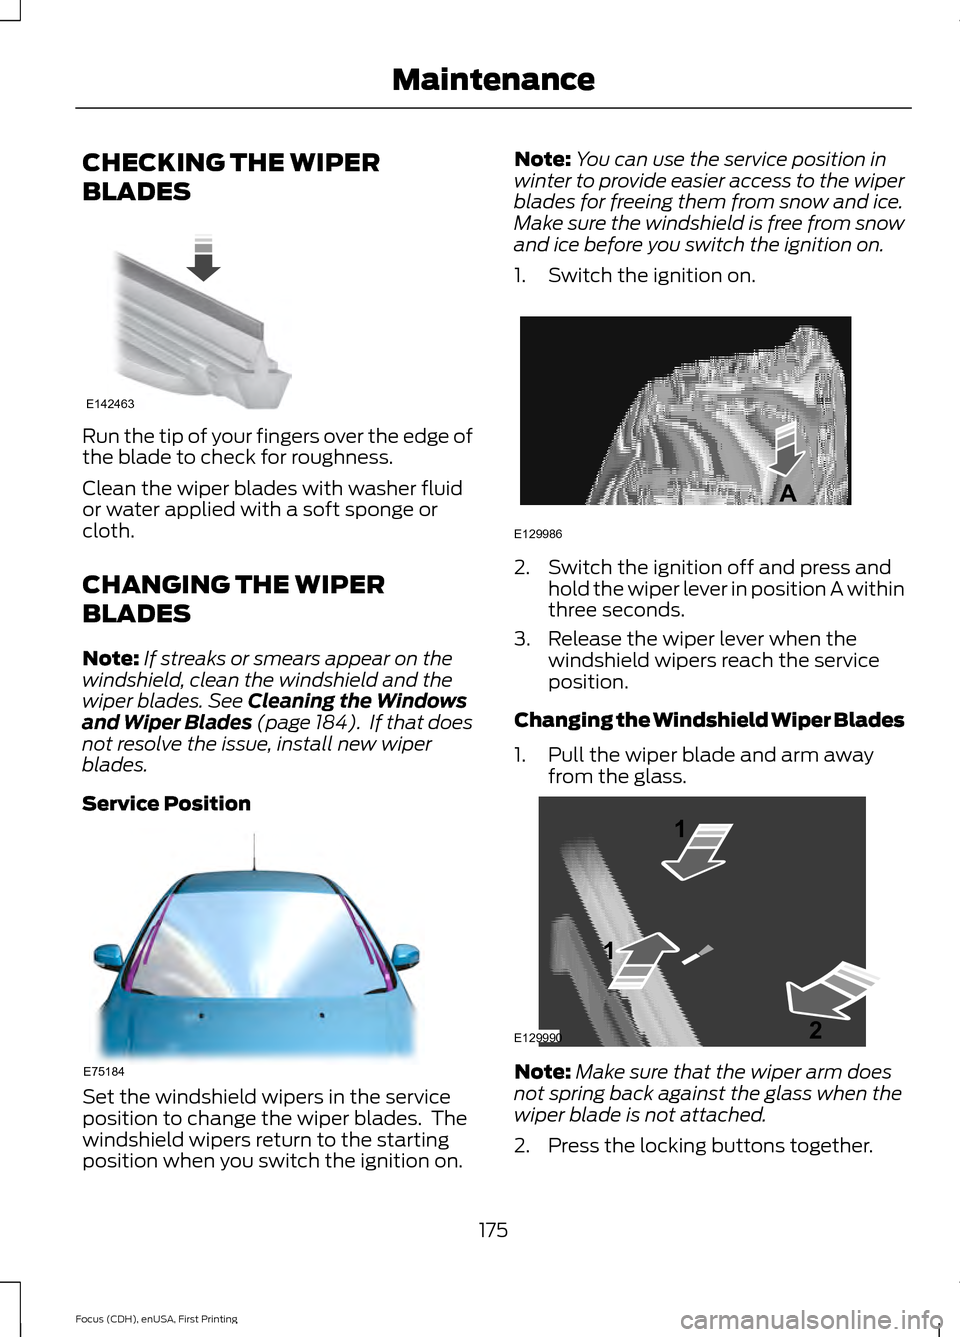
Service Position Set the windshield wipers in the service
position to change the wiper blades. The
windshield wipers return to the starting
position when you switch the ignition on. Note:
You can use the service position in
winter to provide easier access to the wiper
blades for freeing them from snow and ice.
Make sure the windshield is free from snow
and ice before you switch the ignition on.
1. Switch the ignition on. 2. Switch the ignition off and press and
hold the wiper lever in position A within
three seconds.
3. Release the wiper lever when the windshield wipers reach the service
position.
Changing the Windshield Wiper Blades
1. Pull the wiper blade and arm away from the glass. Note:
Make sure that the wiper arm does
not spring back against the glass when the
wiper blade is not attached.
2. Press the locking buttons together.
175
Focus (CDH), enUSA, First Printing MaintenanceE142463 E75184 E129986
A E129990
1
1 2
Page 179 of 369
3. Rotate and remove the wiper blade.
4. Install in the reverse order.
Note:
Make sure that the wiper blade locks
into place.
Changing the Rear Window Wiper
Blade
1. Lift the wiper arm. Note:
Make sure that the wiper arm does
not spring back against the glass when the
wiper blade is not attached.
2. Slightly rotate the wiper blade.
3. Disengage the wiper blade from the wiper arm.
4. Remove the wiper blade.
5. Install in the reverse order.
Note: Make sure that the wiper blade locks
into place.
ADJUSTING THE HEADLAMPS
Vertical Aim Adjustment
If your vehicle has been involved in a crash,
have the aim of the headlamp beam
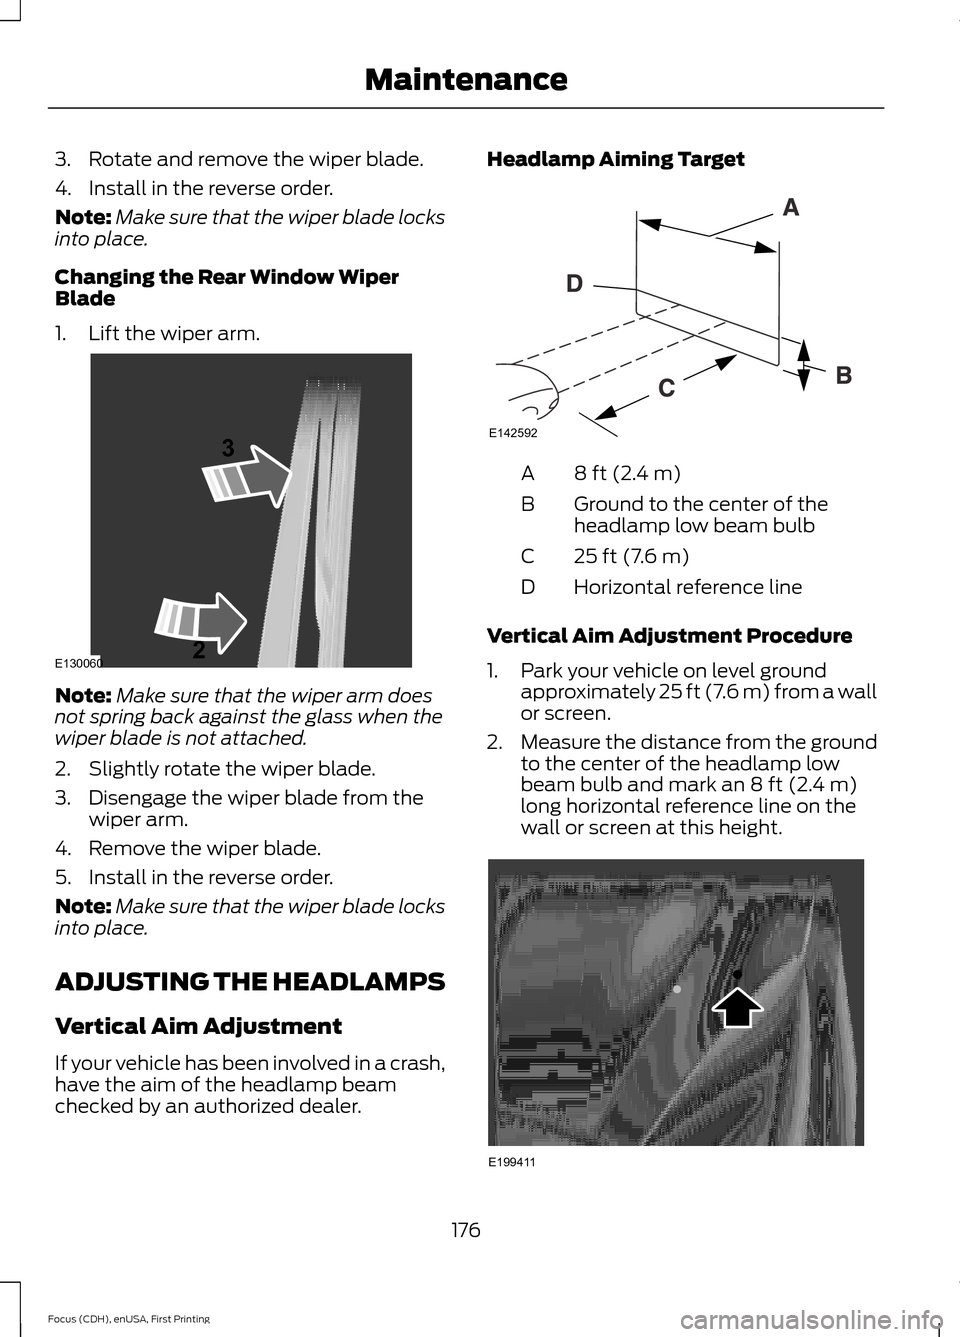
checked by an authorized dealer. Headlamp Aiming Target
8 ft (2.4 m)
A
Ground to the center of the
headlamp low beam bulb
B
25 ft (7.6 m)
C
Horizontal reference line
D
Vertical Aim Adjustment Procedure
1. Park your vehicle on level ground approximately 25 ft (7.6 m) from a wall
or screen.
2. Measure the distance from the ground
to the center of the headlamp low
beam bulb and mark an
8 ft (2.4 m)
long horizontal reference line on the
wall or screen at this height. 176
Focus (CDH), enUSA, First Printing MaintenanceE130060
3
2 E142592 E199411
Page 187 of 369
•
Never wash or rinse any ignition coil,
spark plug wire or spark plug well, or
the area in and around these locations.
• Cover the battery, power distribution
box, and air filter assembly to prevent
water damage when cleaning the
engine.
CLEANING THE WINDOWS AND
WIPER BLADES
Car wash chemicals and environmental
fallout can result in windshield and wiper
blade contamination. Dirty windshield and
wipers will result in poor windshield wiper
operation. Keep the windshield and wiper
blades clean to maintain windshield wiper
performance.
To clean the windshield and wiper blades:
• Clean the windshield with a
non-abrasive glass cleaner.
• For windshields contaminated with
tree sap, chemicals, wax or bugs, clean
the entire windshield using steel wool
(no greater than 0000 grade) in a
circular motion and rinse with water.
• Clean the wiper blades with isopropyl
rubbing alcohol or windshield washer
concentrate.
Note: Do not use razor blades or other
sharp objects to clean or remove decals
from the inside of the heated rear window.
The vehicle warranty does not cover
damage caused to the heated rear window
grid lines.
CLEANING THE INTERIOR WARNINGS
Do not use cleaning solvents, bleach
or dye on the vehicle
’s safety belts,
as these actions may weaken the
belt webbing. WARNINGS
On vehicles equipped with
seat-mounted airbags, do not use
chemical solvents or strong
detergents. Such products could
contaminate the side airbag system and
affect performance of the side airbag in a
collision. For fabric, carpets, cloth seats, safety belts
and seats equipped with side airbags:
•
Remove dust and loose dirt with a
vacuum cleaner.
• Remove light stains and soil with
Motorcraft Professional Strength
Carpet & Upholstery Cleaner.
• If grease or tar is present on the
material, spot-clean the area first with
Motorcraft Spot and Stain Remover. In
Canada, use Motorcraft Multi-Purpose
Cleaner.
• If a ring forms on the fabric after spot
cleaning, clean the entire area
immediately (but do not oversaturate)
or the ring will set.
• Do not use household cleaning
products or glass cleaners, which can
stain and discolor the fabric and affect
the flame retardant abilities of the seat
materials.
CLEANING THE INSTRUMENT
PANEL AND INSTRUMENT
CLUSTER LENS WARNING
Do not use chemical solvents or
strong detergents when cleaning the
steering wheel or instrument panel
to avoid contamination of the airbag
system. 184
Focus (CDH), enUSA, First Printing Vehicle Care
Page 191 of 369
Brakes
•
Make sure the brakes and parking brake
release fully.
Tires
• Maintain recommended air pressure.
Miscellaneous
• Make sure you cover all linkages,
cables, levers and pins under your
vehicle with grease to prevent rust.
• Move vehicles at least 25 ft (7.5 m)
every 15 days to lubricate working parts
and prevent corrosion.
Removing Vehicle From Storage
When your vehicle is ready to come out of
storage, do the following:
• Wash your vehicle to remove any dirt
or grease film build-up on window
surfaces.
• Check windshield wipers for any
deterioration.
• Check under the hood for any foreign
material that may have collected
during storage such as mice or squirrel
nests.
• Check the exhaust for any foreign
material that may have collected
during storage.
• Check tire pressures and set tire
inflation per the Tire Label.
• Check brake pedal operation. Drive
your vehicle
15 ft (4.5 m) back and
forth to remove rust build-up.
• Check fluid levels (including coolant
and gas) to make sure there are no
leaks, and fluids are at recommended
levels.
• If you remove the 12-volt battery, clean
the cable ends and inspect. Contact an authorized dealer if you have
any concerns or issues.
188
Focus (CDH), enUSA, First Printing Vehicle Care
Page 199 of 369
•
Read all instructions and cautions fully.
• Before operating the kit, make sure
your vehicle is safely off the road and
away from moving traffic. Switch on
the hazard lights.
• Always set the parking brake to make
sure the vehicle does not move
unexpectedly.
• Do not remove any foreign objects,
such as nails or screws, from the tire.
• When using the kit, leave the engine
running (only if the vehicle is outdoors
or in a well-ventilated area) so the
compressor does not drain the
vehicle's battery.
• Do not allow the compressor to
operate continuously for more than 15
minutes. This will help prevent the
compressor from overheating.
• Never leave the kit unattended during
operation.
• Sealant compound contains latex.
Those with latex sensitivities should
use appropriate precautions to avoid
an allergic reaction.
• Keep the kit away from children.
• Only use the kit when the ambient
temperature is between -22°F (-30°C)
and 158°F (70°C).
• Only use the sealing compound before
the use-by date. The use-by date is on
a label on the sealant canister, which
you can see through the rectangular
viewing window on the bottom of the
compressor. Check the use-by date
regularly and replace the canister after
four years of non-use.
• Do not store the kit unsecured inside
the passenger compartment of the
vehicle as it may cause injury during a
sudden stop or crash. Always store the
kit in its original location. •
After sealant use, an authorized Ford
dealer must replace the tire pressure
monitoring system sensor and valve
stem on the wheel.
• Operating the kit could cause an
electrical disturbance in radio, CD and
DVD player operation. * When inflation only is required
for a tire or other objects, the
selector must be in the Air
position.
What to Do When a Tire Is
Punctured
Repair a tire puncture within the tire's tread
area in two stages with the kit.
• In the first stage, inflate the tire with a
sealing compound and air. After you
inflate the tire, you will need to drive
the vehicle a short distance (about 4
miles [6 kilometers]) to distribute the
sealant in the tire.
• In the second stage, check the tire
pressure and adjust, if necessary, to the
vehicle's specified tire inflation
pressure.
First Stage: Inflating the Tire with
Sealing Compound and Air WARNINGS
Do not stand directly over the kit
while inflating the tire. If you notice
any unusual bulges or deformations
in the tire's sidewall during inflation, stop
and call roadside assistance. If the tire does not inflate to the
recommended tire pressure within
15 minutes, stop and call roadside
assistance. Do not run the engine during kit
operation unless the vehicle is
outdoors or in a well-ventilated area.
196
Focus (CDH), enUSA, First Printing Wheels and TiresE175978
Page 203 of 369
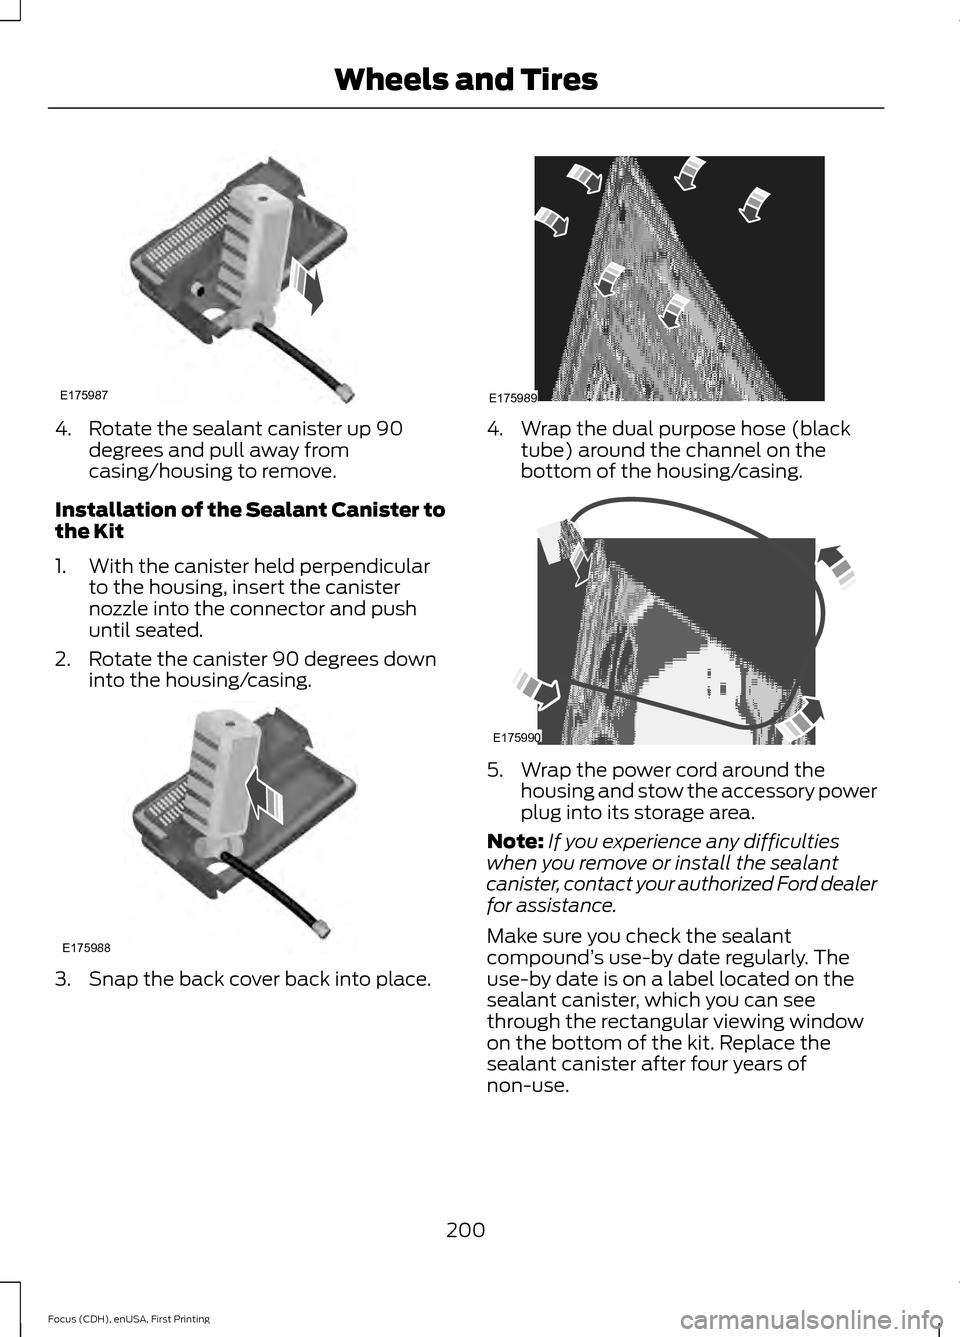
4. Rotate the sealant canister up 90
degrees and pull away from
casing/housing to remove.
Installation of the Sealant Canister to
the Kit
1. With the canister held perpendicular to the housing, insert the canister
nozzle into the connector and push
until seated.
2. Rotate the canister 90 degrees down into the housing/casing. 3. Snap the back cover back into place. 4. Wrap the dual purpose hose (black
tube) around the channel on the
bottom of the housing/casing. 5. Wrap the power cord around the
housing and stow the accessory power
plug into its storage area.
Note: If you experience any difficulties
when you remove or install the sealant
canister, contact your authorized Ford dealer
for assistance.
Make sure you check the sealant
compound ’s use-by date regularly. The
use-by date is on a label located on the
sealant canister, which you can see
through the rectangular viewing window
on the bottom of the kit. Replace the
sealant canister after four years of
non-use.
200
Focus (CDH), enUSA, First Printing Wheels and TiresE175987 E175988 E175989 E175990
Page 241 of 369
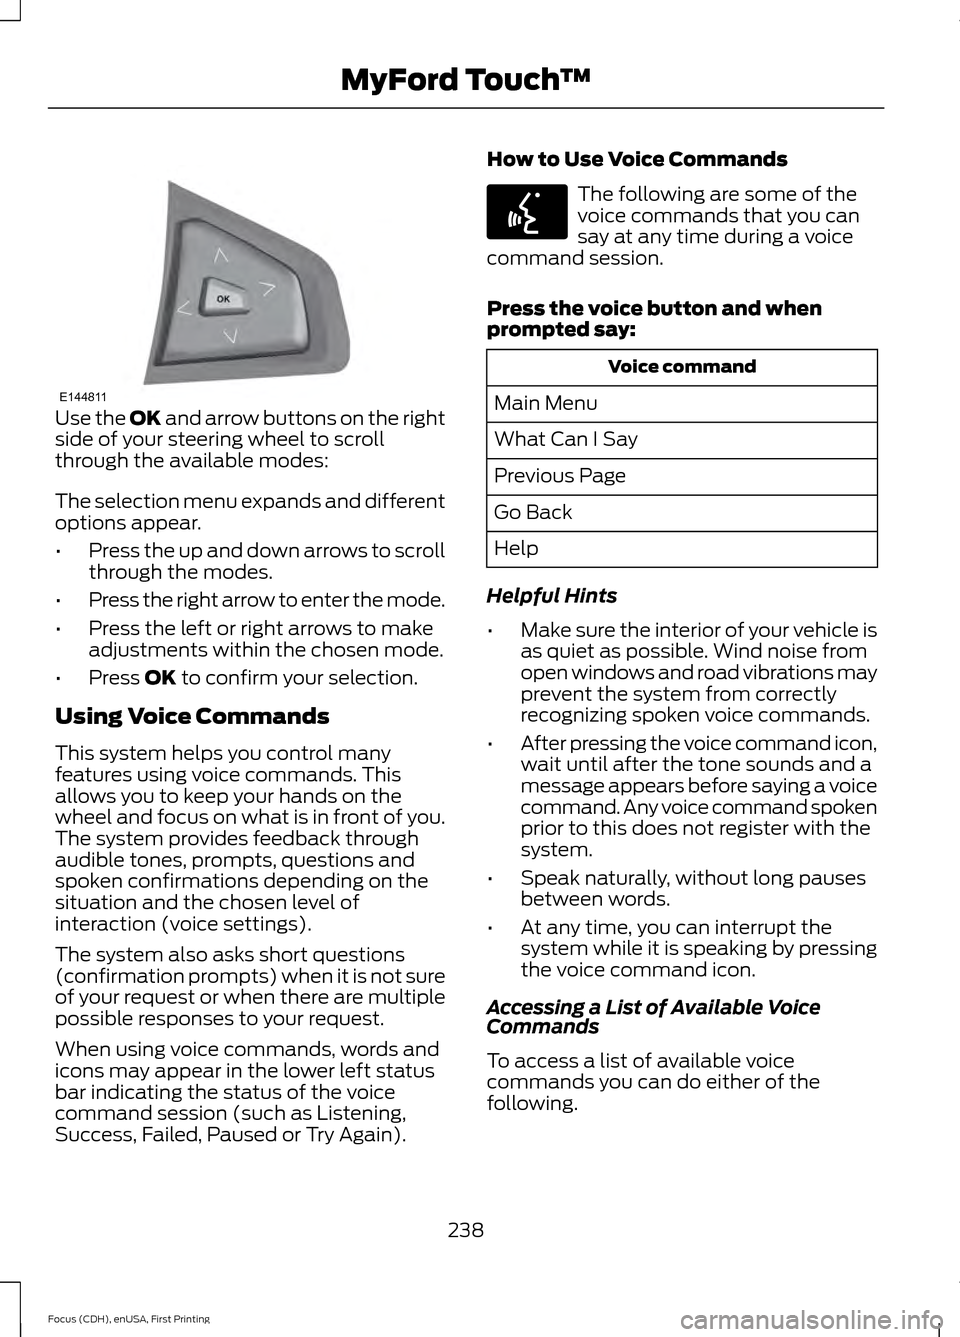
Use the OK and arrow buttons on the right
side of your steering wheel to scroll
through the available modes:
The selection menu expands and different
options appear.
• Press the up and down arrows to scroll
through the modes.
• Press the right arrow to enter the mode.
• Press the left or right arrows to make
adjustments within the chosen mode.
• Press
OK to confirm your selection.
Using Voice Commands
This system helps you control many
features using voice commands. This
allows you to keep your hands on the
wheel and focus on what is in front of you.
The system provides feedback through
audible tones, prompts, questions and
spoken confirmations depending on the
situation and the chosen level of
interaction (voice settings).
The system also asks short questions
(confirmation prompts) when it is not sure
of your request or when there are multiple
possible responses to your request.
When using voice commands, words and
icons may appear in the lower left status
bar indicating the status of the voice
command session (such as Listening,
Success, Failed, Paused or Try Again). How to Use Voice Commands The following are some of the
voice commands that you can
say at any time during a voice
command session.
Press the voice button and when
prompted say: Voice command
Main Menu
What Can I Say
Previous Page
Go Back
Help
Helpful Hints
• Make sure the interior of your vehicle is
as quiet as possible. Wind noise from
open windows and road vibrations may
prevent the system from correctly
recognizing spoken voice commands.
• After pressing the voice command icon,
wait until after the tone sounds and a
message appears before saying a voice
command. Any voice command spoken
prior to this does not register with the
system.
• Speak naturally, without long pauses
between words.
• At any time, you can interrupt the
system while it is speaking by pressing
the voice command icon.
Accessing a List of Available Voice
Commands
To access a list of available voice
commands you can do either of the
following.
238
Focus (CDH), enUSA, First Printing MyFord Touch
™E144811 E142599
Page 302 of 369
If your vehicle is equipped with
Navigation, touch the I (Information)
button to access these features. If your
vehicle is not equipped with
Navigation, touch the corner of the
touchscreen with the green tab. Then
select:
Message
Apps
911 Assist
On You can also access 911 Assist by
pressing:
Message
Settings
Phone
911 Assist
Or you can also select:
Help
911 Assist
To make sure that 911 Assist works
properly:
• SYNC must be powered and working
properly at the time of the incident and
throughout feature activation and use.
• The 911 Assist feature must be set on
prior to the incident.
• You must pair and connect a
Bluetooth-enabled and compatible
phone to SYNC. •
A connected Bluetooth-enabled phone
must have the ability to make and
maintain an outgoing call at the time
of the incident.
• A connected Bluetooth-enabled phone
must have adequate network coverage,
battery power and signal strength.
• The vehicle must have battery power
and be located in the United States,
Canada or in a territory in which 911 is
the emergency number.
In the Event of a Crash
Not all crashes deploy an airbag or activate
the fuel pump shut-off (which would
trigger 911 Assist); however, SYNC tries to
contact emergency services if 911 Assist
triggers. If a connected phone sustains
damage or loses connection to SYNC,
SYNC searches for, and tries to connect
to, any available previously paired phone
and tries to make the call to 911.
Before making the call:
• SYNC provides a short window of time
(approximately 10 seconds) to cancel
the call. If you fail to cancel the call,
SYNC attempts to dial 911.
• SYNC says the following, or a similar
message: "SYNC will attempt to call
911, to cancel the call, press Cancel on
your screen or press and hold the
phone button on your steering wheel."
If you do not cancel the call, and SYNC
makes a successful call, a pre-recorded
message plays for the 911 operator, and
then the occupant(s) in your vehicle is able
to talk with the operator. Be prepared to
provide your name, phone number and
location immediately, because not all 911
systems are capable of receiving this
information electronically.
299
Focus (CDH), enUSA, First Printing MyFord Touch
™E142607