2015 FORD FIESTA tow
[x] Cancel search: towPage 61 of 423

PASSIVE ANTI-THEFT
SYSTEM
Note:
The system is not compatible with
non-Ford aftermarket remote start systems.
Use of these systems may result in vehicle
starting problems and a loss of security
protection.
Note: Metallic objects, electronic devices
or a second coded key on the same key
chain may cause vehicle starting problems
if they are too close to the key when starting
the engine. Prevent these objects from
touching the coded key while starting the
engine. Switch the ignition off, move all
objects on the key chain away from the
coded key and restart the engine if a
problem occurs.
Note: Do not leave a duplicate coded key
in the vehicle. Always take your keys and
lock all doors when leaving the vehicle.
SecuriLock®
The system is an engine immobilization
system. It is designed to help prevent the
engine from being started unless a coded
key programmed to your vehicle is used.
Using the wrong key may prevent the
engine from starting. A message may
appear in the information display.
If you are unable to start the engine with a
correctly coded key, a malfunction has
happened and a message may appear in
the information display.
Automatic Arming
The vehicle arms immediately after you
switch the ignition off.
Automatic Disarming
Switching the ignition on with a coded key
disarms the vehicle. Replacement Keys
Note:
Your vehicle comes equipped with
two integrated keyhead transmitters or two
intelligent access keys.
The integrated keyhead transmitter
functions as a programmed ignition key
that operates all the locks and starts the
vehicle, as well as a remote control.
The intelligent access key functions as a
programmed key that operates the driver
door lock and activates the intelligent
access with push button start system, as
well as a remote control.
If your programmed transmitters or
standard SecuriLock coded keys
(integrated keyhead transmitters only) are
lost or stolen and you do not have an extra
coded key, you will need to have your
vehicle towed to an authorized dealer. You
need to erase the key codes from your
vehicle and program new coded keys.
Store an extra programmed key away from
the vehicle in a safe place to help prevent
any inconveniences. See your authorized
dealer to purchase additional spare or
replacement keys.
Programming a Spare Integrated
Keyhead Transmitter
Note: You can program a maximum of eight
coded keys to your vehicle. All eight can be
integrated keyhead transmitters.
You can program your own integrated
keyhead transmitter or standard
SecuriLock coded keys to your vehicle. This
procedure will program both the engine
immobilizer keycode and the remote entry
portion of the remote control to your
vehicle
Only use integrated keyhead transmitters
or standard SecuriLock keys.
58
Fiesta (CCT), enUSA, Second Printing Security
Page 67 of 423

REAR WINDOW WIPER AND
WASHERS
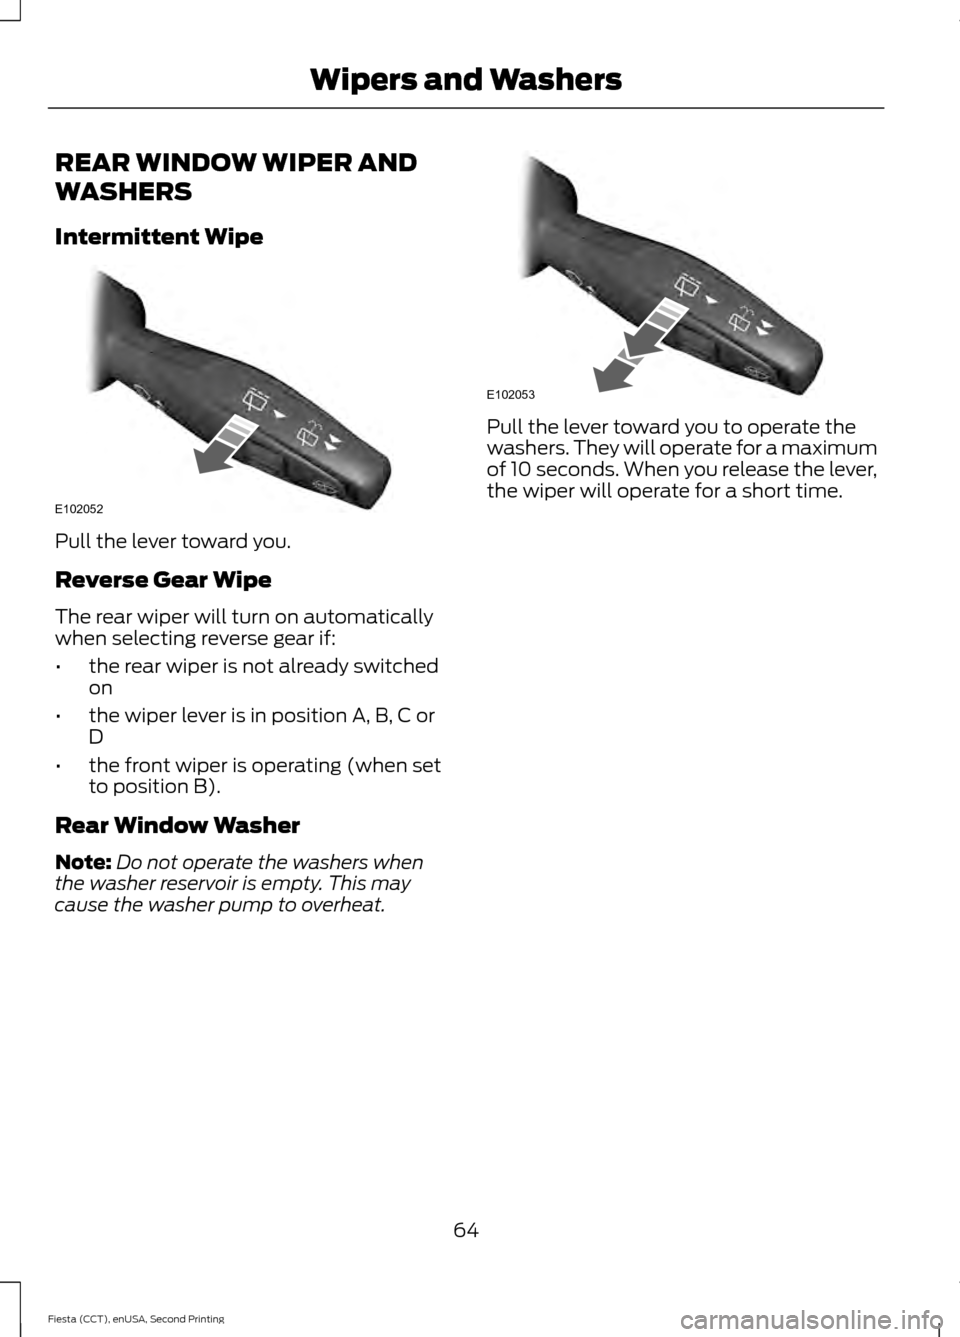
Intermittent Wipe
Pull the lever toward you.
Reverse Gear Wipe
The rear wiper will turn on automatically
when selecting reverse gear if:
•
the rear wiper is not already switched
on
• the wiper lever is in position A, B, C or
D
• the front wiper is operating (when set
to position B).
Rear Window Washer
Note: Do not operate the washers when
the washer reservoir is empty. This may
cause the washer pump to overheat. Pull the lever toward you to operate the
washers. They will operate for a maximum
of 10 seconds. When you release the lever,
the wiper will operate for a short time.
64
Fiesta (CCT), enUSA, Second Printing Wipers and WashersE102052 E102053
Page 69 of 423

High Beams
Pull the lever fully toward you to switch
the high beams on.
Pull the lever fully toward you again to
switch the high beams off.
Headlamp Flasher
Pull the lever toward you slightly and
release it to flash the headlamps.
AUTOLAMPS (If Equipped)
WARNING
The daytime running lamps system
does not activate the rear lamps and
may not provide adequate lighting
during low visibility driving conditions. Also,
the autolamps switch position may not
activate the headlamps in all low visibility
conditions, such as daytime fog. Make sure
the headlamps are switched to auto or on,
as appropriate, during all low visibility
conditions. Failure to do so may result in a
crash. When the lighting control is in the
autolamps position, the headlamps
automatically turn on in low light situations
or when the wipers turn on.
The headlamps remain on for a period of
time after you switch the ignition off. Use
the information display controls to adjust
the period of time that the headlamps
remain on. See Information Displays
(page 83).
Note: With the headlamps in the
autolamps position, you cannot switch the
high beam headlamps on until the
autolamps system turns the low beam
headlamps on.
Windshield Wiper Activated
Headlamps
The windshield wiper activated headlamps
turn on within 10 seconds when you switch
the windshield wipers on and the lighting
control is in the autolamps position. They
turn off approximately 60 seconds after
you switch the windshield wipers off.
66
Fiesta (CCT), enUSA, Second Printing LightingE101829 E158778
Page 70 of 423

The headlamps will not turn on by wiper
activation:
•
During a single wipe.
• When the wipers are on to clear washer
fluid during a wash condition.
• If the wipers are in intermittent mode.
Note: If you switch autolamps and
autowipers on, the headlamps will
automatically turn on when the windshield
wipers continuously operate.
INSTRUMENT LIGHTING
DIMMER HEADLAMP EXIT DELAY
After you switch the ignition off, you can
switch the headlamps on by pulling the
direction indicator lever toward you. You
will hear a short tone. The headlamps will
switch off automatically after three
minutes with any door open or 30 seconds
after the last door has been closed. You
can cancel this feature by pulling the
direction indicator toward you again or
switching the ignition on. DAYTIME RUNNING LAMPS (If
Equipped) WARNING
The daytime running lamps system
does not activate the rear lamps and
may not provide adequate lighting
during low visibility driving conditions. Also,
the autolamps switch position may not
activate the headlamps in all low visibility
conditions, such as daytime fog. Make sure
the headlamps are switched to auto or on,
as appropriate, during all low visibility
conditions. Failure to do so may result in a
crash. The system switches the headlamps on in
daylight conditions.
To switch the system on:
1. Switch the ignition on.
2. Turn the lighting control to the off,
autolamp or parking lamp position.
3. Make sure the transmission selector lever is not in position
P.
FRONT FOG LAMPS
(If Equipped) 67
Fiesta (CCT), enUSA, Second Printing LightingE156652 E156823
Page 76 of 423

Move the controller in the direction of the
arrows to adjust the mirror.
Fold-Away Exterior Mirrors
Push the mirror toward the door window
glass. Make sure that you fully engage the
mirror in its support when returning it to its
original position.
Integrated Blind Spot Mirrors (If
Equipped) WARNING
Objects in the blind spot mirror are
closer than they appear.
Blind spot mirrors have an integrated
convex mirror built into the upper outboard
corner of the exterior mirrors. They are
designed to increase your visibility along
the side of your vehicle.
Check the main mirror first before a lane
change, then check the blind spot mirror.
If no vehicles are present in the blind spot
mirror and the traffic in the adjacent lane
is at a safe distance, signal that you intend
to change lanes. Glance over your shoulder
to verify traffic is clear and carefully
change lanes. The image of the approaching vehicle is
small and near the inboard edge of the
main mirror when it is at a distance. The
image becomes larger and begins to move
outboard across the main mirror as the
vehicle approaches (A). The image will
transition from the main mirror and begin
to appear in the blind spot mirror as the
vehicle approaches (B). The vehicle will
transition to your peripheral field of view
as it leaves the blind spot mirror (C).
INTERIOR MIRROR
WARNING
Do not adjust the mirror when your
vehicle is moving.
73
Fiesta (CCT), enUSA, Second Printing Windows and MirrorsE71281 A
B
C
E138665
Page 77 of 423

Note:
Do not clean the housing or glass of
any mirror with harsh abrasives, fuel or other
petroleum or ammonia-based cleaning
products.
You can adjust the interior mirror to your
preference. Some mirrors also have a
second pivot point. This lets you move the
mirror head up or down and from side to
side.
Pull the tab below the mirror toward you
to reduce glare at night.
Auto-Dimming Mirror (If Equipped)
Note: Do not block the sensors on the front
and back of the mirror. Mirror performance
may be affected. A rear center passenger or
raised rear center head restraint may also
block light from reaching the sensor.
The mirror will dim automatically to reduce
glare when bright lights are detected from
behind your vehicle. It will automatically
return to normal reflection when you select
reverse gear to make sure you have a clear
view when backing up.
MOONROOF
(If Equipped) WARNINGS
Do not let children play with the
moonroof or leave them unattended
in the vehicle. They may seriously
hurt themselves. When closing the moonroof, you
should verify that it is free of
obstructions and make sure that
children and pets are not in the proximity
of the roof opening. The moonroof controls are located on the
overhead console. Opening and Closing the Moonroof
Press and release the rear of the
SLIDE
control to open the moonroof. The sliding
shade will automatically open, if closed,
while the moonroof opens.
Press and hold the front of the
SLIDE
control to close the moonroof.
Note: The sliding shade will not
automatically close.
Moonroof Sliding Shade
You can manually open or close the sliding
shade when the moonroof is closed. Slide
the shade backward or forward to open or
close it.
Venting the Moonroof
Press and hold the rear of the TILT control
to vent the moonroof.
Press and hold the front of the
TILT
control to close the moonroof.
74
Fiesta (CCT), enUSA, Second Printing Windows and MirrorsE156620
Page 98 of 423

PRINCIPLE OF OPERATION
Outside Air
Keep the air intakes in front of the
windshield free from obstruction (such as
snow or leaves) to allow the climate
control system to function effectively.
Recirculated Air
WARNING
Prolonged use of recirculated air may
cause the windows to mist up. If the
windows mist up, follow the settings
for demisting the windshield. The air currently in the passenger
compartment recirculates. Outside air does
not enter your vehicle.
Heating
Heating performance depends on the
temperature of the engine coolant.
General Information on Controlling
the Interior Climate
Fully close all the windows.
Warming the Interior
Direct the air toward your feet. In cold or
humid weather conditions, direct some of
the air toward the windshield and the door
windows.
Cooling the Interior
Direct the air toward your face. Air Conditioning
The system directs air through the
evaporator for cooling. The evaporator
extracts humidity from the air to help keep
the windows free of mist. The system
directs the resulting condensation to the
outside of your vehicle, which may cause
a small pool to form under your vehicle.
This is normal.
Note:
The air conditioning operates only
when the temperature is above 39°F (4°C).
Note: When you use air conditioning, your
vehicle uses more fuel.
AIR VENTS
Center Air Vents Side Air Vent
95
Fiesta (CCT), enUSA, Second Printing Climate ControlE147812 E71942
Page 102 of 423

Manual Climate Control
Note:
To reduce fogging of the windshield
during humid weather, adjust the air
distribution control to the windshield air
vents position. Increase the temperature
and fan speed to improve clearing, if
required.
Automatic Climate Control
Note: Do not adjust the settings when your
vehicle interior is extremely hot or cold. The
system automatically adjusts to the
previously stored settings. For the system
to function efficiently, the instrument panel
and side air vents should be fully open.
Note: At low ambient temperatures with
AUTO selected, the air stream is directed
toward the windshield and side windows
for as long as the engine remains cold. Note:
When the system is switched off,
outside air is prevented from entering your
vehicle.
Note: When you select
AUTO mode and
the interior and exterior temperatures are
high, the system automatically selects
recirculated air to maximize cooling of the
interior. When the desired air temperature
is reached, the system automatically selects
outside air.
Note: When you select windshield
defrosting and defogging, the instrument
panel and footwell level functions
automatically switch off and air conditioning
switches on. Outside air flows into your
vehicle.
Heating the Interior Quickly Vehicles With Automatic Climate Control
Vehicles With Manual Climate Control
Press the
AUTO button.
Adjust the fan speed to the highest
setting.
1
Adjust the temperature control to the
desired setting.
Adjust the temperature control to the
highest setting.
2
Adjust the air distribution control to the
footwell air vents position.
3
Recommended Settings for Heating Vehicles With Automatic Climate Control
Vehicles With Manual Climate Control
Press the
AUTO button.
Adjust the fan speed to the second
setting.
1
Adjust the temperature control to the
desired setting.
Adjust the temperature control to the
desired setting.
2
Adjust the air distribution control to the
footwell and windshield air vents posi-
tion.
3
99
Fiesta (CCT), enUSA, Second Printing Climate Control