2015 FORD F250 SUPER DUTY hood open
[x] Cancel search: hood openPage 7 of 470
Changing a Fuse............................................231
Maintenance
General Information....................................232
Opening and Closing the Hood..............232
Under Hood Overview - 6.2L...................233
Under Hood Overview - 6.8L..................234
Engine Oil Dipstick......................................235
Engine Oil Check..........................................235
Engine Coolant Check...............................236
Automatic Transmission FluidCheck...........................................................240
Transfer Case Fluid Check........................243
Brake Fluid Check........................................243
Power Steering Fluid Check.....................243
Washer Fluid Check....................................244
Fuel Filter........................................................244
Changing the 12V Battery.........................244
Checking the Wiper Blades.....................246
Changing the Wiper Blades.....................246
Adjusting the Headlamps.........................247
Removing a Headlamp.............................248
Changing a Bulb..........................................250
Bulb Specification Chart...........................252
Changing the Engine Air Filter................254
Vehicle Care
General Information...................................256
Cleaning Products.......................................256
Cleaning the Exterior..................................256
Waxing..............................................................257
Cleaning the Engine....................................257
Cleaning the Windows and WiperBlades..........................................................258
Cleaning the Interior...................................258
Cleaning the Instrument Panel andInstrument Cluster Lens.......................258
Cleaning Leather Seats.............................259
Repairing Minor Paint Damage..............260
Cleaning the Alloy Wheels........................261
Vehicle Storage.............................................261
Wheels and Tires
General Information...................................263
Tire Care..........................................................265
Using Snow Chains.....................................282
Tire Pressure Monitoring System...........282
Changing a Road Wheel...........................288
Technical Specifications..........................299
Capacities and Specific-ations
Engine Specifications.................................301
Motorcraft Parts..........................................302
Vehicle Identification Number................303
Vehicle Certification Label.......................303
Transmission Code Designation............304
Technical Specifications..........................305
Audio System
General Information....................................310
Audio unit - Vehicles With: AM/FM.........311
Audio unit - Vehicles With: AM/FM/CD/SYNC.............................................................312
Audio unit - Vehicles With: Sony AM/FM/CD...................................................................315
Digital Radio...................................................316
Satellite Radio...............................................318
Audio Input Jack............................................321
USB Port...........................................................321
Media Hub......................................................322
SYNC™
General Information...................................323
Using Voice Recognition...........................325
Using SYNC™ With Your Phone.............327
SYNC™ Applications and Services......338
Using SYNC™ With Your MediaPlayer...........................................................345
SYNC™ Troubleshooting.........................353
4
Super Duty (), enUSA
Table of Contents
Page 47 of 470
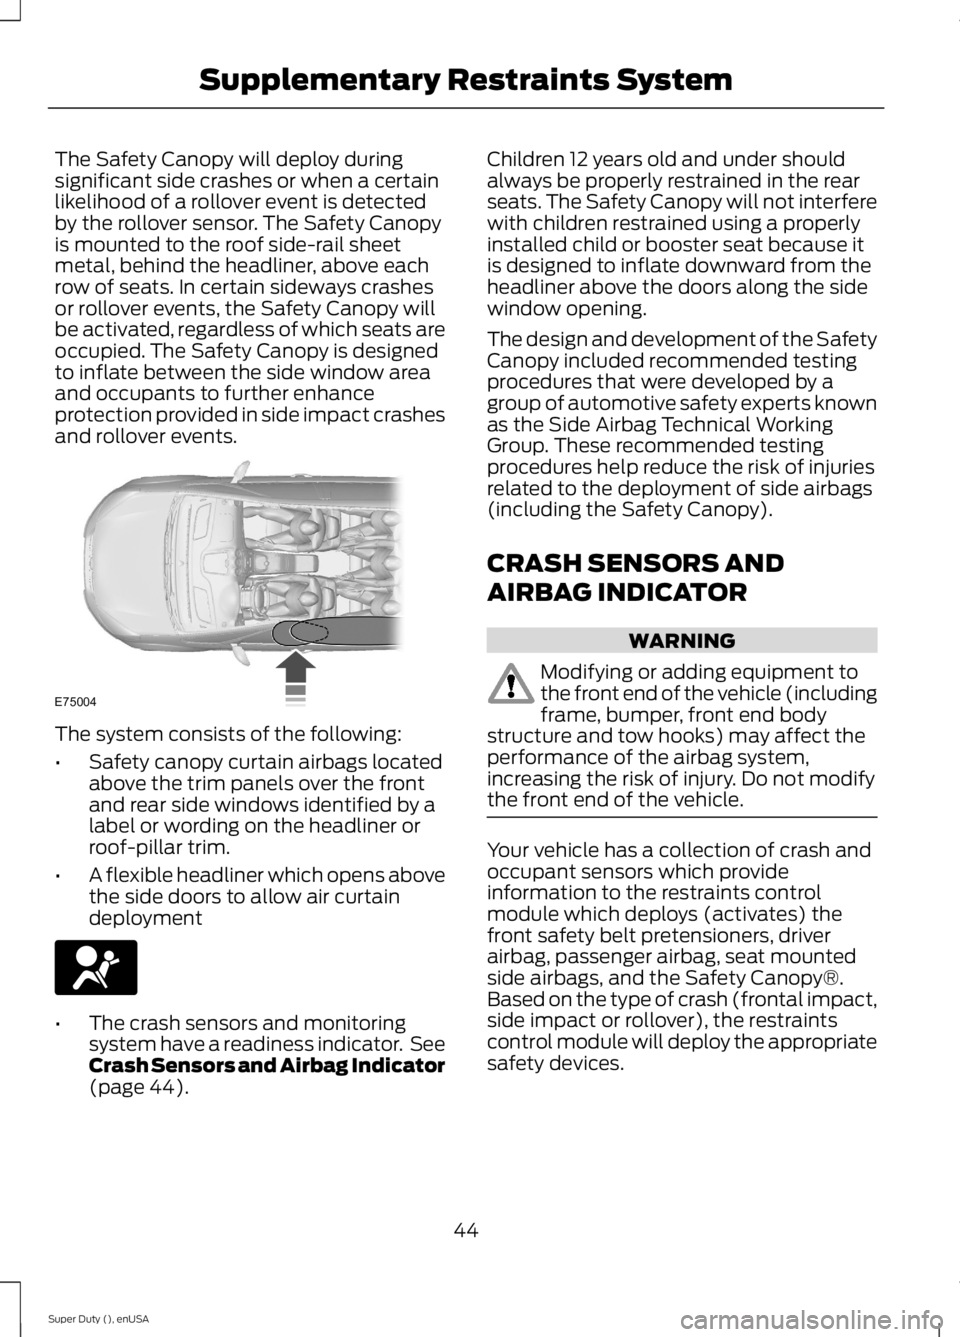
The Safety Canopy will deploy duringsignificant side crashes or when a certainlikelihood of a rollover event is detectedby the rollover sensor. The Safety Canopyis mounted to the roof side-rail sheetmetal, behind the headliner, above eachrow of seats. In certain sideways crashesor rollover events, the Safety Canopy willbe activated, regardless of which seats areoccupied. The Safety Canopy is designedto inflate between the side window areaand occupants to further enhanceprotection provided in side impact crashesand rollover events.
The system consists of the following:
•Safety canopy curtain airbags locatedabove the trim panels over the frontand rear side windows identified by alabel or wording on the headliner orroof-pillar trim.
•A flexible headliner which opens abovethe side doors to allow air curtaindeployment
•The crash sensors and monitoringsystem have a readiness indicator. SeeCrash Sensors and Airbag Indicator(page 44).
Children 12 years old and under shouldalways be properly restrained in the rearseats. The Safety Canopy will not interferewith children restrained using a properlyinstalled child or booster seat because itis designed to inflate downward from theheadliner above the doors along the sidewindow opening.
The design and development of the SafetyCanopy included recommended testingprocedures that were developed by agroup of automotive safety experts knownas the Side Airbag Technical WorkingGroup. These recommended testingprocedures help reduce the risk of injuriesrelated to the deployment of side airbags(including the Safety Canopy).
CRASH SENSORS AND
AIRBAG INDICATOR
WARNING
Modifying or adding equipment tothe front end of the vehicle (includingframe, bumper, front end bodystructure and tow hooks) may affect theperformance of the airbag system,increasing the risk of injury. Do not modifythe front end of the vehicle.
Your vehicle has a collection of crash andoccupant sensors which provideinformation to the restraints controlmodule which deploys (activates) thefront safety belt pretensioners, driverairbag, passenger airbag, seat mountedside airbags, and the Safety Canopy®.Based on the type of crash (frontal impact,side impact or rollover), the restraintscontrol module will deploy the appropriatesafety devices.
44
Super Duty (), enUSA
Supplementary Restraints SystemE75004
Page 51 of 470

Sounding a Panic Alarm
Note:The panic alarm will only operatewhen the ignition is off.
Press the button to activate thealarm. Press the button again orturn the ignition on to deactivateit.
Remote Start (If Equipped)
WARNING
To avoid exhaust fumes, do not useremote start if your vehicle is parkedindoors or areas that are not wellventilated.
Note:Do not use remote start if your vehicleis low on fuel.
The remote start button is on thetransmitter.
This feature allows you to start yourvehicle from outside the vehicle. Thetransmitter has an extended operatingrange.
Vehicles with automatic climate controlcan be set to operate when you remotestart the vehicle. See Climate Control(page 103). A manual climate controlsystem will run at the setting it was set towhen you switch the vehicle off.
Many states and provinces haverestrictions for the use of remote start.Check your local and state or provinciallaws for specific requirements regardingremote start systems.
The remote start system will not work if:
•the ignition is on
•the alarm system is triggered
•you disable the feature
•the hood is open
•the transmission is not in P
•the vehicle battery voltage is too low
•the service engine soon indicator is on.
Remote Starting the Vehicle
Note:You must press each button withinthree seconds of each other. Your vehiclewill not remote start and the horn will notsound if you do not follow this sequence.
The label on your transmitter details thestarting procedure.
To remote start your vehicle:
1. Press the lock button to lock all thedoors.
2. Press the remote start button twice.The exterior lamps will flash twice.
The horn will sound if the system fails tostart.
Note:If you remote start your vehicle withan integrated keyhead transmitter, you mustswitch the ignition on before driving yourvehicle. If you remote start your vehicle withan intelligent access transmitter, you mustpress the START/STOP button on theinstrument panel once while applying thebrake pedal before driving your vehicle.
The power windows will not work duringthe remote start and the radio will not turnon automatically.
The parking lamps will remain on and thevehicle will run for 5, 10, or 15 minutes,depending on the setting.
48
Super Duty (), enUSA
Keys and Remote ControlsE138624 E138625 E138626
Page 57 of 470

LOCKING AND UNLOCKING
You can use the power door lock controlor the remote control to lock and unlockyour vehicle.
Power Door Locks (If Equipped)
The power door lock control is on the driverand front passenger door panels.
UnlockA
LockB
Remote Control (If Equipped)
You can use the remote control at any timeyour vehicle is not running.
Unlocking the Doors (Two-StageUnlock)
Press the button to unlock thedriver door.
Press the button again withinthree seconds to unlock all doors. The turnsignals will flash.
Press and hold both the lock and unlockbuttons on the remote control for fourseconds to disable or enable two-stageunlocking. Disabling two-stage unlockingallows all vehicle doors to unlock with onepress of the button. The turn signals willflash twice to indicate a change to theunlocking mode. The unlocking modeapplies to the remote control and keylessentry keypad.
Locking the Doors
Press the button to lock all thedoors. The turn signals willilluminate.
Press the button again within threeseconds to confirm that all the doors areclosed. The doors will lock again, the hornwill sound and the turn signals willilluminate if all the doors are closed.
Mislock
If any door is open or if the hood is open onvehicles with an anti-theft alarm or remotestart, the horn will sound twice and thelamps will not flash.
Smart Unlocks (If Equipped)
This feature helps to prevent you fromlocking yourself out of your vehicle if yourkey is still in the ignition.
When you open the driver door and lockyour vehicle with the power door lockcontrol, all the doors will lock then unlockif your key is still in the ignition.
Your can still lock your vehicle with the keyin the ignition by:
•using the manual lock on the door
•locking the driver door with a key
•using the keyless entry keypad
•using the lock button on the remotecontrol
Autolock and Autounlock (If Equipped)
The autolock feature will lock all the doorswhen:
•all doors are closed, and
•the ignition is on, and
•you shift into any gear putting yourvehicle in motion, and
•your vehicle attains a speed greaterthan 12 mph (20 km/h).
54
Super Duty (), enUSA
LocksABE163049 E138629 E138623
Page 62 of 470

1.Insert the first previously programmedcoded key into the ignition.
2.Switch the ignition from off to on. Keepthe ignition on for at least threeseconds, but no more than 10 seconds.
3.Switch the ignition off and remove thefirst coded key from the ignition.
4. After three seconds but within 10seconds of switching the ignition off,insert the second previously coded keyinto the ignition.
5.Switch the ignition from off to on. Keepthe ignition on for at least threeseconds, but no more than 10 seconds.
6.Switch the ignition off and remove thesecond previously programmed codedkey from the ignition.
7. After three seconds but within 10seconds of switching the ignition offand removing the previouslyprogrammed coded key, insert the newunprogrammed key into the ignition.
8.Switch the ignition from off to on. Keepthe ignition on for at least six secondsuntil you hear the door locks cycle.
9.Remove the newly programmed codedkey from the ignition.
The key will start the engine ifprogramming is successful. You canoperate the remote entry system if the newkey is an integrated keyhead transmitter.
If programming was not successful, wait20 seconds and repeat Steps 1 through 8.If you are still unsuccessful, take yourvehicle to an authorized dealer.
ANTI-THEFT ALARM (IF EQUIPPED)
The system warns you of an unauthorizedentry to your vehicle. It triggers if any dooror the hood opens without using the key,remote control or keyless entry keypad.
The direction indicators flash and the hornsounds if the system triggers while thealarm is armed.
Take all remote controls to an authorizeddealer if there is any potential alarmproblem with your vehicle.
Arming the Alarm
The alarm is ready to arm when there isnot a key in the ignition. Electronically lockthe vehicle to arm the alarm.
The direction indicators flash once afteryou lock the vehicle. This indicates thealarm is in the pre-armed mode. It will fullyarm in 20 seconds.
Disarming the Alarm
Disarm the alarm by any of the followingactions:
•Press the power door unlock buttonwithin the 20-second pre-armed mode.
•Unlock the doors with the remotecontrol or keyless entry keypad.
•Switch the ignition on or start thevehicle.
•Use a key in the driver door to unlockthe vehicle, then switch the ignition onwithin 12 seconds.
Note:Pressing the panic button on theremote control will stop the horn and signalindicators, but will not disarm the system.
59
Super Duty (), enUSA
Security
Page 235 of 470
GENERAL INFORMATION
Have your vehicle serviced regularly to helpmaintain its roadworthiness and resalevalue. There is a large network of Fordauthorized dealers that are there to helpyou with their professional servicingexpertise. We believe that their speciallytrained technicians are best qualified toservice your vehicle properly and expertly.They are supported by a wide range ofhighly specialized tools developedspecifically for servicing your vehicle.
To help you service your vehicle, weprovide scheduled maintenanceinformation which makes tracking routineservice easy. See ScheduledMaintenance (page 440).
If your vehicle requires professional service,your authorized dealer can provide thenecessary parts and service. Check yourwarranty information to find out whichparts and services are covered.
Use only recommended fuels, lubricants,fluids and service parts conforming tospecifications. Motorcraft® parts aredesigned and built to provide the bestperformance in your vehicle.
Precautions
•Do not work on a hot engine.
•Make sure that nothing gets caught inmoving parts.
•Do not work on a vehicle with theengine running in an enclosed space,unless you are sure you have enoughventilation.
•Keep all open flames and other burningmaterial (such as cigarettes) awayfrom the battery and all fuel relatedparts.
Working with the Engine Off
1. Set the parking brake and shift to P(Park).
2.Turn off the engine and remove the key(if equipped).
3. Block the wheels.
Working with the Engine On
WARNING
To reduce the risk of vehicle damageand/or personal burn injuries, do notstart your engine with the air cleanerremoved and do not remove it while theengine is running.
1. Set the parking brake and shift to P(Park).
2. Block the wheels
OPENING AND CLOSING THE
HOOD
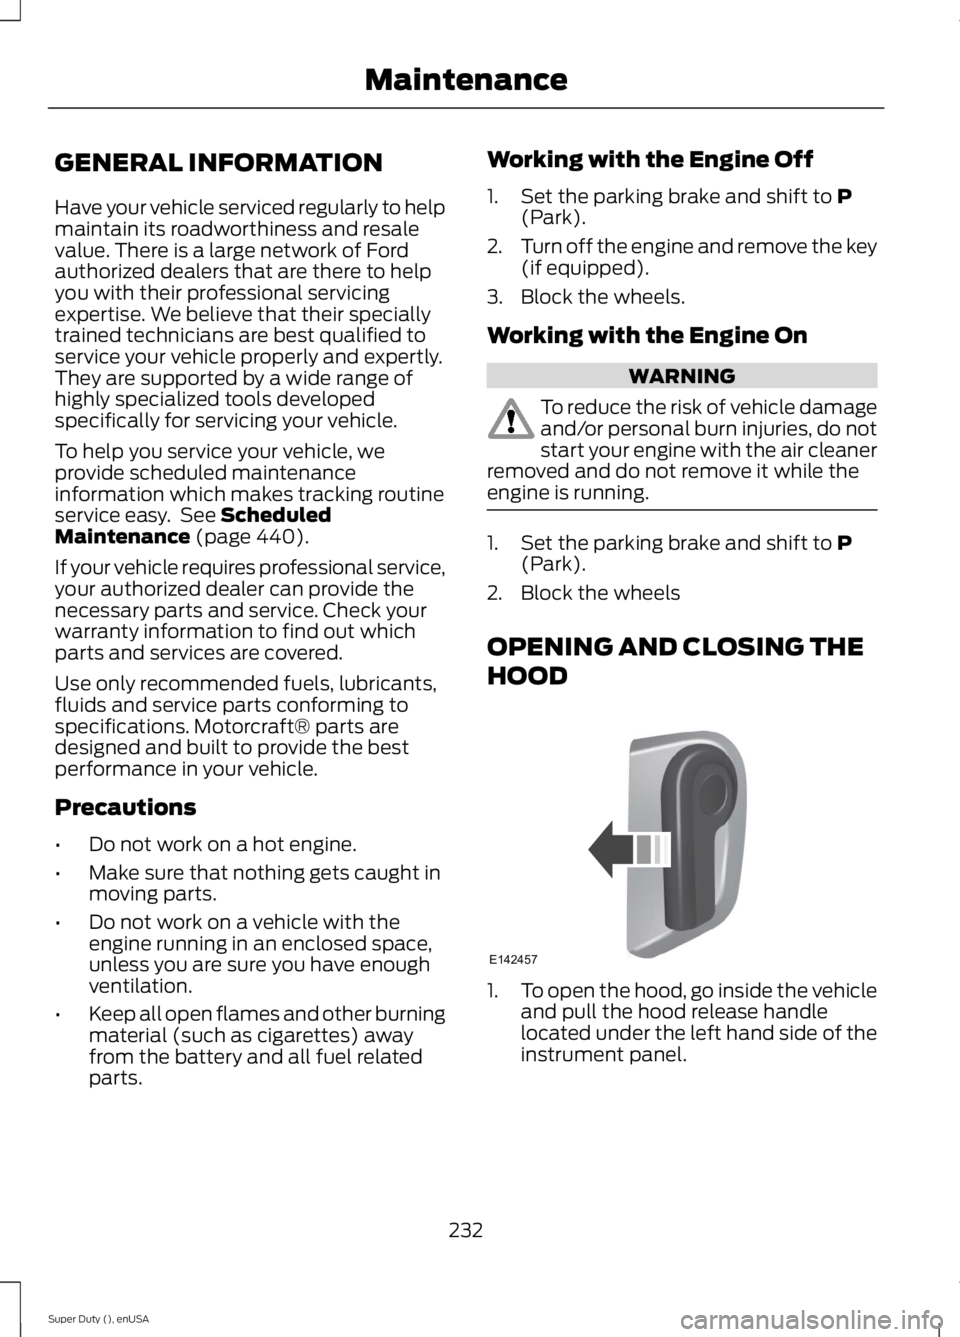
1.To open the hood, go inside the vehicleand pull the hood release handlelocated under the left hand side of theinstrument panel.
232
Super Duty (), enUSA
MaintenanceE142457
Page 238 of 470
Power steering fluid reservoirF.
Brake fluid reservoirG.
Engine coolant reservoirH.
Air filter assemblyI.
Power distribution boxJ.
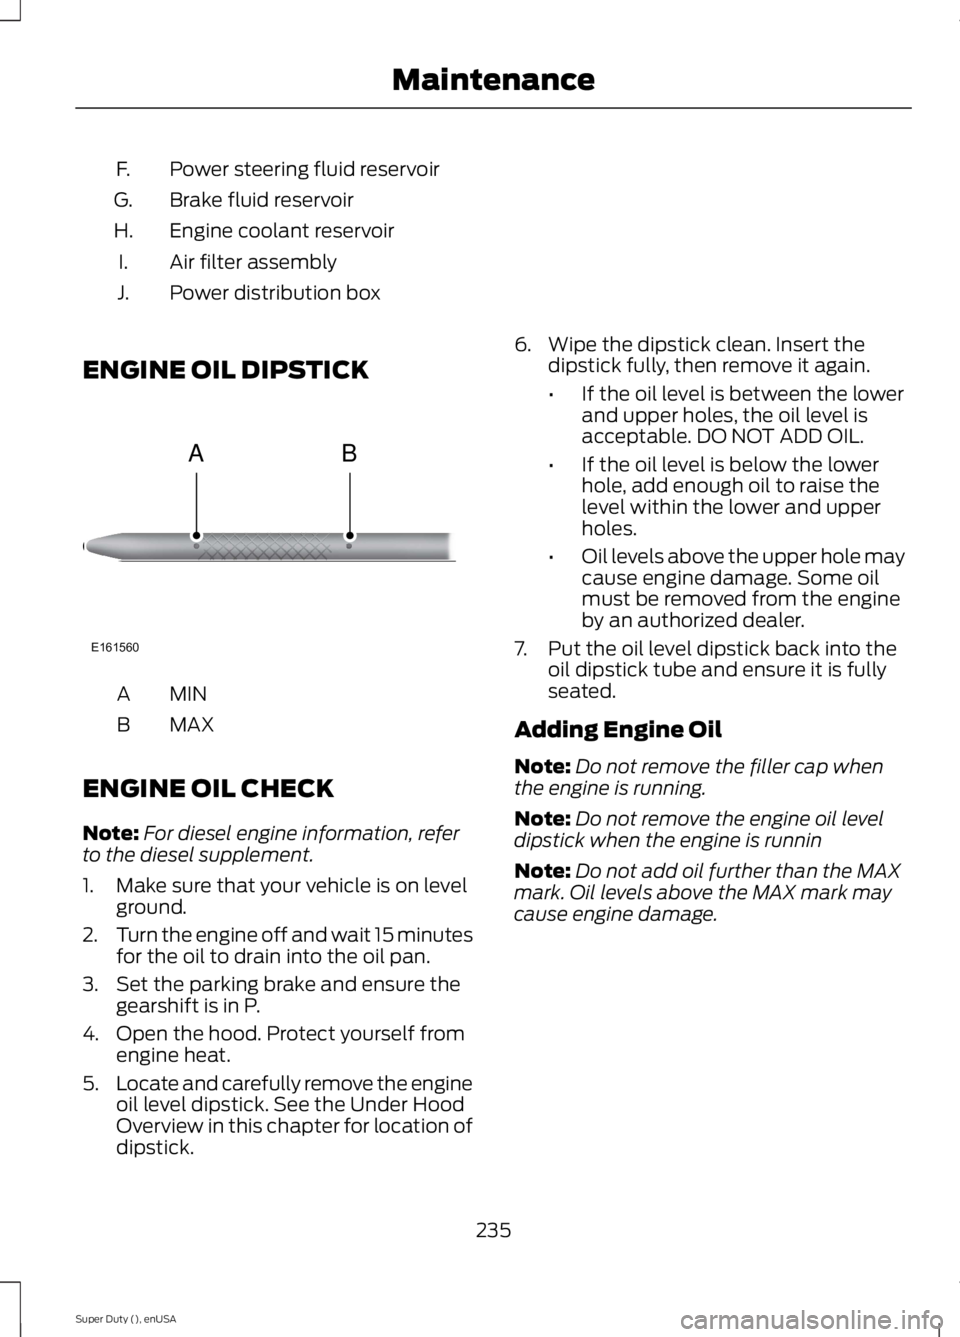
ENGINE OIL DIPSTICK
MINA
MAXB
ENGINE OIL CHECK
Note:For diesel engine information, referto the diesel supplement.
1. Make sure that your vehicle is on levelground.
2.Turn the engine off and wait 15 minutesfor the oil to drain into the oil pan.
3. Set the parking brake and ensure thegearshift is in P.
4. Open the hood. Protect yourself fromengine heat.
5.Locate and carefully remove the engineoil level dipstick. See the Under HoodOverview in this chapter for location ofdipstick.
6. Wipe the dipstick clean. Insert thedipstick fully, then remove it again.
•If the oil level is between the lowerand upper holes, the oil level isacceptable. DO NOT ADD OIL.
•If the oil level is below the lowerhole, add enough oil to raise thelevel within the lower and upperholes.
•Oil levels above the upper hole maycause engine damage. Some oilmust be removed from the engineby an authorized dealer.
7. Put the oil level dipstick back into theoil dipstick tube and ensure it is fullyseated.
Adding Engine Oil
Note:Do not remove the filler cap whenthe engine is running.
Note:Do not remove the engine oil leveldipstick when the engine is runnin
Note:Do not add oil further than the MAXmark. Oil levels above the MAX mark maycause engine damage.
235
Super Duty (), enUSA
MaintenanceE161560
AB
Page 246 of 470
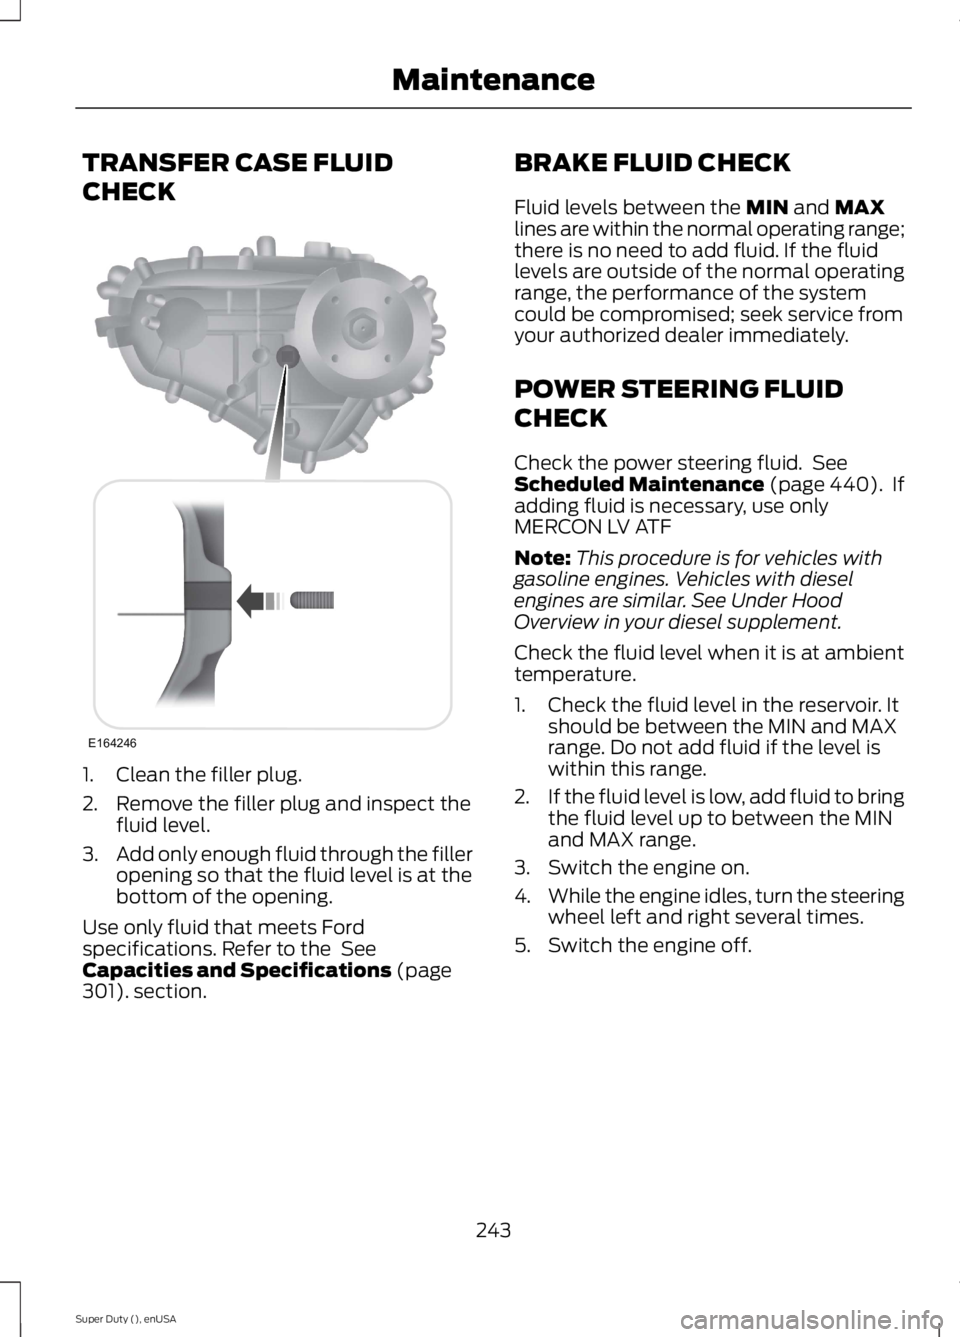
TRANSFER CASE FLUID
CHECK
1. Clean the filler plug.
2. Remove the filler plug and inspect thefluid level.
3.Add only enough fluid through the filleropening so that the fluid level is at thebottom of the opening.
Use only fluid that meets Fordspecifications. Refer to the SeeCapacities and Specifications (page301). section.
BRAKE FLUID CHECK
Fluid levels between the MIN and MAXlines are within the normal operating range;there is no need to add fluid. If the fluidlevels are outside of the normal operatingrange, the performance of the systemcould be compromised; seek service fromyour authorized dealer immediately.
POWER STEERING FLUID
CHECK
Check the power steering fluid. SeeScheduled Maintenance (page 440). Ifadding fluid is necessary, use onlyMERCON LV ATF
Note:This procedure is for vehicles withgasoline engines. Vehicles with dieselengines are similar. See Under HoodOverview in your diesel supplement.
Check the fluid level when it is at ambienttemperature.
1. Check the fluid level in the reservoir. Itshould be between the MIN and MAXrange. Do not add fluid if the level iswithin this range.
2.If the fluid level is low, add fluid to bringthe fluid level up to between the MINand MAX range.
3. Switch the engine on.
4.While the engine idles, turn the steeringwheel left and right several times.
5. Switch the engine off.
243
Super Duty (), enUSA
MaintenanceE164246