2015 FORD F250 SUPER DUTY parking brake
[x] Cancel search: parking brakePage 166 of 470

PARKING BRAKE
WARNING
Always set the parking brake fullyand make sure the transmissionselector lever is placed in position P.Failure to set the parking brake and engagepark could result in vehicle roll-away,property damage or bodily injury. Turn theignition to the lock position and removethe key whenever you leave your vehicle.
Apply the parking brake whenever yourvehicle is parked. Press the pedaldownward to set the parking brake. Thebrake warning lamp in the instrumentcluster will illuminate and remainsilluminated until the parking brake isreleased.
To release, pull the brake release leverlocated at the lower left side of theinstrument panel.
If you are parking your vehicle on a gradeor with a trailer, press and hold the brakepedal down, then set the parking brake.There may be a little vehicle movement asthe parking brake sets to hold the vehicle'sweight. This is normal and should be noreason for concern. If needed, press andhold the service brake pedal down, thentry reapplying the parking brake. Chock thewheels if required. If the parking brakecannot hold the weight of the vehicle, theparking brake may need to be serviced orthe vehicle may be overloaded.
HILL START ASSIST
WARNINGS
The system does not replace theparking brake. When you leave yourvehicle, always apply the parkingbrake and put the transmission in park (P).
WARNINGS
You must remain in your vehicle onceyou have activated the system.
During all times, you are responsiblefor controlling your vehicle,supervising the system andintervening, if required.
If the engine is revved excessively, orif a malfunction is detected, thesystem will be deactivated.
The system makes it easier to pull awaywhen your vehicle is on a slope without theneed to use the parking brake.
When the system is active, your vehicle willremain stationary on the slope for two tothree seconds after you release the brakepedal. This allows you time to move yourfoot from the brake to the acceleratorpedal. The brakes are releasedautomatically once the engine hasdeveloped sufficient drive to prevent yourvehicle from rolling down the slope. Thisis an advantage when pulling away on aslope, (for example from a car park ramp,traffic lights or when reversing uphill intoa parking space).
The system will activate automatically onany slope that will cause significant vehiclerollback.
Using Hill Start Assist
1. Press the brake pedal to bring yourvehicle to a complete standstill. Keepthe brake pedal pressed.
2. If the sensors detect that your vehicleis on a slope, the system will activateautomatically.
3. When you remove your foot from thebrake pedal, your vehicle will remainon the slope without rolling away forabout two or three seconds. This holdtime will automatically be extended ifyou are in the process of driving off.
163
Super Duty (), enUSA
Brakes
Page 173 of 470
PRINCIPLE OF OPERATION
WARNINGS
Hill descent control cannot controldescent in all surface conditions andcircumstances, such as ice orextremely steep grades. Hill descentcontrol is a driver assist system and cannotsubstitute for good judgment by the driver.Failure to do so may result in loss of vehiclecontrol, crash or serious injury.
Hill descent control does not providehill hold at zero miles per hour (0kilometers per hour). When stopped,the parking brake must be applied or thevehicle must be placed in P (Park) or itmay roll away.
Hill descent control allows the driver to setand maintain vehicle speed whiledescending steep grades in various surfaceconditions.
Hill descent control can maintain vehiclespeeds on downhill grades between 2 mph(3 km/h) and 12 mph (20 km/h). Above 20mph (32 km/h), the system remainsarmed, but descent speed cannot be setor maintained.
Hill descent control requires a coolingdown interval after a period of sustaineduse. The amount of time that the featurecan remain active before cooling varieswith conditions. The system will provide awarning in the message center and a chimewill sound when the system is about todisengage for cooling. At this time,manually apply the brakes as needed tomaintain descent speed.
USING HILL DESCENT
CONTROL
Press and release the hilldescent button located on theinstrument panel. A light in thecluster will illuminate and achime will sound when this feature isactivated.
To increase descent speed, press theaccelerator pedal until the desired speedis reached. To decrease descent speed,press the brake pedal until the desiredspeed is reached.
Whether accelerating or decelerating, oncethe desired descent speed is reached,remove your feet from the pedals and thechosen vehicle speed will be maintained.
Note:Noise from the ABS pump motor maybe observed during hill descent controloperation. This is a normal characteristic ofthe ABS and should be no reason forconcern.
Hill descent modes
•At speeds below 20 mph (32 km/h):When the Hill Descent Control switchis pressed and Hill Descent Control isactive, the Hill Descent Control telltalewill flash.
•At speeds below 20 mph (32 km/h):When the Hill Descent Control switchis pressed and conditions are notcorrect for hill descent activation, theHill Descent Control system will beenabled, the Hill Descent Controltelltale will be solid and a message willdisplay in the information display.
170
Super Duty (), enUSA
Terrain Response (If Equipped)E163957
Page 175 of 470

PARKING AID (IF EQUIPPED)
WARNINGS
To help avoid personal injury, pleaseread and understand the limitationsof the system as contained in thissection. Sensing is only an aid for some(generally large and fixed) objects whenmoving in reverse on a flat surface atparking speeds. Traffic control systems,inclement weather, air brakes, and externalmotors and fans may also affect thefunction of the sensing system; this mayinclude reduced performance or a falseactivation.
To help avoid personal injury, alwaysuse caution when in R (Reverse) andwhen using the sensing system.
This system is not designed toprevent contact with small or movingobjects. The system is designed toprovide a warning to assist the driver indetecting large stationary objects to avoiddamaging the vehicle. The system may notdetect smaller objects, particularly thoseclose to the ground.
Certain add-on devices such as largetrailer hitches, bike or surfboard racksand any device that may block thenormal detection zone of the system, maycreate false beeps.
Note:Keep the sensors, located on thebumper or fascia, free from snow, ice andlarge accumulations of dirt. If the sensorsare covered, the system’s accuracy can beaffected. Do not clean the sensors withsharp objects.
Note:If your vehicle sustains damage tothe bumper or fascia, leaving it misalignedor bent, the sensing zone may be alteredcausing inaccurate measurement ofobstacles or false alarms.
Note:If your vehicle is equipped withMyKey™, it is possible to prevent turningthe sensing system off. See MyKey™ (page50).
Note:If your vehicle is equipped with a fullyintegrated electronic trailer brake controller(TBC) and a trailer with electric trailerbrakes is connected to your vehicle, the RSSwill be disabled. When the vehicle is shiftedinto reverse, the information display willremain in the Rear Park Aid Off selection.For more information on the TBC, SeeTrailer Sway Control (page 190).
The sensing system warns the driver ofobstacles within a certain range of thebumper area. The system turns onautomatically whenever the ignition isswitched on.
When receiving a detection warning, theradio volume is reduced to apredetermined level. After the warninggoes away, the radio volume returns to theprevious level.
Rear Sensing System
The rear sensors are only active when thetransmission is in R (Reverse). As thevehicle moves closer to the obstacle, therate of the audible warning increases.When the obstacle is fewer than 12 inches(30 centimeters) away, the warningsounds continuously. If a stationary orreceding object is detected farther than 12inches (30 centimeters) from the side ofthe vehicle, the tone sounds for only threeseconds. Once the system detects anobject approaching, the warning soundsagain.
172
Super Duty (), enUSA
Parking Aids
Page 207 of 470
•When stopped in congested orheavy traffic during hotweather, place the gearshift inposition P to aid engine andtransmission cooling and tohelp A/C performance.
•Turn off the speed control withheavy loads or in hilly terrain.The speed control may turn offautomatically when you aretowing on long, steep grades.
•Shift to a lower gear whendriving down a long or steephill. Do not apply the brakescontinuously, as they mayoverheat and become lesseffective.
•If your transmission is equippedwith a Grade Assist orTow/Haul feature, use thisfeature when towing. Thisprovides engine braking andhelps eliminate excessivetransmission shifting foroptimum fuel economy andtransmission cooling.
•If your vehicle is equipped withAdvanceTrac with RSC, thissystem may turn on duringtypical cornering maneuverswith a heavily loaded trailer.This is normal. Turning thecorner at a slower speed whiletowing may reduce thistendency.
•If you are towing a trailerfrequently in hot weather, hillyconditions, at the grosscombined weight rating (or anycombination of these factors),consider refilling your rear axlewith synthetic gear lubricant (ifthe axle is not already filledwith it). See Capacities andSpecifications (page 301).
•Allow more distance forstopping with a trailerattached. Anticipate stops andbrake gradually.
•Avoid parking on a grade.However, if you must park on agrade:
1. Turn the steering wheel topoint your vehicle tires awayfrom traffic flow.
2.Set your vehicle parking brake.
3.Place the automatictransmission in position P.
4.Place wheel chocks in frontand back of the trailer wheels.(Chocks not included withvehicle.)
Your vehicle may be equippedwith a temporary or conventionalspare tire. A "temporary" spare tireis different in size (diameter orwidth), tread-type (All-Season orAll Terrain) or is from a differentmanufacturer than the road tireson your vehicle. Consultinformation on the tire label orSafety Compliance label forlimitations when using.
204
Super Duty (), enUSA
Towing
Page 233 of 470
Protected componentsFuse amp ratingFuse or relay number
Ignition switch15A28
GPS module20A29RadioSYNC
Parking lamp relay15A30Trailer tow parking lamp relay
Customer access5A31Trailer brake controller (brake signal)
Auto dimming mirror15A32Driver and passenger door lock switchilluminationDriver and passenger smart window motorMoonroof motorPassenger window switchPower inverterRear heated seat switch illuminationTelescoping mirror switch
Restraint control module10A33
Heated steering wheel module10A34Rear heated seats module
Reverse park aid module5A35Select shift switchTrailer brake control module
Fuel tank select switch10A36
Positive temperature coefficient heater10A37
AM/FM base radio10A38
High beam headlamps15A39
Parking lamps (in mirrors)10A40Roof marker lamps
Passenger airbag deactivation indicator7.5A41
Not used (spare)5A42
Wiper relay10A43
Auxiliary switches10A44
230
Super Duty (), enUSA
Fuses
Page 235 of 470
GENERAL INFORMATION
Have your vehicle serviced regularly to helpmaintain its roadworthiness and resalevalue. There is a large network of Fordauthorized dealers that are there to helpyou with their professional servicingexpertise. We believe that their speciallytrained technicians are best qualified toservice your vehicle properly and expertly.They are supported by a wide range ofhighly specialized tools developedspecifically for servicing your vehicle.
To help you service your vehicle, weprovide scheduled maintenanceinformation which makes tracking routineservice easy. See ScheduledMaintenance (page 440).
If your vehicle requires professional service,your authorized dealer can provide thenecessary parts and service. Check yourwarranty information to find out whichparts and services are covered.
Use only recommended fuels, lubricants,fluids and service parts conforming tospecifications. Motorcraft® parts aredesigned and built to provide the bestperformance in your vehicle.
Precautions
•Do not work on a hot engine.
•Make sure that nothing gets caught inmoving parts.
•Do not work on a vehicle with theengine running in an enclosed space,unless you are sure you have enoughventilation.
•Keep all open flames and other burningmaterial (such as cigarettes) awayfrom the battery and all fuel relatedparts.
Working with the Engine Off
1. Set the parking brake and shift to P(Park).
2.Turn off the engine and remove the key(if equipped).
3. Block the wheels.
Working with the Engine On
WARNING
To reduce the risk of vehicle damageand/or personal burn injuries, do notstart your engine with the air cleanerremoved and do not remove it while theengine is running.
1. Set the parking brake and shift to P(Park).
2. Block the wheels
OPENING AND CLOSING THE
HOOD
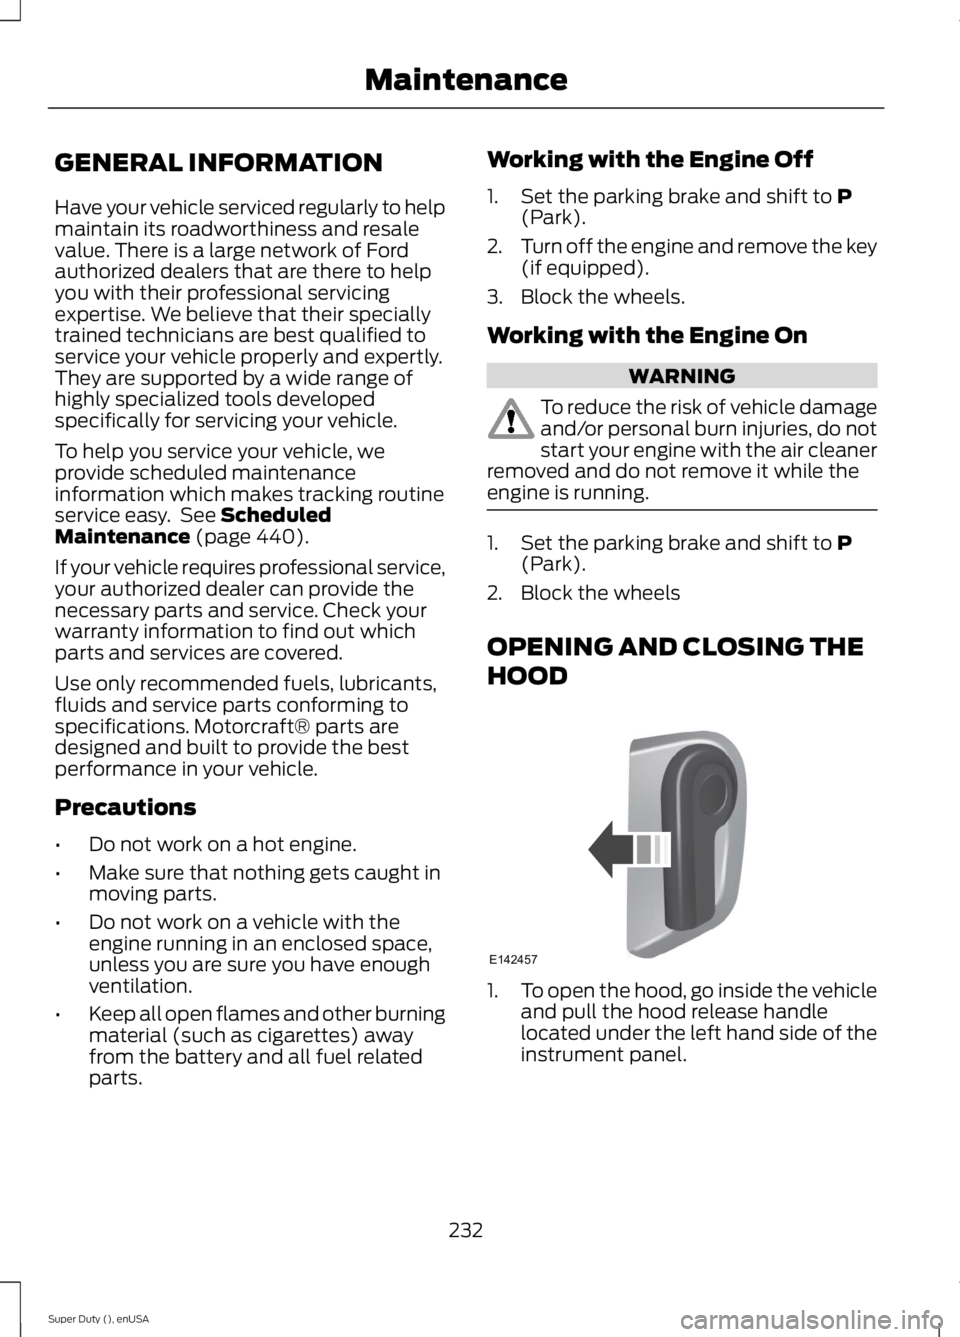
1.To open the hood, go inside the vehicleand pull the hood release handlelocated under the left hand side of theinstrument panel.
232
Super Duty (), enUSA
MaintenanceE142457
Page 238 of 470
Power steering fluid reservoirF.
Brake fluid reservoirG.
Engine coolant reservoirH.
Air filter assemblyI.
Power distribution boxJ.
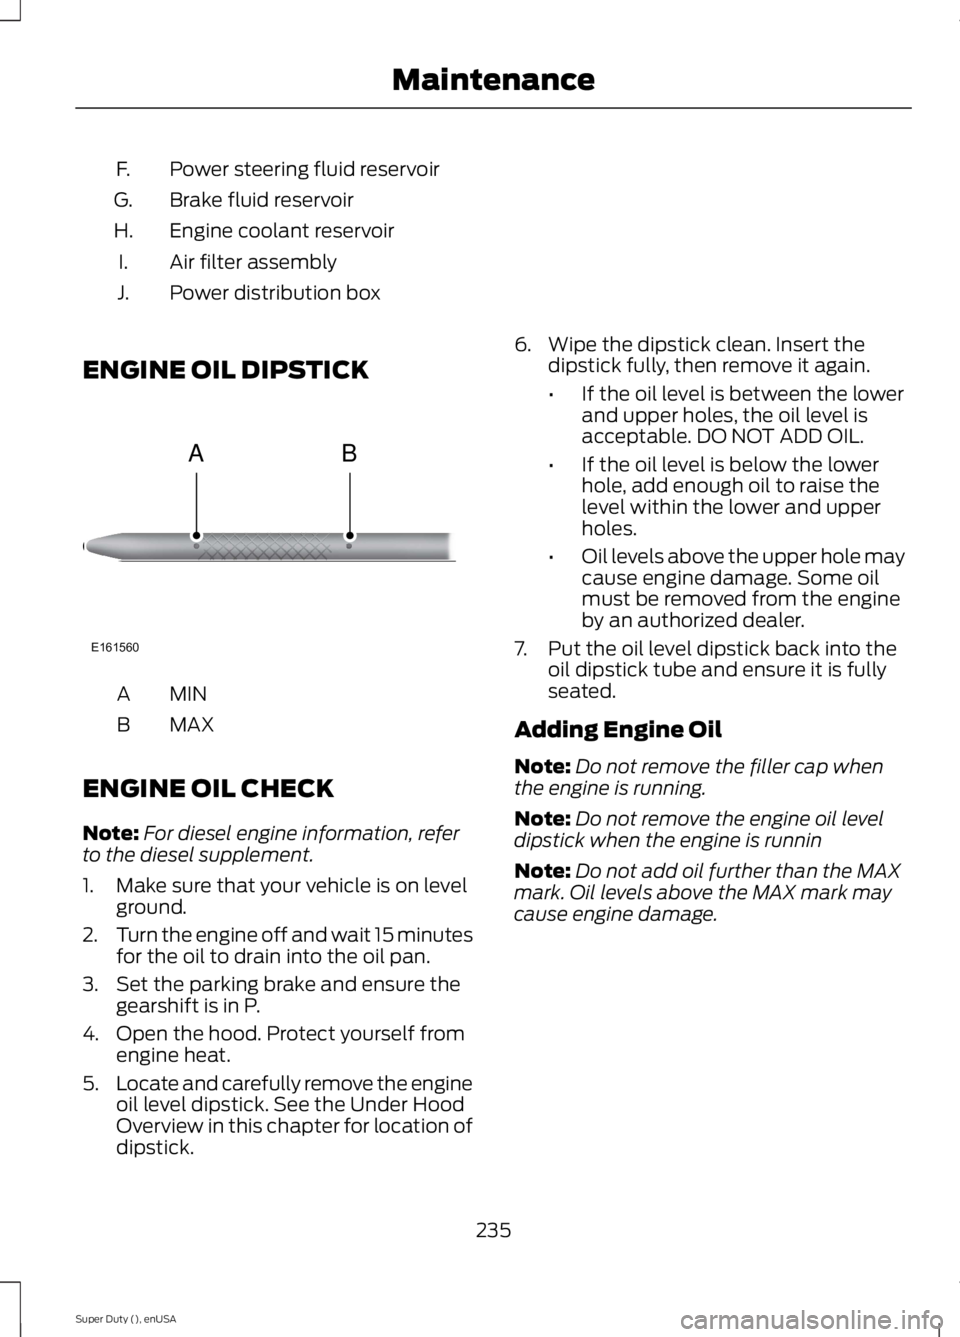
ENGINE OIL DIPSTICK
MINA
MAXB
ENGINE OIL CHECK
Note:For diesel engine information, referto the diesel supplement.
1. Make sure that your vehicle is on levelground.
2.Turn the engine off and wait 15 minutesfor the oil to drain into the oil pan.
3. Set the parking brake and ensure thegearshift is in P.
4. Open the hood. Protect yourself fromengine heat.
5.Locate and carefully remove the engineoil level dipstick. See the Under HoodOverview in this chapter for location ofdipstick.
6. Wipe the dipstick clean. Insert thedipstick fully, then remove it again.
•If the oil level is between the lowerand upper holes, the oil level isacceptable. DO NOT ADD OIL.
•If the oil level is below the lowerhole, add enough oil to raise thelevel within the lower and upperholes.
•Oil levels above the upper hole maycause engine damage. Some oilmust be removed from the engineby an authorized dealer.
7. Put the oil level dipstick back into theoil dipstick tube and ensure it is fullyseated.
Adding Engine Oil
Note:Do not remove the filler cap whenthe engine is running.
Note:Do not remove the engine oil leveldipstick when the engine is runnin
Note:Do not add oil further than the MAXmark. Oil levels above the MAX mark maycause engine damage.
235
Super Duty (), enUSA
MaintenanceE161560
AB
Page 243 of 470
•the engine coolant temperature gaugemoves fully into the red (hot) area
•the coolant temperature warning lightilluminates
•the service engine soon indicatorilluminates.
WARNING
Never remove the coolant reservoircap while the engine is running or hot.
1. Pull off the road as soon as safelypossible and place the vehicle in P(Park).
2. Leave the engine running until thecoolant temperature gauge needlemoves away from the H range. Afterseveral minutes, if this does nothappen, follow the remaining steps.
3. Turn the engine off and wait for it tocool before checking the coolant level.
4. If the coolant level is normal, you mayrestart your engine and continue on.
5. If the coolant is low, add coolant,restart the engine and take your vehicleto an authorized dealer. See Addingengine coolant in this chapter for moreinformation. Refer to fail-safe coolingfor additional information.
AUTOMATIC TRANSMISSION
FLUID CHECK
Have an authorized dealer check andchange the transmission fluid and filter atthe correct service interval. SeeScheduled Maintenance (page 440).
Do not use supplemental transmissionfluid additives, treatments or cleaningagents. The use of these materials mayaffect transmission operation and resultin damage to internal transmissioncomponents.
Checking Automatic TransmissionFluid (If Equipped)
For scheduled intervals of the fluid checksand changes, See ScheduledMaintenance (page 440). Yourtransmission does not consume fluid.However, the fluid level should be checkedif the transmission is not working properly,i.e., if the transmission slips or shifts slowlyor if you notice some sign of fluid leakage.
Automatic transmission fluid expandswhen warmed. To obtain an accurate fluidcheck, drive the vehicle until it is at normaloperating temperature (approximately19 mi (30 km)). Verify that thetransmission fluid temperature gauge,located on the instrument cluster, is withinnormal range.
1. Drive the vehicle 19 mi (30 km)until itreaches normal operating temperature.
2.Park the vehicle on a level surface andengage the parking brake.
3.With the engine running, parking brakeengaged and your foot on the brakepedal, move the gearshift lever throughall of the gear ranges. Allow sufficienttime for each gear to engage.
4.Latch the gearshift lever in P and leavethe engine running.
5. Remove the dipstick, wiping it cleanwith a clean, dry lint free rag. Ifnecessary, refer to the Under HoodOverview in this chapter for thelocation of the dipstick.
6.Install the dipstick making sure it is fullyseated in the filler tube.
7. Remove the dipstick and inspect thefluid level. The fluid should be in thedesignated area for normal operatingtemperature or ambient temperature.
Low Fluid Level
Type A
240
Super Duty (), enUSA
Maintenance