2015 FORD F250 SUPER DUTY mirror
[x] Cancel search: mirrorPage 106 of 470
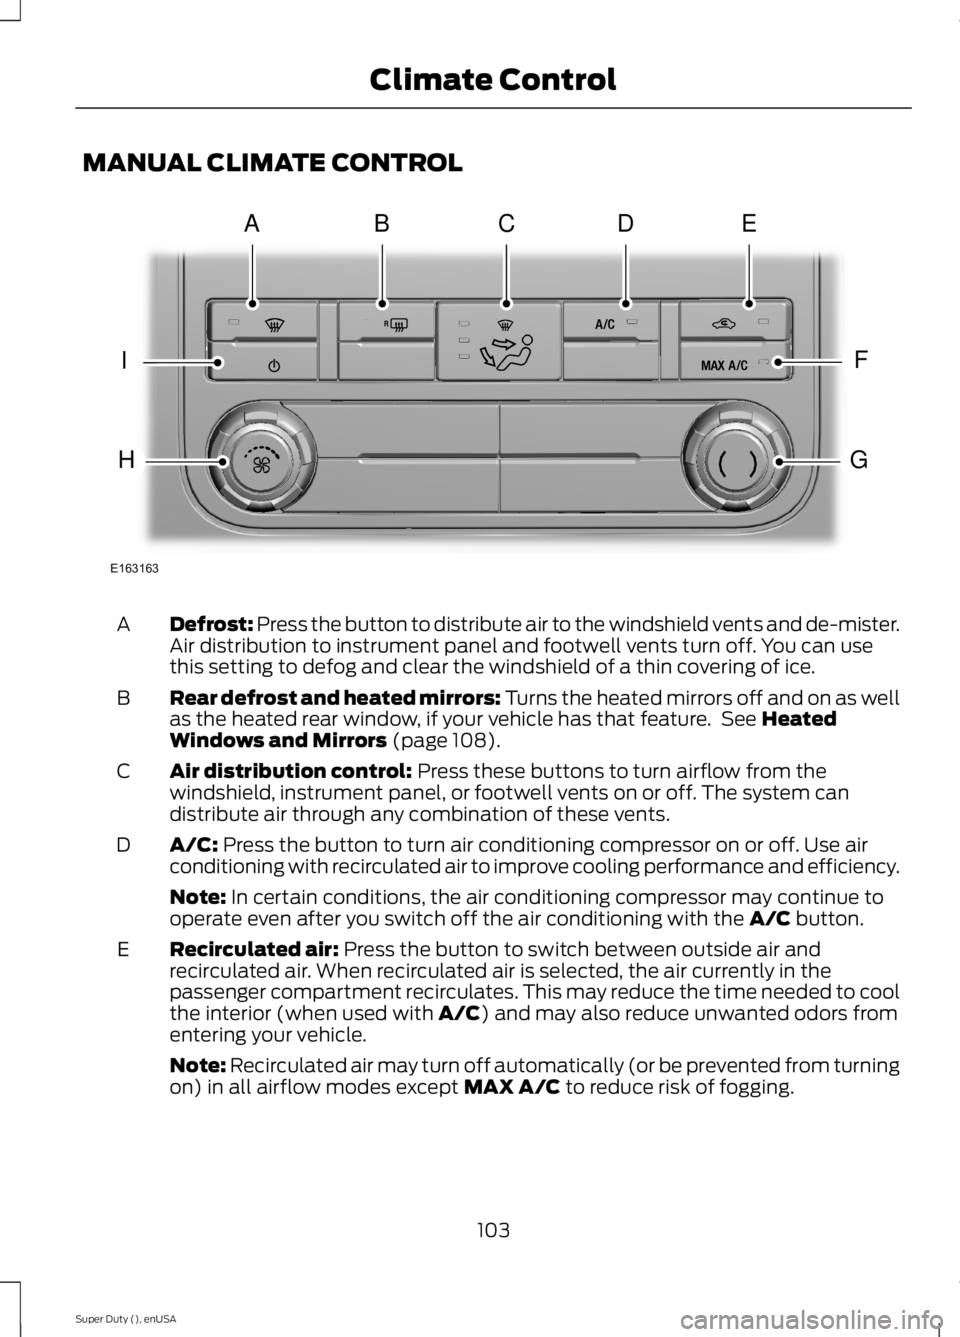
MANUAL CLIMATE CONTROL
Defrost: Press the button to distribute air to the windshield vents and de-mister.Air distribution to instrument panel and footwell vents turn off. You can usethis setting to defog and clear the windshield of a thin covering of ice.
A
Rear defrost and heated mirrors: Turns the heated mirrors off and on as wellas the heated rear window, if your vehicle has that feature. See HeatedWindows and Mirrors (page 108).
B
Air distribution control: Press these buttons to turn airflow from thewindshield, instrument panel, or footwell vents on or off. The system candistribute air through any combination of these vents.
C
A/C: Press the button to turn air conditioning compressor on or off. Use airconditioning with recirculated air to improve cooling performance and efficiency.D
Note: In certain conditions, the air conditioning compressor may continue tooperate even after you switch off the air conditioning with the A/C button.
Recirculated air: Press the button to switch between outside air andrecirculated air. When recirculated air is selected, the air currently in thepassenger compartment recirculates. This may reduce the time needed to coolthe interior (when used with A/C) and may also reduce unwanted odors fromentering your vehicle.
E
Note: Recirculated air may turn off automatically (or be prevented from turningon) in all airflow modes except MAX A/C to reduce risk of fogging.
103
Super Duty (), enUSA
Climate ControlE163163
ABDCE
F
G
I
H
Page 107 of 470
MAX A/C: Turn the temperature control dial all the way past the full coolposition to maximize cooling. Recirculated air flows through the instrumentpanel vents, air conditioning automatically turns on, the fan automaticallyadjusts to the highest speed and the temperature dial returns to the full coolposition.
F
Temperature control: Controls the temperature of the airflow in your vehicle.Adjust to select the desired temperature.G
Fan speed control: Controls the volume of air circulated in your vehicle. Adjustto select the desired fan speed.H
Power: Press the button to turn the system on and off. Switching off the climatecontrol system prevents outside air from entering the vehicle.I
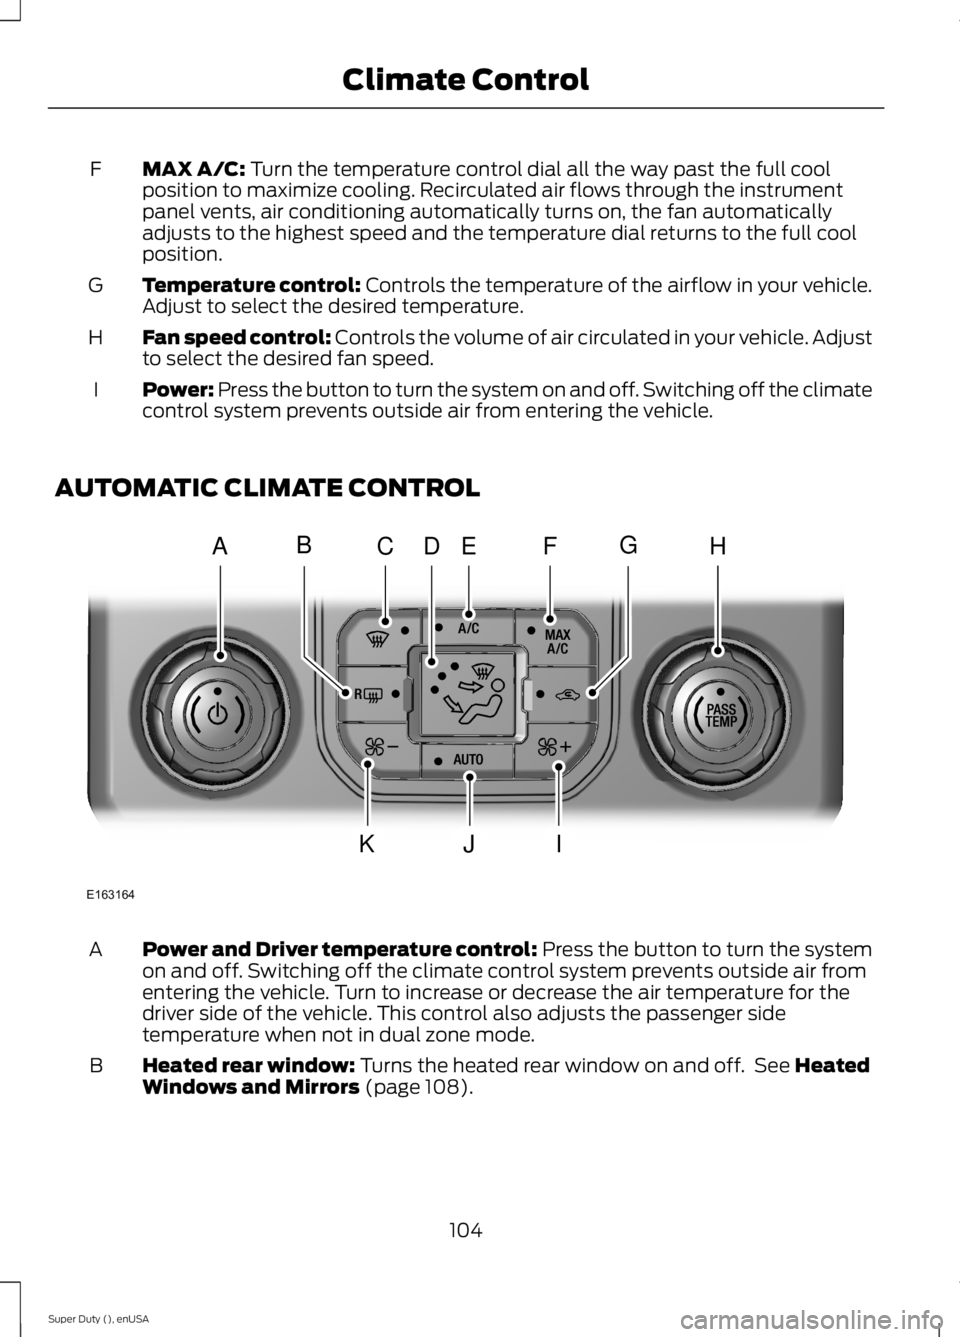
AUTOMATIC CLIMATE CONTROL
Power and Driver temperature control: Press the button to turn the systemon and off. Switching off the climate control system prevents outside air fromentering the vehicle. Turn to increase or decrease the air temperature for thedriver side of the vehicle. This control also adjusts the passenger sidetemperature when not in dual zone mode.
A
Heated rear window: Turns the heated rear window on and off. See HeatedWindows and Mirrors (page 108).B
104
Super Duty (), enUSA
Climate ControlE163164
AHCEF
JIK
DBG
Page 111 of 470
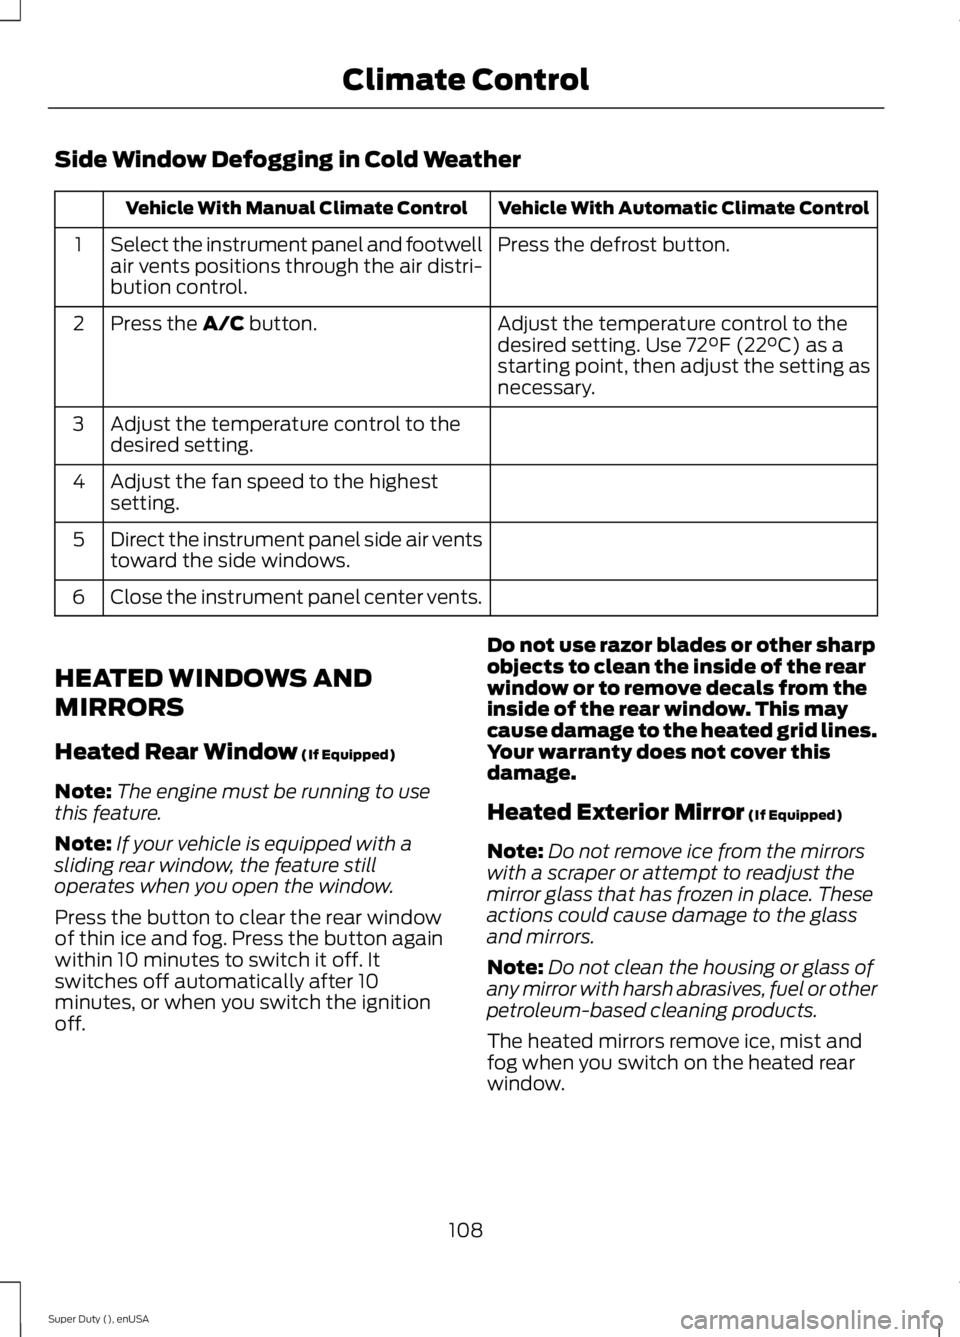
Side Window Defogging in Cold Weather
Vehicle With Automatic Climate ControlVehicle With Manual Climate Control
Press the defrost button.Select the instrument panel and footwellair vents positions through the air distri-bution control.
1
Adjust the temperature control to thedesired setting. Use 72°F (22°C) as astarting point, then adjust the setting asnecessary.
Press the A/C button.2
Adjust the temperature control to thedesired setting.3
Adjust the fan speed to the highestsetting.4
Direct the instrument panel side air ventstoward the side windows.5
Close the instrument panel center vents.6
HEATED WINDOWS AND
MIRRORS
Heated Rear Window (If Equipped)
Note:The engine must be running to usethis feature.
Note:If your vehicle is equipped with asliding rear window, the feature stilloperates when you open the window.
Press the button to clear the rear windowof thin ice and fog. Press the button againwithin 10 minutes to switch it off. Itswitches off automatically after 10minutes, or when you switch the ignitionoff.
Do not use razor blades or other sharpobjects to clean the inside of the rearwindow or to remove decals from theinside of the rear window. This maycause damage to the heated grid lines.Your warranty does not cover thisdamage.
Heated Exterior Mirror (If Equipped)
Note:Do not remove ice from the mirrorswith a scraper or attempt to readjust themirror glass that has frozen in place. Theseactions could cause damage to the glassand mirrors.
Note:Do not clean the housing or glass ofany mirror with harsh abrasives, fuel or otherpetroleum-based cleaning products.
The heated mirrors remove ice, mist andfog when you switch on the heated rearwindow.
108
Super Duty (), enUSA
Climate Control
Page 112 of 470
REMOTE START (IF EQUIPPED)
The remote start feature allows you topre-condition the interior of your vehicle.The climate control system works toachieve comfort according to your previoussettings.
Note:You cannot adjust the system duringremote start operation.
Turn the ignition on to return the systemto its previous settings. You can now makeadjustments normally, but you need to turncertain vehicle-dependent features backon, such as:
•Heated seats.
•Cooled seats.
•Heated steering wheel.
•Heated mirrors.
•Heated rear window.
You can adjust the default remote startsettings using the information displaycontrols. See Information Displays(page 81).
Automatic Settings
In hot weather, the system is set to 72°F(22°C). The cooled seats are set to high(if available, and selected to AUTO in theinformation display).
In moderate weather, the system eitherheats or cools (based on previoussettings). The rear defroster, heatedmirrors and heated seats do notautomatically turn on.
In cold weather, the system is set to 72°F(22°C). The heated seats are set to high(if available, and selected to AUTO in theinformation display). The rear defrosterand heated mirrors automatically turn on.
109
Super Duty (), enUSA
Climate Control
Page 117 of 470
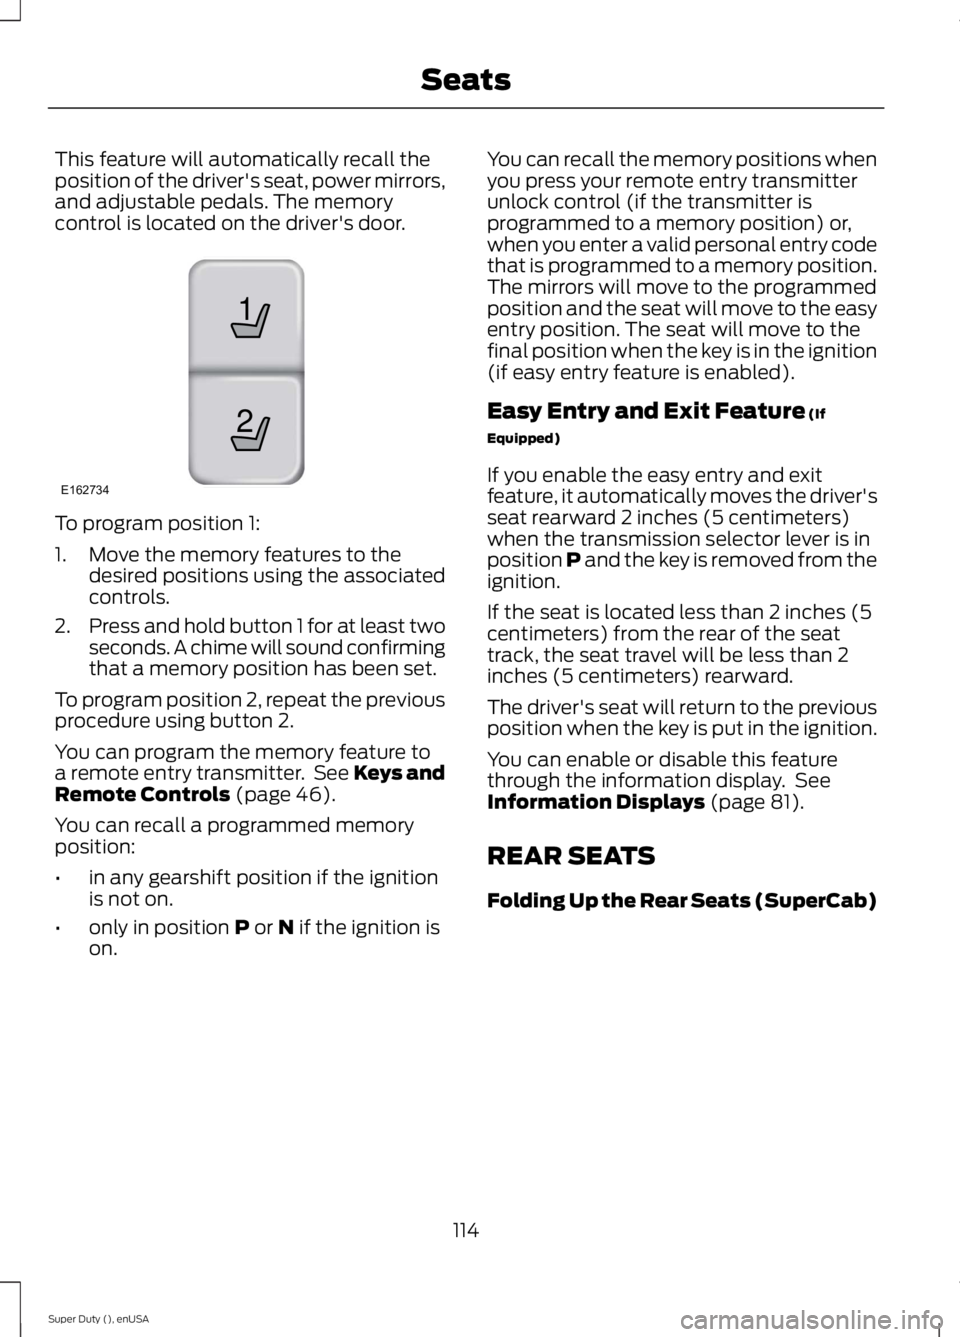
This feature will automatically recall theposition of the driver's seat, power mirrors,and adjustable pedals. The memorycontrol is located on the driver's door.
To program position 1:
1. Move the memory features to thedesired positions using the associatedcontrols.
2.Press and hold button 1 for at least twoseconds. A chime will sound confirmingthat a memory position has been set.
To program position 2, repeat the previousprocedure using button 2.
You can program the memory feature toa remote entry transmitter. See Keys andRemote Controls (page 46).
You can recall a programmed memoryposition:
•in any gearshift position if the ignitionis not on.
•only in position P or N if the ignition ison.
You can recall the memory positions whenyou press your remote entry transmitterunlock control (if the transmitter isprogrammed to a memory position) or,when you enter a valid personal entry codethat is programmed to a memory position.The mirrors will move to the programmedposition and the seat will move to the easyentry position. The seat will move to thefinal position when the key is in the ignition(if easy entry feature is enabled).
Easy Entry and Exit Feature (If
Equipped)
If you enable the easy entry and exitfeature, it automatically moves the driver'sseat rearward 2 inches (5 centimeters)when the transmission selector lever is inposition P and the key is removed from theignition.
If the seat is located less than 2 inches (5centimeters) from the rear of the seattrack, the seat travel will be less than 2inches (5 centimeters) rearward.
The driver's seat will return to the previousposition when the key is put in the ignition.
You can enable or disable this featurethrough the information display. SeeInformation Displays (page 81).
REAR SEATS
Folding Up the Rear Seats (SuperCab)
114
Super Duty (), enUSA
Seats21
E162734
Page 176 of 470
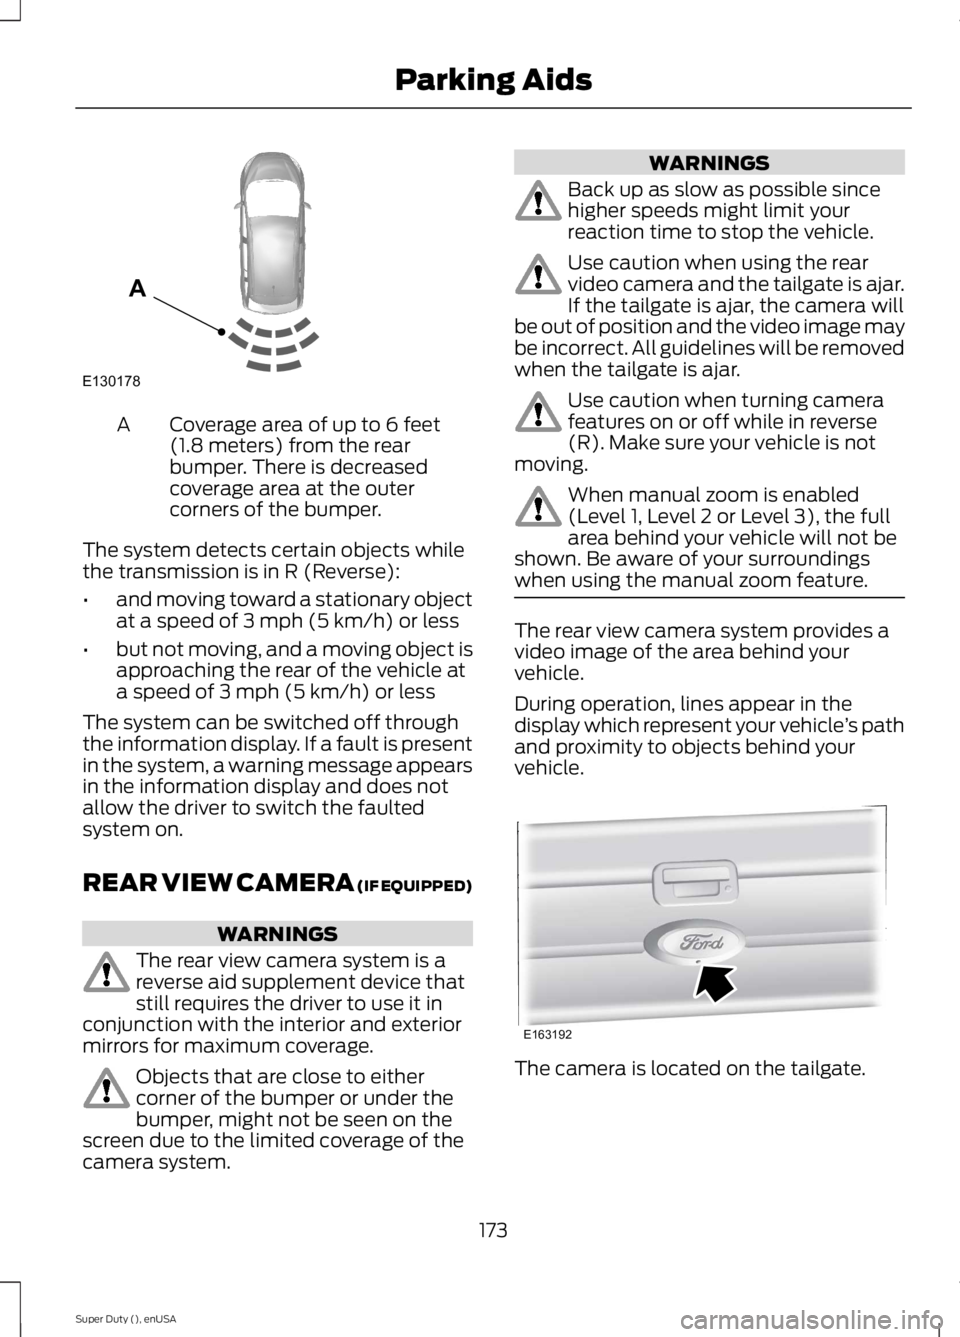
Coverage area of up to 6 feet(1.8 meters) from the rearbumper. There is decreasedcoverage area at the outercorners of the bumper.
A
The system detects certain objects whilethe transmission is in R (Reverse):
•and moving toward a stationary objectat a speed of 3 mph (5 km/h) or less
•but not moving, and a moving object isapproaching the rear of the vehicle ata speed of 3 mph (5 km/h) or less
The system can be switched off throughthe information display. If a fault is presentin the system, a warning message appearsin the information display and does notallow the driver to switch the faultedsystem on.
REAR VIEW CAMERA (IF EQUIPPED)
WARNINGS
The rear view camera system is areverse aid supplement device thatstill requires the driver to use it inconjunction with the interior and exteriormirrors for maximum coverage.
Objects that are close to eithercorner of the bumper or under thebumper, might not be seen on thescreen due to the limited coverage of thecamera system.
WARNINGS
Back up as slow as possible sincehigher speeds might limit yourreaction time to stop the vehicle.
Use caution when using the rearvideo camera and the tailgate is ajar.If the tailgate is ajar, the camera willbe out of position and the video image maybe incorrect. All guidelines will be removedwhen the tailgate is ajar.
Use caution when turning camerafeatures on or off while in reverse(R). Make sure your vehicle is notmoving.
When manual zoom is enabled(Level 1, Level 2 or Level 3), the fullarea behind your vehicle will not beshown. Be aware of your surroundingswhen using the manual zoom feature.
The rear view camera system provides avideo image of the area behind yourvehicle.
During operation, lines appear in thedisplay which represent your vehicle’s pathand proximity to objects behind yourvehicle.
The camera is located on the tailgate.
173
Super Duty (), enUSA
Parking AidsE130178
A E163192
Page 178 of 470
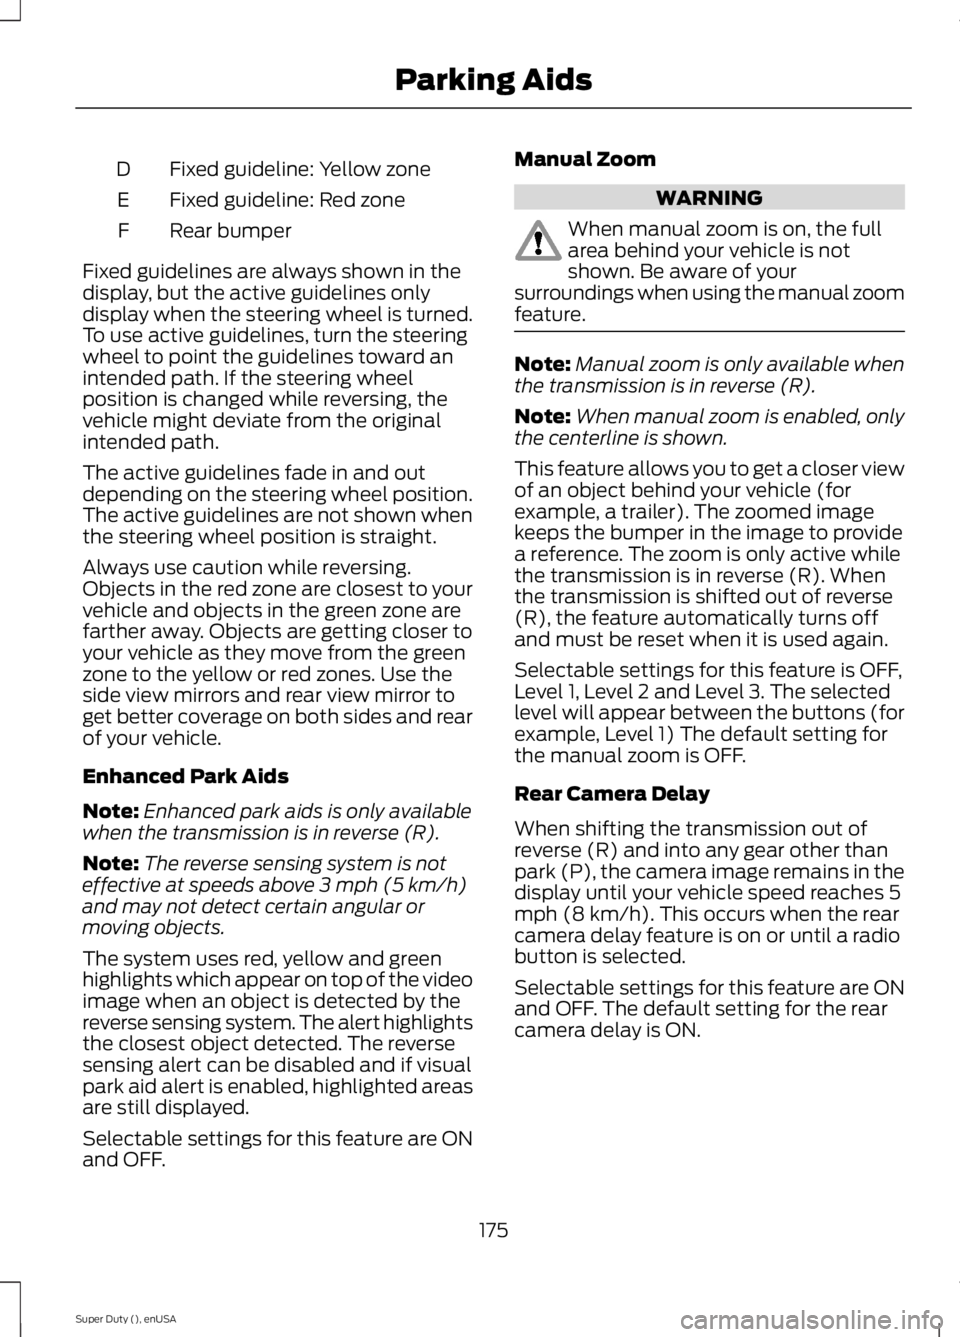
Fixed guideline: Yellow zoneD
Fixed guideline: Red zoneE
Rear bumperF
Fixed guidelines are always shown in thedisplay, but the active guidelines onlydisplay when the steering wheel is turned.To use active guidelines, turn the steeringwheel to point the guidelines toward anintended path. If the steering wheelposition is changed while reversing, thevehicle might deviate from the originalintended path.
The active guidelines fade in and outdepending on the steering wheel position.The active guidelines are not shown whenthe steering wheel position is straight.
Always use caution while reversing.Objects in the red zone are closest to yourvehicle and objects in the green zone arefarther away. Objects are getting closer toyour vehicle as they move from the greenzone to the yellow or red zones. Use theside view mirrors and rear view mirror toget better coverage on both sides and rearof your vehicle.
Enhanced Park Aids
Note:Enhanced park aids is only availablewhen the transmission is in reverse (R).
Note:The reverse sensing system is noteffective at speeds above 3 mph (5 km/h)and may not detect certain angular ormoving objects.
The system uses red, yellow and greenhighlights which appear on top of the videoimage when an object is detected by thereverse sensing system. The alert highlightsthe closest object detected. The reversesensing alert can be disabled and if visualpark aid alert is enabled, highlighted areasare still displayed.
Selectable settings for this feature are ONand OFF.
Manual Zoom
WARNING
When manual zoom is on, the fullarea behind your vehicle is notshown. Be aware of yoursurroundings when using the manual zoomfeature.
Note:Manual zoom is only available whenthe transmission is in reverse (R).
Note:When manual zoom is enabled, onlythe centerline is shown.
This feature allows you to get a closer viewof an object behind your vehicle (forexample, a trailer). The zoomed imagekeeps the bumper in the image to providea reference. The zoom is only active whilethe transmission is in reverse (R). Whenthe transmission is shifted out of reverse(R), the feature automatically turns offand must be reset when it is used again.
Selectable settings for this feature is OFF,Level 1, Level 2 and Level 3. The selectedlevel will appear between the buttons (forexample, Level 1) The default setting forthe manual zoom is OFF.
Rear Camera Delay
When shifting the transmission out ofreverse (R) and into any gear other thanpark (P), the camera image remains in thedisplay until your vehicle speed reaches 5mph (8 km/h). This occurs when the rearcamera delay feature is on or until a radiobutton is selected.
Selectable settings for this feature are ONand OFF. The default setting for the rearcamera delay is ON.
175
Super Duty (), enUSA
Parking Aids
Page 198 of 470
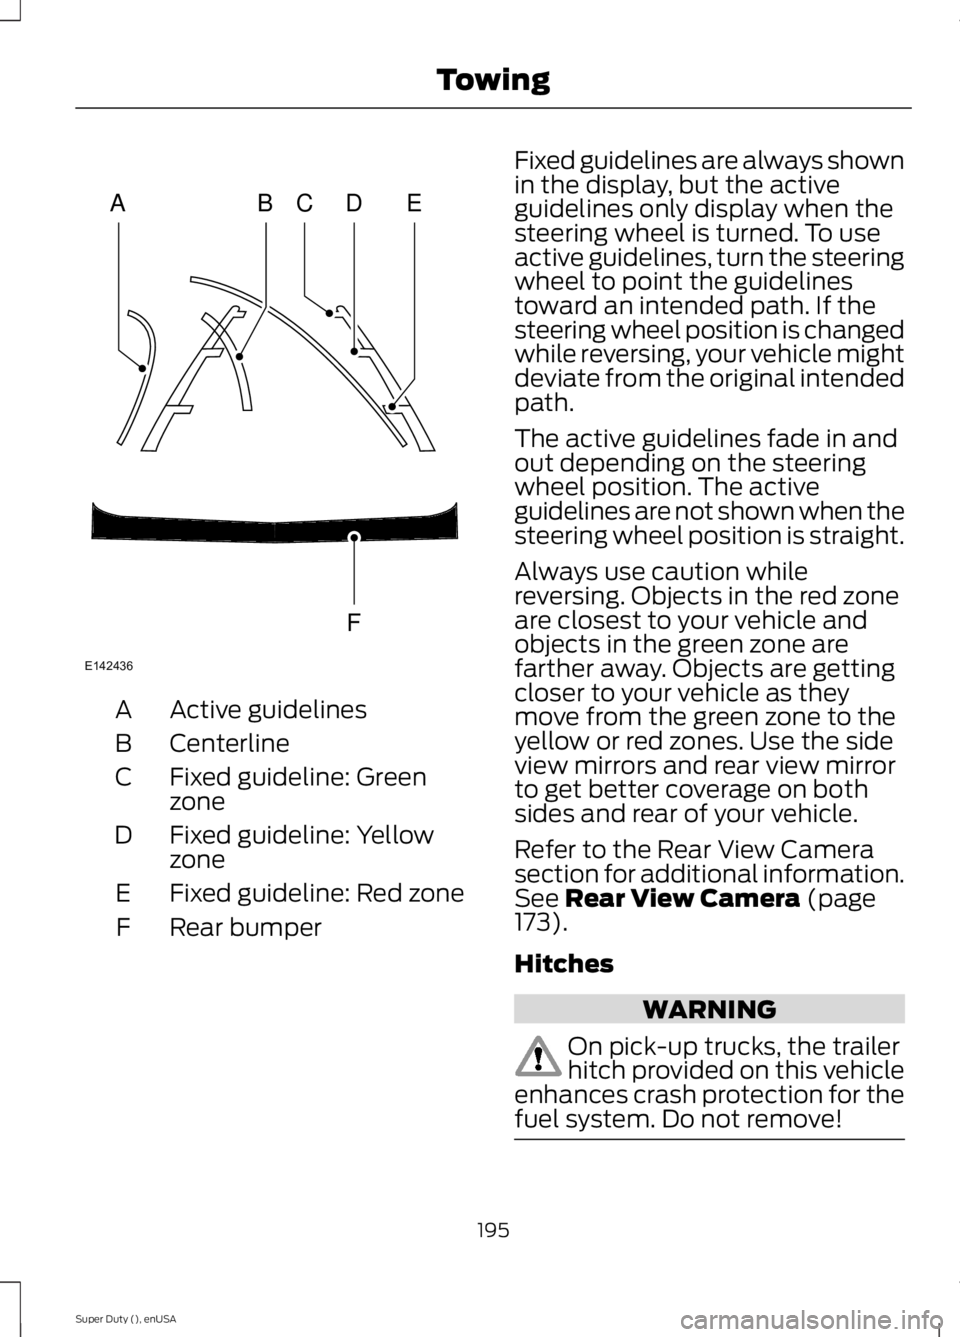
Active guidelinesA
CenterlineB
Fixed guideline: GreenzoneC
Fixed guideline: YellowzoneD
Fixed guideline: Red zoneE
Rear bumperF
Fixed guidelines are always shownin the display, but the activeguidelines only display when thesteering wheel is turned. To useactive guidelines, turn the steeringwheel to point the guidelinestoward an intended path. If thesteering wheel position is changedwhile reversing, your vehicle mightdeviate from the original intendedpath.
The active guidelines fade in andout depending on the steeringwheel position. The activeguidelines are not shown when thesteering wheel position is straight.
Always use caution whilereversing. Objects in the red zoneare closest to your vehicle andobjects in the green zone arefarther away. Objects are gettingcloser to your vehicle as theymove from the green zone to theyellow or red zones. Use the sideview mirrors and rear view mirrorto get better coverage on bothsides and rear of your vehicle.
Refer to the Rear View Camerasection for additional information.See Rear View Camera (page173).
Hitches
WARNING
On pick-up trucks, the trailerhitch provided on this vehicleenhances crash protection for thefuel system. Do not remove!
195
Super Duty (), enUSA
TowingABCD
F
E
E142436