2015 FORD F250 SUPER DUTY instrument cluster
[x] Cancel search: instrument clusterPage 83 of 470

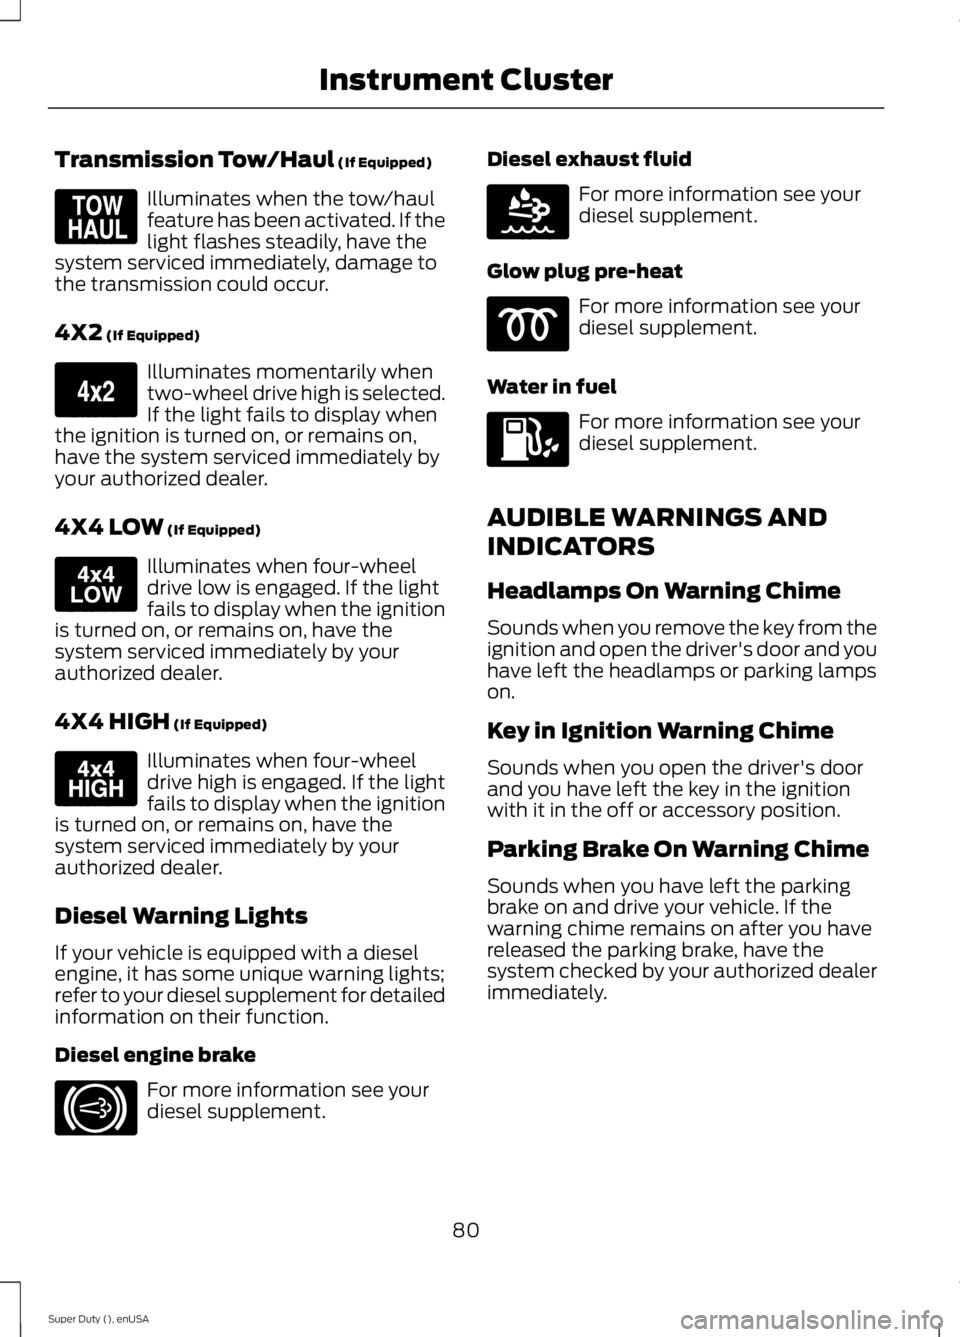
Transmission Tow/Haul (If Equipped)
Illuminates when the tow/haulfeature has been activated. If thelight flashes steadily, have thesystem serviced immediately, damage tothe transmission could occur.
4X2 (If Equipped)
Illuminates momentarily whentwo-wheel drive high is selected.If the light fails to display whenthe ignition is turned on, or remains on,have the system serviced immediately byyour authorized dealer.
4X4 LOW (If Equipped)
Illuminates when four-wheeldrive low is engaged. If the lightfails to display when the ignitionis turned on, or remains on, have thesystem serviced immediately by yourauthorized dealer.
4X4 HIGH (If Equipped)
Illuminates when four-wheeldrive high is engaged. If the lightfails to display when the ignitionis turned on, or remains on, have thesystem serviced immediately by yourauthorized dealer.
Diesel Warning Lights
If your vehicle is equipped with a dieselengine, it has some unique warning lights;refer to your diesel supplement for detailedinformation on their function.
Diesel engine brake
For more information see yourdiesel supplement.
Diesel exhaust fluid
For more information see yourdiesel supplement.
Glow plug pre-heat
For more information see yourdiesel supplement.
Water in fuel
For more information see yourdiesel supplement.
AUDIBLE WARNINGS AND
INDICATORS
Headlamps On Warning Chime
Sounds when you remove the key from theignition and open the driver's door and youhave left the headlamps or parking lampson.
Key in Ignition Warning Chime
Sounds when you open the driver's doorand you have left the key in the ignitionwith it in the off or accessory position.
Parking Brake On Warning Chime
Sounds when you have left the parkingbrake on and drive your vehicle. If thewarning chime remains on after you havereleased the parking brake, have thesystem checked by your authorized dealerimmediately.
80
Super Duty (), enUSA
Instrument ClusterE161509 E163173 E163174 E163175 E171217 E163176
Page 95 of 470

Compass/Transmission indicatordisplay (if equipped)
The compass heading will display in theupper right corner of the informationdisplay; the transmission gear indicatordisplays in the right side of the informationdisplay when using the SelectShiftAutomatic™ transmission feature. Thesedisplays will not be shown in all screenmodes. For example: when programmingcertain vehicle features or in certaininformation menus.
INFORMATION MESSAGES
Note:Depending on your vehicle optionsand instrument cluster type, not all of themessages will display or be available.Additionally, the information display mayabbreviate or shorten certain messages.
Press the RESET button for Type 1 displaysor the OK button for Type 2 displays toacknowledge and remove some messagesfrom the information display. Theinformation display will automaticallyremove other messages after a short time.
You need to confirm certain messagesbefore you can access the menus.
AdvanceTrac™
ActionMessage
The system detects a condition that requires service. Havethe system checked by an authorized dealer.SERVICE ADVAN-CETRAC
The driver has disabled the stability control system. SeeUsing Stability Control (page 167).ADVANCETRAC OFF
The driver has disabled the traction control system. See UsingTraction Control (page 165).TRACTION CONTROLOFF
Alarm
ActionMessage
An unauthorized entry has triggered the alarm. See Anti-TheftAlarm (page 59).TO STOP ALARMSTART VEHICLE
The security system has detected a fault. Have the systemchecked by an authorized dealer.SECURITY SYSTEMFAULT
92
Super Duty (), enUSA
Information Displays
Page 142 of 470

WARNINGS
Keep sparks, flames and smokingmaterials away from fuel.
Stay outside your vehicle and do notleave the fuel pump unattendedwhen refueling your vehicle. This isagainst the law in some places.
Keep children away from the fuelpump; never let children pump fuel.
Do not use personal electronicdevices while refueling.
Use the following guidelines to avoidelectrostatic charge build-up when fillingan ungrounded fuel container:
•Place approved fuel container on theground.
•Do not fill a fuel container while it is inthe vehicle (including the cargo area).
•Keep the fuel pump nozzle in contactwith the fuel container while filling.
•Do not use a device that would holdthe fuel pump handle in the fill position.
Fuel Filler Cap
WARNINGS
The fuel system may be underpressure. If you hear a hissing soundnear the fuel filler door, do not refueluntil the sound stops. Otherwise, fuel mayspray out, which could cause seriouspersonal injury.
If you do not use the proper fuel fillercap, excessive pressure or vacuumin the fuel tank may damage the fuelsystem or cause the fuel cap to disengagein a collision, which may result in possiblepersonal injury.
Note:If you must replace the fuel filler cap,replace it with a fuel filler cap that isdesigned for your vehicle. The customerwarranty may be void for any damage to thefuel tank or fuel system if the correctgenuine Ford, Motorcraft® or other certifiedfuel filler cap is not used.
Your fuel tank filler cap has an indexeddesign with a 1/4th turn on and off feature.When fueling your vehicle:
1. Put the vehicle in P (Park).
2. Turn the engine off.
3. Carefully turn the filler capcounterclockwise until it spins off.
4. Pull to remove the cap from the fuelfiller pipe.
5.To install the cap, align the tabs on thecap with the notches on the filler pipe.
6. Turn the filler cap clockwise 1/4 of aturn clockwise until it clicks at leastonce.
If the Check Fuel Cap light or a Check FuelCap message appears in the instrumentcluster and stays on after you start theengine, the fuel filler cap may not beproperly installed.
If the fuel cap light remains on, at the nextopportunity, safely pull off of the road,remove the fuel filler cap, align the capproperly and reinstall it. The check fuel caplight or Check fuel cap message may notreset immediately; it may take severaldriving cycles for the indicators to turn off.A driving cycle consists of an enginestart-up (after four or more hours with theengine off) followed by normal city andhighway driving.
139
Super Duty (), enUSA
Fuel and Refueling
Page 147 of 470

AUTOMATIC TRANSMISSION
WARNING
Always set the parking brake fullyand make sure the gearshift islatched in P (Park). Turn the ignitionto the off position and remove the keywhenever you leave your vehicle.
Understanding the Shift Positionsof the 5–Speed AutomaticTransmission (If Equipped)
Putting your vehicle in or out of gear:
1. Fully press down the brake pedal.
2. Move the gearshift lever into thedesired gear.
3. Come to a complete stop.
4. Move the gearshift lever and securelylatch it in P (Park)
P (Park)
This position locks the transmission andprevents the rear wheels from turning.
R (Reverse)
With the gearshift lever in R (Reverse), thevehicle will move backward. Always cometo a complete stop before shifting into andout of R (Reverse).
N (Neutral)
With the gearshift lever in N (Neutral), thevehicle can be started and is free to roll.Hold the brake pedal down while in thisposition.
D (Overdrive) with tow/haul off
D (Overdrive) with tow/haul off is thenormal driving position for the best fueleconomy. The overdrive function allowsautomatic upshifts and downshifts throughgears one through five.
D (Overdrive) with tow/haul on
The tow/haul feature improvestransmission operation when towing atrailer or a heavy load. All transmissiongear ranges are available when usingtow/haul.
To activate tow/haul, press thebutton on the end of thegearshift lever. The TOW HAULindicator light will illuminate in theinstrument cluster.
Tow/haul delays upshifts to reducefrequency of transmission shifting.Tow/haul also provides engine braking inall forward gears when the transmission isin the D (Overdrive) position; this enginebraking will slow the vehicle and assist thedriver in controlling the vehicle whendescending a grade. Depending on drivingconditions and load conditions, the
144
Super Duty (), enUSA
TransmissionE161511
P R N D 3 2 1 E163182 E161509
Page 149 of 470

R (Reverse)
With the gearshift lever in R (Reverse), thevehicle will move backward. Always cometo a complete stop before shifting into andout of R (Reverse).
N (Neutral)
With the gearshift lever in N (Neutral), thevehicle can be started and is free to roll.Hold the brake pedal down while in thisposition.
D (Overdrive) with tow/haul off
D (Overdrive) with tow/haul off is thenormal driving position for the best fueleconomy. The overdrive function allowsautomatic upshifts and downshifts throughgears one through six.
D (Overdrive) with tow/haul on
The tow/haul feature improvestransmission operation when towing atrailer or a heavy load. All transmissiongear ranges are available when usingtow/haul.
To activate tow/haul, press thebutton on the end of thegearshift lever. The TOW HAULindicator light will illuminate in theinstrument cluster.
Tow/haul delays upshifts to reducefrequency of transmission shifting.Tow/haul also provides engine braking inall forward gears when the transmission isin the D (Overdrive) position; this enginebraking will slow the vehicle and assist thedriver in controlling the vehicle whendescending a grade. Depending on drivingconditions and load conditions, thetransmission may downshift, slow thevehicle and control the vehicle speed whendescending a hill, without the acceleratorpedal being pressed. The amount ofdownshift braking provided will vary basedupon the amount the brake pedal ispressed.
Tow/haul may be automatically activated(without pressing the tow/haul button).This provides engine braking to assist thevehicles braking system when goingdownhill and repetitive braking is sensed.Once the tow/haul mode has beenautomatically activated it will notautomatically deactivate.
To deactivate the tow/haul feature andreturn to normal driving mode, press thebutton on the end of the gearshift lever.The TOW HAUL light will no longer beilluminated.
Tow/haul will also deactivate when thevehicle is powered down for a few minutes.
WARNING
Do not use the tow/haul or enginebrake features when driving in icy orslippery conditions as the increasedengine braking can cause the rear wheelsto slide and your vehicle to swing aroundwith the possible loss of vehicle control.
146
Super Duty (), enUSA
TransmissionE163182 E161509
Page 150 of 470

M (Manual) without Overdrive
With the gearshift lever in M (Manual), thedriver can change gears up or down asdesired. This is called SelectShiftAutomatic™ transmission (SST) mode.By moving the gearshift lever from driveposition D (Overdrive) to M (Manual) younow have control of selecting the gear youdesire using buttons on the shift lever.
To return to normal D (Overdrive) position,move the shift lever back from M to D.
The transmission will operate in gears onethrough six.
2 (Second)
Use 2 (Second) to start-up on slipperyroads or to provide additional enginebraking on downgrades.
1 (First)
•Provides maximum engine braking
•Allows upshifts by moving gearshiftlever
•The transmission will not downshiftinto 1 (First) at high speeds; it willdownshift to a lower gear and thenshift into 1 (First) when the vehiclereaches slower speeds.
Forced downshifts
•Allowed in D (Overdrive) with thetow/haul feature on or off
•Press the accelerator to the floor
•Allows transmission to select anappropriate gear
Understanding your SelectShiftAutomatic® transmission (If Equipped)
Your vehicle is equipped with a SelectShiftAutomatic transmission gearshift lever.SelectShift Automatic transmission givesyou the ability to change gears up or down(without a clutch) as desired.
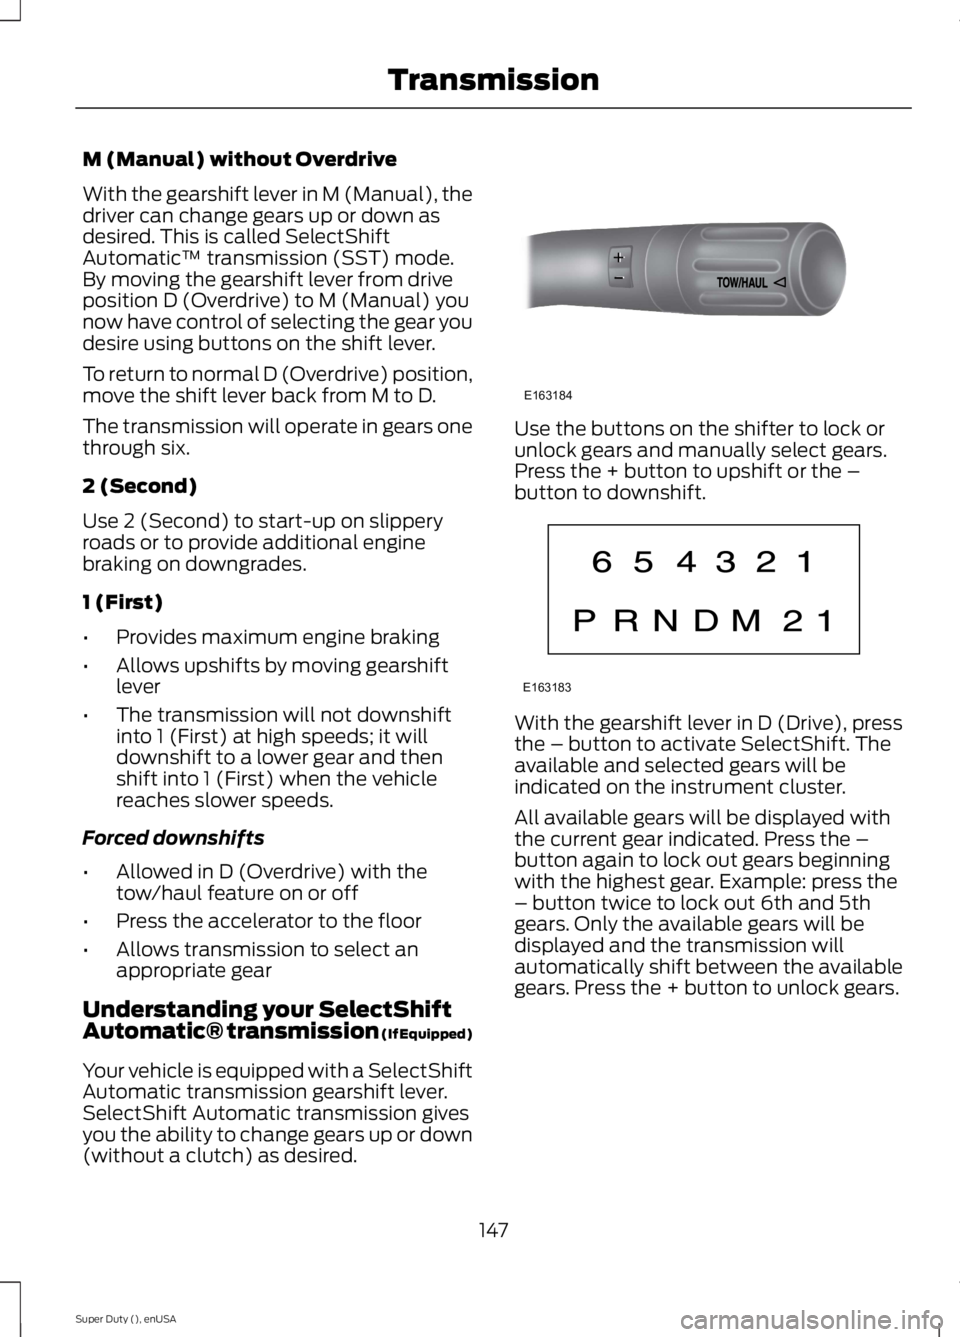
Use the buttons on the shifter to lock orunlock gears and manually select gears.Press the + button to upshift or the –button to downshift.
With the gearshift lever in D (Drive), pressthe – button to activate SelectShift. Theavailable and selected gears will beindicated on the instrument cluster.
All available gears will be displayed withthe current gear indicated. Press the –button again to lock out gears beginningwith the highest gear. Example: press the– button twice to lock out 6th and 5thgears. Only the available gears will bedisplayed and the transmission willautomatically shift between the availablegears. Press the + button to unlock gears.
147
Super Duty (), enUSA
TransmissionE163184 E163183
Page 166 of 470

PARKING BRAKE
WARNING
Always set the parking brake fullyand make sure the transmissionselector lever is placed in position P.Failure to set the parking brake and engagepark could result in vehicle roll-away,property damage or bodily injury. Turn theignition to the lock position and removethe key whenever you leave your vehicle.
Apply the parking brake whenever yourvehicle is parked. Press the pedaldownward to set the parking brake. Thebrake warning lamp in the instrumentcluster will illuminate and remainsilluminated until the parking brake isreleased.
To release, pull the brake release leverlocated at the lower left side of theinstrument panel.
If you are parking your vehicle on a gradeor with a trailer, press and hold the brakepedal down, then set the parking brake.There may be a little vehicle movement asthe parking brake sets to hold the vehicle'sweight. This is normal and should be noreason for concern. If needed, press andhold the service brake pedal down, thentry reapplying the parking brake. Chock thewheels if required. If the parking brakecannot hold the weight of the vehicle, theparking brake may need to be serviced orthe vehicle may be overloaded.
HILL START ASSIST
WARNINGS
The system does not replace theparking brake. When you leave yourvehicle, always apply the parkingbrake and put the transmission in park (P).
WARNINGS
You must remain in your vehicle onceyou have activated the system.
During all times, you are responsiblefor controlling your vehicle,supervising the system andintervening, if required.
If the engine is revved excessively, orif a malfunction is detected, thesystem will be deactivated.
The system makes it easier to pull awaywhen your vehicle is on a slope without theneed to use the parking brake.
When the system is active, your vehicle willremain stationary on the slope for two tothree seconds after you release the brakepedal. This allows you time to move yourfoot from the brake to the acceleratorpedal. The brakes are releasedautomatically once the engine hasdeveloped sufficient drive to prevent yourvehicle from rolling down the slope. Thisis an advantage when pulling away on aslope, (for example from a car park ramp,traffic lights or when reversing uphill intoa parking space).
The system will activate automatically onany slope that will cause significant vehiclerollback.
Using Hill Start Assist
1. Press the brake pedal to bring yourvehicle to a complete standstill. Keepthe brake pedal pressed.
2. If the sensors detect that your vehicleis on a slope, the system will activateautomatically.
3. When you remove your foot from thebrake pedal, your vehicle will remainon the slope without rolling away forabout two or three seconds. This holdtime will automatically be extended ifyou are in the process of driving off.
163
Super Duty (), enUSA
Brakes
Page 173 of 470

PRINCIPLE OF OPERATION
WARNINGS
Hill descent control cannot controldescent in all surface conditions andcircumstances, such as ice orextremely steep grades. Hill descentcontrol is a driver assist system and cannotsubstitute for good judgment by the driver.Failure to do so may result in loss of vehiclecontrol, crash or serious injury.
Hill descent control does not providehill hold at zero miles per hour (0kilometers per hour). When stopped,the parking brake must be applied or thevehicle must be placed in P (Park) or itmay roll away.
Hill descent control allows the driver to setand maintain vehicle speed whiledescending steep grades in various surfaceconditions.
Hill descent control can maintain vehiclespeeds on downhill grades between 2 mph(3 km/h) and 12 mph (20 km/h). Above 20mph (32 km/h), the system remainsarmed, but descent speed cannot be setor maintained.
Hill descent control requires a coolingdown interval after a period of sustaineduse. The amount of time that the featurecan remain active before cooling varieswith conditions. The system will provide awarning in the message center and a chimewill sound when the system is about todisengage for cooling. At this time,manually apply the brakes as needed tomaintain descent speed.
USING HILL DESCENT
CONTROL
Press and release the hilldescent button located on theinstrument panel. A light in thecluster will illuminate and achime will sound when this feature isactivated.
To increase descent speed, press theaccelerator pedal until the desired speedis reached. To decrease descent speed,press the brake pedal until the desiredspeed is reached.
Whether accelerating or decelerating, oncethe desired descent speed is reached,remove your feet from the pedals and thechosen vehicle speed will be maintained.
Note:Noise from the ABS pump motor maybe observed during hill descent controloperation. This is a normal characteristic ofthe ABS and should be no reason forconcern.
Hill descent modes
•At speeds below 20 mph (32 km/h):When the Hill Descent Control switchis pressed and Hill Descent Control isactive, the Hill Descent Control telltalewill flash.
•At speeds below 20 mph (32 km/h):When the Hill Descent Control switchis pressed and conditions are notcorrect for hill descent activation, theHill Descent Control system will beenabled, the Hill Descent Controltelltale will be solid and a message willdisplay in the information display.
170
Super Duty (), enUSA
Terrain Response (If Equipped)E163957