2015 FORD F SERIES MOTORHOME AND COMMERCIAL CHASSIS jump cable
[x] Cancel search: jump cablePage 55 of 144

Canadian roadside coverage and benefitsmay differ from the U.S. coverage. If yourequire more information, please refer tothe coverage section of your warrantyguide, call us in Canada at1-800-665-2006, or visit our website atwww.ford.ca.
Sykes Assistance Services Corporationadministers the Roadside Assistanceprogram. You must receive coveredservices in Canada or the continentalUnited States. Coverage extends tovehicles that use public, non-seasonal,annually traveled roadways. RoadsideAssistance coverage does not extend tovehicles involved in cross-country driving,logging, autocross and any other form ofoff-road use. Well maintained roads andsurfaces help ensure safe travel for thesupplier, and allow their representativesto perform service as per the standardoperating procedures.
In Remote Locations
If our supplier cannot take your vehicle byroad to the nearest authorized dealership,transportation by rail or water may benecessary. The program covers a tow tothe dock or rail terminal and also to thedealership at the end of the trip.
For rail or water transportation, however,contact your authorized dealer to confirmif you are eligible for additional coveragebefore you authorize or pay for the service.
Call the Ford Roadside Assistance at1-800-665-2006 for additionalinformation.
HAZARD WARNING FLASHERS
Note:The hazard warning flashers willoperate when the ignition is in any positionor if the key is not in the ignition. If usedwhen the engine is not running, the batterywill lose charge. As a result, there may beinsufficient power to restart your engine.
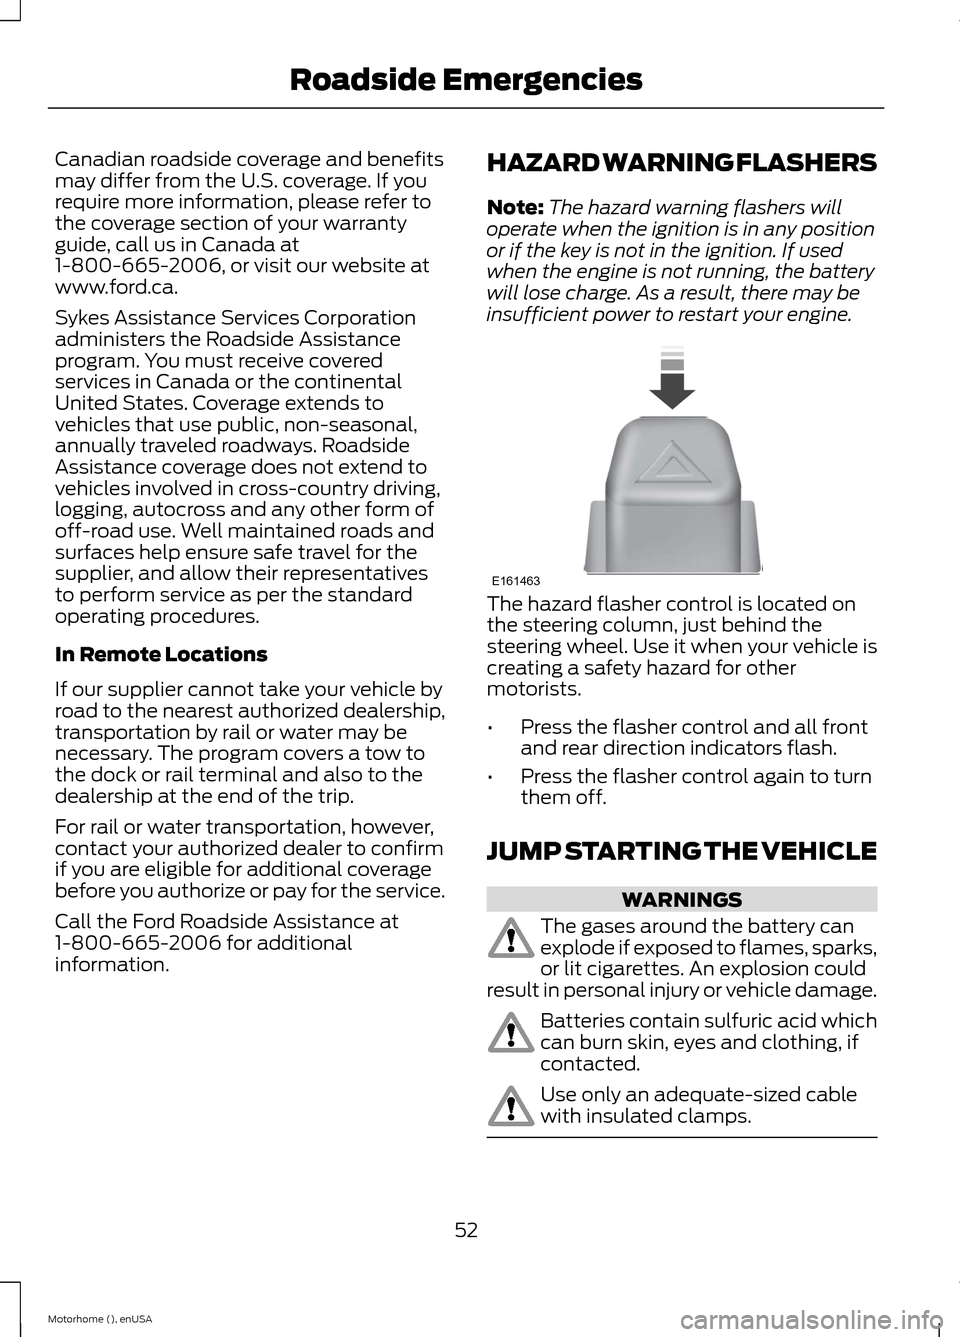
The hazard flasher control is located onthe steering column, just behind thesteering wheel. Use it when your vehicle iscreating a safety hazard for othermotorists.
•Press the flasher control and all frontand rear direction indicators flash.
•Press the flasher control again to turnthem off.
JUMP STARTING THE VEHICLE
WARNINGS
The gases around the battery canexplode if exposed to flames, sparks,or lit cigarettes. An explosion couldresult in personal injury or vehicle damage.
Batteries contain sulfuric acid whichcan burn skin, eyes and clothing, ifcontacted.
Use only an adequate-sized cablewith insulated clamps.
52Motorhome (), enUSARoadside EmergenciesE161463
Page 56 of 144

Preparing Your Vehicle
Note:Do not attempt to push-start yourautomatic transmission vehicle. Automatictransmissions do not have push-startcapability. Attempting to push-start avehicle with an automatic transmission maycause transmission damage.
Note:Use only a 12-volt supply to start yourvehicle.
Note:Do not disconnect the battery of thedisabled vehicle as this could damage thevehicle's electrical system.
Park the booster vehicle close to the hoodof the disabled vehicle, making sure thetwo vehicles do not touch. Turn allaccessories off.
Connecting the Jumper Cables
WARNING
Do not attach the cables to fuel lines,engine rocker covers, the intakemanifold or electrical componentsas grounding points. Stay clear of movingparts. To avoid reverse polarityconnections, make sure that you correctlyidentify the positive (+) and negative (-)terminals on both the disabled and boostervehicles before connecting the cables.
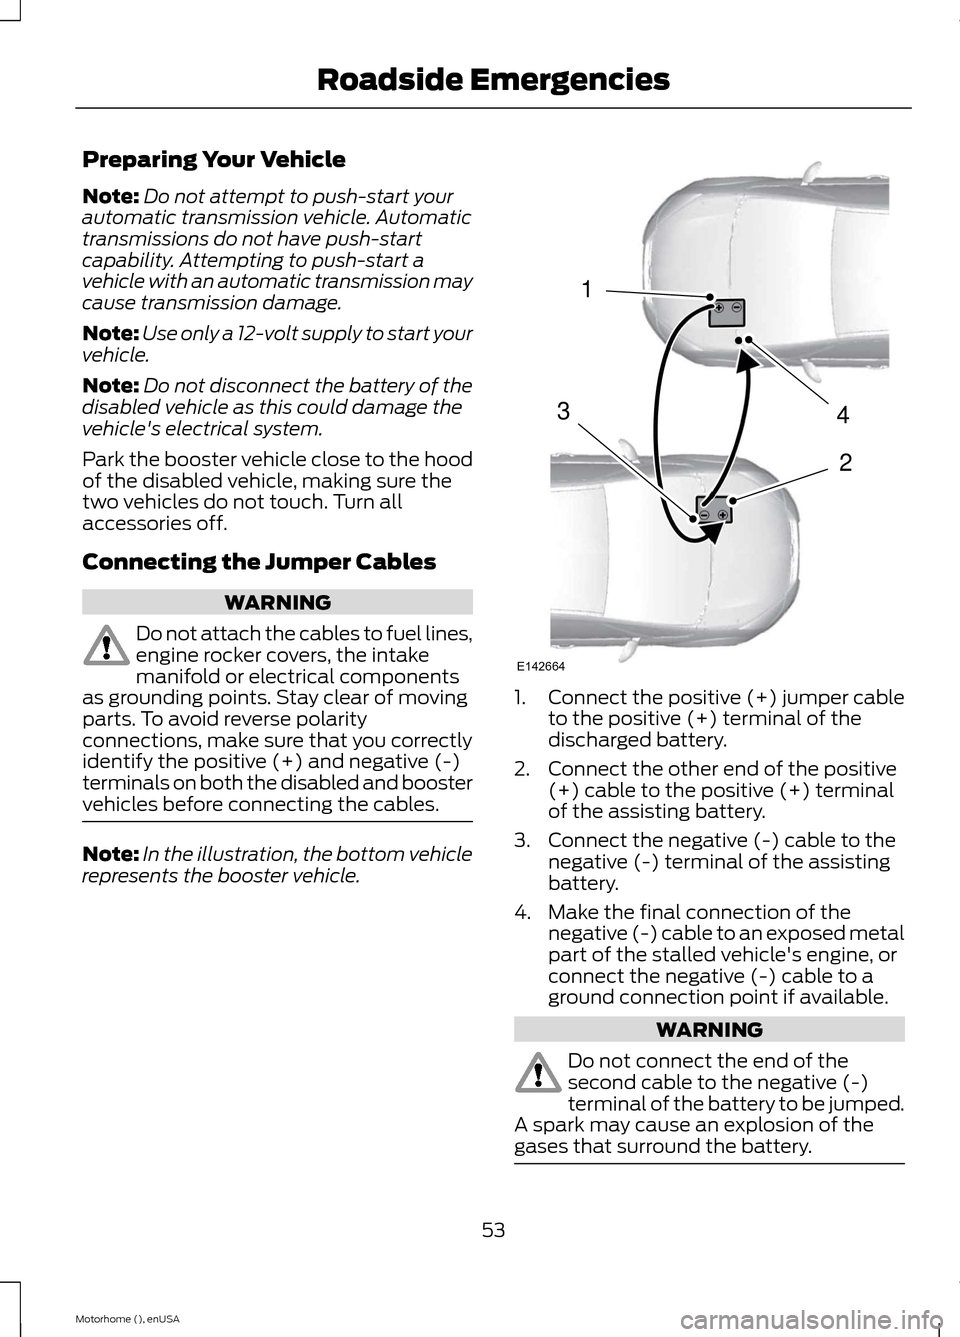
Note:In the illustration, the bottom vehiclerepresents the booster vehicle.
1.Connect the positive (+) jumper cableto the positive (+) terminal of thedischarged battery.
2.Connect the other end of the positive(+) cable to the positive (+) terminalof the assisting battery.
3.Connect the negative (-) cable to thenegative (-) terminal of the assistingbattery.
4.Make the final connection of thenegative (-) cable to an exposed metalpart of the stalled vehicle's engine, orconnect the negative (-) cable to aground connection point if available.
WARNING
Do not connect the end of thesecond cable to the negative (-)terminal of the battery to be jumped.A spark may cause an explosion of thegases that surround the battery.
53Motorhome (), enUSARoadside Emergencies4213E142664
Page 57 of 144

Jump Starting
1.Start the engine of the booster vehicleand rev the engine moderately, or pressthe accelerator gently to keep yourengine speed between 2000 and 3000rpms, as shown in your tachometer.
2.Start the engine of the disabled vehicle.
3.Once the disabled vehicle has beenstarted, run both vehicle engines for anadditional three minutes beforedisconnecting the jumper cables.
Removing the Jumper Cables
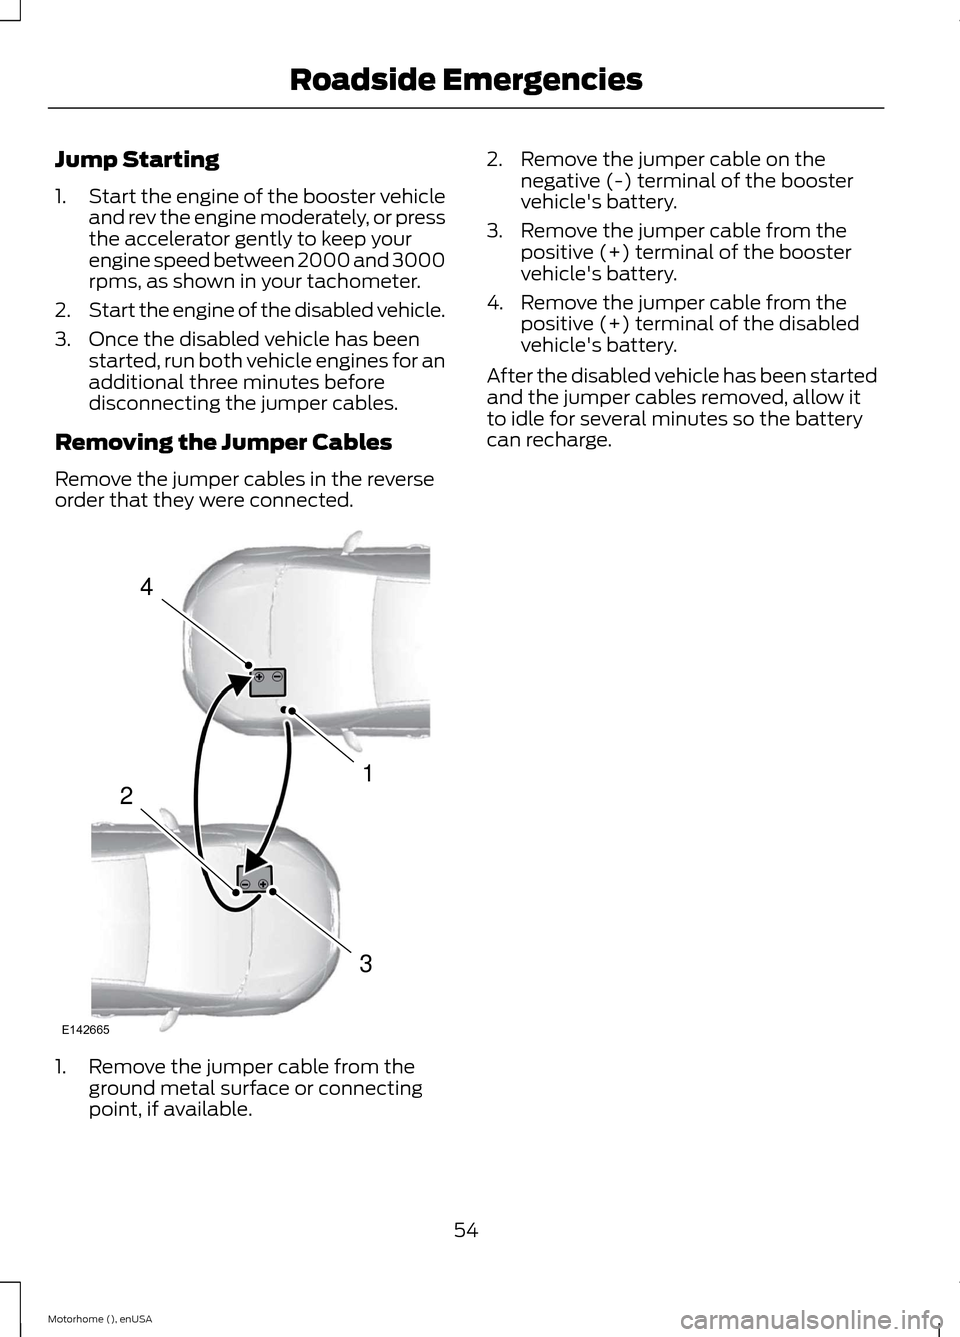
Remove the jumper cables in the reverseorder that they were connected.
1.Remove the jumper cable from theground metal surface or connectingpoint, if available.
2.Remove the jumper cable on thenegative (-) terminal of the boostervehicle's battery.
3.Remove the jumper cable from thepositive (+) terminal of the boostervehicle's battery.
4.Remove the jumper cable from thepositive (+) terminal of the disabledvehicle's battery.
After the disabled vehicle has been startedand the jumper cables removed, allow itto idle for several minutes so the batterycan recharge.
54Motorhome (), enUSARoadside Emergencies4132E142665
Page 142 of 144

J
Jump Starting the Vehicle...........................52Connecting the Jumper Cables.......................53Jump Starting........................................................54Preparing Your Vehicle.......................................53Removing the Jumper Cables.........................54
L
Lighting Control...............................................10Headlamp Flasher................................................10High Beams.............................................................10Lighting...............................................................10Load Carrying..................................................36Load Limit.........................................................36Vehicle Loading - with and without aTrailer...................................................................36Lug NutsSee: Changing a Road Wheel........................106
M
Maintenance......................................................71General Information.............................................71Message CenterSee: Information Displays..................................16Mobile Communications Equipment.........7Motorcraft Parts..............................................111
N
Normal Scheduled Maintenance...........124
O
Oil CheckSee: Engine Oil Check.........................................74Ordering Additional Owner'sLiterature........................................................59Obtaining a French Owner’s Manual............59
P
Parking Brake...................................................34Perchlorate..........................................................5Power Steering Fluid Check........................81Steering linkage lubrication points................82
R
Recommended Towing Weights..............43Refueling............................................................24Fuel Filler Cap........................................................24Replacement PartsRecommendation.........................................6Collision Repairs......................................................6Scheduled Maintenance and MechanicalRepairs...................................................................6Warranty on Replacement Parts......................6Reporting Safety Defects (CanadaOnly)................................................................60Reporting Safety Defects (U.S.Only)................................................................59Roadside Assistance......................................51Vehicles Sold in Canada: Getting RoadsideAssistance...........................................................51Vehicles Sold in Canada: Using RoadsideAssistance...........................................................51Vehicles Sold in the United States: GettingRoadside Assistance.......................................51Vehicles Sold in the United States: UsingRoadside Assistance.......................................51Roadside Emergencies.................................51Running-InSee: Breaking-In...................................................49Running Out of Fuel......................................23
S
Safety Precautions.........................................22Scheduled Maintenance Record............128Scheduled Maintenance.............................121Snow ChainsSee: Using Snow Chains..................................105Special Notices.................................................6New Vehicle Limited Warranty..........................6Special Instructions...............................................6Special Operating Conditions ScheduledMaintenance................................................126Exceptions..............................................................127Speed ControlSee: Cruise Control..............................................35Starter SwitchSee: Ignition Switch.............................................20
139Motorhome (), enUSAIndex