2015 FORD EXPEDITION brake
[x] Cancel search: brakePage 215 of 564

Hill start assist keeps your vehicle stationary long enough to move your
foot from the brake pedal to the accelerator pedal when your vehicle is
on a slope.
The brakes are released automatically once the engine has developed
sufficient drive to prevent the vehicle from rolling down the slope. This
is an advantage when pulling away on a slope, (for example from a car
park ramp, traffic lights or when reversing uphill into a parking space).
Using Hill Start Assist
1. Press the brake pedal to bring the vehicle to a complete standstill.
Keep the brake pedal pressed.
2. If the sensors detect that the vehicle is on a slope, the hill start assist
feature will be activated automatically.
3. When you remove your foot from the brake pedal, the vehicle will
remain on the slope without rolling away for approximately two or three
seconds. This hold time will automatically be extended if you are in the
process of driving off.
4. Drive off in the normal manner. The brakes will be released
automatically.
214Brakes
2015 Expedition(exd)
Owners Guide gf, 1st Printing, July 2014
USA(fus)
Page 216 of 564
PRINCIPLES OF OPERATION
The traction control system helps avoid drive wheel spin and loss of
traction.
If your vehicle begins to slide, the system applies the brakes to individual
wheels and, when needed, reduces engine power at the same time. If the
wheels spin when accelerating on slippery or loose surfaces, the system
reduces engine power in order to increase traction.
USING TRACTION CONTROL
In certain situations (for example, stuck in snow or mud), turning the
traction control off may be beneficial as this allows the wheels to spin
with full engine power.
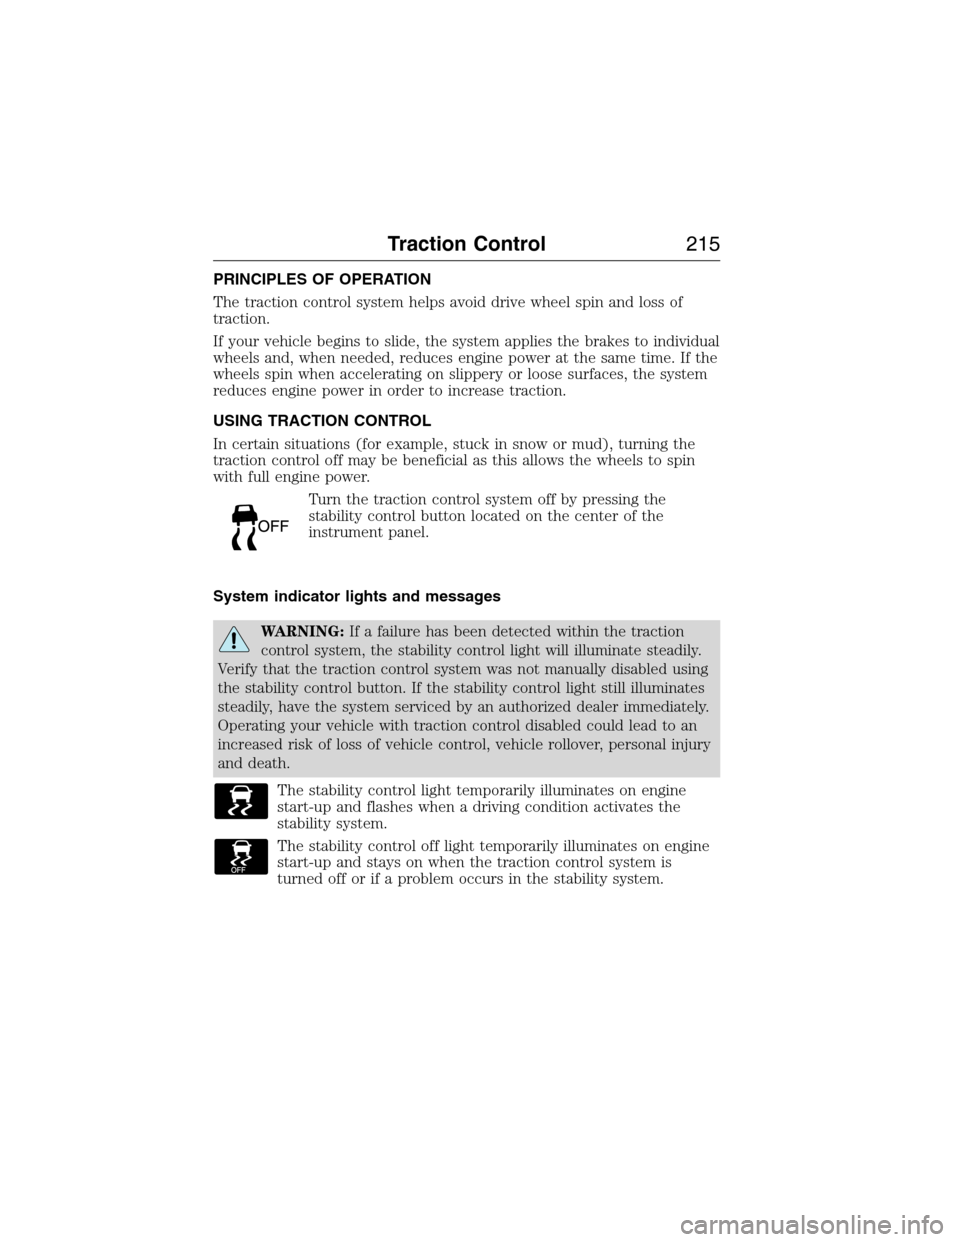
Turn the traction control system off by pressing the
stability control button located on the center of the
instrument panel.
System indicator lights and messages
WARNING:If a failure has been detected within the traction
control system, the stability control light will illuminate steadily.
Verify that the traction control system was not manually disabled using
the stability control button. If the stability control light still illuminates
steadily, have the system serviced by an authorized dealer immediately.
Operating your vehicle with traction control disabled could lead to an
increased risk of loss of vehicle control, vehicle rollover, personal injury
and death.
The stability control light temporarily illuminates on engine
start-up and flashes when a driving condition activates the
stability system.
The stability control off light temporarily illuminates on engine
start-up and stays on when the traction control system is
turned off or if a problem occurs in the stability system.
Traction Control215
2015 Expedition(exd)
Owners Guide gf, 1st Printing, July 2014
USA(fus)
Page 219 of 564
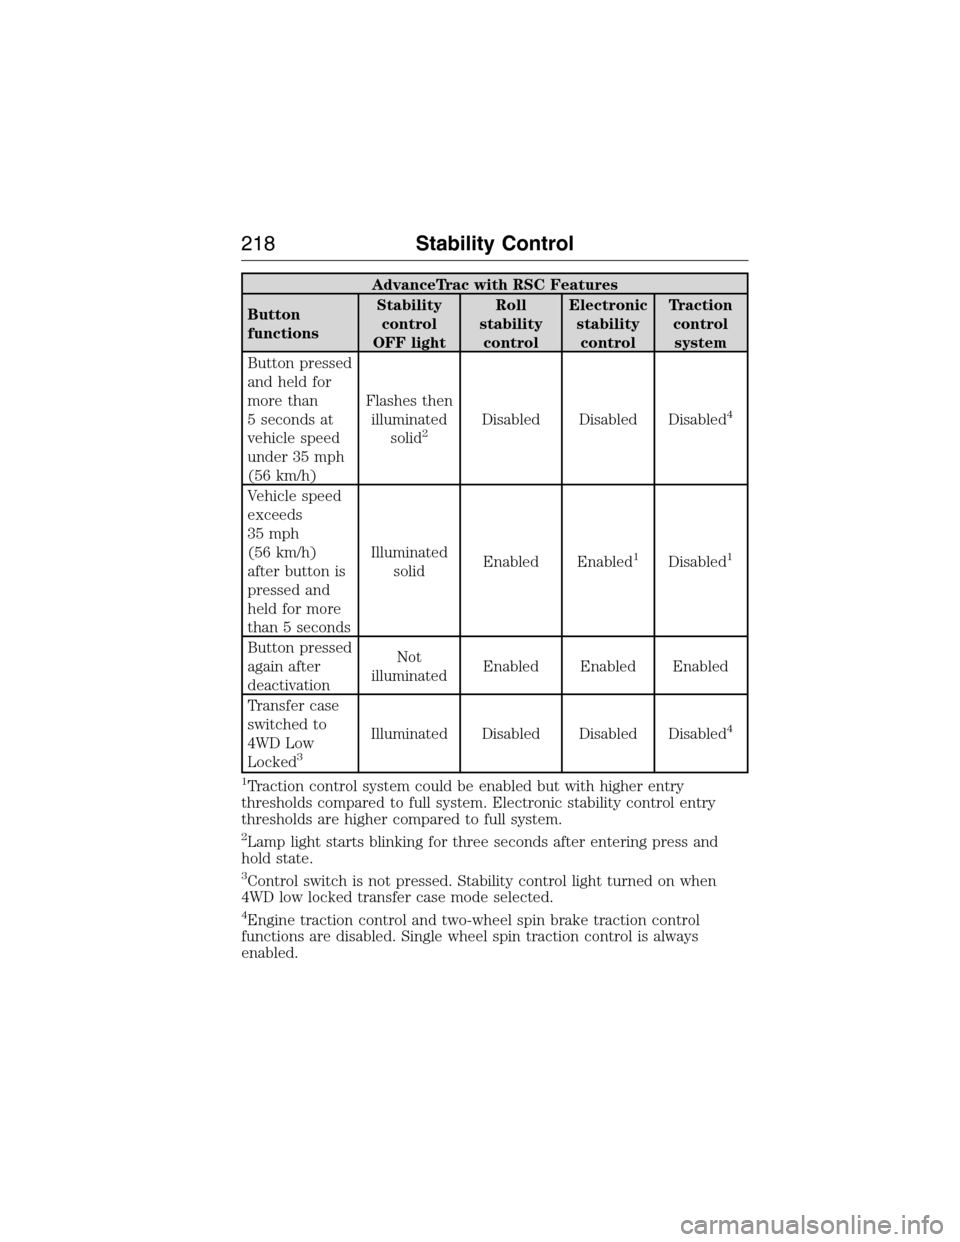
AdvanceTrac with RSC Features
Button
functionsStability
control
OFF lightRoll
stability
controlElectronic
stability
controlTraction
control
system
Button pressed
and held for
more than
5 seconds at
vehicle speed
under 35 mph
(56 km/h)Flashes then
illuminated
solid
2Disabled Disabled Disabled4
Vehicle speed
exceeds
35 mph
(56 km/h)
after button is
pressed and
held for more
than 5 secondsIlluminated
solidEnabled Enabled
1Disabled1
Button pressed
again after
deactivationNot
illuminatedEnabled Enabled Enabled
Transfer case
switched to
4WD Low
Locked
3
Illuminated Disabled Disabled Disabled4
1
Traction control system could be enabled but with higher entry
thresholds compared to full system. Electronic stability control entry
thresholds are higher compared to full system.
2Lamp light starts blinking for three seconds after entering press and
hold state.
3Control switch is not pressed. Stability control light turned on when
4WD low locked transfer case mode selected.
4Engine traction control and two-wheel spin brake traction control
functions are disabled. Single wheel spin traction control is always
enabled.
218Stability Control
2015 Expedition(exd)
Owners Guide gf, 1st Printing, July 2014
USA(fus)
Page 220 of 564
HILL DESCENT CONTROL™ (IF EQUIPPED)
WARNING:Hill descent control cannot control descent in all
surface conditions and circumstances, such as ice or extremely
steep grades. Hill descent control is a driver assist system and cannot
substitute for good judgment by the driver. Failure to do so may result
in loss of vehicle control, crash or serious injury.
WARNING:Hill descent control does not provide hill hold at
zero mph (0 km/h). When stopped, the parking brake must be
applied and/or the vehicle must be placed in P (Park) or it may roll
away.
Hill descent control allows the driver to set and maintain vehicle speed
while descending steep grades in various surface conditions.
Hill descent control can maintain vehicle speeds on downhill grades
between 3 mph (5 km/h) and 20 mph (32 km/h). Above 20 mph
(32 km/h), the system remains armed, but descent speed cannot be set
or maintained.
Hill descent control requires a cooling down interval after a period of
sustained use. The amount of time that the feature can remain active
before cooling varies with conditions. The system will provide a warning
in the message center and a chime will sound when the system is about
to disengage for cooling. At this time, manually apply the brakes as
needed to maintain descent speed.
To enable hill descent control and set the descent speed, do the
following:
1. Press and release the hill descent button located in the
center of the terrain management control. A light in the
control will illuminate and chime will sound when this feature
is activated.
2. To increase descent speed, press the accelerator pedal until the
desired speed is reached. To decrease descent speed, press the brake
pedal until the desired speed is reached.
Whether accelerating or decelerating, once the desired descent speed is
reached, remove your feet from the pedals and the chosen vehicle speed
will be maintained.
Terrain Response219
2015 Expedition(exd)
Owners Guide gf, 1st Printing, July 2014
USA(fus)
Page 222 of 564

SENSING SYSTEM (IF EQUIPPED)
WARNING:To help avoid personal injury, please read and
understand the limitations of the system as contained in this
section. Sensing is only an aid for some (generally large and fixed)
objects when moving in reverse on a flat surface at parking speeds.
Traffic control systems, inclement weather, air brakes, and external
motors and fans may also affect the function of the sensing system; this
may include reduced performance or a false activation.
WARNING:To help avoid personal injury, always use caution
when in R (Reverse) and when using the sensing system.
WARNING:This system is not designed to prevent contact with
small or moving objects. The system is designed to provide a
warning to assist the driver in detecting large stationary objects to
avoid damaging the vehicle. The system may not detect smaller objects,
particularly those close to the ground.
WARNING:Certain add-on devices such as large trailer hitches,
bike or surfboard racks and any device that may block the normal
detection zone of the system, may create false beeps.
Note:Keep the sensors (located on the bumper/fascia) free from snow,
ice and large accumulations of dirt. If the sensors are covered, the
system’s accuracy can be affected. Do not clean the sensors with sharp
objects.
Note:If your vehicle sustains damage to the bumper/fascia, leaving it
misaligned or bent, the sensing zone may be altered causing inaccurate
measurement of obstacles or false alarms.
Note:If your vehicle is equipped with MyKey®, it is possible to prevent
turning the sensing system off. Refer to theMyKey®chapter.
Note:When a trailer is connect to your vehicle, the Rear Sensing System
may detect the trailer and provide warnings. It is suggested that the
driver disables the Rear Sensing System when a trailer is connected to
your vehicle to prevent these warnings.
Parking Aids221
2015 Expedition(exd)
Owners Guide gf, 1st Printing, July 2014
USA(fus)
Page 229 of 564
PRINCIPLES OF OPERATION
Cruise control lets you maintain a set speed without keeping your foot
on the accelerator pedal.
USING CRUISE CONTROL
WARNING:Do not use cruise control in heavy traffic, on
winding roads or when the road surface is slippery. This could
result in loss of vehicle control, serious injury or death.
WARNING:When you are going downhill, your vehicle speed
may increase above the set speed. The system will not apply the
brakes. Change down a gear to assist the system in maintaining the set
speed. Failure to do so could result in loss of vehicle control, serious
injury or death.
Note:Cruise control will disengage if your vehicle speed decreases more
than 10 mph (16 km/h) below your set speed while driving uphill.
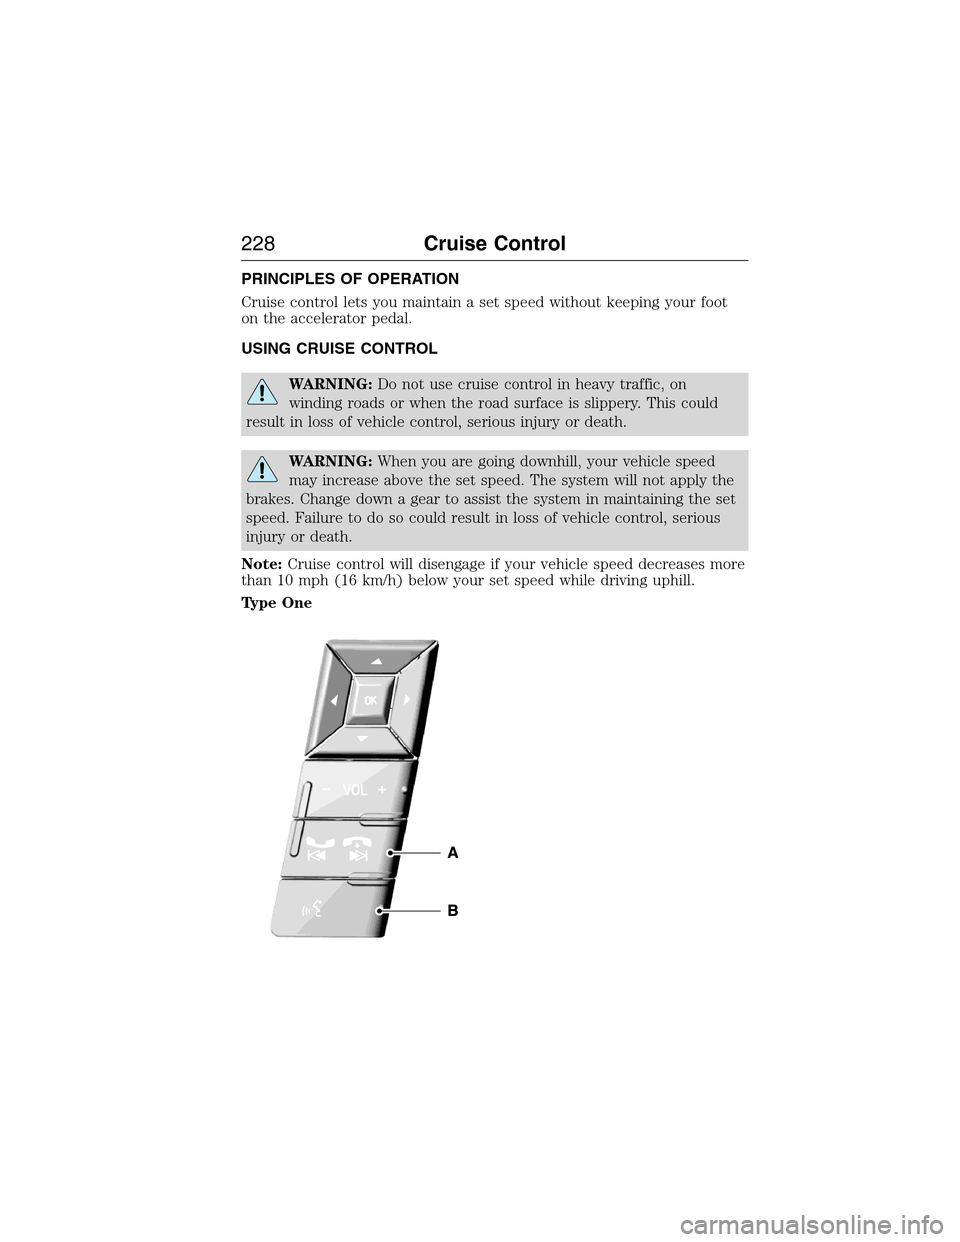
Type One
228Cruise Control
2015 Expedition(exd)
Owners Guide gf, 1st Printing, July 2014
USA(fus)
Page 230 of 564
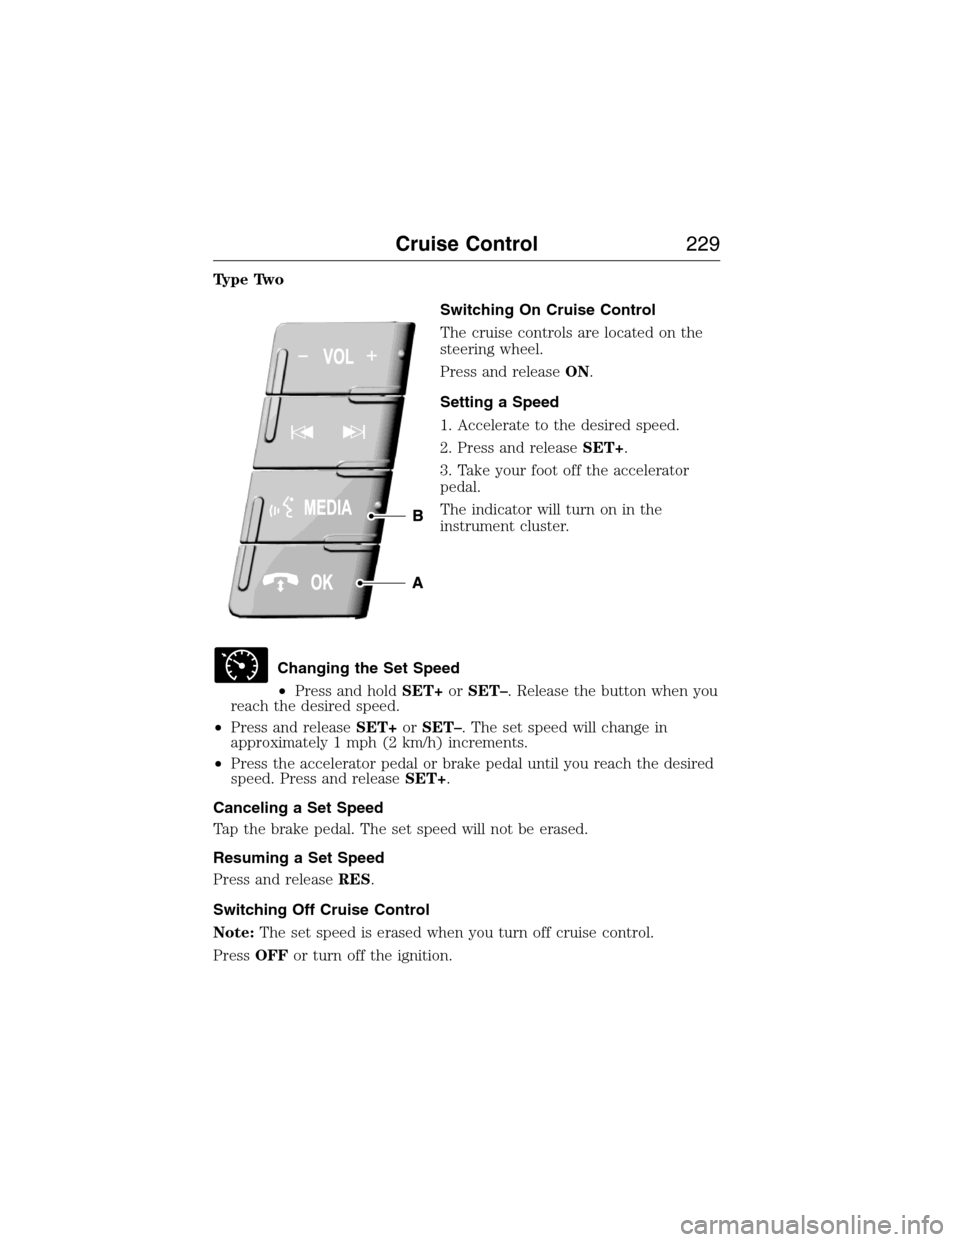
Type Two
Switching On Cruise Control
The cruise controls are located on the
steering wheel.
Press and releaseON.
Setting a Speed
1. Accelerate to the desired speed.
2. Press and releaseSET+.
3. Take your foot off the accelerator
pedal.
The indicator will turn on in the
instrument cluster.
Changing the Set Speed
•Press and holdSET+orSET–. Release the button when you
reach the desired speed.
•Press and releaseSET+orSET–. The set speed will change in
approximately 1 mph (2 km/h) increments.
•Press the accelerator pedal or brake pedal until you reach the desired
speed. Press and releaseSET+.
Canceling a Set Speed
Tap the brake pedal. The set speed will not be erased.
Resuming a Set Speed
Press and releaseRES.
Switching Off Cruise Control
Note:The set speed is erased when you turn off cruise control.
PressOFFor turn off the ignition.
Cruise Control229
2015 Expedition(exd)
Owners Guide gf, 1st Printing, July 2014
USA(fus)
Page 243 of 564
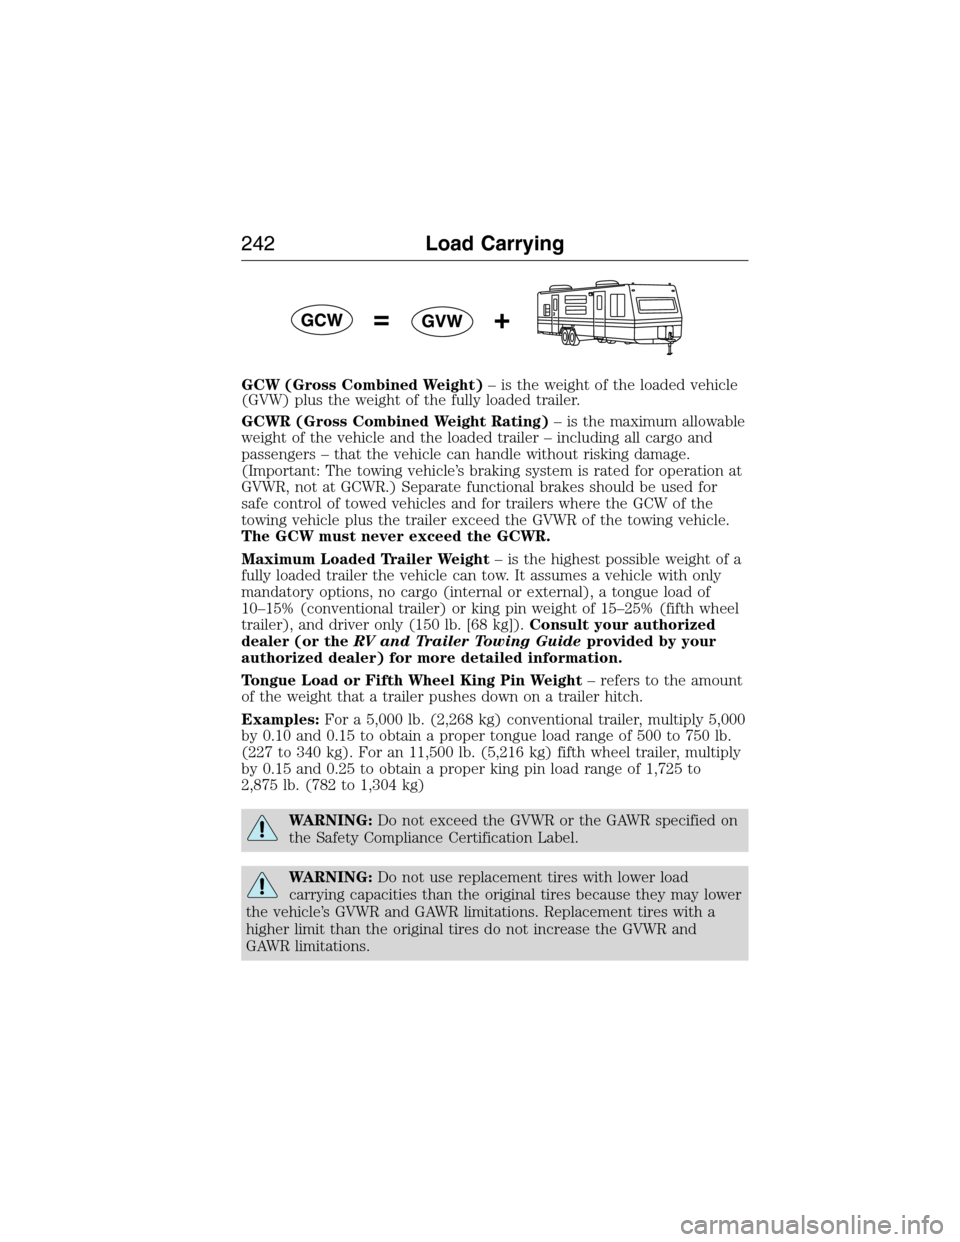
GCW (Gross Combined Weight)– is the weight of the loaded vehicle
(GVW) plus the weight of the fully loaded trailer.
GCWR (Gross Combined Weight Rating)– is the maximum allowable
weight of the vehicle and the loaded trailer – including all cargo and
passengers – that the vehicle can handle without risking damage.
(Important: The towing vehicle’s braking system is rated for operation at
GVWR, not at GCWR.) Separate functional brakes should be used for
safe control of towed vehicles and for trailers where the GCW of the
towing vehicle plus the trailer exceed the GVWR of the towing vehicle.
The GCW must never exceed the GCWR.
Maximum Loaded Trailer Weight– is the highest possible weight of a
fully loaded trailer the vehicle can tow. It assumes a vehicle with only
mandatory options, no cargo (internal or external), a tongue load of
10–15% (conventional trailer) or king pin weight of 15–25% (fifth wheel
trailer), and driver only (150 lb. [68 kg]).Consult your authorized
dealer (or theRV and Trailer Towing Guideprovided by your
authorized dealer) for more detailed information.
Tongue Load or Fifth Wheel King Pin Weight– refers to the amount
of the weight that a trailer pushes down on a trailer hitch.
Examples:For a 5,000 lb. (2,268 kg) conventional trailer, multiply 5,000
by 0.10 and 0.15 to obtain a proper tongue load range of 500 to 750 lb.
(227 to 340 kg). For an 11,500 lb. (5,216 kg) fifth wheel trailer, multiply
by 0.15 and 0.25 to obtain a proper king pin load range of 1,725 to
2,875 lb. (782 to 1,304 kg)
WARNING:Do not exceed the GVWR or the GAWR specified on
the Safety Compliance Certification Label.
WARNING:Do not use replacement tires with lower load
carrying capacities than the original tires because they may lower
the vehicle’s GVWR and GAWR limitations. Replacement tires with a
higher limit than the original tires do not increase the GVWR and
GAWR limitations.
242Load Carrying
2015 Expedition(exd)
Owners Guide gf, 1st Printing, July 2014
USA(fus)