2015 FIAT DOBLO COMBI fog light
[x] Cancel search: fog lightPage 62 of 323

– door opening with window
moving, due to the intervention of
the anti-pinch system;
– 50 window movements without
ever closing the window;
– 3 door opening movements, with
moving window, without ever
closing the window.
Proceed as follows for the
initialisation:
1. completely close the driver's door
window, keeping the operating
button pressed for at least 5
seconds after the (upper) end of
travel position
2. proceed in the same way on the
passenger's side door button and
on the buttons of rear doors.
WARNING
28) Incorrect use of the electric
windows may be dangerous.
Before and during their operation,
ensure that any passengers are
not at risk from the moving glass
either by personal objects getting
caught in the mechanism or by
being hit by it directly.
29) When leaving the vehicle,
always remove the ignition key to
avoid the risk of injury due to
accidental operation of the
electric windows.
CONTROLS
FOG LIGHTS
(for versions/markets, where
provided)
Press the
button to turn them
on. The
warning light on the
panel switches on.
When the fog lights are on, the side
lights also come on, while the
daytime running lights go off
irrespective of the position of the
twist switch.
Press the button again to switch the
lights off.
72F0V0507
58
KNOW YOUR VEHICLE
Page 63 of 323

REAR FOG LIGHTS
Press the
button with the dipped
beam headlights or front fog lights
on to turn the rear fog lights on. The
warning light on the panel
switches on.
Press the button again to turn the
lights off, or turn off the dipped
beam headlights and/or the front fog
lights (where provided).
BONNET
Opening
Proceed as follows:
❒pull lever A fig. 73 in the direction
indicated by the arrow;
❒operate lever B fig. 74, lift the bonnet
and, at the same time, release the
supporting rod C fig. 75 from its
catch D, then insert the end of the
rod into housing E in the bonnet
(large hole) and push to safety
position (small hole), as shown in the
figure.
30) 31) 32) 33)
Closing
Proceed as follows:
❒Hold the bonnet up with one hand
and with the other remove rod C
from housing E and fit it back into its
catch D;
❒Lower the bonnet to approximately
20 centimetres above the engine
compartment and let it come down.
Make sure that the bonnet is
completely closed and not just
secured in safety position. If it is not
perfectly closed, do not try to press
the bonnet down but open it and
repeat the procedure.
34)
73F0V0047
74F0V0048
59
Page 73 of 323

WARNING
44) Strictly adhere to the laws in
force concerning maximum
clearance.
45) Check that the attachment fixing
screws are tight after a few
kilometres.
IMPORTANT
8) Evenly distribute the load and
take into account, when driving,
the increased responsiveness
of the vehicle to side wind.
9) Never exceed the maximum
permitted loads (see chapter
“Technical specifications”).
HEADLIGHTS
LIGHT BEAM
ALIGNMENT
The correct alignment of the
headlights is essential for the
comfort and safety of the driver and
other road users. To ensure the
best visibility when travelling with the
headlights on, the headlight
alignment must be correct. Contact
a Fiat Dealership to have the
headlights checked and adjusted.
HEADLIGHT
ALIGNMENT
CORRECTOR
This device works with the ignition
key in the MAR position and the
dipped beam headlights on.
The vehicle tilts backwards when it
is laden, raising the beam. The
beams must therefore be realigned
in this case.Headlight alignment
adjustment
Press theandfig. 109
buttons on the control panel to
adjust.
The display located on the
instrument panel provides a visual
indication of the adjustment
position.
Position 0 - one or two people in the
front seats.
Position 1 - five people.
Position 2 - five people + load in the
luggage compartment.
Position 3 - driver + maximum
permitted load stowed in the
luggage compartment.
IMPORTANT Check the light beam
alignment every time the load
transported changes.
FOG LIGHTS
ALIGNMENT
(for versions/markets, where
provided)
Contact a Fiat Dealership to have
the headlights checked and
adjusted.
69
Page 77 of 323

KNOWING THE INSTRUMENT PANEL
This section of the booklet gives you
all the information you need to
understand, interpret and use the
instrument panel correctly.CONTROL PANEL AND
ON-BOARD INSTRUMENTS ........... 74
DIGITAL DISPLAY............................ 77
MULTIFUNCTION DISPLAY ............. 81
TRIP COMPUTER ........................... 89
EOBD SYSTEM............................... 91
WARNING LIGHTS AND
MESSAGES .................................... 92
- LOW BRAKE FLUID/HANDBRAKE
ENGAGED .......................................... 92
- EBD FAILURE .................................. 93
- AIRBAG FAILURE ............................. 93
- SEAT BELTS NOT FASTENED .......... 94
- ENGINE COOLANT TEMPERATURE
TOO HIGH .......................................... 95
- LOW BATTERY CHARGE ................. 95
- LOW ENGINE OIL PRESSURE ......... 96
-ENGINE OIL DETERIORATED ........... 96
-LOW ENGINE OIL LEVEL .................. 97
-INCOMPLETE DOOR LOCKING ........ 97
- INJECTION/EOBD SYSTEM
FAILURE ............................................. 98
- ABS FAILURE ................................... 99
-FUEL RESERVE ................................ 99
- GLOW PLUG PREHEATING/GLOW
PLUG PREHEATING FAILURE ............ 100
- WATER IN DIESEL FILTER ................ 100
-VEHICLE PROTECTION SYSTEM
FAILURE - FIAT CODE ........................ 101
- REAR FOG LIGHTS .......................... 101
-GENERIC FAILURE INDICATION ....... 101
-DPF (PARTICULATE FILTER)
CLEANING UNDERWAY ..................... 102
-WORN BRAKE PADS ........................ 103
-ASR SYSTEM DEACTIVATED ............ 103
- TRACTION PLUS SYSTEM
ACTIVATION ....................................... 104- TPMS ............................................... 104
-PARKING SENSOR FAILURE ............ 105
-START&STOP SYSTEM FAILURE ...... 105
- DIPPED BEAM HEADLIGHTS .......... 106
- FOLLOW ME HOME ........................ 106
- LEFT-HAND DIRECTION INDICATOR
............................................................ 107
- RIGHT-HAND DIRECTION
INDICATOR ........................................ 107
-FOG LIGHTS ..................................... 107
- CRUISE CONTROL .......................... 107
- MAIN BEAM HEADLIGHTS .............. 108
73
Page 105 of 323

Warning lights on
panelWhat it means What to do
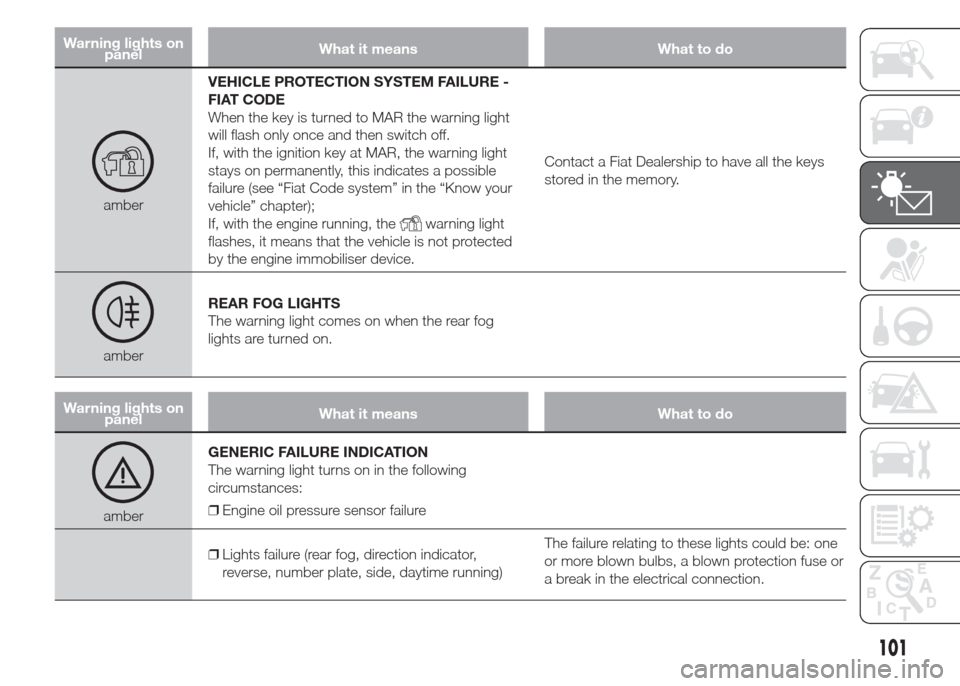
amberVEHICLE PROTECTION SYSTEM FAILURE -
FIAT CODE
When the key is turned to MAR the warning light
will flash only once and then switch off.
If, with the ignition key at MAR, the warning light
stays on permanently, this indicates a possible
failure (see “Fiat Code system” in the “Know your
vehicle” chapter);
If, with the engine running, the
warning light
flashes, it means that the vehicle is not protected
by the engine immobiliser device.Contact a Fiat Dealership to have all the keys
stored in the memory.
amberREAR FOG LIGHTS
The warning light comes on when the rear fog
lights are turned on.
Warning lights on
panelWhat it means What to do
amberGENERIC FAILURE INDICATION
The warning light turns on in the following
circumstances:
❒Engine oil pressure sensor failure
❒Lights failure (rear fog, direction indicator,
reverse, number plate, side, daytime running)The failure relating to these lights could be: one
or more blown bulbs, a blown protection fuse or
a break in the electrical connection.
101
Page 111 of 323

Warning lights on
panelWhat it means What to do
greenLEFT-HAND DIRECTION INDICATOR
The warning light switches on when the direction
indicator control stalk is moved downwards or,
together with the right indicator, when the hazard
warning light button is pressed.
greenRIGHT-HAND DIRECTION INDICATOR
The warning light switches on when the direction
indicator control stalk is moved upwards or,
together with the left indicator, when the hazard
warning light button is pressed.
greenFOG LIGHTS
The warning light comes on when the front fog
lights are turned on.
greenCRUISE CONTROL
(for versions/markets, where provided)
The digital warning light switches on in the display
when the ignition key is turned to MAR, but it
should switch off after a few seconds, if the
Cruise Control is deactivated.
The warning light is lit up on the display by
rotating the Cruise Control ring nut to ON or,
depending on the version. On certain versions a
dedicated message is displayed.
107
Page 166 of 323

Bulbs
Use Type Power Ref. Figure
Main beam headlights H7 55 W E
Dipped headlights H7 55 W E
Daytime running lights / side lights W21W 13 W B
Front direction indicators WY21W 21 W B
Side direction indicators WY5W 5 W A
Rear direction indicators PY21W 21 W B
Rear fog light W16W 16 W A
Reverse W16W 16 W A
Rear side lights P21/5W 5 W B
Brake lights P21W 21 W B
3rd brake light wing W5W 5 W A
3rd brake light swinging W5W 5 W A
3rd brake light swinging (for privacy glass) Xenon 6 W 6 W A
Front fog lights (for versions/markets where
provided)H11 55 W E
162
IN AN EMERGENCY
Page 168 of 323

DIRECTION
INDICATORS
Front
To replace the bulb, proceed as
follows:
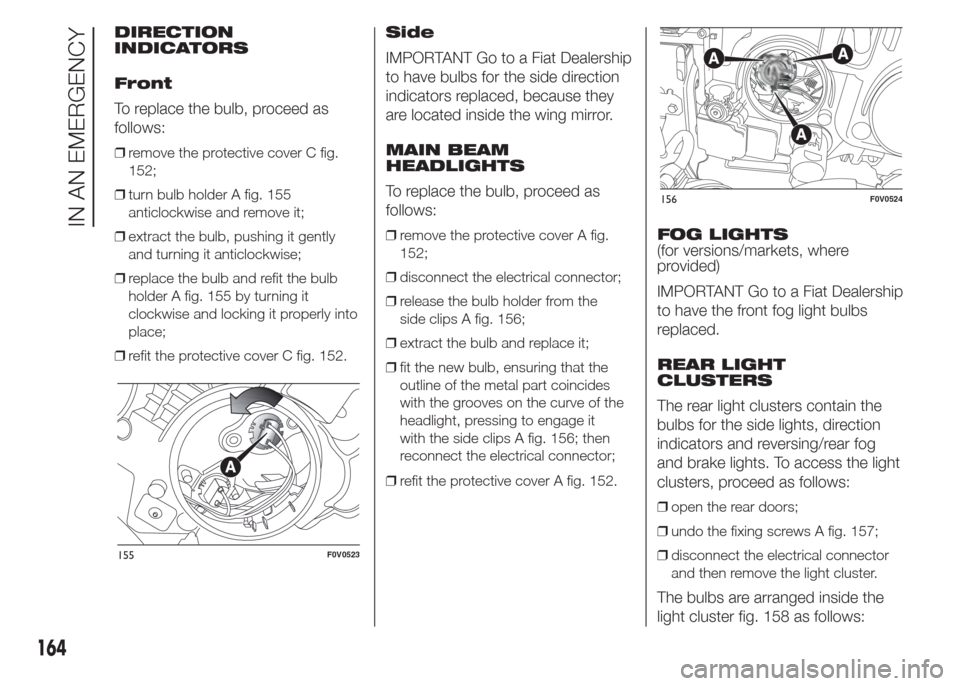
❒remove the protective cover C fig.
152;
❒turn bulb holder A fig. 155
anticlockwise and remove it;
❒extract the bulb, pushing it gently
and turning it anticlockwise;
❒replace the bulb and refit the bulb
holder A fig. 155 by turning it
clockwise and locking it properly into
place;
❒refit the protective cover C fig. 152.
Side
IMPORTANT Go to a Fiat Dealership
to have bulbs for the side direction
indicators replaced, because they
are located inside the wing mirror.
MAIN BEAM
HEADLIGHTS
To replace the bulb, proceed as
follows:
❒remove the protective cover A fig.
152;
❒disconnect the electrical connector;
❒release the bulb holder from the
side clips A fig. 156;
❒extract the bulb and replace it;
❒fit the new bulb, ensuring that the
outline of the metal part coincides
with the grooves on the curve of the
headlight, pressing to engage it
with the side clips A fig. 156; then
reconnect the electrical connector;
❒refit the protective cover A fig. 152.FOG LIGHTS
(for versions/markets, where
provided)
IMPORTANT Go to a Fiat Dealership
to have the front fog light bulbs
replaced.
REAR LIGHT
CLUSTERS
The rear light clusters contain the
bulbs for the side lights, direction
indicators and reversing/rear fog
and brake lights. To access the light
clusters, proceed as follows:
❒open the rear doors;
❒undo the fixing screws A fig. 157;
❒disconnect the electrical connector
and then remove the light cluster.
The bulbs are arranged inside the
light cluster fig. 158 as follows:
155F0V0523
156F0V0524
164
IN AN EMERGENCY