2015 FIAT 500 ABARTH electronic
[x] Cancel search: electronicPage 47 of 108

Button Short push function(less than One second)Long push function(more than One second)
MUTE/ESC Cancel voice recognitionCancel a voice announce-mentInterrupt message readingExit BLUE&ME™ MainMenuExit the sub-menu andreturn to the previousmenu optionExit current menu optionwithout storing settingsTurn the microphone on/off during a phone con-versationMute the ring tone of anincoming callMedia player Pause on/off
–
VOICE RECOGNITION(VR)Activate voice recognitionInterrupt voice announce-ment to provide a newvoice command
Repeat the last utterancein a voice interaction
PHONE HANG UP Reject an incoming calland end a phone call inprogressEnd an active call andswitch to a call waiting (onhold)
–
PRESET UP/OK (centerbutton on left side back ofsteering wheel)
Confirm manually se-lected menu optionSwitch phone conversa-tion from the hands-freephone to your mobilephone and vice versaSelect displayed message
–
SCAN UP/SCAN DOWN(upper and lower buttonson left side back of steer-ing wheel
Scroll BLUE&ME™ menuitemsScroll through mediaplayer tracksSeek up and downthrough radio stationsScroll inbox messages
–
ELECTRONICS
45
Page 48 of 108

BLUE&ME™ Hands-Free Communication
•To use the hands-free feature, you need a Bluetooth® wireless technology enabled
mobile phone. This hands-free feature gives you the possibility of interacting vocally
with your mobile phone while driving, even if your mobile device does not feature this
capability. You can also interact with your mobile phone manually and visually using
the steering wheel controls and the instrument panel Electronic Vehicle Information
Center (EVIC) display.
• To get started with BLUE&ME™ hands-free feature with voice recognition, you
have to simply pair your Bluetooth® wireless technology enabled mobile phone
with the system.
• Refer to the BLUE&ME™ User's Manual on the DVD for more details.
Pair Your Mobile Phone
• Push the VR steering wheel button and say, “Settings” then, at the end of the
BLUE&ME™ message say, “Pairing.” You may also access the pairing feature via
the menu by selecting it.
• The system will show the phone pairing PIN number on the EVIC display. For the
next two steps, consult your mobile phone owner’s manual about Bluetooth®
pairing procedures for your phone.
• On your mobile phone, search for devices equipped with Bluetooth® wireless
technology (the setting on your mobile phone might be called Discover or New
Device). In this list you will find BLUE&ME™ (name identifying the BLUE&ME™
system on your car) select it.
• When prompted by the mobile phone, enter the PIN number shown on the instru-
ment panel display using your mobile phone keypad. If pairing is successful, the
system will say “Connecting” and at the end the display will show as confirmation
message, the ID of the paired mobile phone.
•It is essential to wait until you see this confirmation message on the display. Pushing
the PHONE/MENU button on the steering wheel or the MUTE/ESC button before the
message is displayed may cancel the pairing process. If the pairing process fails, an
error message will be displayed: in this event repeat the pairing procedure.
• At first pairing, BLUE&ME™ will say “Welcome” immediately after connecting.
This message will no longer be heard when your phone automatically connects to
the BLUE&ME™ system on future ignition cycles.
• BLUE&ME™ will ask if you would like to copy your paired phone phonebook to
BLUE&ME™. It is recommended to copy it. To start copying the phonebook say
“Yes”, otherwise say “No.”
ELECTRONICS
46
Page 49 of 108

• For certain mobile phones the phonebook is not copied automatically, in this case
you must transfer the phonebook contacts using your mobile phone keypad. If
BLUE&ME™ asks you to do this, then perform this procedure following the in-
structions specific to your mobile phone and push the PHONE/MENU button on
the steering wheel when you have finished. Certain mobile phones may require
you to indicate that you do not want to be asked every time to copy the phone-
book. If this is the case, this could be indicated by checking a box during on the
phone the pairing process. If applicable, this option will only be presented on the
phone during the pairing process.
Making A Phone Call
• Assume that “John Smith” is one of the contacts stored in your phonebook.
• To call John Smith, push the steering wheel button PHONE/MENU and pro-
nounce “Call John Smith.”
• If the name is recognized, the system will display the recognized contact’s infor-
mation on the display screen.
• If there is just one phone number for John Smith in your phonebook, the system
will ask if you would like to call John Smith. To start the call say “Yes,” otherwise
say “No.”
• If John Smith has several phone numbers, the system will ask which phone num-
ber you would like to call (e.g.: “Call John Smith (at) Work or (at) Home?”). An-
swer with the type of required phone number (e.g.: “(at) Home”).
• If John Smith has several phone numbers but the “location” (e.g.: the type of
phone number like work, home, etc.) is missing, the system will display the se-
lected contact and a list of related phone numbers on the instrument cluster dis-
play. The hands-free phone system will ask if you would like to call the phone
number displayed. To respond with yes, say “Yes,” otherwise say “No.” If this is
the correct contact but the wrong number, say “Forward” or “Backward” to navi-
gate to the phone number you’d like to call. To call the displayed phone number,
pronounce “Call.” You can also scroll through the phone number list manually by
pushing the buttons on the back of the steering wheel until you find the required
number. Then, push the PRESET UP/OK button on the rear of the steering wheel
to start the call.
• To end the phone call, push the PHONE HANG UP button on the steering wheel.
Media Player
• With the BLUE&ME™ media player you can play, via the car sound system, the
digital audio files stored on a USB device by simply connecting it to the USB port
located on the center console of the car.
• The MEDIA PLAYER menu enables the following:
– Display tracks stored on your USB stick/iPod®.
– Play audio files stored on your USB stick/iPod® (BLUE&ME™ recognizes .wma,
.mp3 and .wav, .aac formats for audio files and .wpl and .m3u for playlists).
ELECTRONICS
47
Page 50 of 108

How To Connect The USB Stick/iPod® To BLUE&ME™
• To connect your USB stick/iPod® to BLUE&ME™, proceed as follows:
• USB devices without USB wire: just connect the USB stick/iPod® (directly or
by an extension lead) to the USB port on the car.
• USB stick/iPod® with USB wire: use the wire to connect the USB stick/iPod®
to the USB port on the car.
• Turn the ignition key to ON. BLUE&ME™ will start automatically to play your
digital tracks selecting them from the library built at the moment the USB
stick/iPod® is connected.
• If AUTOPLAY is set to “ON,” BLUE&ME™ will start playback automatically.
• Refer to the iPod®/USB/MP3 CONTROL section in this manual and the
BLUE&ME™ User's Manual on the DVD for more details.
WARNING!
Driving while distracted can result in loss of vehicle control, accident and injury. It
is strongly recommended that you use extreme caution when using any device or
feature that may take your focus off the road or your hands off the steering wheel.
Your primary responsibility is the safe operation of your vehicle. We recommend
against the use of any handheld device while driving, encourage the use of voice-
operated systems when possible and that you become aware of applicable laws
that may affect the use of electronic devices while driving.
ELECTRONICS
48
Page 51 of 108

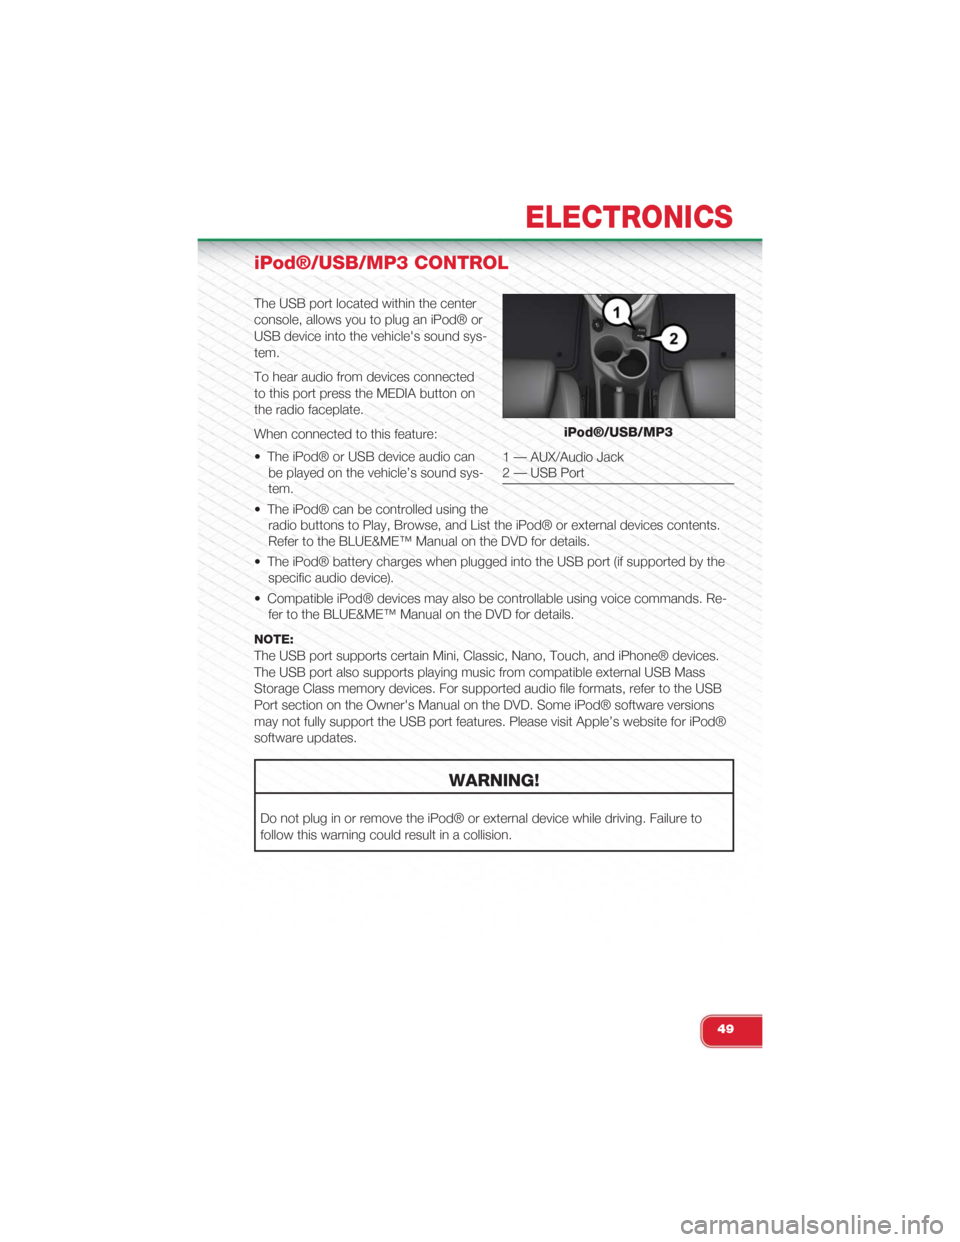
iPod®/USB/MP3 CONTROL
The USB port located within the center
console, allows you to plug an iPod® or
USB device into the vehicle's sound sys-
tem.
To hear audio from devices connected
to this port press the MEDIA button on
the radio faceplate.
When connected to this feature:
• The iPod® or USB device audio can
be played on the vehicle’s sound sys-
tem.
• The iPod® can be controlled using the
radio buttons to Play, Browse, and List the iPod® or external devices contents.
Refer to the BLUE&ME™ Manual on the DVD for details.
• The iPod® battery charges when plugged into the USB port (if supported by the
specific audio device).
• Compatible iPod® devices may also be controllable using voice commands. Re-
fer to the BLUE&ME™ Manual on the DVD for details.
NOTE:
The USB port supports certain Mini, Classic, Nano, Touch, and iPhone® devices.
The USB port also supports playing music from compatible external USB Mass
Storage Class memory devices. For supported audio file formats, refer to the USB
Port section on the Owner's Manual on the DVD. Some iPod® software versions
may not fully support the USB port features. Please visit Apple’s website for iPod®
software updates.
WARNING!
Do not plug in or remove the iPod® or external device while driving. Failure to
follow this warning could result in a collision.
iPod®/USB/MP3
1 — AUX/Audio Jack2 — USB Port
ELECTRONICS
49
Page 52 of 108

ELECTRONIC VEHICLE INFORMATION CENTER
(EVIC)
The EVIC features a driver interactive display that is located in the instrument clus-
ter. Pushing the controls on the right side of the Instrument Cluster allows the driver
to select vehicle information and Personal Settings. For additional information, refer
to “Programmable Features” in this guide.
• Push the MENU button to enter the
menu mode.
• Push the UPor DOWNbut-
tons to scroll through the menu set-
tings.
• Once the menu setting is shown in the
EVIC display push the MENU button
to access the setting and use the UP
or DOWNbuttons to change
the current setting. Push the MENU
button a second time to save the set-
ting and return to menu screen.
EVIC Controls
ELECTRONICS
50
Page 53 of 108

PROGRAMMABLE FEATURES
Electronic Vehicle Information Center (EVIC)
• The EVIC can be used to program the following Personal Settings. Push the
MENU button until menu is displayed, then push the UPor DOWNbut-
tons to scroll through the settings.
• Once the menu setting is shown in the EVIC display push the MENU button to
access the setting and use the UPor DOWNbuttons to change the
current setting. The menu includes the following functions:
• Speed Beep • Buzzer Volume
• Trip B Data • Button Volume
• Set Time • Hill Start Assist
• Set Date • Daylights (D.R.L)
• See Radio (Repeat Audio Informa-tion)• Hill Start
• Speed Display • Tire Pressure
• Autoclose • Unlock Driver Door First
• Units • Unlock All Doors
• Language • Exit Menu
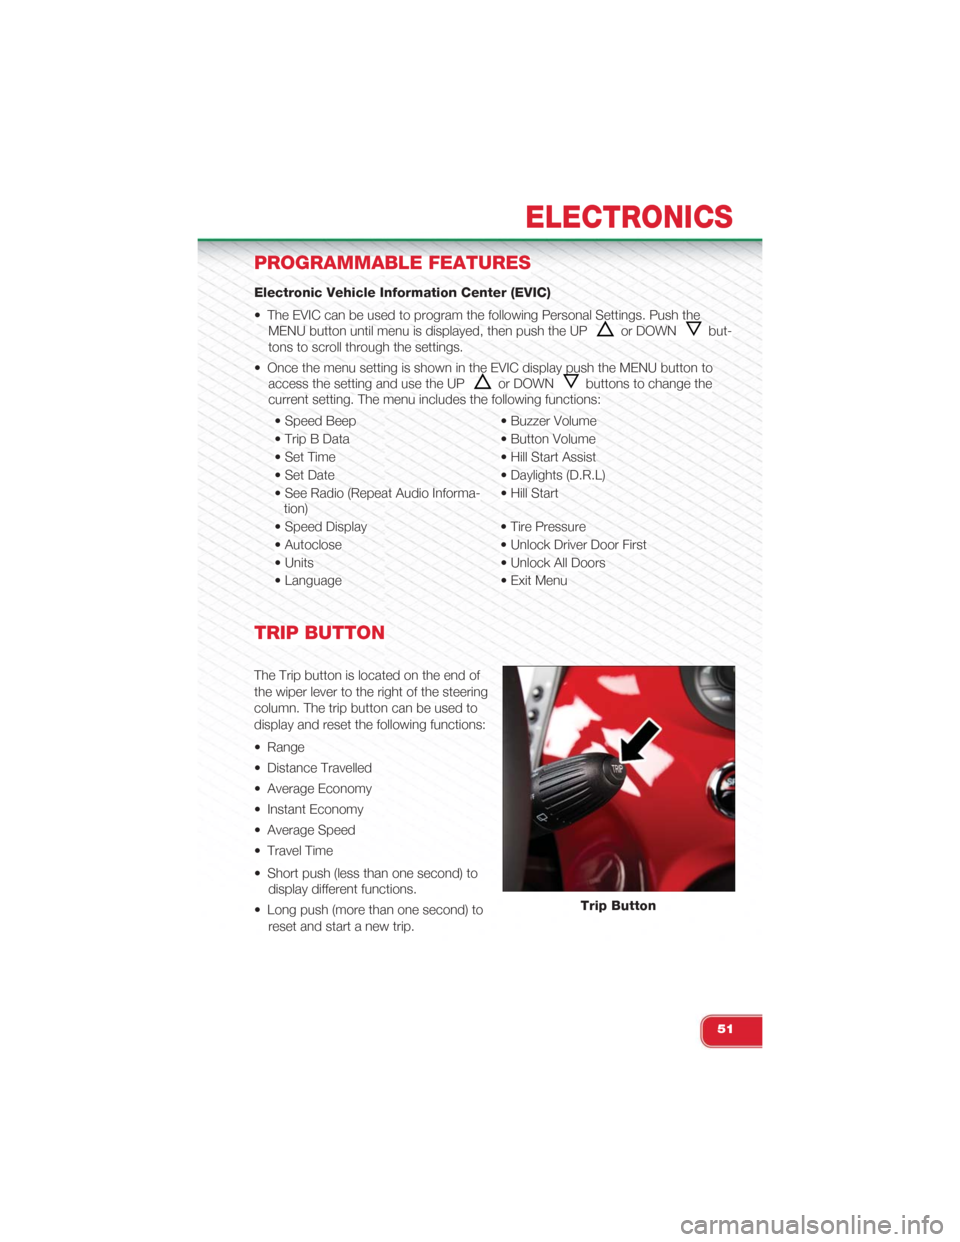
TRIP BUTTON
The Trip button is located on the end of
the wiper lever to the right of the steering
column. The trip button can be used to
display and reset the following functions:
• Range
• Distance Travelled
• Average Economy
• Instant Economy
• Average Speed
• Travel Time
• Short push (less than one second) to
display different functions.
• Long push (more than one second) to
reset and start a new trip.
Trip Button
ELECTRONICS
51
Page 54 of 108

New Trip
• A new trip can be reset or restarted by:
• “Manual” resetting by the user, by pushing the Trip button;
• “Automatically” resetting, when the “Trip distance” reaches 9999.9 miles or
when the “Travel time” reaches 99.59 (99 hours and 59 minutes);
• After disconnecting/reconnecting the battery.
Trip A
• Shows the total distance traveled for Trip A since the last reset.
Trip B
• Shows the total distance traveled for Trip B since the last reset.
Start Of Trip Procedure
• With the ignition key on, push and hold the TRIP button for over one second to
reset Trip A or Trip B.
Exit Trip
• The Trip function is over when all the values have been displayed or holding the
MENU button for longer than one second.
• Briefly push the MENU button to go back to the main screen or push and hold
the MENU button (approximately one second) to go back to the main screen
without storing settings.
ELECTRONICS
52