Page 54 of 703
LIFTGATE
On vehicles equipped with power locks, the liftgate can
be unlocked using the Remote Keyless Entry (RKE)
transmitter button, or by activating the power door lock
switches located on the front doors.
To open the liftgate, push the liftgate release handle
located on the underside of the license plate bar and pull
the liftgate open with one fluid motion.
Liftgate Handle Location
52 THINGS TO KNOW BEFORE STARTING YOUR VEHICLE
Page 55 of 703
Power Liftgate — If Equipped
The power liftgate may be opened manually or by using
the button on the Remote Keyless Entry (RKE) transmit-
ter. Push the button on the transmitter twice within five
seconds, to open the power liftgate. When the liftgate is
fully open, pushing the button twice within five seconds,
a second time, will close the liftgate.
The power liftgate may also be opened and closed by
pushing the button located on the overhead console.
Overhead Console Master Power Switch
1—LeftSlidingDoor3—RightSlidingDoor2 — Liftgate4 — Master Lock
2
THINGS TO KNOW BEFORE STARTING YOUR VEHICLE 53
Page 93 of 703

Do not drive your vehicle after the air bags have de-
ployed. If you are involved in another collision, the air
bags will not be in place to protect you.
WARNING!
Deployed air bags and seat belt pretensioners cannot
protect you in another collision. Have the air bags,
seat belt pretensioners, and the seat belt retractor
assemblies replaced by an authorized dealer imme-
diately. Also, have the Occupant Restraint Controller
System serviced as well.
NOTE:
•Air bag covers may not be obvious in the interior trim,
but they will open during air bag deployment.
•After any collision, the vehicle should be taken to an
authorized dealer immediately.
Enhanced Accident Response System
In the event of an impact, if the communication network
remains intact, and the power remains intact, depending
on the nature of the event, the ORC will determine
whether to have the Enhanced Accident Response Sys-
tem perform the following functions:
•Cut off fuel to the engine.
•Flash hazard lights as long as the battery has power or
until the ignition switch is turned to the “OFF” posi-
tion.
•Turn on the interior lights, which remain on as long as
the battery has power or until the ignition switch is
turned to the “OFF” position.
•Unlock the doors automatically.
2
THINGS TO KNOW BEFORE STARTING YOUR VEHICLE 91
Page 127 of 703

Periodic Safety Checks You Should Make Outside
The Vehicle
Tires
Examine tires for excessive tread wear and uneven wear
patterns. Check for stones, nails, glass, or other objects
lodged in the tread or sidewall. Inspect the tread for cuts
and cracks. Inspect sidewalls for cuts, cracks and bulges.
Check the wheel nuts for tightness. Check the tires
(including spare) for proper cold inflation pressure.
Lights
Have someone observe the operation of brake lights and
exterior lights while you work the controls. Check turn
signal and high beam indicator lights on the instrument
panel.
Door Latches
Check for positive closing, latching, and locking.
Fluid Leaks
Check area under vehicle after overnight parking for fuel,
engine coolant, oil, or other fluid leaks. Also, if gasoline
fumes are detected or if fuel, power steering fluid (if
equipped), or brake fluid leaks are suspected, the cause
should be located and corrected immediately.
2
THINGS TO KNOW BEFORE STARTING YOUR VEHICLE 125
Page 220 of 703

4. Press and release button (1) or (2) accordingly.
“Memory Profile Set” (1 or 2) will display in the
instrument cluster.
5. Press and release the LOCK button on the RKE
transmitter within 10 seconds.
NOTE:Your RKE transmitters can be unlinked to your
memory settings by pressing the SET (S) button, and
within 10 seconds, followed by pressing the UNLOCK
button on the RKE transmitter.
Memory Position Recall
NOTE:The vehicle must be in PARK to recall memory
positions. If a recall is attempted when the vehicle is not
in PARK, a message will be displayed in the EVIC.
To recall the memory settings for driver one, press
MEMORY button 1 on the driver’s door or the UNLOCK
button on the RKE transmitter linked to memory position
1.
To recall the memory setting for driver two, press
MEMORY button 2 on the driver’s door or the UNLOCK
button on the RKE transmitter linked to Memory Position
2.
A recall can be cancelled by pressing any of the
MEMORY buttons on the driver’s door during a recall (S,
1, or 2). When a recall is cancelled, the driver’s seat, and
the pedals (if equipped) stop moving. A delay of one
second will occur before another recall can be selected.
NOTE:Pressing the mirror adjust switch will cancel the
memory mirror recall.
Easy Entry/Exit Seat (Available With Memory Seat
Only)
This feature provides automatic driver seat positioning to
enhance driver mobility when entering and exiting the
vehicle.
218 UNDERSTANDING THE FEATURES OF YOUR VEHICLE
Page 255 of 703

Courtesy/Interior Lighting
At the forward end of the console are two courtesy lights
(standard dome light has two buttons). The lights turn on
when a front door, a sliding door or the liftgate is opened.
If your vehicle is equipped with Remote Keyless Entry
(RKE) the lights will also turn on when the UNLOCK
button on the RKE transmitter is pressed.
The courtesy lights also function as reading lights. Press
in on each lens to turn these lights on while inside the
vehicle. Press a second time to turn each light off. You
may adjust the direction of these lights by pressing the
outside ring, which is identified with four directional
arrows (LED lamps only).
The area around the instrument panel cupholders is also
illuminated from a light in the overhead console (pre-
mium console only). This light is turned on when the
headlight switch is on, and will adjust in brightness when
the dimmer control is rotated up or down.
Sunglass Storage (Non-Sunroof Only)
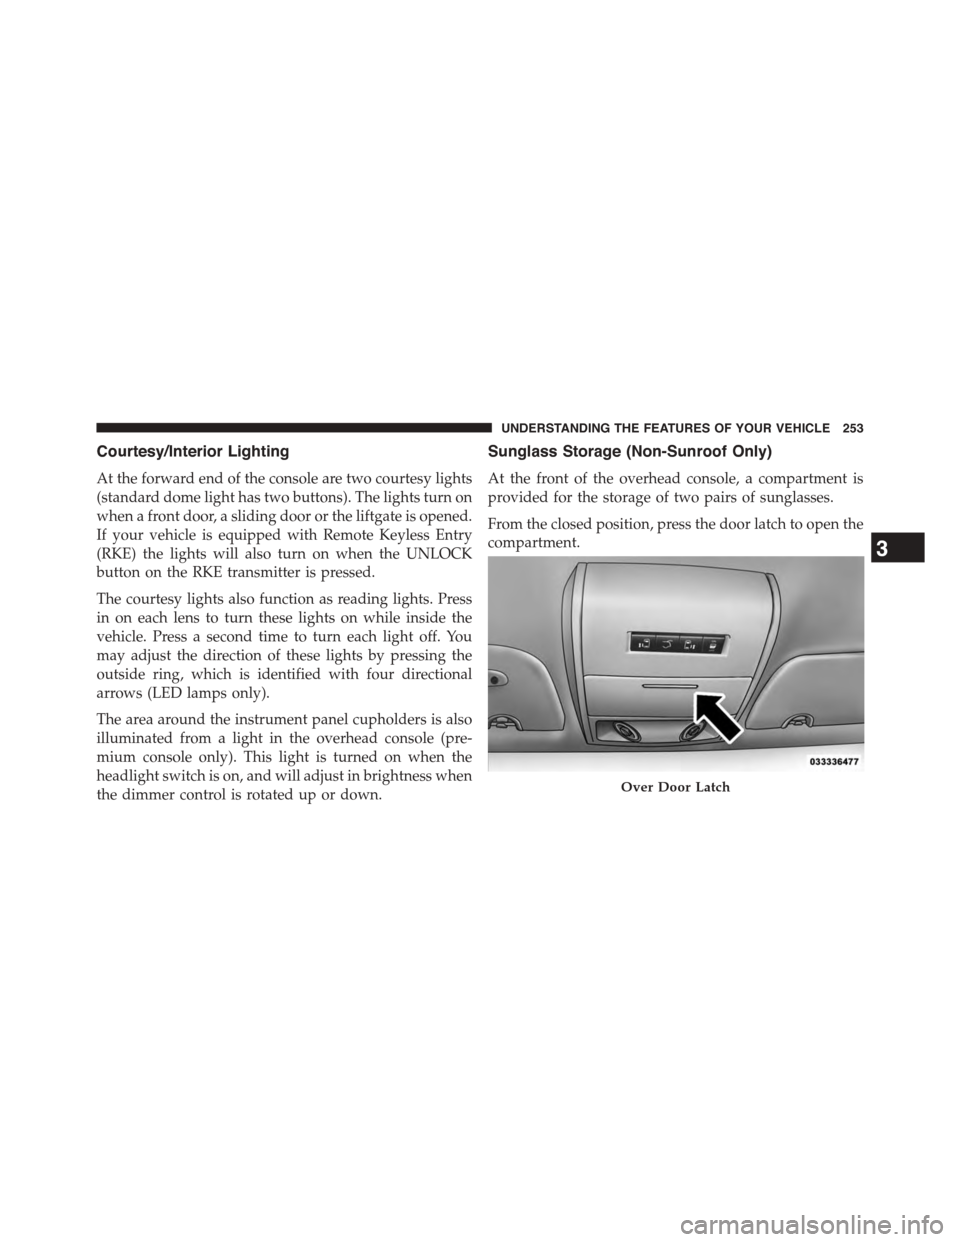
At the front of the overhead console, a compartment is
provided for the storage of two pairs of sunglasses.
From the closed position, press the door latch to open the
compartment.
Over Door Latch
3
UNDERSTANDING THE FEATURES OF YOUR VEHICLE 253
Page 257 of 703
Rear Courtesy/Reading Lights — If Equipped
The overhead console has two sets of courtesy lights. The
lights turn on when a front door, a sliding door or the
liftgate is opened. If your vehicle is equipped with
Remote Keyless Entry (RKE) the lights will also turn on
when the UNLOCK button on the RKE transmitter is
pressed.
The courtesy lights also function as reading lights. Press
in on each lens to turn these lights on while inside the
vehicle. Press the lens a second time to turn each light off.
You may adjust the direction of these lights by pressing
the outside ring, which is identified with four directional
arrows.Rear Overhead Consoles — If Equipped
The rear overhead storage system is available in two
versions: with or without sunroof.
An additional LED at the front of the rear console shines
down on the front foot-well area while in courtesy mode,
for added convenience.
Reading Lights
3
UNDERSTANDING THE FEATURES OF YOUR VEHICLE 255
Page 265 of 703

•If the indicator light stays on constantly, program-
ming is complete and the garage door/device should
activate when the HomeLink® button is pushed.
•To program the two remaining HomeLink® buttons,
repeat each step for each remaining button. DO NOT
erase the channels.
If you unplugged the garage door opener/device for
programming, plug it back in at this time.
Reprogramming A Single HomeLink® Button
(Canadian/Gate Operator)
To reprogram a channel that has been previously trained,
follow these steps:
1. Cycle the ignition to the ON/RUN position.
2. Push and hold the desired HomeLink® button until
the indicator light begins to flash after 20 seconds.Do
not release the button.
3.Without releasing the buttonproceed with
“Canadian/Gate Operator Programming” step 2 and
follow all remaining steps.
Using HomeLink®
To operate, push and release the programmed
HomeLink® button. Activation will now occur for the
programmed device (i.e., garage door opener, gate opera-
tor, security system, entry door lock, home/office light-
ing, etc.,). The hand-held transmitter of the device may
also be used at any time.
Security
It is advised to erase all channels before you sell or turn
in your vehicle.
To do this, push and hold the two outside buttons for 20
seconds until the red indicator flashes. Note that all
channels will be erased. Individual channels cannot be
erased.
3
UNDERSTANDING THE FEATURES OF YOUR VEHICLE 263