Page 377 of 703

SCAN Button
Pushing the SCAN button causes the tuner to search for
the next channel, pausing for eight seconds before con-
tinuing to the next. To stop the search, push the SCAN
button a second time.
INFO Button
Pushing the INFO button will cycle the display informa-
tion between Artist, Song Title, and Composer (if avail-
able). Also, pushing and holding the INFO button for an
additional three seconds will make the radio display the
Song Title all of the time (push and hold again to return
to normal display).
RW/FF
Pushing the RW (Rewind) or FF (Fast Forward) buttons
causes the tuner to search for the next channel in the
direction of the arrows.
TUNE Control (Rotary)
Turn the rotary TUNE/SCROLL control knob clockwise
to increase or counterclockwise to decrease the channel.
MUSIC TYPE Button
Pushing this button once will turn on the Music Type
mode for five seconds. Pushing the MUSIC TYPE button
or turning the TUNE/SCROLL control knob within five
seconds will allow the program format type to be se-
lected.
Toggle the MUSIC TYPE button again to select the music
type.
By pushing the SEEK button when the Music Type
function is active, the radio will be tuned to the next
channel with the same selected Music Type name.
If a preset button is activated while in the Music Type
(Program Type) mode, the Music Type mode will be
exited and the radio will tune to the preset channel.
4
UNDERSTANDING YOUR INSTRUMENT PANEL 375
Page 378 of 703

SETUP Button
Pushing the SETUP button allows you to select the
following items:
•Display Sirius ID number — Push the AUDIO/
SELECT button to display the Sirius ID number. This
number is used to activate, deactivate, or change the
Sirius subscription.
SET Button — To Set The Pushbutton Memory
When you are receiving a channel that you wish to
commit to pushbutton memory, push the SET button. The
symbol SET 1 will now show in the display window.
Select the button (1-6) you wish to lock onto this channel
and push and release that button. If a button is not
selected within five seconds after pushing the SET but-
ton, the channel will continue to play but will not be
stored into pushbutton memory.
You may add a second channel to each pushbutton by
repeating the above procedure with this exception: Push
the SET button twice and SET 2 will show in the display
window. Each button can be set for SET 1 and SET 2. This
allows a total of 12 Satellite channels to be stored into
pushbutton memory. The channels stored in SET 2
memory can be selected by pushing the pushbutton
twice.
Every time a preset button is used, a corresponding
button number will display.
Buttons1-6
These buttons tune the radio to the channels that you
commit to pushbutton memory (12 Satellite stations).
376 UNDERSTANDING YOUR INSTRUMENT PANEL
Page 381 of 703

Using This Feature
By using an iPod® cable, or an external USB device to
connect to the USB port:
•The audio device can be played on the vehicle’s sound
system, providing metadata (artist, track title, album,
etc.) information on the radio display.
•The audio device can be controlled using the radio
buttons to Play, Browse, and List the iPod® contents.
•The audio device battery charges when plugged into
the USB/AUX connector (if supported by the specific
audio device).
Controlling The iPod® Or External USB Device
Using Radio Buttons
To get into the iPod®/USB/MP3 control mode and
access a connected audio device, either push the “AUX”
button on the radio faceplate or push the VR button and
say#USB#or#Switch to USB.#Once in the iPod®/USB/
MP3 control mode, audio tracks (if available from audio
device) start playing over the vehicle’s audio system.
Play Mode
When switched to iPod®/USB/MP3 control mode, the
iPod® or external USB device automatically starts Play
mode. In Play mode, the following buttons on the radio
faceplate may be used to control the iPod® or external
USB device and display data:
•Use theTUNEcontrol knob to select the next or
previous track.
•Turning it clockwise (forward) by one click, while
playing a track, skips to the next track or push the VR
button and say#Next Track.#
•Turning it counterclockwise (backward) by one click,
will jump to the previous track in the list or push the
VR button and say#Previous Track.#
4
UNDERSTANDING YOUR INSTRUMENT PANEL 379
Page 383 of 703

device, or push the VR button and say#Shuffle ON#or
#Shuffle Off.#If theRNDicon is showing on the radio
display, then the shuffle mode is ON.
List Or Browse Mode
During Play mode, pushing any of the buttons described
below, will bring up List mode. List mode enables
scrolling through the list of menus and tracks on the
audio device.
TUNEcontrol knob: TheTUNEcontrol knob functions in
a similar manner as the scroll wheel on the audio device
or external USB device.
•Turning it clockwise (forward) and counterclockwise
(backward) scrolls through the lists, displaying the
track detail on the radio display. Once the track to be
played is highlighted on the radio display, push the
TUNEcontrol knob to select and start playing the
track. Turning theTUNEcontrol knob fast will scroll
through the list faster. During fast scroll, a slight delay
in updating the information on the radio display may
be noticeable.
During all List modes, the iPod® displays all lists in
“wrap-around” mode. So if the track is at the bottom of
the list, just turn the wheel backward (counterclockwise)
to get to the track faster.
In List mode, the radioPRESETbuttons are used as
shortcuts to the following lists on the iPod® or external
USB device:
•Preset 1 – Playlists
•Preset 2 – Artists
•Preset 3 – Albums
•Preset 4 – Genres
•Preset 5 – Audiobooks
•Preset 6 – Podcasts
4
UNDERSTANDING YOUR INSTRUMENT PANEL 381
Page 408 of 703
Locking The Remote Control
All remote control functionality can be disabled as a
parental control feature.
•To disable the Remote Control from making any
changes, press the Video Lock button on the DVD
player (if equipped). If the vehicle is not equipped
with a DVD player, follow the radio’s instructions to
turn Video Lock on. The radio and the video screen(s)
indicate when Video Lock is active.
•Pressing the Video Lock again or turning the ignition
OFF turns Video Lock OFF and allows remote control
operation of the VES™.
Replacing The Remote Control Batteries
The remote control requires two AAA batteries for op-
eration. To replace the batteries:
•Locate the battery compartment on the back of the
remote, then slide the battery cover downward.
•Replace the batteries, making sure to orient them
according to the polarity diagram shown.
•Replace the battery compartment cover.
406 UNDERSTANDING YOUR INSTRUMENT PANEL
Page 415 of 703
Information Mode DisplayNumeric Keypad Menu
When the display for either Channel 1 or Channel 2
shows DIRECT TUNE, pressing the remote control’s OK
button activates a numeric keypad menu. This screen
Information Mode Video Screen Display
1—Channel1Mode2—Channel1SharedStatus3—Channel1AudioOnly/Mute4—Channel2Mode5—Channel2SharedStatus6—Channel2AudioOnly/Mute
7—Channel1ENTER/OKButton Action8—Channel2ENTER/OKButton Action9—Clock10 — Video Lock11 — Not Available / Error
Numeric Keypad Menu
4
UNDERSTANDING YOUR INSTRUMENT PANEL 413
Page 432 of 703

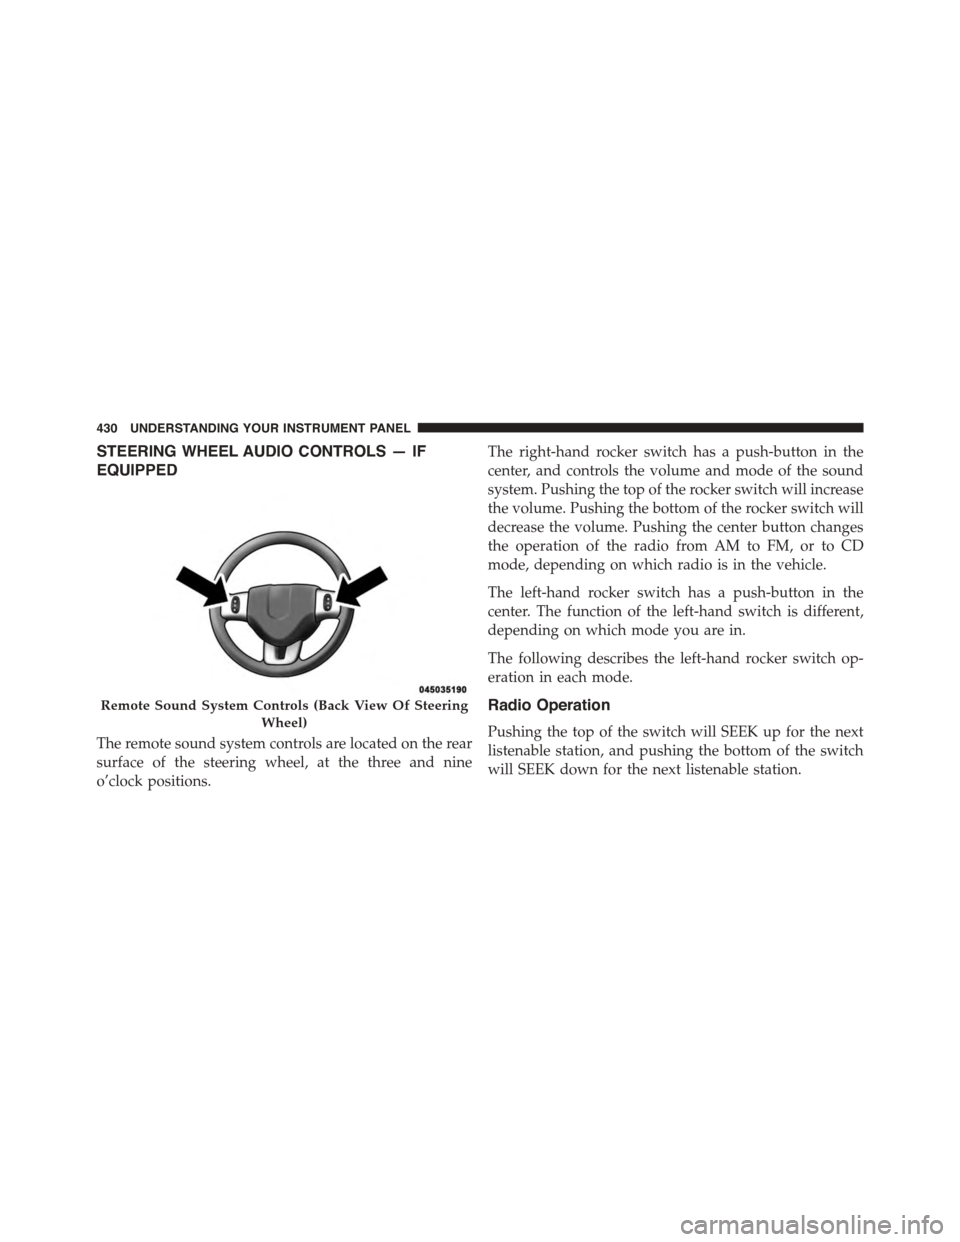
STEERING WHEEL AUDIO CONTROLS — IF
EQUIPPED
The remote sound system controls are located on the rear
surface of the steering wheel, at the three and nine
o’clock positions.
The right-hand rocker switch has a push-button in the
center, and controls the volume and mode of the sound
system. Pushing the top of the rocker switch will increase
the volume. Pushing the bottom of the rocker switch will
decrease the volume. Pushing the center button changes
the operation of the radio from AM to FM, or to CD
mode, depending on which radio is in the vehicle.
The left-hand rocker switch has a push-button in the
center. The function of the left-hand switch is different,
depending on which mode you are in.
The following describes the left-hand rocker switch op-
eration in each mode.
Radio Operation
Pushing the top of the switch will SEEK up for the next
listenable station, and pushing the bottom of the switch
will SEEK down for the next listenable station.
Remote Sound System Controls (Back View Of Steering
Wheel)
430 UNDERSTANDING YOUR INSTRUMENT PANEL
Page 438 of 703

CAUTION!(Continued)
•Do not use scrapers, sharp instruments, or abrasive
window cleaners on the interior surface of the
window.
•Keep all objects a safe distance from the window.
9. Recirculation Control Button
Press this button to choose between outside air
intake or recirculation of the air inside the
vehicle. An indicator light will illuminate when
you are in Recirculation mode. Only use the
Recirculation mode to temporarily block out any outside
odors, smoke, or dust, and to cool the interior rapidly
upon initial start-up in very hot or humid weather.
NOTE:
•If the Recirculation button is pressed when the
system is in Defrost mode the Recirculation LED
indicator will flash three times to indicate Recircula-
tion mode is not allowed.
•Continuous use of the Recirculation mode may make
the inside air stuffy and window fogging may occur.
Extended use of this mode is not recommended.
•In cold or damp weather, the use of the Recirculation
mode will cause windows to fog on the inside
because of moisture buildup inside the vehicle. For
maximum defogging, select the outside air position.
•In order to prevent fogging, when the Recirculation
button is pressed and the mode control is set to
Panel, the A/C will engage automatically.
•The A/C can be deselected manually without dis-
turbing the mode control selection.
436 UNDERSTANDING YOUR INSTRUMENT PANEL