2015 DODGE DURANGO park assist
[x] Cancel search: park assistPage 3 of 236

INTRODUCTION/WELCOME
WELCOME FROM FCA US LLC.......2
CONTROLS AT A GLANCE
DRIVER COCKPIT...............6INSTRUMENT CLUSTER...........8
GETTING STARTED
KEY FOB . . . . . . . . . . . . . . . . . . . 10REMOTE START . . . . . . . . . . . . . . . . 11KEYLESS ENTER-N-GO™.........12VEHICLE SECURITY ALARM........15SEAT BELT SYSTEMS............15SUPPLEMENTAL RESTRAINT SYSTEM(SRS) — AIR BAGS.............16CHILD RESTRAINTS............19HEAD RESTRAINTS.............25FRONT SEATS.................28REAR SEATS.................31HEATED/VENTILATED SEATS........34HEATED STEERING WHEEL........36TILT/TELESCOPING STEERINGCOLUMN...................37
OPERATING YOUR VEHICLE
ENGINE BREAK-INRECOMMENDATIONS............39TURN SIGNAL/WIPER/WASHER/HIGHBEAM LEVER.................40HEADLIGHT SWITCH............41ELECTRONIC SPEED CONTROL......42ADAPTIVE CRUISE CONTROL (ACC)....44FORWARD COLLISION WARNING (FCW)WITH MITIGATION..............49AUTOMATIC DIMMING MIRRORS.....51ELECTRONIC SHIFTER...........51AUTOSTICK..................52FUEL ECONOMY (ECO) MODE.......54AUTOMATIC CLIMATE CONTROLS.....55PA R K S E N S E®REAR PARK ASSIST.....60PA R K V I E W®REAR BACK-UP CAMERA...61BLIND SPOT MONITORING.........61POWER SUNROOF..............62WIND BUFFETING..............63
ELECTRONICSYOUR VEHICLE'S SOUND SYSTEM....64IDENTIFYING YOUR RADIO.........66Uconnect®ACCESS.............67Uconnect®5.0 . . . . . . . . . . . . . . . . 84Uconnect®8.4A...............96Uconnect®8.4AN.............124Uconnect®PHONE.............137STEERING WHEEL AUDIO CONTROLS...147DRIVER INFORMATION DISPLAY (DID)...148PROGRAMMABLE FEATURES.......150UNIVERSAL GARAGE DOOR OPENER(HomeLink®).................152
POWER INVERTER.............154POWER OUTLET..............155
OFF-ROAD CAPABILITIESALL-WHEEL DRIVE OPERATION.....157
UTILITYROOF LUGGAGE RACK..........160TRAILER TOWING WEIGHTS (MAXIMUMTRAILER WEIGHT RATINGS).......161RECREATIONAL TOWING (BEHINDMOTORHOME, ETC.)............163
WHAT TO DO IN EMERGENCIESROADSIDE ASSISTANCE..........168INSTRUMENT CLUSTER WARNINGLIGHTS....................168INSTRUMENT CLUSTER INDICATORLIGHTS...................173IF YOUR ENGINE OVERHEATS......175JACKING AND TIRE CHANGING.....176BATTERY LOCATION............186JUMP-STARTING..............186MANUAL PARK RELEASE.........189TOWING A DISABLED VEHICLE.....190FREEING A STUCK VEHICLE.......191EVENT DATA RECORDER (EDR).....192CAP-LESS FUEL FILL FUNNEL......192
MAINTAINING YOUR VEHICLE
OPENING THE HOOD...........193ENGINE COMPARTMENT.........194FLUID CAPACITIES.............198FLUIDS, LUBRICANTS AND GENUINEPA RT S....................199MAINTENANCE PROCEDURES......201MAINTENANCE SCHEDULE.......201MAINTENANCE RECORD.........205FUSES....................206TIRE PRESSURES.............209ADDING FUEL................210SPARE TIRES — IF EQUIPPED......211WHEEL AND WHEEL TRIM CARE....213REPLACEMENT BULBS..........214
CUSTOMER ASSISTANCE
FCA US LLC CUSTOMER CENTER....215CHRYSLER CANADA INC. CUSTOMERCENTER...................215ASSISTANCE FOR THE HEARINGIMPAIRED..................215PUBLICATIONS ORDERING........216REPORTING SAFETY DEFECTS IN THEUNITED STATES..............216
MOPAR® ACCESSORIESAUTHENTIC ACCESSORIES BY MOPAR®...217
FREQUENTLY ASKED QUESTIONS
FREQUENTLY ASKED QUESTIONS....218
INDEX.....................220
TABLE OF CONTENTS
Page 62 of 236

PARKSENSE® REAR PARK ASSIST
The four ParkSense®sensors, located in the rear fascia/bumper, monitor the area behind
the vehicle that is within the sensors’ field of view.
The sensors can detect obstacles from approximately 12 in (30 cm) up to 79 in (200 cm)
from the rear bumper while the vehicle is in REVERSE, a warning will display in the Driver
Information Display (DID) and a chime will sound (when Sound and Display is selected
from the Customer Programmable Features section of the Uconnect®System screen). As
the vehicle moves closer to the object, the chime rate will change from single 1/2 second
tone, to slow, to fast, to continuous.
Cleaning The ParkSense® Sensors
If “PARKSENSE UNAVAILABLE WIPE REAR SENSORS" or "PARKSENSE UNAVAIL-
ABLE WIPE FRONT SENSORS” appears in the “Driver Information Display (DID),” clean
the ParkSense®sensors with water, car wash soap and a soft cloth. Do not use rough or
hard cloths. Do not scratch or poke the sensors. Otherwise, you could damage the sensors.
OPERATING YOUR VEHICLE
60
Page 71 of 236

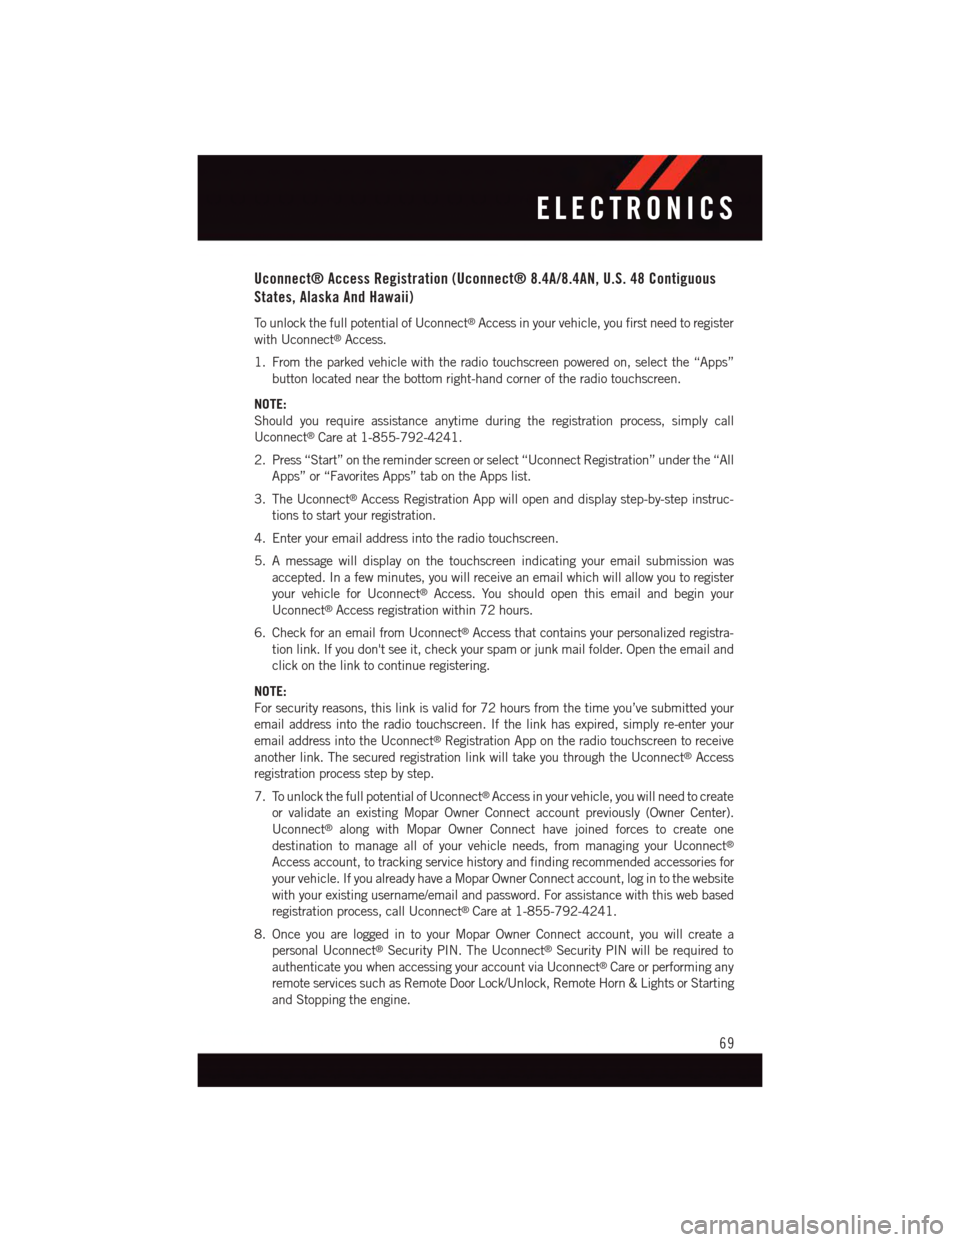
Uconnect® Access Registration (Uconnect® 8.4A/8.4AN, U.S. 48 Contiguous
States, Alaska And Hawaii)
To u n l o c k t h e f u l l p o t e n t i a l o f U c o n n e c t®Access in your vehicle, you first need to register
with Uconnect®Access.
1. From the parked vehicle with the radio touchscreen powered on, select the “Apps”
button located near the bottom right-hand corner of the radio touchscreen.
NOTE:
Should you require assistance anytime during the registration process, simply call
Uconnect®Care at 1-855-792-4241.
2. Press “Start” on the reminder screen or select “Uconnect Registration” under the “All
Apps” or “Favorites Apps” tab on the Apps list.
3. The Uconnect®Access Registration App will open and display step-by-step instruc-
tions to start your registration.
4. Enter your email address into the radio touchscreen.
5. A message will display on the touchscreen indicating your email submission was
accepted. In a few minutes, you will receive an email which will allow you to register
your vehicle for Uconnect®Access. You should open this email and begin your
Uconnect®Access registration within 72 hours.
6. Check for an email from Uconnect®Access that contains your personalized registra-
tion link. If you don't see it, check your spam or junk mail folder. Open the email and
click on the link to continue registering.
NOTE:
For security reasons, this link is valid for 72 hours from the time you’ve submitted your
email address into the radio touchscreen. If the link has expired, simply re-enter your
email address into the Uconnect®Registration App on the radio touchscreen to receive
another link. The secured registration link will take you through the Uconnect®Access
registration process step by step.
7. To unlock the full potential of Uconnect®Access in your vehicle, you will need to create
or validate an existing Mopar Owner Connect account previously (Owner Center).
Uconnect®along with Mopar Owner Connect have joined forces to create one
destination to manage all of your vehicle needs, from managing your Uconnect®
Access account, to tracking service history and finding recommended accessories for
your vehicle. If you already have a Mopar Owner Connect account, log in to the website
with your existing username/email and password. For assistance with this web based
registration process, call Uconnect®Care at 1-855-792-4241.
8. Once you are logged in to your Mopar Owner Connect account, you will create a
personal Uconnect®Security PIN. The Uconnect®Security PIN will be required to
authenticate you when accessing your account via Uconnect®Care or performing any
remote services such as Remote Door Lock/Unlock, Remote Horn & Lights or Starting
and Stopping the engine.
ELECTRONICS
69
Page 74 of 236

Purchasing WiFi Hotspot While In Your Vehicle
Yo u m u s t s e t u p a U c o n n e c t®Access Payment Account online (log in to
moparownerconnect.com, go to Edit Profile, then Uconnect®Payment Account, to set
up and manage your Payment Account).
1. To purchase WiFi while in your vehicle, ensure the vehicle is running and in Park. Press
the “Apps” button on the touchscreen, then select WiFi within the “Apps” menu.
Follow the on-screen instructions. When asked for your payment PIN, use the 4-digit
PIN you established when setting up your payment account on Mopar Owner Connect.
NOTE:
This may be different than the Uconnect®Security PIN you established for using features
such as Remote Vehicle Start. After purchasing WiFi, it may take up to 30 minutes (with
the vehicle running) before the WiFi will be active in your vehicle.
2. Select WiFi again, then note the hotspot name. Select this network when connecting
devices to the hotspot. Also click on View/Edit Passphrase, then note the security
passphrase you will need to connect to the network on each device.
If your devices cannot see the WiFi Hotspot network after 30 minutes, please contact
Uconnect®Care by pushing the ASSIST button on the rearview mirror, or by calling
1-855-792-4241.
Using Uconnect® Access
Getting Started With Apps
Applications (Apps) and features in your Uconnect®Access system deliver services that
are customized for the driver and are certified by FCA US LLC. Two different types are:
1.Built-In Features—usethebuilt-in3GCellularNetworkonyourUconnect®8.4A/
8.4AN radio.
2.Uconnect® Access Via Mobile(if equipped) — Via Mobile uses the Uconnect®Access
app and your smartphone's data plan to access your personal Pandora®,iHeartRadio,
Aha™ by HARMAN and Slacker Radio accounts from the vehicle and control them
using the vehicle touchscreen. Customer’s data plan charges will apply. Available on
Uconnect®8.4A and 8.4AN Radios (if equipped).
Get started with your Uconnect®Access apps by pressing the Uconnect®“Apps” button
on the menu bar at the bottom right corner of the radio touchscreen. Available apps and
features are organized by the tabs on the left of the screen:
Favorite Apps—Thisisthedefaultscreenwhenyoufirstpressthe“Apps”buttononthe
touchscreen, and is a good place to put the apps you use most frequently. To make an App
a“favorite”,pressthestarbuttonnexttotheappnameandconfirmthepromptwith
“yes."
All Apps—OrganizesyourUconnect®Access apps (when available).
ELECTRONICS
72
Page 154 of 236

UNIVERSAL GARAGE DOOR OPENER (HomeLink®)
•HomeLink®replaces up to three hand-held transmitters that operate devices such as
garage door openers, motorized gates, lighting or home security systems. The HomeLink®
unit is powered by your vehicles 12 Volt battery.
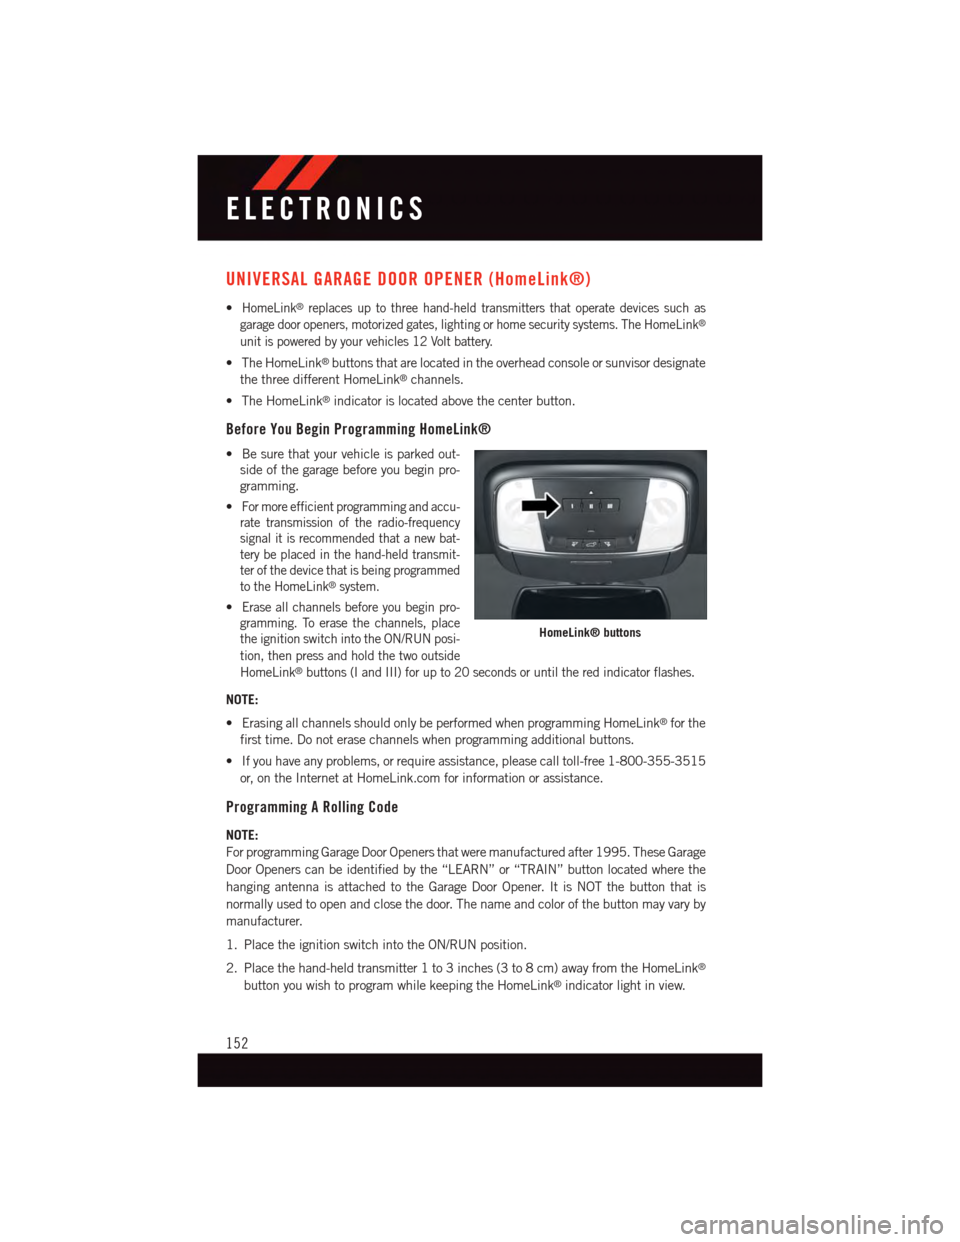
•TheHomeLink®buttons that are located in the overhead console or sunvisor designate
the three different HomeLink®channels.
•TheHomeLink®indicator is located above the center button.
Before You Begin Programming HomeLink®
•Besurethatyourvehicleisparkedout-
side of the garage before you begin pro-
gramming.
•For more efficient programming and accu-
rate transmission of the radio-frequency
signal it is recommended that a new bat-
tery be placed in the hand-held transmit-
ter of the device that is being programmed
to the HomeLink®system.
•Erase all channels before you begin pro-
gramming. To erase the channels, place
the ignition switch into the ON/RUN posi-
tion, then press and hold the two outside
HomeLink®buttons (I and III) for up to 20 seconds or until the red indicator flashes.
NOTE:
•ErasingallchannelsshouldonlybeperformedwhenprogrammingHomeLink®for the
first time. Do not erase channels when programming additional buttons.
•Ifyouhaveanyproblems,orrequireassistance,pleasecalltoll-free1-800-355-3515
or, on the Internet at HomeLink.com for information or assistance.
Programming A Rolling Code
NOTE:
For programming Garage Door Openers that were manufactured after 1995. These Garage
Door Openers can be identified by the “LEARN” or “TRAIN” button located where the
hanging antenna is attached to the Garage Door Opener. It is NOT the button that is
normally used to open and close the door. The name and color of the button may vary by
manufacturer.
1. Place the ignition switch into the ON/RUN position.
2. Place the hand-held transmitter 1 to 3 inches (3 to 8 cm) away from the HomeLink®
button you wish to program while keeping the HomeLink®indicator light in view.
HomeLink® buttons
ELECTRONICS
152
Page 188 of 236

BATTERY LOCATION
The battery in your vehicle is located under the passenger's front seat. Remote battery
posts are located on the right side of the engine compartment for jump-starting.
JUMP-STARTING
If your vehicle has a discharged battery it can be jump-started using a set of jumper cables
and a battery in another vehicle or by using a portable battery booster pack.
Jump-starting can be dangerous if done improperly so please follow the procedures in this
section carefully.
NOTE:
When using a portable battery booster pack follow the manufacturer’s operating instruc-
tions and precautions.
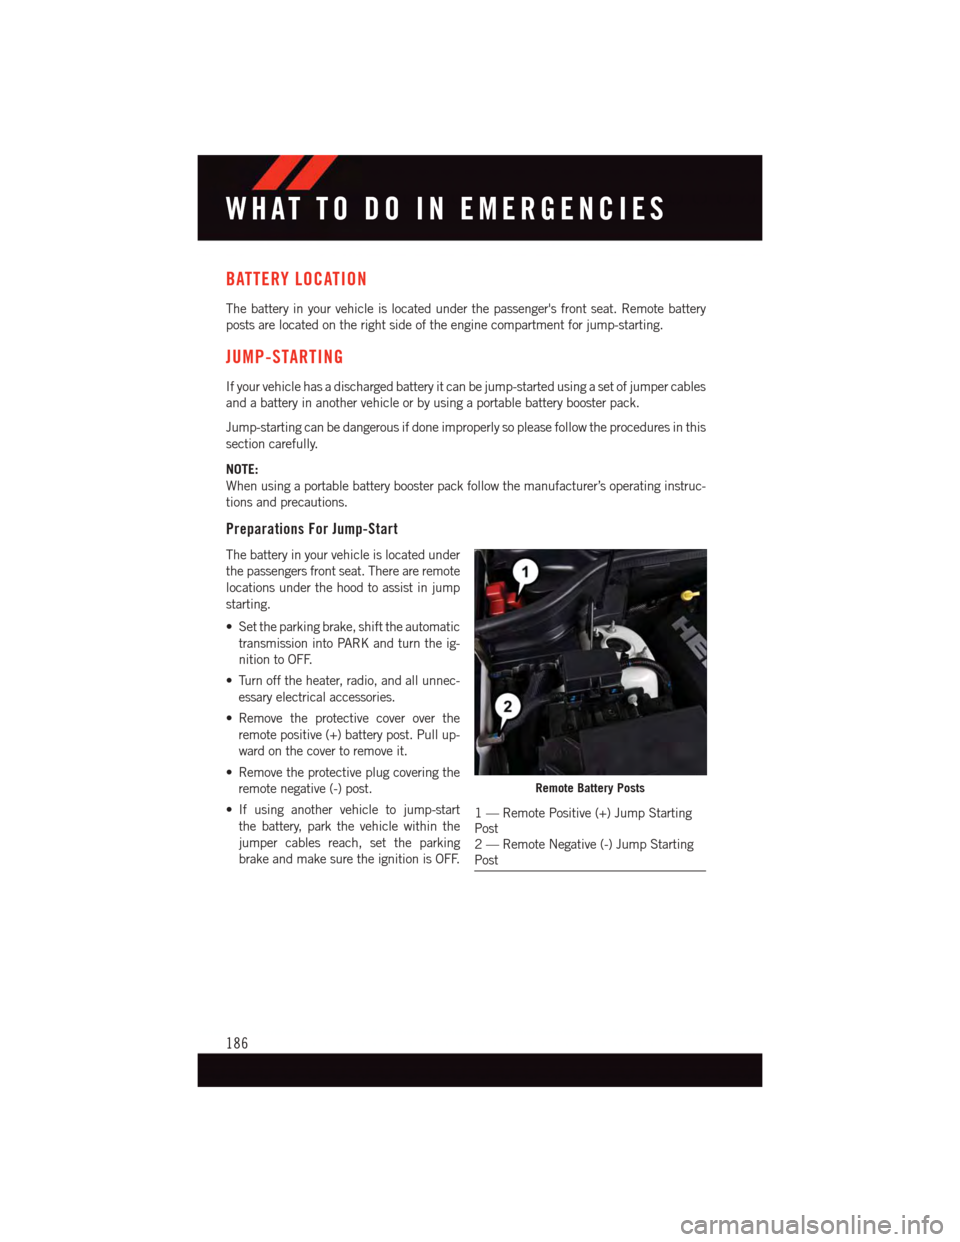
Preparations For Jump-Start
The battery in your vehicle is located under
the passengers front seat. There are remote
locations under the hood to assist in jump
starting.
•Settheparkingbrake,shifttheautomatic
transmission into PARK and turn the ig-
nition to OFF.
•Turnofftheheater,radio,andallunnec-
essary electrical accessories.
•Remove the protective cover over the
remote positive (+) battery post. Pull up-
ward on the cover to remove it.
•Removetheprotectiveplugcoveringthe
remote negative (-) post.
•If using another vehicle to jump-start
the battery, park the vehicle within the
jumper cables reach, set the parking
brake and make sure the ignition is OFF.
Remote Battery Posts
1—RemotePositive(+)JumpStartingPost2—RemoteNegative(-)JumpStartingPost
WHAT TO DO IN EMERGENCIES
186
Page 210 of 236

Cavity Cartridge Fuse Micro FuseDescription
F67–15 Amp Blue CD / DVD / Bluetooth Hands-freeModule - If Equipped
F68–20AmpYellowRear Wiper Motor
F69–15 Amp Blue Spotlight Feed - If Equipped
F70–20AmpYellowFuel Pump Motor
F71–30AmpGreenAudio Amplifier
F73–15 Amp Blue HID Headlamp RH - If Equipped
F74–20AmpYellowBrakeVacuumPump-IfEquipped
F76–10 Amp Red Anti-lock Brakes/Electronic StabilityControl
F77–10 Amp Red Drivetrain Control Module/Front AxleDisconnect Module
F78–10 Amp Red Engine Control Module / ElectricPower Steering - If Equipped
F80–10 Amp Red Universal Garage Door Opener /Compass / Anti-Intrusion Module
F81–20AmpYellowTrailerTowRightTurn/StopLights
F82–10 Amp Red Steering Column Control Module/Cruise Control
F83–10 Amp RedFuel Door
F84–15 Amp Blue Switch Bank/Instrument Cluster
F85–10 Amp RedAirbag Module
F86–10 Amp RedAirbag Module
F87–10 Amp Red Air Suspension – If Equipped / TrailerTo w / S t e e r i n g C o l u m n C o n t r o l M o d u l e
F88–15 Amp Blue Instrument Panel Cluster
F90/F91 – 20 Amp Yellow Power Outlet (Rear seats) Selectable
F92–10 Amp Red Rear Console Lamp - If Equipped
F93–20AmpYellowCigar Lighter
F94–10 Amp Red Shifter / Transfer Case Module
F95–10 Amp Red Rear Camera / ParkSense®
F96–10 Amp Red Rear Seat Heater Switch / FlashlampCharger - If Equipped
F97–20AmpYellowRearHeatedSeats&HeatedSteeringWheel - If Equipped
F98–20AmpYellowFrontHeatedSeats-IfEquipped
F99–10 Amp Red Climate Control / Driver AssistanceSystems Module
F100–10 Amp Red Active Damping - If Equipped
F101–15 Amp Blue Electrochromatic Mirror/SmartHigh Beams - If Equipped
MAINTAINING YOUR VEHICLE
208
Page 223 of 236

Electronic Speed Control ON
Indicator . . . . . . . . . . . . . .173
Electronic Speed Control SET
Indicator . . . . . . . . . . . . . .173
Electronic Stability Control (ESC)
OFF Indicator Light . . . . . . . .173
Front Fog Light Indicator . . . . .173
High Beam Indicator.......173
Park/Headlight ON Indicator . . .173
Tu r n S i g n a l I n d i c a t o r.......173Vehicle Security Light.......173Clutch . . . . . . . . . . . . . . . . .201Clutch Fluid . . . . . . . . . . . . . .201Compact Spare Tire..........212Compass Calibration..........148Cooling System.............201Adding Coolant (Antifreeze)....201Coolant Capacity.........198Coolant Level...........201Disposal of Used Coolant.....201Drain, Flush, and Refill......201Inspection . . . . . . . . . . . . .201Points to Remember.......201Pressure Cap . . . . . . . . . . .201Selection of Coolant(Antifreeze)......198, 199, 201Corrosion Protection..........201Cruise Control (Speed Control).....42Cruise Light . . . . . . . . . . . . . . .42Customer Assistance.......215, 216Customer Programmable Features . .150
Defects, Reporting...........216Dimmer Control.............42Dimmer Switch, Headlight.......42Disabled Vehicle Towing . . . . . . . .168Disarming, Security System.......15Discharged Battery...........186DisposalAntifreeze (Engine Coolant)....201Driver Cockpit...............7Driver Information DisplayProgrammable Features......149Driver Information Display (DID)Display . . . . . . . . . . . . . . .148
Driver Information Display (DID)..150Selectable Menu Items......150
E-85 Fuel................200
ECO . . . . . . . . . . . . . . . . . . .148
Economy (Fuel) Mode..........54
Electronically Shifted Transfer Case . .157
Electronics
Yo u r Ve h i c l e ' s S o u n d S y s t e m....64
Electronic Speed Control (Cruise
Control) . . . . . . . . . . . . . . . .42
Electronic Stability Control (ESC) . . .171
Electronic Stability Control (ESC)OFF Indicator . . . . . . . . . . . .173Electronic Throttle Control WarningLight . . . . . . . . . . . . . . . . .172Emergency, In Case ofJacking..............176Overheating............175To w i n g . . . . . . . . . . . . . . . 1 6 8EngineAir Cleaner . . . . . . . . . . . . .201Break-In Recommendations....39Checking Oil Level.........201Compartment............194Cooling . . . . . . . . . . . . . . .201Fuel Requirements.........198Malfunction Indicator(Check Engine)..........170Oil . . . . . . . . . . . . . .198, 201Oil Filler Cap...........201Oil Selection . . . . .198, 199, 201Overheating............175Starting...............14Stopping..............14Ethanol.................200Event Data Recorder..........192Exhaust System............201Exterior Lights . . . . . . . . . . . . .214
FA Q . . . . . . . . . . . . . . . . . . . 2 1 8FiltersAir Cleaner . . . . . . . . . . . . .201Engine Oil.............201Engine Oil Disposal........201FlashersTu r n S i g n a l............173Flexible Fuel Vehicles.........200Fluid Capacities............198Fluids . . . . . . . . . . . . . . . . . .200
Fluids, Lubricants and Genuine Parts..199
INDEX
221