2015 DODGE CHARGER SRT spare tire
[x] Cancel search: spare tirePage 441 of 595

These indicators are molded into the bottom of the tread
grooves. They will appear as bands when the tread depth
becomes a 1/16 of an inch (2 mm). When the tread is
worn to the tread wear indicators, the tire should be
replaced. Refer to “Replacement Tires” in this section for
further information.
Life Of Tire
The service life of a tire is dependent upon varying
factors including, but not limited to:
•Driving style.
•Tire pressure - Improper cold tire inflation pressures
can cause uneven wear patterns to develop across the
tire tread. These abnormal wear patterns will reduce
tread life, resulting in the need for earlier tire replace-
ment.
•Distance driven.
•Performance tires, tires with a speed rating of V or
higher, and summer tires typically have a reduced
tread life. Rotation of these tires per the vehicle main-
tenance schedule is highly recommended.
WARNING!
Tires and the spare tire should be replaced after six
years, regardless of the remaining tread. Failure to
follow this warning can result in sudden tire failure.
You could lose control and have a collision resulting
in serious injury or death.
Keep dismounted tires in a cool, dry place with as little
exposure to light as possible. Protect tires from contact
with oil, grease, and gasoline.
Replacement Tires
The tires on your new vehicle provide a balance of many
characteristics. They should be inspected regularly for
5
STARTING AND OPERATING 439
Page 451 of 595

message is then followed with a graphic display with
pressure values still shown. This indicates that the pres-
sure values are still being received from the TPM sensors
but they may not be located in the correct vehicle
position. The system still needs to be serviced as long as
the#SERVICE TPM SYSTEM#message is displayed.
Vehicles With Compact Spare
1. The compact spare tire does not have a TPM sensor.
Therefore, the TPMS will not monitor the pressure in
the compact spare tire.
2. If you install the compact spare tire in place of a road
tire that has a pressure below the low-pressure warn-
ing limit, upon the next ignition switch cycle, the
“TPM Telltale Light” will remain ON and a chime will
sound. In addition, the graphic in the DID will still
display the low pressure values in a different color and
the#Inflate Tire to XX#message.
3. After driving the vehicle for up to 20 minutes above
15 mph (24 km/h), the “TPM Telltale Light” will flash
on and off for 75 seconds and then remain on solid. In
addition, the DID will display a#SERVICE TPM
SYSTEM#message for a minimum of five seconds and
then display dashes (- -) in place of the pressure value.
4. For each subsequent ignition switch cycle, a chime will
sound, the “TPM Telltale Light” will flash on and off
for 75 seconds and then remain on solid, and the DID
will display a#SERVICE TPM SYSTEM#message for a
minimum of five seconds and then display dashes (- -)
in place of the pressure value.
5. Once you repair or replace the original road tire and
reinstall it on the vehicle in place of the compact spare,
the TPMS will update automatically. In addition, the
“TPM Telltale Light” will turn OFF and the graphic in
the DID will display a new pressure value instead of
dashes (- -), as long as no tire pressure is below the
5
STARTING AND OPERATING 449
Page 458 of 595

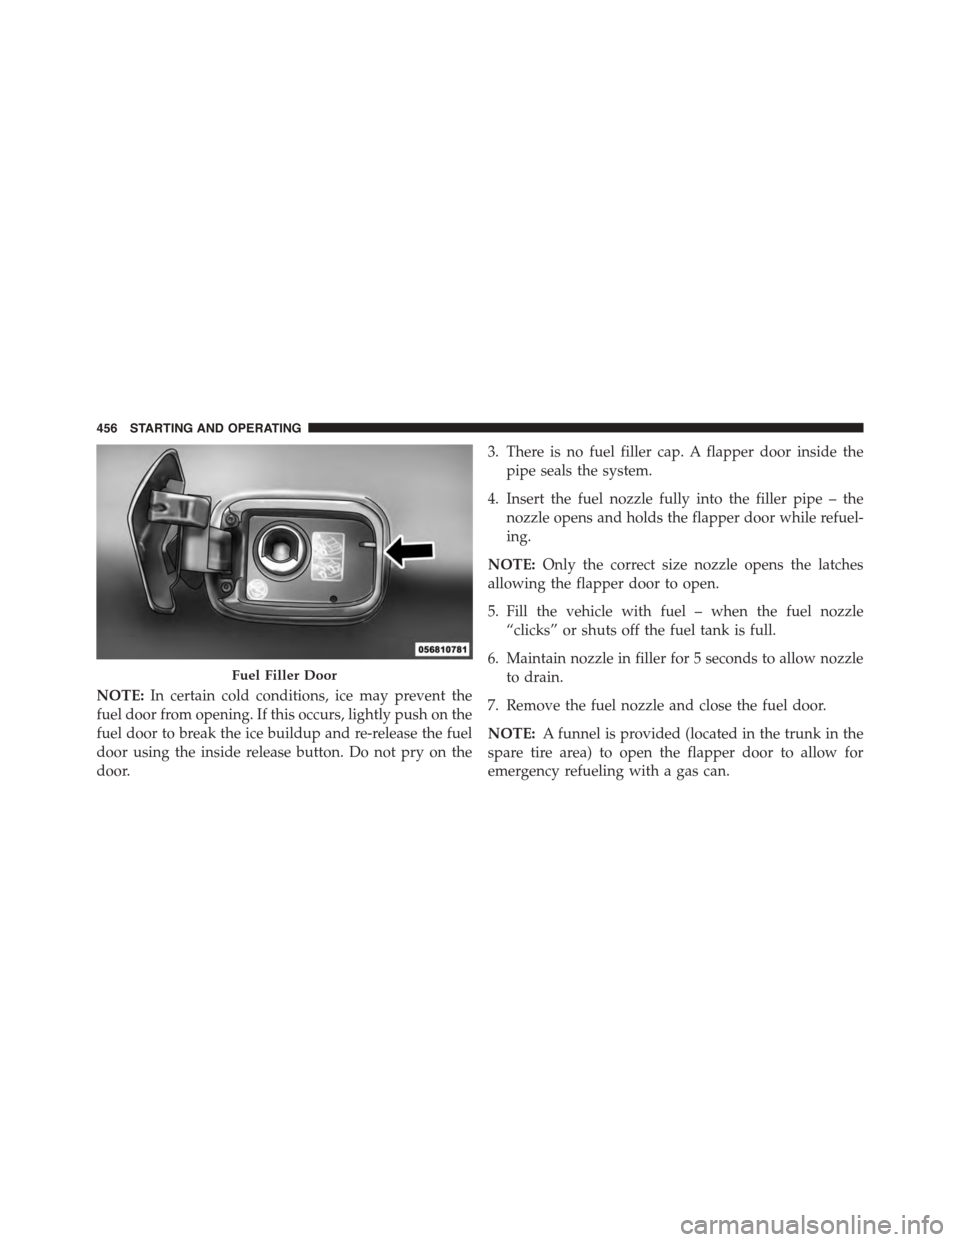
NOTE:In certain cold conditions, ice may prevent the
fuel door from opening. If this occurs, lightly push on the
fuel door to break the ice buildup and re-release the fuel
door using the inside release button. Do not pry on the
door.
3. There is no fuel filler cap. A flapper door inside the
pipe seals the system.
4. Insert the fuel nozzle fully into the filler pipe – the
nozzle opens and holds the flapper door while refuel-
ing.
NOTE:Only the correct size nozzle opens the latches
allowing the flapper door to open.
5. Fill the vehicle with fuel – when the fuel nozzle
“clicks” or shuts off the fuel tank is full.
6. Maintain nozzle in filler for 5 seconds to allow nozzle
to drain.
7. Remove the fuel nozzle and close the fuel door.
NOTE:A funnel is provided (located in the trunk in the
spare tire area) to open the flapper door to allow for
emergency refueling with a gas can.
Fuel Filler Door
456 STARTING AND OPERATING
Page 536 of 595

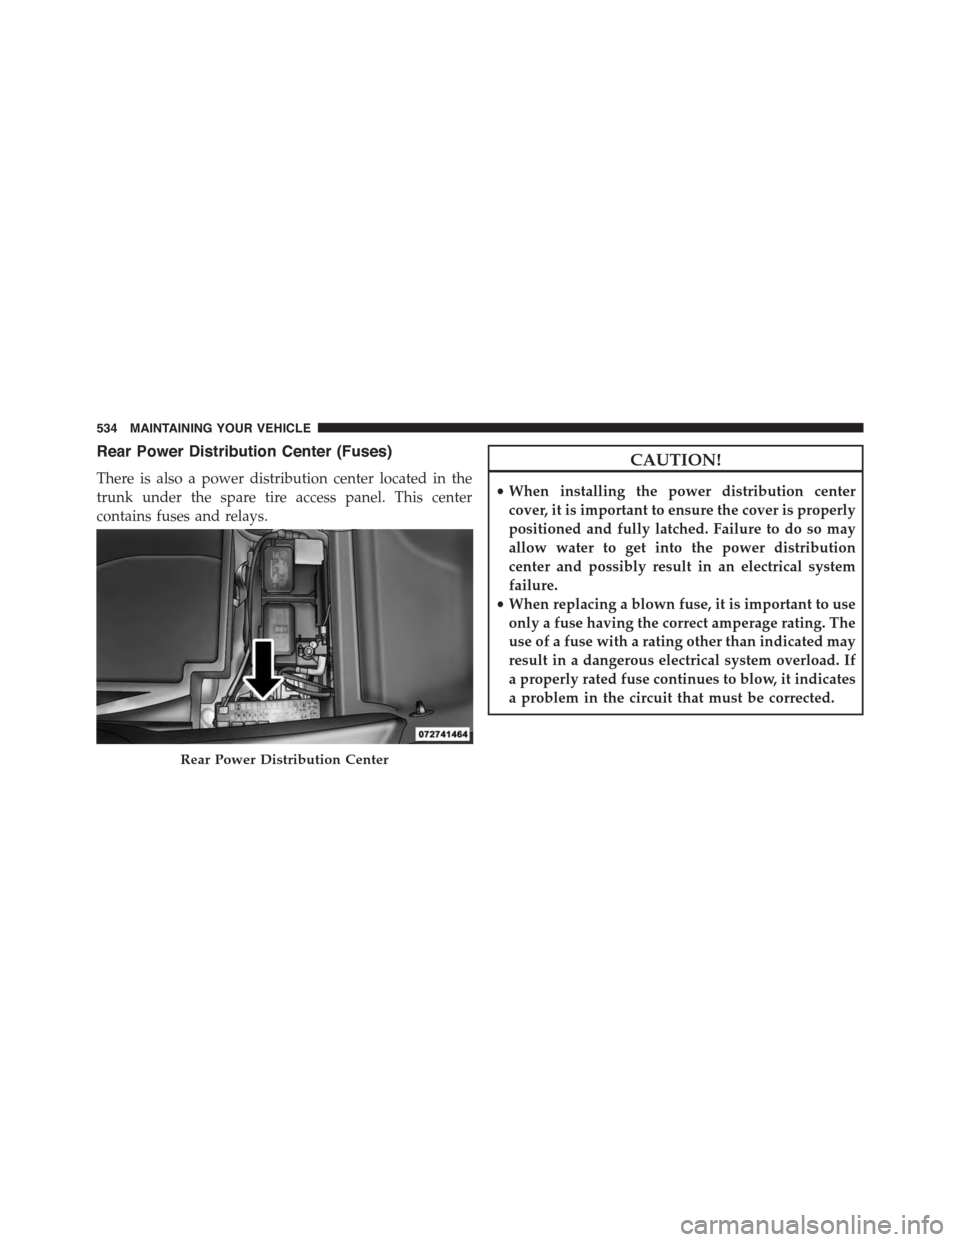
Rear Power Distribution Center (Fuses)
There is also a power distribution center located in the
trunk under the spare tire access panel. This center
contains fuses and relays.
CAUTION!
•When installing the power distribution center
cover, it is important to ensure the cover is properly
positioned and fully latched. Failure to do so may
allow water to get into the power distribution
center and possibly result in an electrical system
failure.
•When replacing a blown fuse, it is important to use
only a fuse having the correct amperage rating. The
use of a fuse with a rating other than indicated may
result in a dangerous electrical system overload. If
a properly rated fuse continues to blow, it indicates
a problem in the circuit that must be corrected.
Rear Power Distribution Center
534 MAINTAINING YOUR VEHICLE
Page 577 of 595

Lower Anchors And Tethers For Children.......80
Older Children And Child Restraints..........76
Seating Positions........................79
Child Safety Locks.........................32
Clean Air Gasoline........................451
Cleaning
Wheels...............................524
Climate Control..........................337
Automatic............................337
Coin Holder.............................240
Cold Weather Operation....................372
Compact Spare Tire........................436
Connector
UCI . . . . . . . . . . . . . . . . . . . . . . . . . . . . . . . ..333
Universal Consumer Interface (UCI)..........333
Console, Floor...........................240
Contract, Service..........................565
Coolant Pressure Cap (Radiator Cap)...........514
Cooling System...........................509
Adding Coolant (Antifreeze)...............512
Coolant Capacity.......................547
Coolant Level..........................510
Disposal of Used Coolant.................514
Drain, Flush, and Refill...................511
Inspection............................515
Points to Remember.....................515
Pressure Cap..........................514
Radiator Cap..........................514
Selection of Coolant (Antifreeze).............511
Corrosion Protection.......................521
Cruise Control (Speed Control)................169
Cupholders.............................237
Customer Assistance.......................563
Customer Programmable Features.............280
Data Recorder, Event.......................72
Daytime Brightness, Interior Lights.............155
Daytime Running Lights....................149
10
INDEX 575
Page 589 of 595

Tilting...............................128
Security Alarm............................18
Arm The System........................19
Selection of Coolant (Antifreeze)...............548
Selection of Oil...........................497
SENTRY KEY®
FCC General Information..................18
Key Programming.......................18
Sentry Key (Immobilizer)....................16
Sentry Key Replacement.....................17
Service Assistance.........................563
Service Contract..........................565
Service Engine Soon Light (Malfunction Indicator) . .251
Service Manuals..........................567
Shifting................................374
Automatic Transmission..................374
Shoulder Belts............................47
Shoulder Belt Upper Anchorage................52
Side View Mirror Adjustment.................115
Signals, Turn............................100
Snow Chains (Tire Chains)...................441
Snow Tires..............................434
Spare Tire...............................436
Spark Plugs.............................548
Specifications
Fuel (Gasoline).........................548
Oil . . . . . . . . . . . . . . . . . . . . . . . . . . . . . . . . ..548
Speed Control (Cruise Control)................165
Speedometer.............................251
SRT Performance Features...................302
Starting.................................26
Automatic Transmission..................369
Cold Weather..........................372
Engine Fails to Start.....................372
Remote...............................26
Starting and Operating.....................369
Starting Procedures........................369
10
INDEX 587
Page 590 of 595

Steering
Column Controls.......................150
Tilt Column...........................160
Wheel, Heated.........................162
Wheel, Tilt............................160
Steering Wheel Audio Controls...............334
Steering Wheel Mounted Sound System Controls . . .334
Storage................................542
Storage, Vehicle...........................347
Storing Your Vehicle.......................542
Stuck, Freeing............................482
Sunglasses Storage........................221
Sun Roof...............................230
Supplemental Restraint System - Airbag..........58
System, Remote Starting.....................26
Tachometer..............................251
Telescoping Steering Column.................160
Temperature Control, Automatic (ATC)..........338
Temperature Gauge, Engine Coolant............251
Tilt Steering Column.......................160
Time Delay, Headlight......................148
Tire and Loading Information Placard...........424
Tire Markings............................418
Ti re s . . . . . . . . . . . . . . . . . . . . . . . . . . . . . . . . ..100
Aging (Life of Tires).....................439
Air Pressure...........................429
Chains...............................441
Compact Spare.........................436
General Information.....................429
High Speed...........................432
Inflation Pressures.......................430
Life of Tires...........................439
Load Capacity.........................424
Pressure Monitor System (TPMS)............443
Pressure Warning Light...................251
Quality Grading........................569
Radial...............................432
588 INDEX