Page 125 of 638

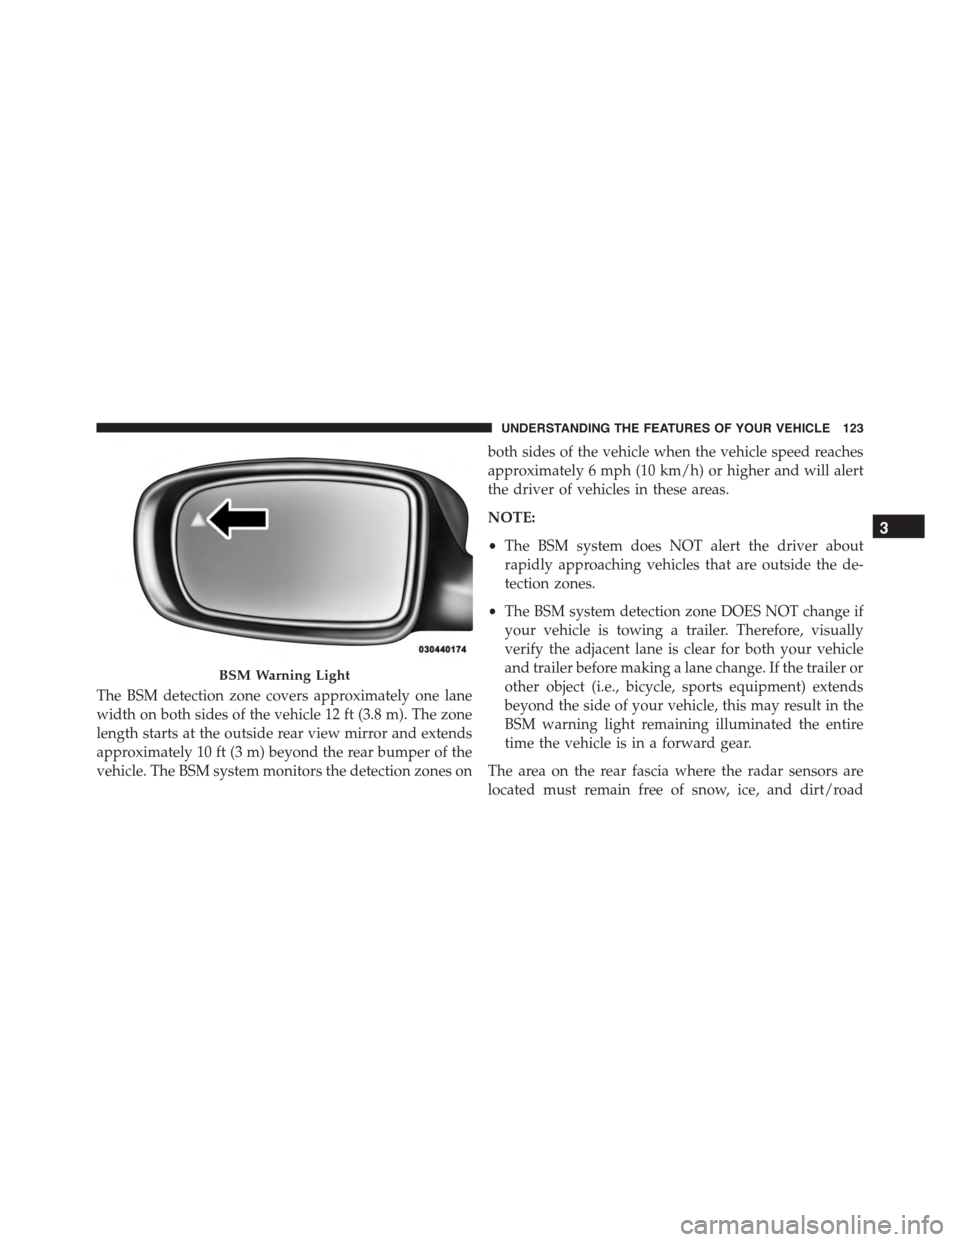
The BSM detection zone covers approximately one lane
width on both sides of the vehicle 12 ft (3.8 m). The zone
length starts at the outside rear view mirror and extends
approximately 10 ft (3 m) beyond the rear bumper of the
vehicle. The BSM system monitors the detection zones on
both sides of the vehicle when the vehicle speed reaches
approximately 6 mph (10 km/h) or higher and will alert
the driver of vehicles in these areas.
NOTE:
•The BSM system does NOT alert the driver about
rapidly approaching vehicles that are outside the de-
tection zones.
•The BSM system detection zone DOES NOT change if
your vehicle is towing a trailer. Therefore, visually
verify the adjacent lane is clear for both your vehicle
and trailer before making a lane change. If the trailer or
other object (i.e., bicycle, sports equipment) extends
beyond the side of your vehicle, this may result in the
BSM warning light remaining illuminated the entire
time the vehicle is in a forward gear.
The area on the rear fascia where the radar sensors are
located must remain free of snow, ice, and dirt/road
BSM Warning Light
3
UNDERSTANDING THE FEATURES OF YOUR VEHICLE 123
Page 130 of 638
Rear Cross Path
The Rear Cross Path (RCP) feature is intended to aid the
drivers when backing out of parking spaces where their
vision of oncoming vehicles may be blocked. Proceed
slowly and cautiously out of the parking space until the
rear end of the vehicle is exposed. The RCP system will
then have a clear view of the cross traffic and if an
oncoming vehicle is detected, alert the driver.
RCP monitors the rear detection zones on both sides of
the vehicle, for objects that are moving toward the side of
the vehicle with a minimum speed of approximately
3 mph (5 km/h), to objects moving a maximum of
approximately 20 mph (32 km/h), such as in parking lot
situations.
RCP Detection Zones
128 UNDERSTANDING THE FEATURES OF YOUR VEHICLE
Page 145 of 638

WARNING!
•A loose head restraint thrown forward in a colli-
sion or hard stop could cause serious injury or
death to occupants of the vehicle. Always securely
stow removed head restraints in a location outside
the occupant compartment.
•ALL the head restraints MUST be reinstalled in the
vehicle to properly protect the occupants. Follow
the re-installation instructions above prior to oper-
ating the vehicle or occupying a seat.
•Do not place items over the top of the Reactive
Head Restraint, such as coats, seat covers or por-
table DVD players. These items may interfere with
the operation of the Reactive Head Restraint in the
event of a collision and could result in serious
injury or death.
Rear Head Restraints
The center head restraint has two adjustable positions, up
or down. When the center seat is being occupied the head
restraint should be in the raised position. When there are
no occupants in the center seat the head restraint can be
lowered for maximum visibility for the driver.
To raise the head restraint, pull upward on the head
restraint. To lower the head restraint, push the adjust-
ment button located at the base of the head restraint and
push downward on the head restraint.
3
UNDERSTANDING THE FEATURES OF YOUR VEHICLE 143
Page 157 of 638

2. Push the multifunction lever away from you (toward
front of vehicle) to engage the high beam mode.
NOTE:This system will not activate until the vehicle is
at or above 15 mph (24 km/h).
To Deactivate
1. Pull the multifunction lever toward you (or rearward
in car) to manually deactivate the system (normal
operation of low beams).
2. Push back on the multifunction lever to reactivate the
system.
Headlight Time Delay
This feature provides the safety of headlight illumination
for up to 90 seconds when leaving your vehicle in an
unlit area.
To activate the delay feature, turn OFF the ignition switch
while the headlights are still on. Then, turn off the
headlights within 45 seconds. The delay interval begins
when the headlight switch is turned off.
NOTE:The lights must be turned off within 45 seconds
of turning the ignition OFF to activate this feature.
If you turn the headlights, park lights or ignition switch
ON again, the system will cancel the delay.
If you turn the headlights off before the ignition, they will
turn off in the normal manner.
NOTE:The Headlight Time Delay is programmable us-
ing the Uconnect® System, refer to “Uconnect® Settings”
in “Understanding Your Instrument Panel” for further
information.
3
UNDERSTANDING THE FEATURES OF YOUR VEHICLE 155
Page 160 of 638

Turn Signals
Move the multifunction lever up or down and the arrows
on each side of the instrument cluster flash to show
proper operation of the front and rear turn signal lights.
NOTE:
•If either light remains on and does not flash, or there is
a very fast flash rate, check for a defective outside light
bulb. If an indicator fails to light when the lever is
moved, it would suggest that the indicator bulb is
defective.
•A “Turn Signal On” message will appear in the Drivers
Information Display (DID) and a continuous chime
will sound if the vehicle is driven more than 1 mi
(1.6 km) with either turn signal on.
Lane Change Assist
Tap the lever up or down once, without moving beyond
the detent, and the turn signal (right or left) will flash
three times then automatically turn off.
High/Low Beam Switch
Push the multifunction lever away from you to switch
the headlights to high beam. Pull the multifunction lever
toward you to switch the headlights back to low beam.
Flash-To-Pass
You can signal another vehicle with your headlights by
lightly pulling the multifunction lever toward you. This
will turn on the high beam headlights until the lever is
released.
NOTE:If the multifunction lever is held in the flash-to
pass position for more than 20 seconds, the high beams
will shut off.
158 UNDERSTANDING THE FEATURES OF YOUR VEHICLE
Page 166 of 638

CAUTION!
•Turn the windshield wipers off when driving
through an automatic car wash. Damage to the
windshield wipers may result if the wiper control
is left in any position other than off.
•In cold weather, always turn off the wiper switch
and allow the wipers to return to the “Park” posi-
tion before turning off the engine. If the wiper
switch is left on and the wipers freeze to the
windshield, damage to the wiper motor may occur
when the vehicle is restarted.
•Always remove any buildup of snow that prevents
the windshield wiper blades from returning to the
off position. If the windshield wiper control is
turned off and the blades cannot return to the off
position, damage to the wiper motor may occur.
Windshield Washers
To use the washer, push the multifunction lever inward
(toward the steering column) and hold it for as long as
washer spray is desired.
If you activate the washer while the windshield wiper
control is in the delay range, the wipers will operate for
two wipe cycles after releasing the lever and then resume
the intermittent interval previously selected.
If you activate the washer while the windshield wiper is
turned off, the wipers will operate for three wipe cycles
and then turn off.
164 UNDERSTANDING THE FEATURES OF YOUR VEHICLE
Page 171 of 638
POWER TILT/TELESCOPING STEERING COLUMN
— IF EQUIPPED
This feature allows you to tilt the steering column
upward or downward. It also allows you to lengthen or
shorten the steering column. The power tilt/telescoping
steering column lever is located below the multifunction
lever on the steering column.
To tilt the steering column, move the lever up or down as
desired. To lengthen or shorten the steering column, pull
the lever toward you or push the lever away from you as
desired.
Power Tilt/Telescoping Switch
3
UNDERSTANDING THE FEATURES OF YOUR VEHICLE 169
Page 174 of 638
ADJUSTABLE PEDALS — IF EQUIPPED
The adjustable pedals system is designed to allow a
greater range of driver comfort for steering wheel tilt and
seat position. This feature allows the brake and accelera-
tor pedals to move toward or away from the driver to
provide improved position with the steering wheel.
The switch is located on the front side of the driver’s seat
cushion side shield.
Push the switch forward to move the pedals forward
(toward the front of the vehicle).
Push the switch rearward to move the pedals rearward
(toward the driver).
•The pedals can be adjusted with the ignition OFF.
Adjustable Pedals Switch
172 UNDERSTANDING THE FEATURES OF YOUR VEHICLE