2015 DODGE CHARGER light
[x] Cancel search: lightPage 322 of 638
•Rain Sensing Auto Wipers
When this feature is selected, the system will automati-
cally activate the windshield wipers if it senses moisture
on the windshield. To make your selection, press the
“Rain Sensing Auto Wipers” button on the touchscreen,
until a check-mark appears next to setting, indicating that
the setting had been selected. Press the back arrow button
on the touchscreen to return to the previous menu.
•Hill Start Assist — If Equipped
When this feature is selected, the Hill Start Assist (HSA)
system is active. Refer to “Electronic Brake Control
System” in “Starting And Operating” for system function
and operating information. To make your selection, press
the “Hill Start Assist” button on the touchscreen, until a
check-mark appears next to setting, indicating that the
setting had been selected. Press the back arrow button on
the touchscreen to return to the previous menu.
Lights
After pressing the “Lights” button on the touchscreen the
following settings will be available.
•Headlight Off Delay
When this feature is selected, it allows adjustment of the
amount of time the headlights remain on after the engine
is shut off. To change the Headlights Off Delay setting,
press the “+” or “-” button on the touchscreen to select
your desired time interval, and choose either 0 sec, 30 sec,
60 sec or 90 seconds. Press the back arrow button on the
touchscreen to return to the previous menu, or push the
back button on the faceplate.
•Headlight Illumination On Approach
When this feature is selected, the headlights will activate
and remain on for 0, 30, 60, or 90 seconds when the doors
are unlocked with the Remote Keyless Entry (RKE)
transmitter. To change the Illuminated Approach status,
320 UNDERSTANDING YOUR INSTRUMENT PANEL
Page 323 of 638
press the “+” or “-” button on the touchscreen to select
your desired time interval. Press the back arrow button
on the touchscreen to return to the previous menu, or
push the back button on the faceplate.
•Headlights With Wipers — If Equipped
When this feature is selected, and the headlight switch is
in the AUTO position, the headlights will turn on ap-
proximately 10 seconds after the wipers are turned on.
The headlights will also turn off when the wipers are
turned off if they were turned on by this feature. To make
your selection, press the “Headlights With Wipers” but-
ton on the touchscreen, until a check-mark appears next
to setting, indicating that the setting has been selected.
Press the back arrow button on the touchscreen to return
to the previous menu, or push the back button on the
faceplate.
•Auto Dim High Beams — If Equipped
When this feature is selected, the high beam headlights
will activate/deactivate automatically under certain con-
ditions. To make your selection, press the “Auto High
Beams” button on the touchscreen, until a check-mark
appears next to setting, indicating that the setting has
been selected. Press the back arrow button on the touch-
screen to return to the previous menu, or push the back
button on the faceplate. Refer to “Lights — If Equipped”
in “Understanding The Features Of Your Vehicle” for
further information.
•Daytime Running Lights — If Equipped
When this feature is selected, the headlights will turn on
whenever the engine is running. To make your selection,
press the “Daytime Running Lights” button on the touch-
screen, until a check-mark appears next to setting, indi-
cating that the setting has been selected. Press the back
4
UNDERSTANDING YOUR INSTRUMENT PANEL 321
Page 324 of 638
arrow button on the touchscreen to return to the previous
menu, or push the back button on the faceplate.
•Flash Lights With Lock
When this feature is selected, the hazard lights will flash
when the doors are locked or unlocked with the Remote
Keyless Entry (RKE) transmitter, or when using the
passive entry feature. This feature may be selected with
or without the sound horn on lock feature selected. To
make your selection, press the “Flash Lights with Lock”
button on the touchscreen, until a check-mark appears
next to setting, indicating that the setting has been
selected. Press the back arrow button on the touchscreen
to return to the previous menu, or push the back button
on the faceplate.
Doors & Locks
After pressing the “Doors & Locks” button on the touch-
screen the following settings will be available:
•Auto Unlock On Exit
When this feature is selected, all doors will unlock when
the vehicle is stopped, the transmission is in the PARK or
NEUTRAL position and the driver’s door is opened. To
make your selection, press the “Auto Unlock On Exit”
button on the touchscreen, until a check-mark appears
next to the setting, showing that the setting has been
selected. Press the back arrow button on the touchscreen
to return to the previous menu.
•Flash Lights With Lock
When this feature is selected, the exterior lights will flash
when the doors are locked or unlocked with the Remote
Keyless Entry (RKE) transmitter, or when using the
passive entry feature. This feature may be selected with
322 UNDERSTANDING YOUR INSTRUMENT PANEL
Page 325 of 638
or without the sound horn on lock feature selected. To
make your selection, press the “Flash Lights with Lock”
button on the touchscreen, until a check-mark appears
next to setting, indicating that the setting has been
selected. Press the back arrow button on the touchscreen
to return to the previous menu.
•Sound Horn With Lock
When this feature is selected, the horn will sound when
the door locks are activated. To make your selection,
press either the “Off,” “1st Press,” or “2nd Press” button
on the touchscreen, until a check-mark appears next to
setting, showing that setting has been selected. Press the
back arrow button on the touchscreen to return to the
previous menu.
•Sound Horn With Remote Start
When this feature is selected, the horn will sound when
the remote start is activated. To make your selection,
press the “Sound Horn with Remote Start” button on the
touchscreen until a check-mark appears next to setting,
showing that setting has been selected. Press the back
arrow button on the touchscreen to return to the previous
menu.
•1st Press Of Key Fob Unlocks
When#Driver Door#is selected with 1st Press Of Key Fob
Unlocks, only the driver’s door will unlock with the first
press of the Remote Keyless Entry (RKE) transmitter
UNLOCK button. You must press the RKE transmitter
UNLOCK button twice to unlock the passenger’s doors.
When#All Doors#is selected for 1st Press Of Key Fob
Unlocks, all doors will unlock on the first press of the
RKE transmitter UNLOCK button.
4
UNDERSTANDING YOUR INSTRUMENT PANEL 323
Page 328 of 638
•Engine Off Power Delay
When this feature is selected, the power window
switches, radio, Uconnect® Phone system (if equipped),
DVD video system (if equipped), power sunroof (if
equipped), and power outlets will remain active for up to
10 minutes after the ignition is cycled to OFF. Opening
either front door will cancel this feature. To change the
Engine Off Power Delay setting, press the “+” or “-”
button on the touchscreen to select your desired time
interval, and choose from “0 seconds,” “45 seconds,” “5
minutes” or “10 minutes.” Press the back arrow button
on the touchscreen to return to the previous menu.
•Headlight Off Delay
When this feature is selected, the driver can choose to have
the headlights remain on for 0, 30, 60, or 90 seconds when
exiting the vehicle. To change the Headlight Off Delay
status press the “+” or “–” button on the touchscreen to
select your desired time interval. Press the back arrow
button on the touchscreen to return to the previous menu.
Audio
After pressing the “Audio” button on the touchscreen the
following settings will be available.
•Balance/Fade
This feature allows you to adjust the Balance and Fade
settings. Press and drag the speaker icon, use the arrows
to adjust, or tap the ‘C’ icon to readjust to the center. Press
the back arrow button on the touchscreen to return to the
previous menu.
•Equalizer
This feature allows you to adjust the Bass, Mid and Treble
settings. Adjust the settings with the “+” and “–” setting
buttons on the touchscreen or by selecting any point on
326 UNDERSTANDING YOUR INSTRUMENT PANEL
Page 335 of 638
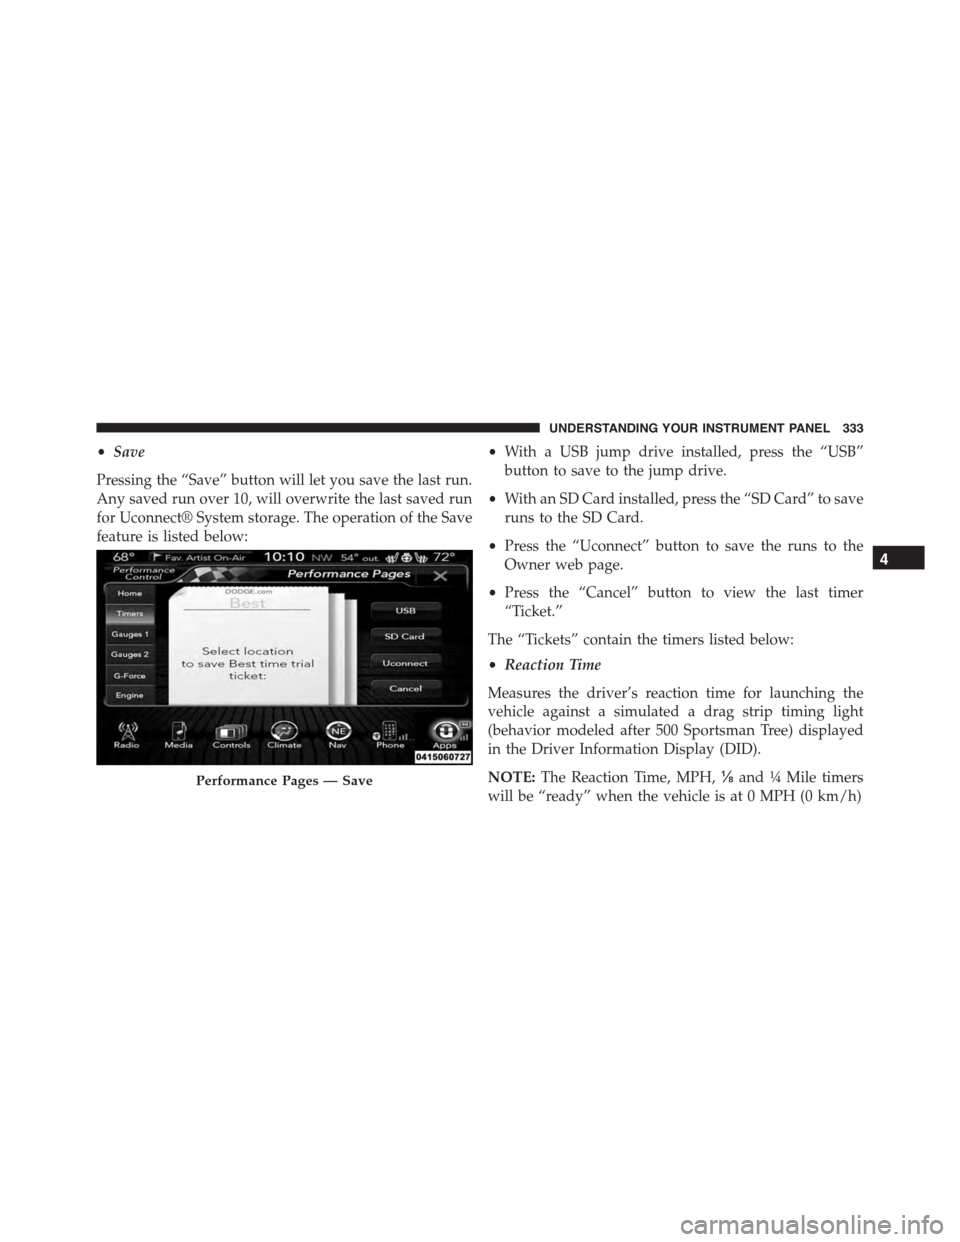
•Save
Pressing the “Save” button will let you save the last run.
Any saved run over 10, will overwrite the last saved run
for Uconnect® System storage. The operation of the Save
feature is listed below:
•With a USB jump drive installed, press the “USB”
button to save to the jump drive.
•With an SD Card installed, press the “SD Card” to save
runs to the SD Card.
•Press the “Uconnect” button to save the runs to the
Owner web page.
•Press the “Cancel” button to view the last timer
“Ticket.”
The “Tickets” contain the timers listed below:
•Reaction Time
Measures the driver’s reaction time for launching the
vehicle against a simulated a drag strip timing light
(behavior modeled after 500 Sportsman Tree) displayed
in the Driver Information Display (DID).
NOTE:The Reaction Time, MPH,⅛and¼Mile timers
will be “ready” when the vehicle is at 0 MPH (0 km/h)
Performance Pages — Save
4
UNDERSTANDING YOUR INSTRUMENT PANEL 333
Page 357 of 638
6. Blower Control
Blower control is used to regulate the amount of air
forced through the climate system. There are seven
blower speeds available. The speeds can be selected
using either the blower control knob on the faceplate or
buttons on the touchscreen as follows:
Blower Control Knob On The Faceplate
The blower speed increases as you turn the blower
control knob clockwise from the lowest blower setting.
The blower speed decreases as you turn the blower
control knob counterclockwise.
Buttons On The Touchscreen
Use the small blower icon to reduce the blower setting
and the large blower icon to increase the blower setting.
Blower can also be selected by pressing the blower bar
area between the icons.
7. Modes
The airflow distribution mode can be adjusted so air
comes from the instrument panel outlets, floor outlets,
and demist outlets. The Mode settings are as follows:
•Panel Mode
Air comes from the outlets in the instrument
panel. Each of these outlets can be individu-
ally adjusted to direct the flow of air. The air vanes of
the center outlets and outboard outlets can be moved
up and down or side to side to regulate airflow
direction. There is a shut off wheel located below the
air vanes to shut off or adjust the amount of airflow
from these outlets.
•Bi-Level Mode
Air comes from the instrument panel outlets
and floor outlets. A slight amount of air is
directed through the defrost and side window demis-
ter outlets.
4
UNDERSTANDING YOUR INSTRUMENT PANEL 355
Page 358 of 638

NOTE:BI-LEVEL mode is designed under comfort con-
ditions to provide cooler air out of the panel outlets and
warmer air from the floor outlets.
•Floor Mode
Air comes from the floor outlets. A slight
amount of air is directed through the defrost
and side window demister outlets.
•Mix Mode
Air comes from the floor, defrost and side
window demist outlets. This mode works best
in cold or snowy conditions.
NOTE:The air conditioning compressor operates in MIX
and DEFROST modes even if the A/C button is not
pushed. This dehumidifies the air to help dry the wind-
shield. To improve fuel economy, use these modes only
when necessary.
8. Climate Control OFF Button
Push and release this button to turn the Climate Control
ON/OFF.
9. Driver Temperature Control Up Button
Provides the driver with independent temperature con-
trol. Push the button on the faceplate for warmer tem-
perature settings or on the touchscreen, press and slide
the temperature bar button into the red area for warmer
temperature settings.
NOTE:In Sync mode, this button will also automatically
adjust the passenger temperature setting at the same
time.
10. Passenger Temperature Control Up Button
Provides the passenger with independent temperature
control. Push the button on the faceplate for warmer
356 UNDERSTANDING YOUR INSTRUMENT PANEL