2015 DODGE CHALLENGER instrument cluster
[x] Cancel search: instrument clusterPage 373 of 603

upshift automatically at redline in this mode, nor will
downshifts be obtained if the accelerator pedal is
pressed to the floor.
•The transmission will automatically downshift as the
vehicle slows (to prevent engine lugging) and will
display the current gear.
•The transmission will automatically downshift to first
gear when coming to a stop. After a stop, the driver
should manually upshift (+) the transmission as the
vehicle is accelerated.
•You can start out, from a stop, in first or second gear.
Tapping (+) (at a stop) will allow starting in second
gear. Starting out in second gear can be helpful in
snowy or icy conditions.
•If a requested downshift would cause the engine to
over-speed, that shift will not occur.
•The system will ignore attempts to upshift at too low
of a vehicle speed.
•Holding the (-) paddle depressed (if equipped), or
holding the shift lever in the (-) position, will down-
shift the transmission to the lowest gear possible at the
current speed.
•Transmission shifting will be more noticeable when
AutoStick® is engaged.
•The system may revert to automatic shift mode if a
fault or overheat condition is detected.
To disengage AutoStick® mode, return the shift lever to
the DRIVE position, or press and hold the (+) shift paddle
(if equipped, and the shift lever is already in DRIVE)
until “D” is once again indicated in the instrument
cluster. You can shift in or out of the AutoStick® mode at
any time without taking your foot off the accelerator
pedal.
5
STARTING AND OPERATING 371
Page 392 of 603
NOTE:When the ESC is switched OFF, a feature of the
system remains active. This feature controls wheel spin
across an axle quite similarly to a limited slip differential.
If one wheel on an axle is spinning faster than the other,
the system will apply the brake of the spinning wheel
and allow more engine torque to be applied to the wheel
that is not spinning. To improve the vehicle’s traction
when driving with tire chains, or when starting off in
deep snow, sand, or gravel, it may be desirable to switch
to the “Partial Off” mode by momentarily pressing the
“ESC Off” switch.
ESC Activation/Malfunction Indicator Light And
ESC OFF Indicator Light
The “ESC Activation/Malfunction Indicator
Light” in the instrument cluster will come on
when the ignition switch is cycled to the ON/
RUN position. It should go out with the engine
running. If the “ESC Activation/Malfunction Indicator
Light” comes on continuously with the engine running, a
malfunction has been detected in the ESC system. If this
light remains on after several ignition cycles, and the
vehicle has been driven several miles (kilometers) at
speeds greater than 30 mph (48 km/h), see your autho-
rized dealer as soon as possible to have the problem
diagnosed and corrected.
The “ESC Activation/Malfunction Indicator Light” (lo-
cated in the instrument cluster) starts to flash as soon as
the tires lose traction and the ESC system becomes active.
The “ESC Activation/Malfunction Indicator Light” also
flashes when TCS is active. If the “ESC Activation/
Malfunction Indicator Light” begins to flash during ac-
celeration, ease up on the accelerator and apply as little
throttle as possible. Be sure to adapt your speed and
driving to the prevailing road conditions.
390 STARTING AND OPERATING
Page 423 of 603

Premium System
The Tire Pressure Monitor System (TPMS) uses wireless
technology with wheel rim mounted electronic sensors to
monitor tire pressure levels. Sensors mounted to each
wheel as part of the valve stem transmit tire pressure
readings to the receiver module.
NOTE:It is particularly important for you to check the
tire pressure in all of the tires on your vehicle monthly
and to maintain the proper pressure.
The TPMS consists of the following components:
•Receiver module,
•Four TPM sensors,
•Various TPMS messages, which display in the Driver
Information Display (DID), and
•TPM Telltale Light
Tire Pressure Monitoring Low Pressure Warnings
The “TPM Telltale Light” will illuminate in the
instrument cluster and a chime will sound when
tire pressure is low in one or more of the four active road
tires. In addition, the DID will display a “LOW TIRE”
message and a graphic showing the pressure values ofTire Pressure Monitor Display
5
STARTING AND OPERATING 421
Page 434 of 603
CAUTION!
•Damage to the fuel system or emissions control
system could result from using an improper fuel
tank filler tube cap (gas cap).
•A poorly fitting gas cap could let impurities into
the fuel system.
•A poorly fitting gas cap may cause the “Malfunc-
tion Indicator Light (MIL)” to turn on.
•To avoid fuel spillage and overfilling, do not “top
off” the fuel tank after filling. When the fuel
nozzle “clicks” or shuts off, the fuel tank is full.
WARNING!
•Never have any smoking materials lit in or near the
vehicle when the gas cap is removed or the tank is
being filled.
(Continued)
WARNING!(Continued)
•Never add fuel to the vehicle when the engine is
running.
•A fire may result if gasoline is pumped into a
portable container that is inside of a vehicle. You
could be burned. Always place gas containers on
the ground while filling.
NOTE:
•When the fuel nozzle “clicks” or shuts off, the fuel tank
is full.
•Tighten the gas cap until you hear a “clicking” sound.
This is an indication that the gas cap is tightened
properly. The MIL in the instrument cluster may turn
on if the gas cap is not secured properly. Make sure
that the gas cap is tightened each time the vehicle is
refueled.
432 STARTING AND OPERATING
Page 530 of 603
Glass Surfaces
All glass surfaces should be cleaned on a regular basis
with MOPAR® Glass Cleaner, or any commercial
household-type glass cleaner. Never use an abrasive type
cleaner. Use caution when cleaning the inside rear win-
dow equipped with electric defrosters or the right rear
quarter window equipped with the radio antenna. Do
not use scrapers or other sharp instrument that may
scratch the elements.
When cleaning the rear view mirror, spray cleaner on the
towel or rag that you are using. Do not spray cleaner
directly on the mirror.
Cleaning Plastic Instrument Cluster Lenses
The lenses in front of the instruments in this vehicle are
molded in clear plastic. When cleaning the lenses, care
must be taken to avoid scratching the plastic.
1. Clean with a wet soft rag. A mild soap solution may be
used, but do not use high alcohol content or abrasive
cleaners. If soap is used, wipe clean with a clean damp
rag.
2. Dry with a soft cloth.
Seat Belt Maintenance
Do not bleach, dye, or clean the belts with chemical
solvents or abrasive cleaners. This will weaken the fabric.
Sun damage can also weaken the fabric.
If the belts need cleaning, use MOPAR® Total Clean, a
mild soap solution, or lukewarm water. Do not remove
the belts from the vehicle to wash them. Dry with a soft
cloth.
Replace the belts if they appear frayed or worn or if the
buckles do not work properly.
528 MAINTAINING YOUR VEHICLE
Page 586 of 603
Deck Lid, Power Release.....................39
Defroster, Rear Window.....................218
Defroster, Windshield.......................95
Delay (Intermittent) Wipers..................148
Diagnostic System, Onboard.................492
Dimmer Switch, Headlight...................144
Dipsticks
Oil (Engine)...........................496
Disabled Vehicle Towing....................484
Disposal
Antifreeze (Engine Coolant)................516
Door Locks
Door Locks............................22
Key Fob . . . . . . . . . . . . . . . . . . . . . . . . . . . . . . .29
Remote...............................29
Remote Keyless Entry (RKE)................29
Door Locks, Automatic......................31
Door Opener, Garage.......................199
Driver Information Display
DID . . . . . . . . . . . . . . . . . . . . . . . . . . . . . . . ..236
Instrument Cluster Display................236
Driving
Through Flowing, Rising, or Shallow Standing
Water................................373
Electrical Power Outlets.....................211
Electric Remote Mirrors.....................113
Electronic Brake Control System...............381
Electronic Power Distribution Center (Fuses)......530
Electronic Speed Control (Cruise Control)........154
Electronic Stability Control (ESC)..............386
Emergency Deck Lid Release..................41
Emergency, In Case of
Freeing Vehicle When Stuck................479
Jacking...............................466
Jump Starting..........................475
Overheating...........................453
584 INDEX
Page 590 of 603
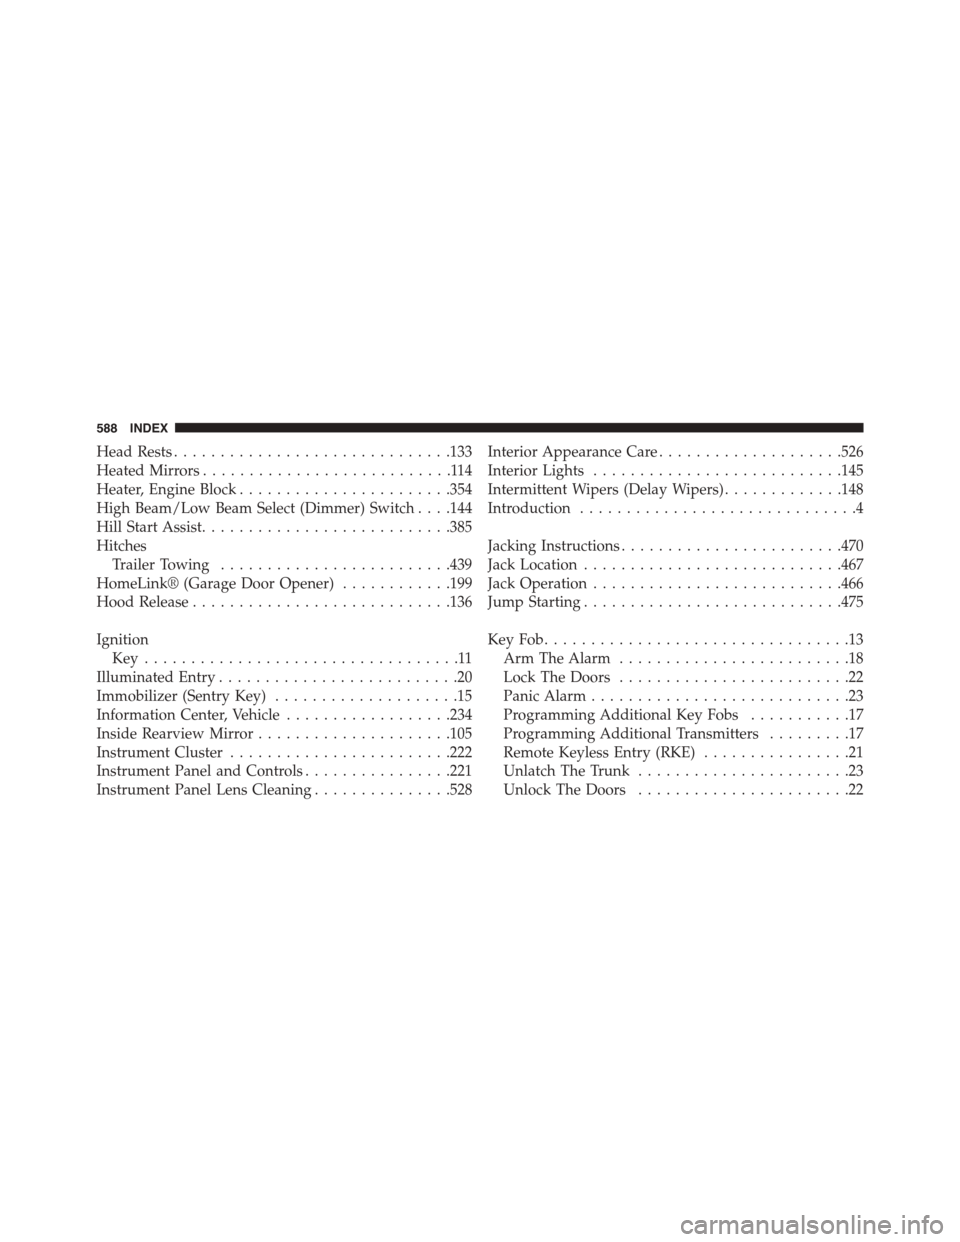
Head Rests..............................133
Heated Mirrors...........................114
Heater, Engine Block.......................354
High Beam/Low Beam Select (Dimmer) Switch . . . .144
Hill Start Assist...........................385
Hitches
Trailer Towing.........................439
HomeLink® (Garage Door Opener)............199
Hood Release............................136
Ignition
Key . . . . . . . . . . . . . . . . . . . . . . . . . . . . . . . . . .11
Illuminated Entry..........................20
Immobilizer (Sentry Key)....................15
Information Center, Vehicle..................234
Inside Rearview Mirror.....................105
Instrument Cluster........................222
Instrument Panel and Controls................221
Instrument Panel Lens Cleaning...............528
Interior Appearance Care....................526
Interior Lights...........................145
Intermittent Wipers (Delay Wipers).............148
Introduction..............................4
Jacking Instructions........................470
Jack Location............................467
Jack Operation...........................466
Jump Starting............................475
Key Fob . . . . . . . . . . . . . . . . . . . . . . . . . . . . . . . . .13
Arm The Alarm.........................18
Lock The Doors.........................22
Panic Alarm............................23
Programming Additional Key Fobs...........17
Programming Additional Transmitters.........17
Remote Keyless Entry (RKE)................21
Unlatch The Trunk.......................23
Unlock The Doors.......................22
588 INDEX
Page 592 of 603

Headlights On Reminder..................142
Headlights On With Wipers................139
Headlight Switch.......................138
High Beam............................144
High Beam Indicator.....................229
High Beam/Low Beam Select...............144
Illuminated Entry........................20
Instrument Cluster......................138
Intensity Control........................145
Interior..............................145
License..............................547
Lights On Reminder.....................142
Malfunction Indicator (Check Engine).........224
Map Reading..........................144
Parade Mode (Daytime Brightness)...........147
Passing..............................144
Reading..............................144
Seat Belt Reminder......................227
Security Alarm.........................225
Service...............................543
Service Engine Soon (Malfunction Indicator) . . . .224
Tire Pressure Monitoring (TPMS)............230
Traction Control........................390
Turn Signal............................97
Vanity Mirror..........................114
Warning (Instrument Cluster Description)......224
Loading Vehicle..........................433
Capacities............................435
Ti re s . . . . . . . . . . . . . . . . . . . . . . . . . . . . . . ..398
Locks..................................29
Automatic Door.........................31
Auto Unlock...........................32
Door.................................29
Power Door............................31
Low Tire Pressure System...................417
Lubrication, Body.........................507
Lug Nuts...............................465
590 INDEX