Page 213 of 248
10
10.47
VOICE COMMANDS
"Media" voice commands
Level 1Level 2Level 3Comment
Play track " Title 1 " Plays the track "Title 1".
Play album " Album 1 " Plays the songs in album "Album 1".
Play artist " Artist 1 " Plays the songs by "Artist 1".
Play musical genre " Jazz " Plays the songs of the "Jazz" musical genre.
Play playlist " Playlist 1 " Plays the songs in the playlist "Playlist 1".
Play podcast " Radio 1 " Plays the podcast "Podcast 1".
Play audio book " Book 1 " Plays the audio book "Book 1".
Play track number " 5 " Plays track number "5".
Select " USB " Selects the USB media as the active audio source.
Scan " Album " Displays the list of albums available.
These voice commands can be issued from any main screen page after press\
ing the voice recognition button on the steering wheel, as long as there is no telephone call in progress.
Page 217 of 248
10.51
AUDIO SYSTEM
MULTIMEDIA AUDIO SYSTEM
BLUETOOTH TELEPHONE
The system is coded in such a way that it will only operate in your vehicle.
For safety reasons, the driver must only carry out operations which require prolonged attention while the vehicle is stationary.
When the engine is not running and to prevent discharging of the battery, the audio system may switch off following activation of energy economy mode.
p.
p.
p.
p.
p.
p.
01 First steps
02 Steering mounted controls
03 Radio
04 Media
05 Telephone
06 Settings
07 Voice commands p.
10.52
10.53
10.54
10.56
10.58
10.60
10.61
CONTENTS
Page 219 of 248
02
10.53
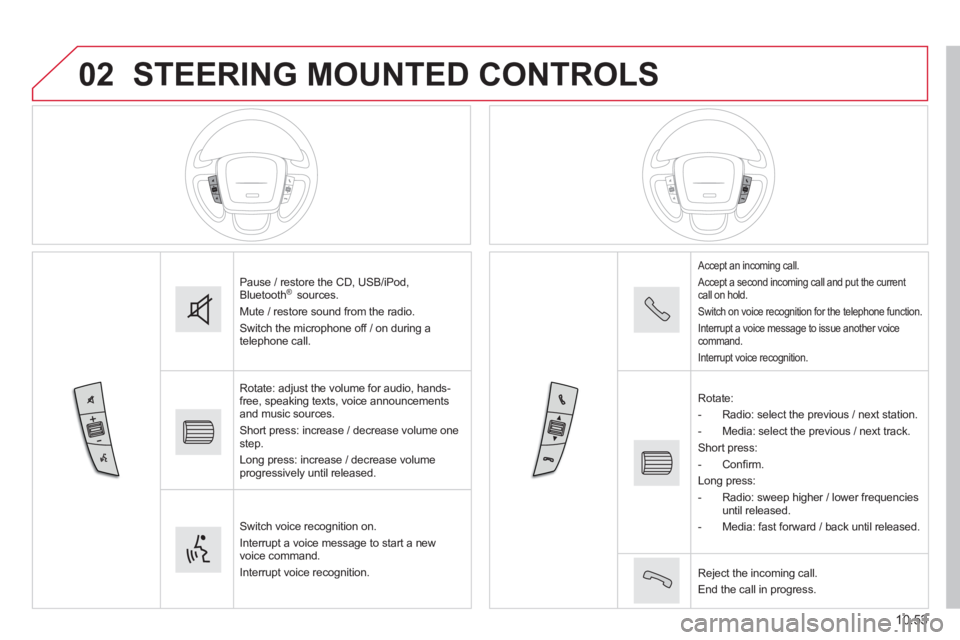
STEERING MOUNTED CONTROLS
Pause / restore the CD, USB/iPod, Bluetooth ® sources.
Mute / restore sound from the radio.
Switch the microphone off / on during a telephone call.
Rotate: adjust the volume for audio, hands-free, speaking texts, voice announcements and music sources.
Short press: increase / decrease volume one step.
Long press: increase / decrease volume progressively until released.
Switch voice recognition on.
Interrupt a voice message to start a new voice command.
Interrupt voice recognition.
Accept an incoming call.
Accept a second incoming call and put the current call on hold.
Switch on voice recognition for the telephone function.
Interrupt a voice message to issue another voice command.
Interrupt voice recognition.
Rotate:
- Radio: select the previous / next station.
- Media: select the previous / next track.
Short press:
- C o n fi r m .
Long press:
- Radio: sweep higher / lower frequencies until released.
- Media: fast forward / back until released.
Reject the incoming call.
End the call in progress.
Page 220 of 248
03
10.54
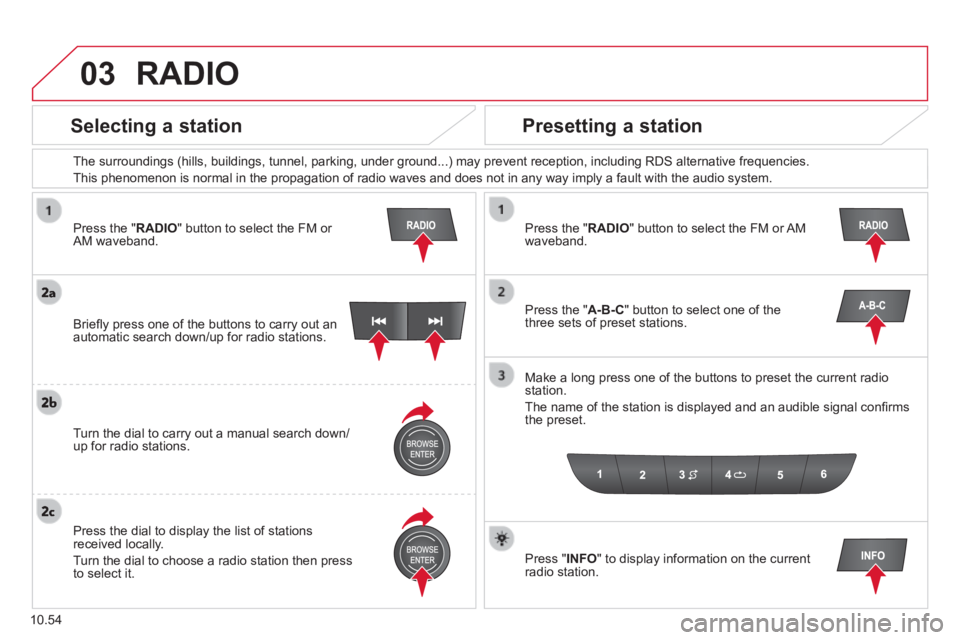
Press the " RADIO " button to select the FM or AM waveband.
The surroundings (hills, buildings, tunnel, parking, under ground...) \
may prevent reception, including RDS alternative frequencies.
This phenomenon is normal in the propagation of radio waves and does not\
in any way imply a fault with the audio system.
Press the " RADIO " button to select the FM or AM waveband.
Press the " A-B-C " button to select one of the three sets of preset stations.
Make a long press one of the buttons to preset the current radio station.
The name of the station is displayed and an audible signal confi rms the preset.
Press " INFO " to display information on the current radio station.
Briefl y press one of the buttons to carry out an automatic search down/up for radio stations.
Turn the dial to carry out a manual search down/up for radio stations.
Press the dial to display the list of stations received locally.
Turn the dial to choose a radio station then press to select it.
RADIO
Selecting a station Presetting a station
Page 222 of 248
04
10.56
MEDIA
USB player
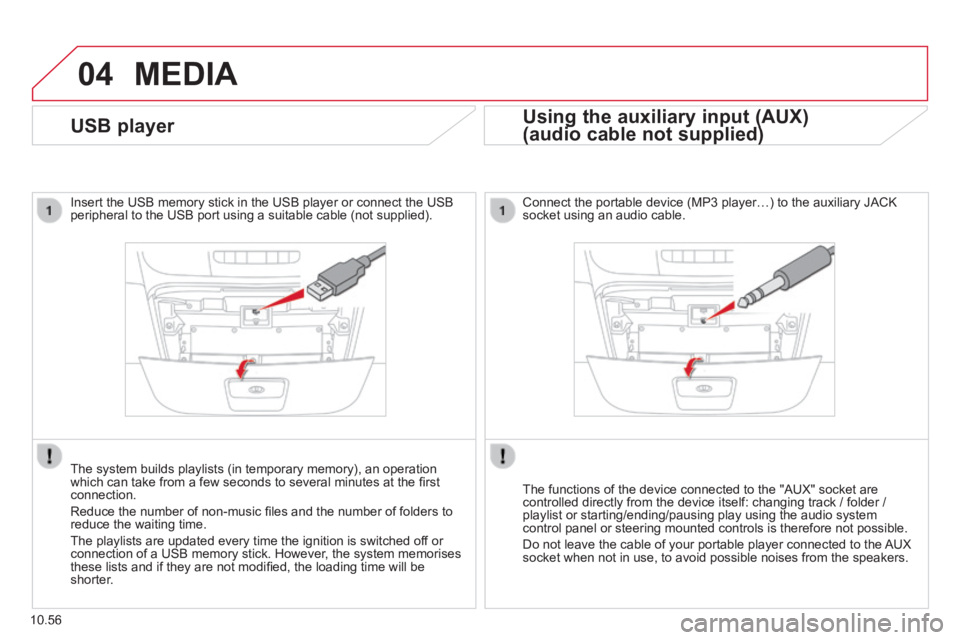
Insert the USB memory stick in the USB player or connect the USB peripheral to the USB port using a suitable cable (not supplied) .
The system builds playlists (in temporary memory), an operation which can take from a few seconds to several minutes at the fi rst connection.
Reduce the number of non-music fi les and the number of folders to reduce the waiting time.
The playlists are updated every time the ignition is switched off or connection of a USB memory stick. However, the system memorises these lists and if they are not modifi ed, the loading time will be shorter.
Using the auxiliary input (AUX)
(audio cable not supplied) (audio cable not supplied)
Using the auxiliary input (AUX)
(audio cable not supplied)
Using the auxiliary input (AUX)
Connect the portable device (MP3 player…) to the auxiliary JACK socket using an audio cable.
The functions of the device connected to the "AUX" socket are controlled directly from the device itself: changing track / folder / playlist or starting/ending/pausing play using the audio system control panel or steering mounted controls is therefore not possible.
Do not leave the cable of your portable player connected to the AUX socket when not in use, to avoid possible noises from the speakers.
Page 223 of 248
04
10.57
MEDIA
MP3 / USB player
Information and advice
The system supports USB mass storage devices, BlackBerry ®
devices or Apple ® players via USB ports. The adaptor cable not ® players via USB ports. The adaptor cable not ®
supplied.
Other peripherals, not recognised on connection, must be connected to the auxiliary socket using a Jack cable (not supplied).
In order to be read, a USB memory stick must be formatted FAT 32.
The system does not support two identical devices connected at the same time (two memory sticks, two Apple ® players) but it is possible ® players) but it is possible ®
to connect one memory stick and one Apple ® player at the same ® player at the same ®
time.
It is recommended that offi cial Apple ® USB cables are used to ® USB cables are used to ®
ensure correct operation.
It is advisable to restrict fi le names to 20 characters, without using of special characters (e.g.: " " ? ; ù) to avoid any playing and displ\
aying problems.
Connecting APPLE ® Connecting APPLE ® Connecting APPLE players ® players ®
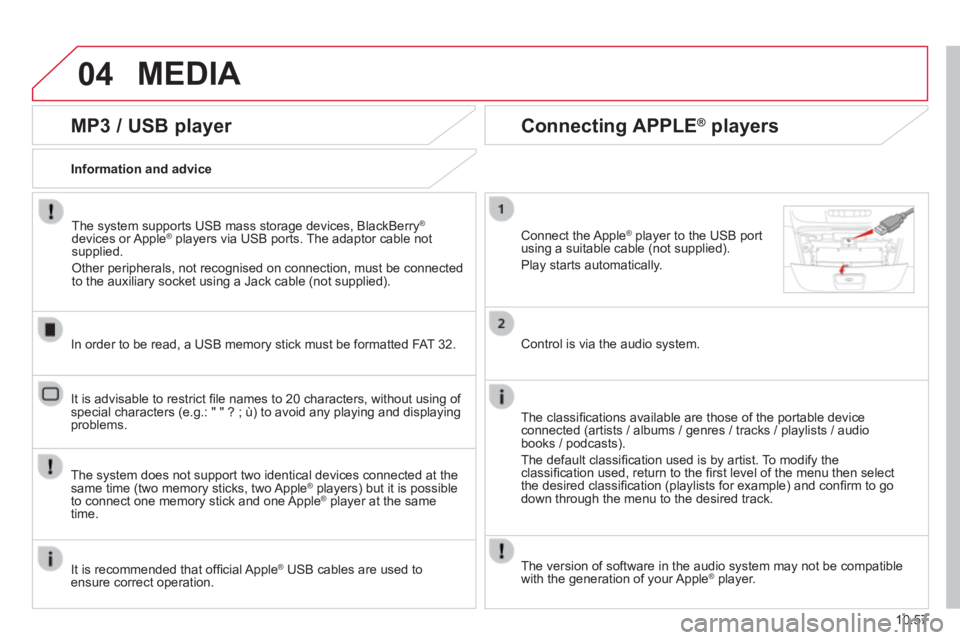
Connect the Apple ® player to the USB port ® player to the USB port ®
using a suitable cable (not supplied).
Play starts automatically.
Control is via the audio system.
The classifi cations available are those of the portable device connected (artists / albums / genres / tracks / playlists / audio books / podcasts).
The default classifi cation used is by artist. To modify the classifi cation used, return to the fi rst level of the menu then select the desired classifi cation (playlists for example) and confi rm to go down through the menu to the desired track.
The version of software in the audio system may not be compatible with the generation of your Apple ® player. ® player. ®
Page 224 of 248
05
10.58
TELEPHONE
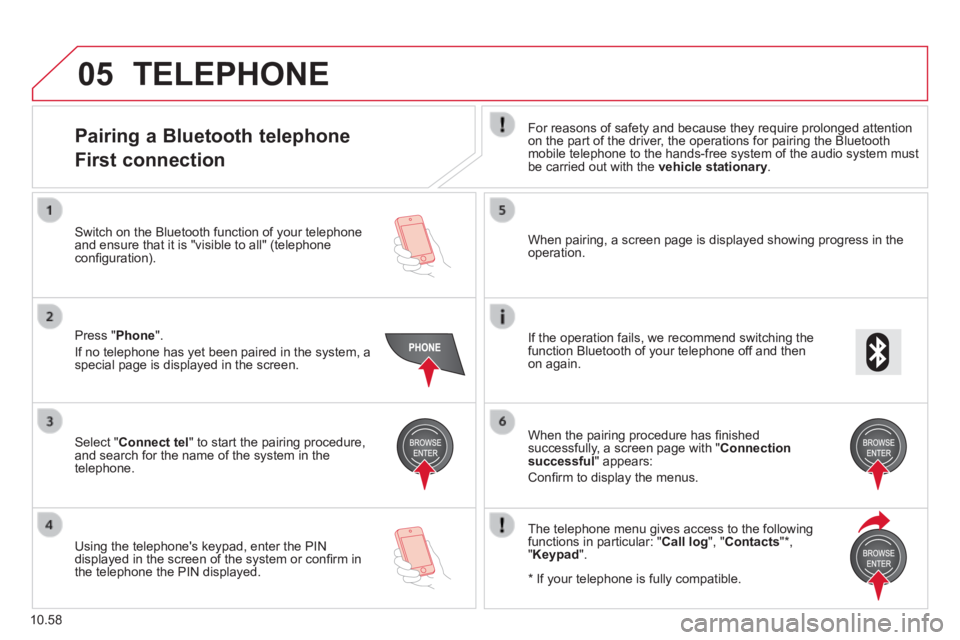
Pairing a Bluetooth telephone
First connection
For reasons of safety and because they require prolonged attention on the part of the driver, the operations for pairing the Bluetooth mobile telephone to the hands-free system of the audio system must be carried out with the vehicle stationary .
Select " Connect tel " to start the pairing procedure, and search for the name of the system in the telephone.
When pairing, a screen page is displayed showing progress in the operation.
Using the telephone's keypad, enter the PIN displayed in the screen of the system or confi rm in the telephone the PIN displayed.
Press " Phone ".
If no telephone has yet been paired in the system, a special page is displayed in the screen.
Switch on the Bluetooth function of your telephone and ensure that it is "visible to all" (telephone confi guration).
If the operation fails, we recommend switching the function Bluetooth of your telephone off and then on again.
When the pairing procedure has fi nished successfully, a screen page with " Connection successful " appears:
Confi rm to display the menus.
The telephone menu gives access to the following functions in particular: " Call log ", " Contacts " * , " Keypad ".
* If your telephone is fully compatible.
Page 226 of 248
06
10.60
SETTINGS
Press the " MENU " button. Press the " MENU " button.
The audio settings are different and independent for each audio source.
System settings Audio
Select " System settings " then press to display the list of settings for activating or deactivating options:
- " Reset default value "
- " 20 min. delay for switching off " 20 min. delay for switching off " 20 min. delay for switching off
- " Limit initial volume "
- " Automatic "
Select " Audio " then press to display the list of settings for activating or deactivating options:
- " Treble "
- " Mid-range "
- " Bass "
- "Activate/Deactivate"
- " Volume linked to vehicle speed "
- " Loudness "