Page 199 of 726
WARNING!
•Persons who are unable to feel pain to the skin
because of advanced age, chronic illness, diabetes,
spinal cord injury, medication, alcohol use, exhaus-
tion or other physical condition must exercise care
when using the seat heater. It may cause burns
even at low temperatures, especially if used for
long periods of time.
•Do not place anything on the seat or seatback that
insulates against heat, such as a blanket or cushion.
This may cause the seat heater to overheat. Sitting
in a seat that has been overheated could cause
serious burns due to the increased surface tempera-
ture of the seat.
Vehicles Equipped With Remote Start
On models that are equipped with remote start, the
driver ’s heated seat can be programmed through the
Electronic Vehicle Information Center (EVIC) to come on
during a remote start. Refer to “Electronic Vehicle Infor-
mation Center (EVIC)” in “Understanding Your Instru-
ment Panel” for further information.
Front Heated Seats
There are two heated seat switches that allow the driver
and passenger to operate the seats independently. The
controls for each heater are located on the switch bank
below the climate controls.
You can choose from HIGH, LOW or OFF heat settings.
Amber indicator lights in each switch indicate the level of
heat in use. Two indicator lights will illuminate for
HIGH, one for LOW and none for OFF.
Press the switch once to select HIGH-level
heating. Press the switch a second time to select
LOW-level heating. Press the switch a third
time to shut the heating elements OFF.
3
UNDERSTANDING THE FEATURES OF YOUR VEHICLE 197
Page 244 of 726

Rear Wiper And Washer
Rotating the rotary ring to the first detent activates the
rear intermittent wipers. To activate the washers, rotate
the rotary ring fully forward and the washers will spray
until the ring is released, and then resume the intermit-
tent interval.
NOTE:Rear window wipers function in the intermittent
wiper speed only.
Rain Sensing Wipers — If Equipped
This feature senses moisture on the windshield and
automatically activates the wipers for the driver. This
feature is especially useful for road splash or overspray
from the windshield washers of the vehicle ahead. Rotate
the end of the multifunction lever to one of the five
intermittent wiper sensitivity settings to activate this
feature.
The sensitivity of the system is adjustable from the
multifunction lever. Wiper sensitivity position 3 has been
calibrated for best overall wiping sensitivity. If the opera-
tor desires more wiping sensitivity, they may select
sensitivity positions 4 or 5. If the operator desires less
wiping sensitivity, they may select sensitivity positions 2
or 1. Place the multifunction lever in the OFF position
when not using the system.
NOTE:
•The Rain Sensing feature will not operate when the
wiper speed is in the low or high position.
•The Rain Sensing feature may not function properly
when ice or dried saltwater is present on the wind-
shield.
•Use of Rain-X® or products containing wax or silicone
may reduce rain sensor performance.
242 UNDERSTANDING THE FEATURES OF YOUR VEHICLE
Page 248 of 726
WARNING!
•Persons who are unable to feel pain to the skin
because of advanced age, chronic illness, diabetes,
spinal cord injury, medication, alcohol use, exhaus-
tion, or other physical conditions must exercise
care when using the steering wheel heater. It may
cause burns even at low temperatures, especially if
used for long periods.
•Do not place anything on the steering wheel that
insulates against heat, such as a blanket or steering
wheel covers of any type and material. This may
cause the steering wheel heater to overheat.
ADJUSTABLE PEDALS — IF EQUIPPED
The adjustable pedals system is designed to allow a
greater range of driver comfort for steering wheel tilt and
seat position. This feature allows the brake, accelerator,
and clutch pedals (if equipped) to move toward or away
from the driver to provide improved position with the
steering wheel.
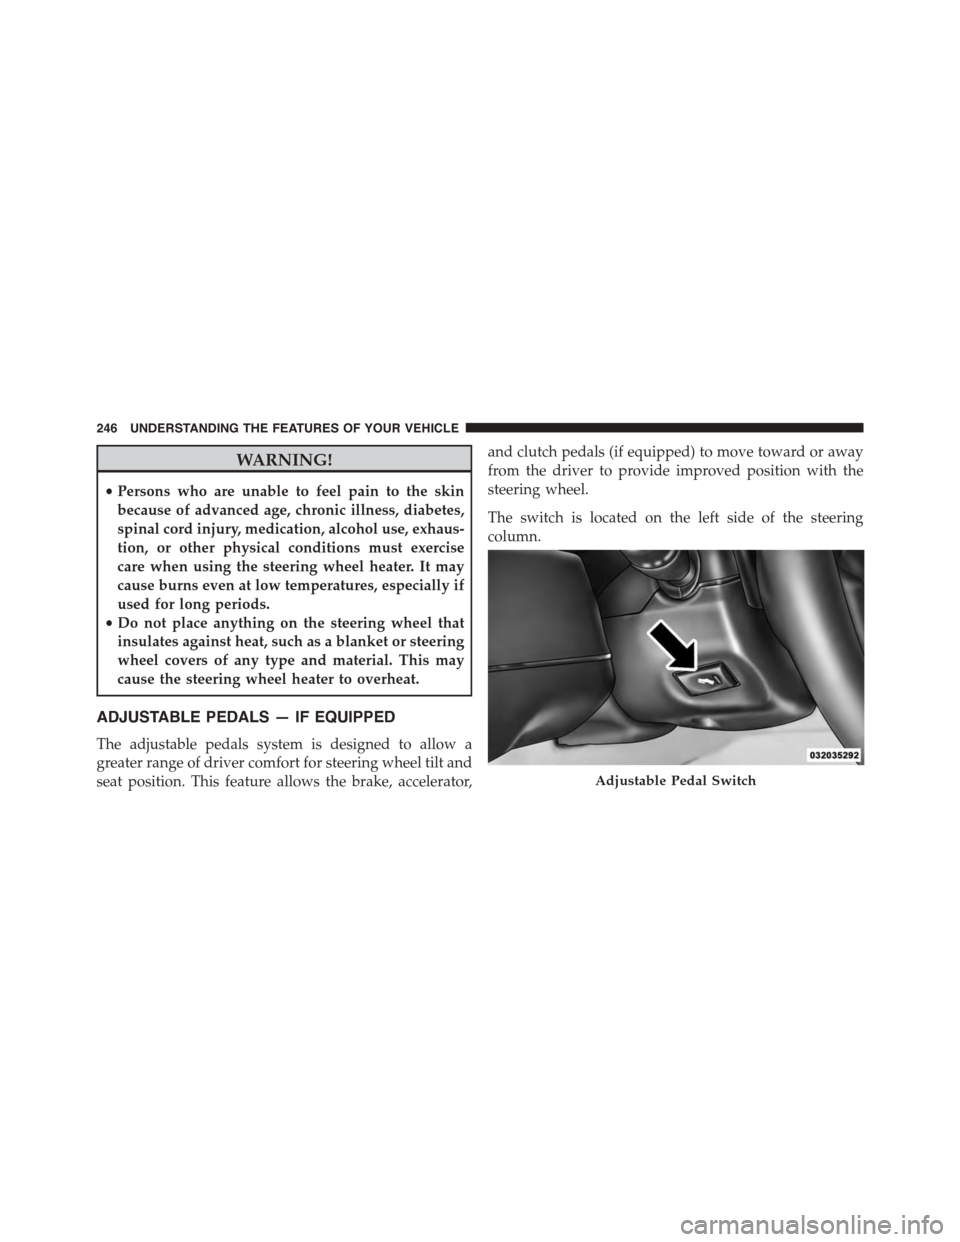
The switch is located on the left side of the steering
column.
Adjustable Pedal Switch
246 UNDERSTANDING THE FEATURES OF YOUR VEHICLE
Page 263 of 726
WARNING!
•Drivers must be careful when backing up even
when using ParkSense®. Always check carefully
behind your vehicle, look behind you, and be sure
to check for pedestrians, animals, other vehicles,
obstructions, and blind spots before backing up.
You are responsible for safety and must continue to
pay attention to your surroundings. Failure to do so
can result in serious injury or death.
(Continued)
WARNING!(Continued)
•Before using ParkSense®, it is strongly recom-
mended that the ball mount and hitch ball assem-
bly is disconnected from the vehicle when the
vehicle is not used for towing. Failure to do so can
result in injury or damage to vehicles or obstacles
because the hitch ball will be much closer to the
obstacle than the rear fascia when the loudspeaker
sounds the continuous tone. Also, the sensors
could detect the ball mount and hitch ball assem-
bly, depending on its size and shape, giving a false
indication that an obstacle is behind the vehicle.
3
UNDERSTANDING THE FEATURES OF YOUR VEHICLE 261
Page 265 of 726
ZoneDistance to the rear of the vehicle
Red0 - 1 ft (0 - 30 cm)
Yellow1 ft - 3 ft (30 cm - 1 m)
Green3 ft or greater (1 m or greater)
WARNING!
Drivers must be careful when backing up even when
using the ParkView® Rear Back Up Camera. Always
check carefully behind your vehicle, and be sure to
check for pedestrians, animals, other vehicles, ob-
structions, or blind spots before backing up. You are
responsible for the safety of your surroundings and
must continue to pay attention while backing up.
Failure to do so can result in serious injury or death.
CAUTION!
•To avoid vehicle damage, ParkView® should only
be used as a parking aid. The ParkView® camera is
unable to view every obstacle or object in your
drive path.
•To avoid vehicle damage, the vehicle must be
driven slowly when using ParkView® to be able to
stop in time when an obstacle is seen. It is recom-
mended that the driver look frequently over his/her
shoulder when using ParkView®.
3
UNDERSTANDING THE FEATURES OF YOUR VEHICLE 263
Page 279 of 726
WARNING!(Continued)
use a garage door opener without these safety fea-
tures. Call toll-free 1-800-355-3515 or, on the Internet
atHomeLink.com for safety information or assis-
tance.
General Information
This device complies with FCC rules Part 15 and Industry
Canada RSS-210. Operation is subject to the following
two conditions:
1. This device may not cause harmful interference.
2. This device must accept any interference that may be
received including interference that may cause unde-
sired operation.
NOTE:
•The transmitter has been tested and it complies with
FCC and IC rules. Changes or modifications not ex-
pressly approved by the party responsible for compli-
ance could void the user ’s authority to operate the
device.
•The term IC before the certification/registration num-
ber only signifies that Industry Canada technical speci-
fications were met.
3
UNDERSTANDING THE FEATURES OF YOUR VEHICLE 277
Page 314 of 726
CAUTION!
•Check deployed crossbars frequently and retighten
thumb screws as necessary.
•To avoid damage to the roof rack and vehicle, do
not exceed the maximum roof rack load capacity of
150 lb (68 kg). Always distribute heavy loads as
evenly as possible and secure the load appropri-
ately.
•To prevent damage to the roof of your vehicle, DO
NOT carry any loads on the roof rack without the
crossbars deployed.
•The load should be secured and placed on top of
the crossbars, not directly on the roof. If it is
necessary to place the load on the roof, place a
blanket or other protective layer between the load
and the roof surface.
(Continued)
CAUTION!(Continued)
•Long loads which extend over the windshield, such
as wood panels or surfboards, or loads with large
frontal area should be secured to both the front and
rear of the vehicle.
•Travel at reduced speeds and turn corners carefully
when carrying large or heavy loads on the roof
rack. Wind forces, due to natural causes or nearby
truck traffic, can add sudden upward lift to a load.
This is especially true on large flat loads and may
result in damage to the cargo or your vehicle.
312 UNDERSTANDING THE FEATURES OF YOUR VEHICLE
Page 329 of 726
8. Tire Pressure Monitoring Telltale Light — If Equipped
Each tire, including the spare (if provided),
should be checked monthly when cold and
inflated to the inflation pressure recommended
by the vehicle manufacturer on the vehicle
placard or tire inflation pressure label. (If your vehicle
has tires of a different size than the size indicated on the
vehicle placard or tire inflation pressure label, you should
determine the proper tire inflation pressure for those
tires.)
As an added safety feature, your vehicle has been
equipped with a Tire Pressure Monitoring System
(TPMS) that illuminates a low tire pressure telltale when
one or more of your tires is significantly under-inflated.
Accordingly, when the low tire pressure telltale illumi-
nates, you should stop and check your tires as soon as
possible, and inflate them to the proper pressure. Driving
on a significantly under-inflated tire causes the tire to
overheat and can lead to tire failure. Under-inflation also
reduces fuel efficiency and tire tread life, and may affect
the vehicle’s handling and stopping ability.
Please note that the TPMS is not a substitute for proper
tire maintenance, and it is the driver ’s responsibility to
maintain correct tire pressure, even if under-inflation has
not reached the level to trigger illumination of the TPMS
low tire pressure telltale.
Your vehicle has also been equipped with a TPMS
malfunction indicator to indicate when the system is not
operating properly. The TPMS malfunction indicator is
combined with the low tire pressure telltale. When the
system detects a malfunction, the telltale will flash for
approximately one minute and then remain continuously
illuminated. This sequence will continue upon subse-
quent vehicle start-ups as long as the malfunction exists.
When the malfunction indicator is illuminated, the sys-
tem may not be able to detect or signal low tire pressure
as intended. TPMS malfunctions may occur for a variety
4
UNDERSTANDING YOUR INSTRUMENT PANEL 327