Page 403 of 726
When connecting an external source to the AUX input, be
sure to follow the standard color coding for the VES™
jacks:
NOTE:Certain high-end video games, such as Playsta-
tion3 and XBox360 will exceed the power limit of the
vehicle’s Power Inverter. Refer to the Power Inverter
section in your vehicle’s Owner’s Manual for more
information.
Using The Remote Control
1. Push the MODE button on the Remote Control.
2. While looking at the video screen, highlight VES™
AUX 1, by either pushing Up/Down/Left/Right but-
tons or by repeatedly pushing the MODE button, then
push ENTER on the Remote Control.
Select VES™ AUX1 Mode On The VES™ Screen
4
UNDERSTANDING YOUR INSTRUMENT PANEL 401
Page 405 of 726
3. Press the 1 button on the touchscreen and then press
either AUX 1 or AUX 2 in the VES™ column (depend-
ing which AUX input is used). To exit press the back
arrow button at the top of the touchscreen.
Listen To An Audio Source On Channel 2 While A
Video Is Playing On Channel 1
Ensure the Remote Control and Headphone switch is on
Channel 2.
Using The Remote Control
1. Push the SOURCE button on the Remote Control and
the Mode Select Screen will display, unless a video is
playing then only a small banner will appear on the
bottom of the screen.
2. While looking at the video screen, either push Up/
Down/Left/Right on the Remote Control to highlight
the desired audio source or repeatedly push the
SOURCE button on the remote until the desired audio
source appears on the screen.
Select Channel/Screen 1 And AUX 1 In The VES™
Column
4
UNDERSTANDING YOUR INSTRUMENT PANEL 403
Page 434 of 726

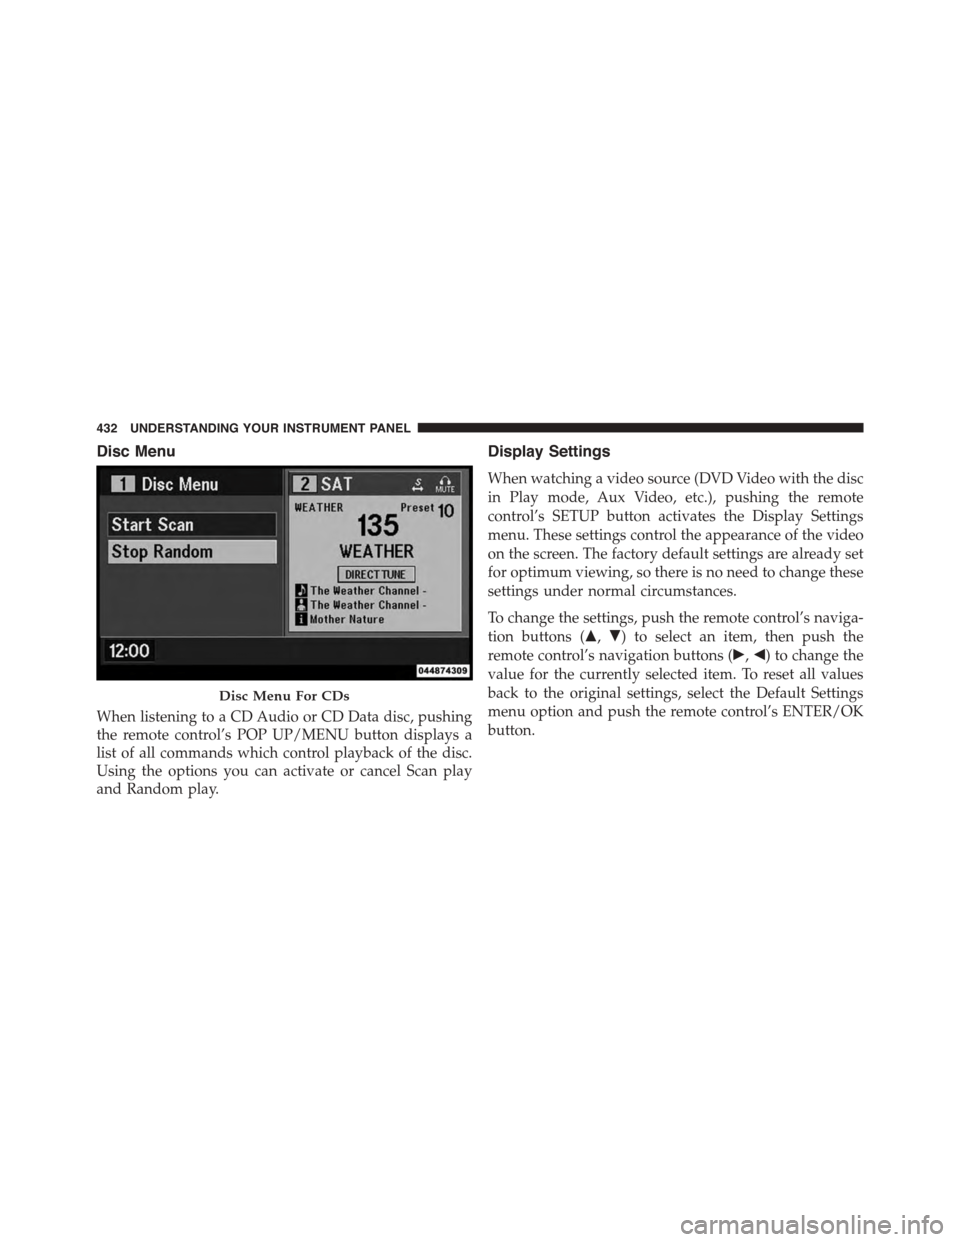
Disc Menu
When listening to a CD Audio or CD Data disc, pushing
the remote control’s POP UP/MENU button displays a
list of all commands which control playback of the disc.
Using the options you can activate or cancel Scan play
and Random play.
Display Settings
When watching a video source (DVD Video with the disc
in Play mode, Aux Video, etc.), pushing the remote
control’s SETUP button activates the Display Settings
menu. These settings control the appearance of the video
on the screen. The factory default settings are already set
for optimum viewing, so there is no need to change these
settings under normal circumstances.
To change the settings, push the remote control’s naviga-
tion buttons ($,") to select an item, then push the
remote control’s navigation buttons (!,#) to change the
value for the currently selected item. To reset all values
back to the original settings, select the Default Settings
menu option and push the remote control’s ENTER/OK
button.
Disc Menu For CDs
432 UNDERSTANDING YOUR INSTRUMENT PANEL
Page 717 of 726

Outlet (Auxiliary Electrical Outlet)...........281
Seats................................193
Sliding Door...........................51
Steering..............................499
Sunroof..............................278
Windows..............................45
Power Steering Fluid.......................681
Pregnant Women and Seat Belts................78
Preparation for Jacking.....................602
Pretensioners
Seat Belts..............................78
Programmable Electronic Features.............354
Radial Ply Tires..........................531
Radiator Cap (Coolant Pressure Cap)...........648
Radio Operation..........................449
Radio Remote Controls.....................447
Rear Air Conditioning......................455
Rear Camera............................262
Rear Cross Path..........................152
Rear Heater.............................455
Rear ParkSense System.....................252
Rearview Mirrors.........................140
Rear Window Features.....................306
Reclining Front Seats.......................201
Recorder, Event Data.......................100
Recreational Towing.......................577
Reformulated Gasoline.....................552
Refrigerant..............................641
Reminder, Seat Belt.........................64
Remote Keyless Entry (RKE)..................21
Arm The Alarm.........................18
Disarm The Alarm.......................19
FCC General Information..................30
Programming Additional Key Fobs...........17
Programming Additional Transmitters.........17
Remote Sound System (Radio) Controls.........447
Remote Starting System......................3110
INDEX 715
Page 722 of 726

Traction................................496
Traction Control..........................506
Traction Control Switch.....................506
Trailer Sway Control (TSC)..................512
Trailer Towing...........................565
Cooling System Tips.....................576
Hitches..............................568
Minimum Requirements..................571
Ti p s . . . . . . . . . . . . . . . . . . . . . . . . . . . . . . . ..576
Trailer and Tongue Weight.................570
Wiring...............................574
Trailer Towing Guide.......................569
Trailer Weight............................569
Transmission............................653
Automatic............................484
Fluid................................653
Transmitter Battery Service (Remote Keyless Entry) . .28
Transmitter, Garage Door Opener (HomeLink®). . . .268
Transmitter, Remote Keyless Entry (RKE).........21
Transporting Pets.........................126
Tread Wear Indicators......................536
Trip Odometer...........................323
Turn Signals.............................323
UCI Connector...........................390
Uconnect®
Advanced Phone Connectivity..............173
Operation.............................157
Phone Call Features.....................165
Phone Features.........................168
Things You Should Know About Your Uconnect®
Phone...............................175
Uconnect® 130
Operating Instructions Auxiliary Mode........371
Operating Instructions CD Mode............366
Operating Instructions Radio Mode..........362
Playing MP3 Files.......................368
720 INDEX