2015 CHEVROLET SILVERADO 1500 display
[x] Cancel search: displayPage 389 of 551
Black plate (12,1)Chevrolet 2015i Silverado Owner Manual (GMNA-Localizing-U.S./Canada/
Mexico-8425172) - 2015 - CRC - 6/20/14
10-12 Vehicle Care
Checking Engine Oil
It is a good idea to check the engine
oil level at each fuel fill. In order to
get an accurate reading, the vehicle
must be on level ground. The
engine oil dipstick handle is a loop.
SeeEngine Compartment Overview
on page 10-6 for the location of the
engine oil dipstick.
If a low oil message displays on the
DIC, it is important to park on level
ground to accurately measure the
oil level on the dipstick. Idling the
vehicle on steep grades for a long
time can influence the level sensing
accuracy.
Obtaining an accurate oil level
reading is essential:
1. If the engine has been running recently, turn off the engine and
allow several minutes for the oil
to drain back into the oil pan.
Checking the oil level too soon
after engine shutoff will not
provide an accurate oil level
reading.{Warning
The engine oil dipstick handle
may be hot; it could burn you.
Use a towel or glove to touch the
dipstick handle.
2. Pull out the dipstick and wipe it with a clean paper towel or cloth,
then push it back in all the way.
Remove it again, keeping the tip
down, and check the level.
When to Add Engine Oil
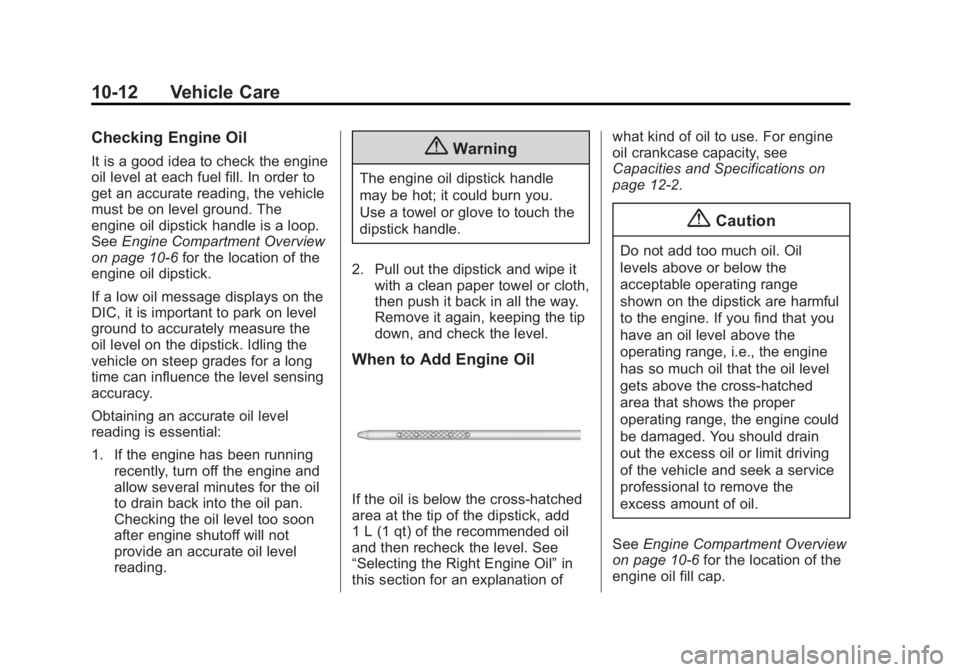
If the oil is below the cross-hatched
area at the tip of the dipstick, add
1 L (1 qt) of the recommended oil
and then recheck the level. See
“Selecting the Right Engine Oil” in
this section for an explanation of what kind of oil to use. For engine
oil crankcase capacity, see
Capacities and Specifications on
page 12-2.
{Caution
Do not add too much oil. Oil
levels above or below the
acceptable operating range
shown on the dipstick are harmful
to the engine. If you find that you
have an oil level above the
operating range, i.e., the engine
has so much oil that the oil level
gets above the cross-hatched
area that shows the proper
operating range, the engine could
be damaged. You should drain
out the excess oil or limit driving
of the vehicle and seek a service
professional to remove the
excess amount of oil.
See Engine Compartment Overview
on page 10-6 for the location of the
engine oil fill cap.
Page 390 of 551
Black plate (13,1)Chevrolet 2015i Silverado Owner Manual (GMNA-Localizing-U.S./Canada/
Mexico-8425172) - 2015 - CRC - 6/20/14
Vehicle Care 10-13
Add enough oil to put the level
somewhere in the proper operating
range. Push the dipstick all the way
back in when through.
Selecting the Right Engine Oil
Selecting the right engine oil
depends on both the proper oil
specification and viscosity grade.
SeeRecommended Fluids and
Lubricants on page 11-12.
Specification
Use and ask for licensed engine oils
with the dexos1
®approved
certification mark. Engine oils
meeting the requirements for the
vehicle should have the dexos1
approved certification mark. This
certification mark indicates that the
oil has been approved to the dexos1
specification. See
www.gmdexos.com.
{Caution
Failure to use the recommended
engine oil can result in engine
damage not covered by the
vehicle warranty. Check with your
dealer or service provider on
whether the oil is approved to the
dexos1 specification.
Viscosity Grade
Use SAE 0W-20 viscosity grade for
the 5.3L and 6.2L V8 engines. Use
SAE 5W-30 viscosity grade for the
4.3L V6, and 6.0L V8 engines.
Cold Temperature Operation: In an
area of extreme cold, where the
temperature falls below −29°C
(−20°F), an SAE 0W-30 oil may be
used in the 4.3L or 6.0L engine. An oil of this viscosity grade will
provide easier cold starting for the
engine at extremely low
temperatures.
When selecting an oil of the
appropriate viscosity grade, always
select an oil of the correct
specification. See
“Specification”
earlier in this section for more
information.
Engine Oil Additives/Engine
Oil Flushes
Do not add anything to the oil. The
recommended oils with the dexos
specification and displaying the
dexos certification mark are all that
is needed for good performance and
engine protection.
Engine oil system flushes are not
recommended and could cause
engine damage not covered by the
vehicle warranty.
Page 392 of 551
Black plate (15,1)Chevrolet 2015i Silverado Owner Manual (GMNA-Localizing-U.S./Canada/
Mexico-8425172) - 2015 - CRC - 6/20/14
Vehicle Care 10-15
How to Reset the Engine Oil
Life System
Reset the system whenever the
engine oil is changed so that the
system can calculate the next
engine oil change. Always reset the
engine oil life to 100% after every oil
change. It will not reset itself. To
reset the engine oil life system:
1. Display the OIL LIFEREMAINING on the DIC. If the
vehicle does not have DIC
buttons, the vehicle must be in
P (Park) to access this display.
See Driver Information Center
(DIC) (Base Level) on page 5-30
or Driver Information Center
(DIC) (Uplevel) on page 5-32.
2. Press and hold
V, or the trip
odometer reset stem if the
vehicle does not have DIC
buttons, for several seconds.
The oil life will change to 100%. The oil life system can also be reset
as follows:
1. Turn the ignition to ON/RUN with
the engine off.
2. Fully press the accelerator pedal slowly three times within
five seconds.
3. Display the OIL LIFE REMAINING on the DIC. If the
display shows 100%, the system
is reset.
If the vehicle has a CHANGE
ENGINE OIL SOON message and it
comes back on when the vehicle is
started and/or the OIL LIFE
REMAINING is near 0%, the engine
oil life system has not been reset.
Repeat the procedure.
Automatic Transmission
Fluid (6 Speed
Transmission)
When to Check and Change
Automatic Transmission Fluid
It is usually not necessary to check
the transmission fluid level. The only
reason for fluid loss is a
transmission leak or overheated
transmission. If a small leak is
suspected, then use the following
checking procedures to check the
fluid level. However, if there is a
large leak, then it may be necessary
to have the vehicle towed to a
dealer service department and have
it repaired before driving the vehicle
further.
Page 404 of 551
Black plate (27,1)Chevrolet 2015i Silverado Owner Manual (GMNA-Localizing-U.S./Canada/
Mexico-8425172) - 2015 - CRC - 6/20/14
Vehicle Care 10-27
If the temperature overheat gauge is
no longer in the overheat zone or an
overheat warning no longer
displays, the vehicle can be driven.
Continue to drive the vehicle slowly
for about 10 minutes. Keep a safe
vehicle distance from the vehicle in
front. If the warning does not come
back on, continue to drive normally
and have the cooling system
checked for proper fill and function.
If the warning continues, pull over,
stop, and park the vehicle
right away.
If there is still no sign of steam and
the vehicle is equipped with an
engine driven cooling fan, push
down the accelerator until the
engine speed is about twice as fast
as normal idle speed for at least
five minutes while the vehicle is
parked. If the warning is still there,
turn off the engine and get everyone
out of the vehicle until it cools down.If there is no sign of steam, idle the
engine for five minutes while
parked. If the warning is still
displayed, turn off the engine until it
cools down.
Overheated Engine
Protection
Operating Mode
If an overheated engine condition
exists and the ENGINE POWER IS
REDUCED message displays, an
overheat protection mode which
alternates firing groups of cylinders
helps to prevent engine damage. In
this mode, a loss in power and
engine performance will be noticed.
This operating mode allows the
vehicle to be driven to a safe place
in an emergency. Driving extended
distances and/or towing a trailer in
the overheat protection mode
should be avoided.
{Caution
After driving in the overheated
engine protection operating
mode, the engine oil will be
severely degraded. Any repairs
performed before the engine is
cool may cause engine damage.
Allow the engine to cool before
attempting any repair. Repair the
cause of coolant loss, change the
oil, and reset the oil life system.
See
Engine Oil on page 10-11.
Engine Fan
If the vehicle has a clutched engine
cooling fan, when the clutch is
engaged, the fan spins faster to
provide more air to cool the engine.
In most everyday driving conditions,
the fan is spinning slower and the
clutch is not fully engaged. This
improves fuel economy and reduces
fan noise. Under heavy vehicle
loading, trailer towing, and/or high
outside temperatures, the fan speed
Page 406 of 551
Black plate (29,1)Chevrolet 2015i Silverado Owner Manual (GMNA-Localizing-U.S./Canada/
Mexico-8425172) - 2015 - CRC - 6/20/14
Vehicle Care 10-29
5. Remove the cap again and lookat the fluid level on the dipstick.
The level should be between the
ADD and FULL marks. If necessary,
add only enough fluid to bring the
level up to the hashed area between
the ADD and FULL marks.
What to Use
To determine what kind of fluid to
use, see Recommended Fluids and
Lubricants on page 11-12. Always
use the proper fluid.
{Caution
Use of the incorrect fluid may
damage the vehicle and the
damages may not be covered by
the vehicle warranty. Always use
the correct fluid listed in
Recommended Fluids and
Lubricants on page 11-12.
Washer Fluid
What to Use
When windshield washer fluid needs
to be added, be sure to read the
manufacturer's instructions before
use. Use a fluid that has sufficient
protection against freezing in an
area where the temperature may fall
below freezing.
Adding Washer Fluid
The vehicle has a low washer fluid
message on the DIC that comes on
when the washer fluid is low. The
message is displayed for
15 seconds at the start of each
ignition cycle. When the WASHER
FLUID LOW ADD FLUID message
displays, washer fluid will need to
be added to the windshield washer
fluid reservoir.
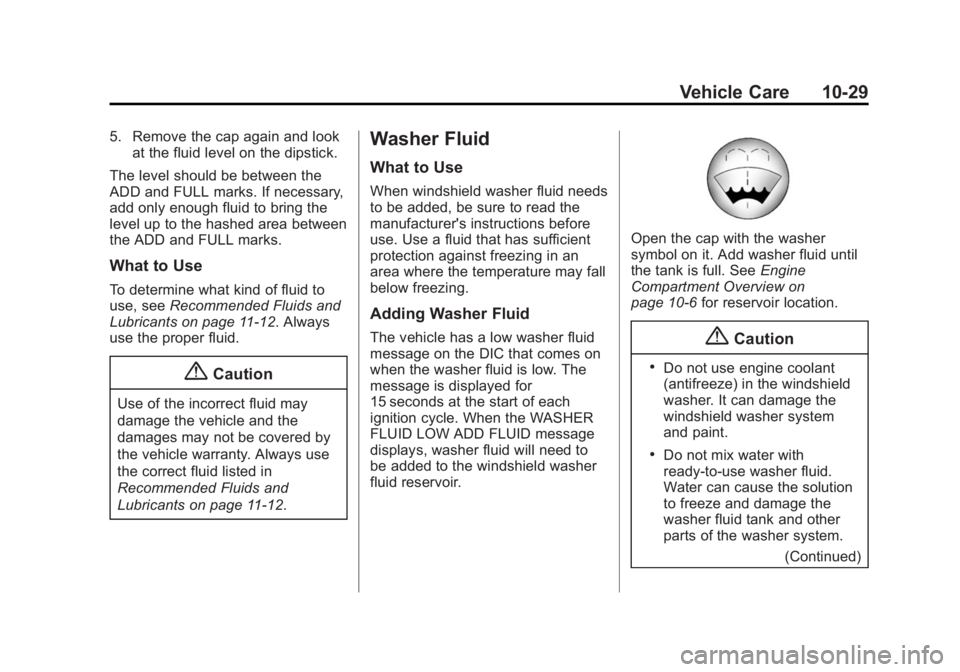
Open the cap with the washer
symbol on it. Add washer fluid until
the tank is full. See Engine
Compartment Overview on
page 10-6 for reservoir location.
{Caution
.Do not use engine coolant
(antifreeze) in the windshield
washer. It can damage the
windshield washer system
and paint.
.Do not mix water with
ready-to-use washer fluid.
Water can cause the solution
to freeze and damage the
washer fluid tank and other
parts of the washer system.
(Continued)
Page 443 of 551
Black plate (66,1)Chevrolet 2015i Silverado Owner Manual (GMNA-Localizing-U.S./Canada/
Mexico-8425172) - 2015 - CRC - 6/20/14
10-66 Vehicle Care
A message to check the pressure in
a specific tire displays in the Driver
Information Center (DIC). The low
tire pressure warning light and the
DIC warning message come on at
each ignition cycle until the tires are
inflated to the correct inflation
pressure. If the vehicle has DIC
buttons, tire pressure levels can be
viewed. For additional information
and details about the DIC operation
and displays, seeDriver Information
Center (DIC) (Base Level) on
page 5-30 orDriver Information
Center (DIC) (Uplevel) on page 5-32
and Tire Messages on page 5-43.
The low tire pressure warning light
may come on in cool weather when
the vehicle is first started, and then
turn off as the vehicle is driven. This
could be an early indicator that the
air pressure is getting low and
needs to be inflated to the proper
pressure. A Tire and Loading Information label
shows the size of the original
equipment tires and the correct
inflation pressure for the tires when
they are cold. See
Vehicle Load
Limits on page 9-15, for an example
of the Tire and Loading Information
label and its location. Also see Tire
Pressure on page 10-62.
The TPMS can warn about a low
tire pressure condition but it does
not replace normal tire
maintenance. See Tire Inspection
on page 10-69, Tire Rotation on
page 10-69 andTires on
page 10-53.
{Caution
Tire sealant materials are not all
the same. A non-approved tire
sealant could damage the TPMS
sensors. TPMS sensor damage
caused by using an incorrect tire
sealant is not covered by the
vehicle warranty. Always use only
(Continued)
Caution (Continued)
the GM approved tire sealant
available through your dealer or
included in the vehicle.
TPMS Malfunction Light and
Message
The TPMS will not function properly
if one or more of the TPMS sensors
are missing or inoperable. When the
system detects a malfunction, the
low tire pressure warning light
flashes for about one minute and
then stays on for the remainder of
the ignition cycle. A DIC warning
message also displays. The
malfunction light and DIC warning
message come on at each ignition
cycle until the problem is corrected.
Some of the conditions that can
cause these to come on are:
.One of the road tires has been
replaced with the spare tire. The
spare tire does not have a
TPMS sensor. The malfunction
Page 445 of 551
Black plate (68,1)Chevrolet 2015i Silverado Owner Manual (GMNA-Localizing-U.S./Canada/
Mexico-8425172) - 2015 - CRC - 6/20/14
10-68 Vehicle Care
The TPMS sensor matching
process is:
1. Set the parking brake.
2. Turn the ignition to ON/RUN withthe engine off.
3. Uplevel DIC Only: Make sure the Tire Pressure info page option is
turned on. The info pages on the
DIC can be turned on and off
through the Settings menu. See
Driver Information Center (DIC)
(Base Level) on page 5-30 or
Driver Information Center (DIC)
(Uplevel) on page 5-32.
4. If the vehicle has an uplevel DIC, use the DIC controls on the
right side of the steering wheel
to scroll to the Tire Pressure
screen under the DIC info page.
If the vehicle has a base level
DIC, use the trip odometer reset
stem to scroll to the Tire
Pressure screen. 5. If the vehicle has an uplevel
DIC, press and hold the
V(Set/
Reset) button located in the
center of the DIC controls.
If the vehicle has a base level
DIC, press and hold the trip
odometer reset stem for about
five seconds. A message asking
if the process should begin
should appear. Select yes and
press the trip odometer reset
stem to confirm the selection.
The horn sounds twice to signal
the receiver is in relearn mode
and the TIRE LEARNING
ACTIVE message displays on
the DIC screen.
6. Start with the driver side front tire.
7. Place the relearn tool against the tire sidewall, near the valve
stem. Then press the button to
activate the TPMS sensor.
A horn chirp confirms that the
sensor identification code has
been matched to this tire and
wheel position. 8. Proceed to the passenger side
front tire, and repeat the
procedure in Step 7.
9. Proceed to the passenger side rear tire, and repeat the
procedure in Step 7.
10. Proceed to the driver side rear tire, and repeat the procedure
in Step 7. The horn sounds two
times to indicate the sensor
identification code has been
matched to the driver side rear
tire, and the TPMS sensor
matching process is no longer
active. The TIRE LEARNING
ACTIVE message on the DIC
display screen goes off.
11. Turn the ignition switch to LOCK/OFF.
12. Set all four tires to the recommended air pressure
level as indicated on the Tire
and Loading Information label.
Page 475 of 551
Black plate (98,1)Chevrolet 2015i Silverado Owner Manual (GMNA-Localizing-U.S./Canada/
Mexico-8425172) - 2015 - CRC - 6/20/14
10-98 Vehicle Care
5. Start the engine, then shift thetransfer case out of N (Neutral)
to Two-Wheel Drive High. See
Four-Wheel Drive for directions
on shifting out of N (Neutral).
6. Check that the vehicle is in Two-Wheel Drive High by
shifting the transmission to
R (Reverse) and then to D
(Drive). There should be
movement of the vehicle while
shifting.
7. Shift the transmission to P (Park) and turn off the ignition.
8. Disconnect the vehicle from the tow vehicle.
9. Release the parking brake.
10. Reset any lost presets.
The outside temperature
display will default to 32°F but
will reset with normal usage.Dolly Towing
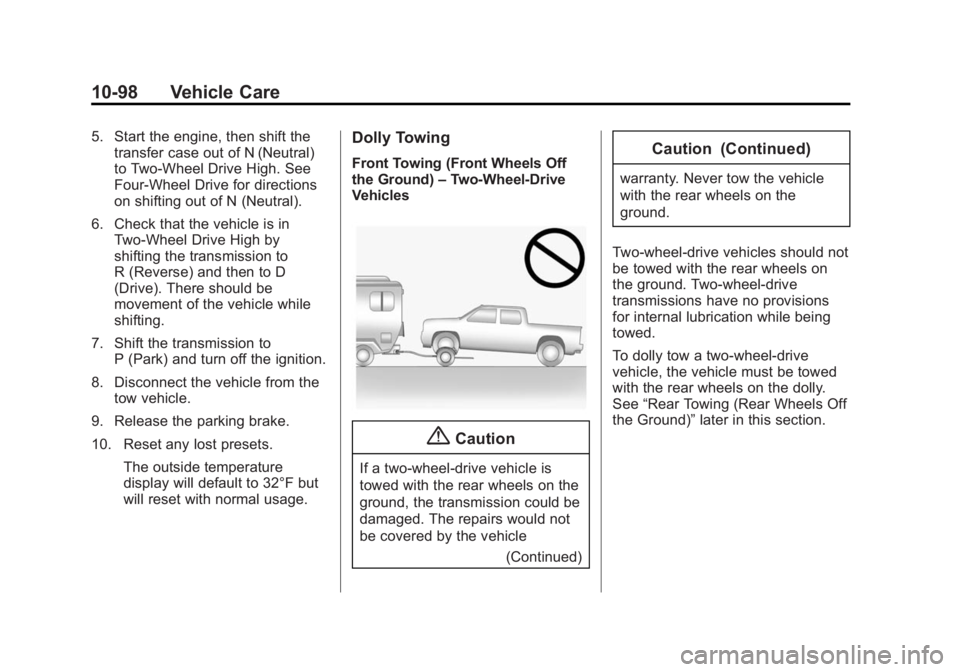
Front Towing (Front Wheels Off
the Ground) –Two-Wheel-Drive
Vehicles
{Caution
If a two-wheel-drive vehicle is
towed with the rear wheels on the
ground, the transmission could be
damaged. The repairs would not
be covered by the vehicle
(Continued)
Caution (Continued)
warranty. Never tow the vehicle
with the rear wheels on the
ground.
Two-wheel-drive vehicles should not
be towed with the rear wheels on
the ground. Two-wheel-drive
transmissions have no provisions
for internal lubrication while being
towed.
To dolly tow a two-wheel-drive
vehicle, the vehicle must be towed
with the rear wheels on the dolly.
See “Rear Towing (Rear Wheels Off
the Ground)” later in this section.