2015 CHEVROLET MALIBU turn signal
[x] Cancel search: turn signalPage 142 of 399
Black plate (35,1)Chevrolet Malibu Owner Manual (GMNA-Localizing-U.S./Canada/Mexico-
7575972) - 2015 - crc - 4/1/14
Instruments and Controls 5-35
Chime Volume
This allows selection of the chime
volume level.
Select Normal or High.
Reverse Tilt Mirror
When on, both the driver and
passenger mirrors will tilt downward
when the vehicle is shifted to
R (Reverse) to improve visibility of
the ground near the rear wheels.
They will return to their previous
driving position when the vehicle is
shifted out of R (Reverse), the
ignition is turned to OFF, or the
vehicle is left in R (Reverse). See
Reverse Tilt Mirrors on page 2-19.
Select On or Off.
Lighting
Select and the following may
display:
.Vehicle Locator Lights
.Exit LightingVehicle Locator Lights
This allows the vehicle locator lights
to be turned on or off. The vehicle
locator lights come on when
unlocking the vehicle with the RKE
transmitter.
Select On or Off.
Exit Lighting
This allows for selecting how long
the exterior lamps stay on when
leaving the vehicle and it is dark
outside.
Select Off, 30 Seconds, 1 Minute,
or 2 Minutes.
Power Door Locks
Select and depending on the radio
the following may display:
.Open Door Anti Lock Out
.Unlocked Door Anti Lock Out
.Auto Door Unlock
.Delayed Door Lock
.Auto Door LockOpen Door Anti Lock Out or
Unlocked Door Anti Lock Out
When on, this feature will keep the
driver door from locking when the
door is open. If Off is selected, the
Delayed Door Lock menu will be
available and the door will lock as
programmed through this menu.
Select to turn On or Off.
Auto Door Unlock
This allows selection of which of the
doors will automatically unlock when
the vehicle is shifted into P (Park).
Select All Doors, Driver Door, or Off.
Delayed Door Lock
When on, this feature will delay the
locking of the doors until
five seconds after the last door is
closed. Three chimes will signal
delayed locking is in use. Press
either the power lock button or
Qon
the RKE transmitter twice to
override the delayed locking feature
and immediately lock all of the
doors.
Page 150 of 399
Black plate (1,1)Chevrolet Malibu Owner Manual (GMNA-Localizing-U.S./Canada/Mexico-
7575972) - 2015 - crc - 4/1/14
Lighting 6-1
Lighting
Exterior Lighting
Exterior Lamp Controls . . . . . . . . 6-1
Exterior Lamps OffReminder . . . . . . . . . . . . . . . . . . . . 6-2
Headlamp High/Low-Beam Changer . . . . . . . . . . . . . . . . . . . . . 6-2
Flash-to-Pass . . . . . . . . . . . . . . . . . 6-2
Daytime Running Lamps (DRL) . . . . . . . . . . . . . . . . 6-2
Automatic Headlamp System . . . . . . . . . . . . . . . . . . . . . . 6-3
Hazard Warning Flashers . . . . . 6-3
Turn and Lane-Change Signals . . . . . . . . . . . . . . . . . . . . . . 6-4
Fog Lamps . . . . . . . . . . . . . . . . . . . . 6-4
Interior Lighting
Instrument Panel Illumination Control . . . . . . . . . . . . . . . . . . . . . . 6-5
Courtesy Lamps . . . . . . . . . . . . . . 6-5
Dome Lamps . . . . . . . . . . . . . . . . . 6-5
Reading Lamps . . . . . . . . . . . . . . . 6-5
Lighting Features
Entry Lighting . . . . . . . . . . . . . . . . . 6-6
Exit Lighting . . . . . . . . . . . . . . . . . . . 6-6
Battery Load Management . . . . 6-7
Exterior Lighting
Exterior Lamp Controls
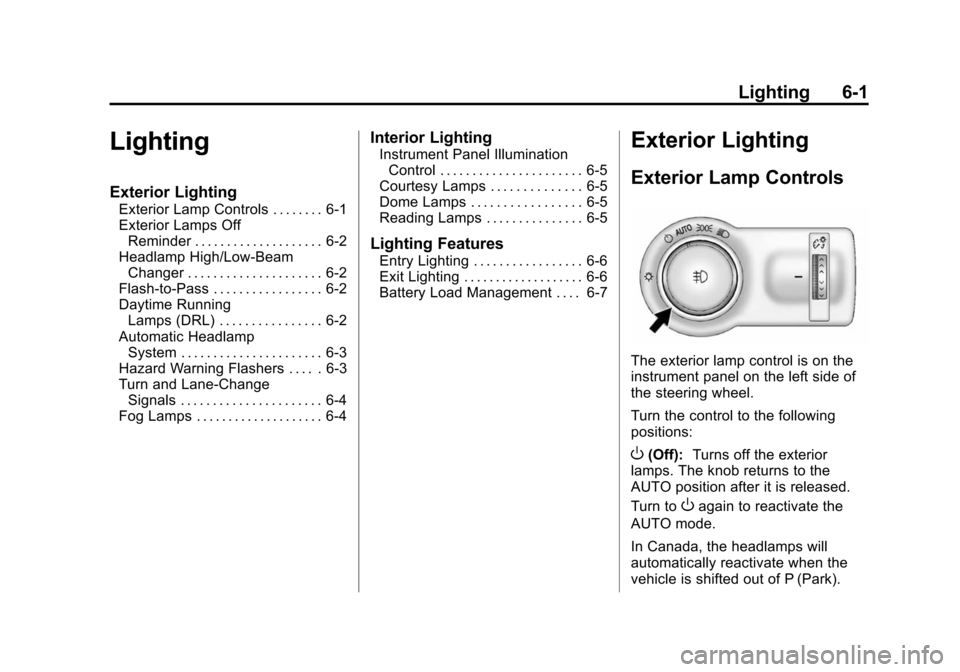
The exterior lamp control is on the
instrument panel on the left side of
the steering wheel.
Turn the control to the following
positions:
O(Off): Turns off the exterior
lamps. The knob returns to the
AUTO position after it is released.
Turn to
Oagain to reactivate the
AUTO mode.
In Canada, the headlamps will
automatically reactivate when the
vehicle is shifted out of P (Park).
Page 151 of 399

Black plate (2,1)Chevrolet Malibu Owner Manual (GMNA-Localizing-U.S./Canada/Mexico-
7575972) - 2015 - crc - 4/1/14
6-2 Lighting
AUTO (Automatic):Automatically
turns the exterior lamps on and off,
depending on outside lighting.
;(Parking Lamps): Turns on the
parking lamps including all lamps,
except the headlamps.
2(Headlamps): Turns on the
headlamps together with the parking
lamps and instrument panel lights.
Exterior Lamps Off
Reminder
A warning chime sounds if the driver
door is opened while the ignition is
off and the exterior lamps are on.
Headlamp High/
Low-Beam Changer
2 3
(Headlamp High/Low-Beam
Changer): Push the turn signal
lever away from you and release, to
turn the high beams on. To return to
low beams, push the lever again or
pull it toward you and release.
This indicator light turns on in the
instrument cluster when the
high-beam headlamps are on.
Flash-to-Pass
To flash the high beams, pull the
turn signal lever toward you, and
release.
Daytime Running
Lamps (DRL)
DRL can make it easier for others to
see the front of your vehicle during
the day. Fully functional DRL are
required on all vehicles first sold in
Canada. The DRL system turns on the
low-beam headlamps at a reduced
brightness. For vehicles with High
Intensity Discharge (HID)
headlamps, there is a dedicated
DRL. The DRL will come on when
all of the following conditions
are met:
.The ignition is on.
.The exterior lamp control is
in AUTO.
.The light sensor determines it is
daytime.
.The vehicle is not in P (Park).
When the DRL are on, the taillamps,
sidemarker lamps, instrument panel
lights, and other lamps will not
be on.
The DRL turn off when the
headlamps are turned to
Oor the
ignition is off.
Page 152 of 399
Black plate (3,1)Chevrolet Malibu Owner Manual (GMNA-Localizing-U.S./Canada/Mexico-
7575972) - 2015 - crc - 4/1/14
Lighting 6-3
This vehicle may have a DRL
disabling function. When the DRL
are on and a turn signal is activated,
the DRL on that side will be off until
the turn signal goes off.
Automatic Headlamp
System
When the exterior lamp control is
set to AUTO and it is dark enough
outside, the headlamps come on
automatically.
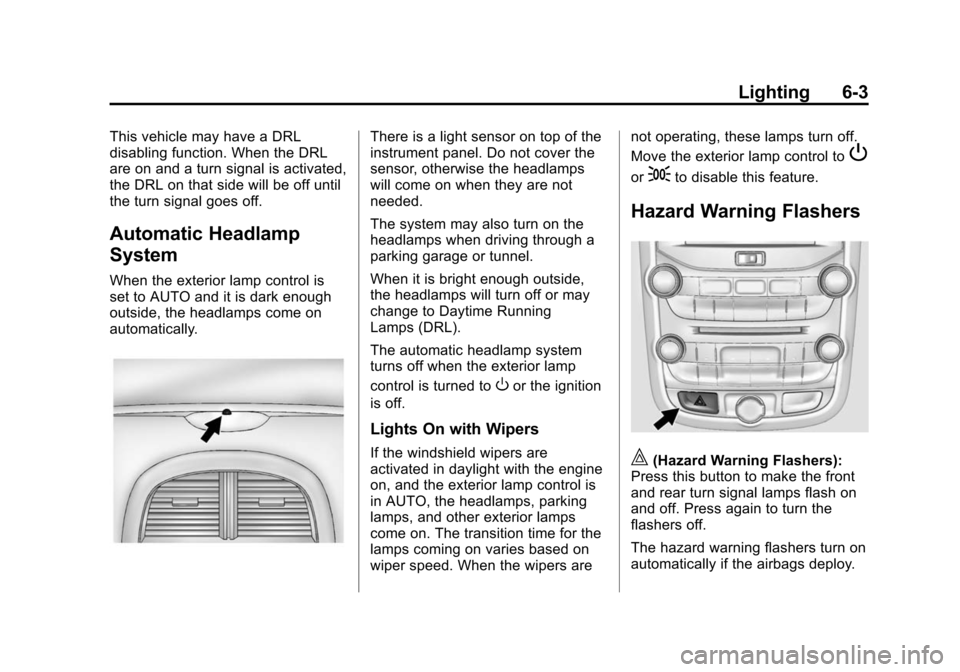
There is a light sensor on top of the
instrument panel. Do not cover the
sensor, otherwise the headlamps
will come on when they are not
needed.
The system may also turn on the
headlamps when driving through a
parking garage or tunnel.
When it is bright enough outside,
the headlamps will turn off or may
change to Daytime Running
Lamps (DRL).
The automatic headlamp system
turns off when the exterior lamp
control is turned to
Oor the ignition
is off.
Lights On with Wipers
If the windshield wipers are
activated in daylight with the engine
on, and the exterior lamp control is
in AUTO, the headlamps, parking
lamps, and other exterior lamps
come on. The transition time for the
lamps coming on varies based on
wiper speed. When the wipers are not operating, these lamps turn off.
Move the exterior lamp control to
P
or;to disable this feature.
Hazard Warning Flashers
|(Hazard Warning Flashers):
Press this button to make the front
and rear turn signal lamps flash on
and off. Press again to turn the
flashers off.
The hazard warning flashers turn on
automatically if the airbags deploy.
Page 153 of 399
Black plate (4,1)Chevrolet Malibu Owner Manual (GMNA-Localizing-U.S./Canada/Mexico-
7575972) - 2015 - crc - 4/1/14
6-4 Lighting
Turn and Lane-Change
Signals
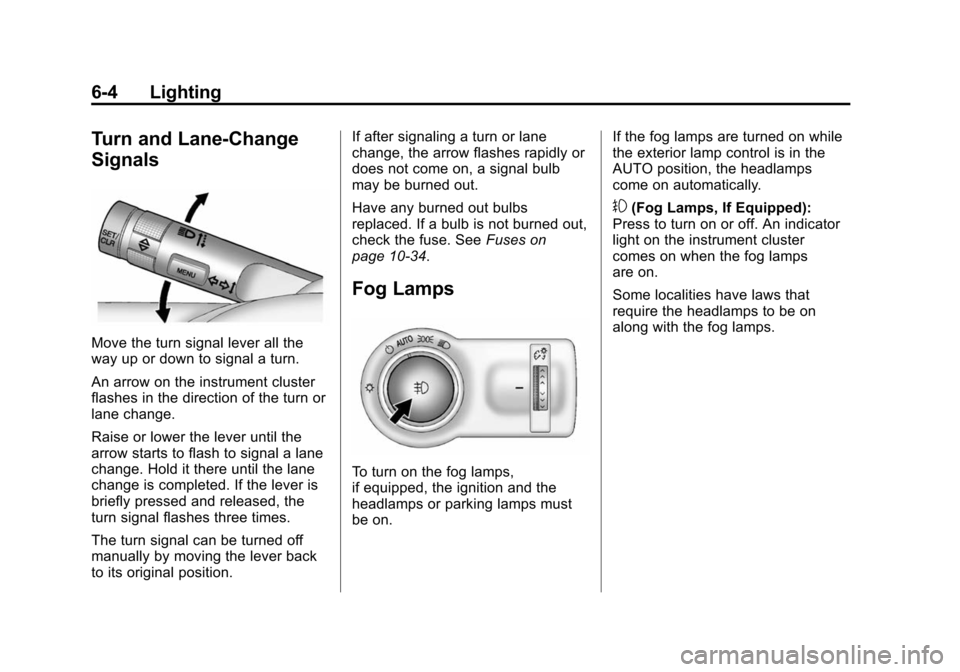
Move the turn signal lever all the
way up or down to signal a turn.
An arrow on the instrument cluster
flashes in the direction of the turn or
lane change.
Raise or lower the lever until the
arrow starts to flash to signal a lane
change. Hold it there until the lane
change is completed. If the lever is
briefly pressed and released, the
turn signal flashes three times.
The turn signal can be turned off
manually by moving the lever back
to its original position.If after signaling a turn or lane
change, the arrow flashes rapidly or
does not come on, a signal bulb
may be burned out.
Have any burned out bulbs
replaced. If a bulb is not burned out,
check the fuse. See
Fuses on
page 10-34.
Fog Lamps
To turn on the fog lamps,
if equipped, the ignition and the
headlamps or parking lamps must
be on. If the fog lamps are turned on while
the exterior lamp control is in the
AUTO position, the headlamps
come on automatically.
#(Fog Lamps, If Equipped):
Press to turn on or off. An indicator
light on the instrument cluster
comes on when the fog lamps
are on.
Some localities have laws that
require the headlamps to be on
along with the fog lamps.
Page 168 of 399
Black plate (11,1)Chevrolet Malibu Owner Manual (GMNA-Localizing-U.S./Canada/Mexico-
7575972) - 2015 - crc - 4/1/14
Infotainment System 7-11
SiriusXM Categories
SiriusXM channels are organized in
categories.
To customize which SiriusXM
categories are used and displayed
in the system, see“Adding or
Removing SiriusXM Categories”
following.
Adding or Removing SiriusXM
Categories
1. Press the CONFIG button on the faceplate.
2. Select Radio Settings.
3. Select Add/Remove XM Categories.
4. From the Add/Remove XM Categories screen, select or
deselect any category to be
used in XM mode. A checkmark
will indicate that the category is
selected.
Turning SiriusXM Channel
Graphic On or Off
1. Press the CONFIG button on thefaceplate.
2. Select Radio Settings.
3. Select XM Channel Graphic to turn on or off.
Radio Reception
Frequency interference and static
can occur during normal radio
reception if items such as cell phone
chargers, vehicle convenience
accessories, and external electronic
devices are plugged into the
accessory power outlet. If there is
interference or static, unplug the
item from the accessory power
outlet.
FM
FM signals only reach about 16 to
65 km (10 to 40 mi). Although the
radio has a built-in electronic circuit
that automatically works to reduce
interference, some static can occur, especially around tall buildings or
hills, causing the sound to fade in
and out.
AM
The range for most AM stations is
greater than for FM, especially at
night. The longer range can cause
station frequencies to interfere with
each other. Static can occur when
things like storms and power lines
interfere with radio reception. When
this happens, try reducing the treble
on the radio.
SiriusXM Satellite Radio
Service
If equipped, SiriusXM Satellite
Radio Service provides digital radio
reception. Tall buildings or hills can
interfere with satellite radio signals,
causing the sound to fade in and
out. In addition, traveling or standing
under heavy foliage, bridges,
garages, or tunnels may cause loss
of the SiriusXM signal for a period
of time.
Page 206 of 399
Black plate (9,1)Chevrolet Malibu Owner Manual (GMNA-Localizing-U.S./Canada/Mexico-
7575972) - 2015 - crc - 4/1/14
Driving and Operating 9-9
If it takes some time for help to
arrive, now and then when you run
the engine, push the accelerator
pedal slightly so the engine runs
faster than the idle speed. This
keeps the battery charged to restart
the vehicle and to signal for help
with the headlamps. Do this as little
as possible to save fuel.
If the Vehicle Is Stuck
Slowly and cautiously spin the
wheels to free the vehicle when
stuck in sand, mud, ice, or snow.
If stuck too severely for the traction
system to free the vehicle, turn the
traction system off and use the
rocking method. SeeTraction
Control/Electronic Stability Control
on page 9-29.
{Warning
If the vehicle's tires spin at high
speed, they can explode, and you
or others could be injured. The
(Continued)
Warning (Continued)
vehicle can overheat, causing an
engine compartment fire or other
damage. Spin the wheels as little
as possible and avoid going
above 56 km/h (35 mph).
Rocking the Vehicle to Get
it Out
Turn the steering wheel left and
right to clear the area around the
front wheels. Turn off any traction
system. Shift back and forth
between R (Reverse) and a low
forward gear, spinning the wheels
as little as possible. To prevent
transmission wear, wait until the
wheels stop spinning before shifting
gears. Release the accelerator
pedal while shifting, and press
lightly on the accelerator pedal
when the transmission is in gear.
Slowly spinning the wheels in the
forward and reverse directions
causes a rocking motion that could
free the vehicle. If that does not get the vehicle out after a few tries, it
might need to be towed out. If the
vehicle does need to be towed out,
see
Towing the Vehicle on
page 10-79.
Vehicle Load Limits
It is very important to know how
much weight the vehicle can
carry. This weight is called the
vehicle capacity weight and
includes the weight of all
occupants, cargo, and all
nonfactory-installed options.
Two labels on the vehicle show
how much weight it may
properly carry, the Tire and
Loading Information label and
the Certification label.
{Warning
Do not load the vehicle any
heavier than the Gross
Vehicle Weight Rating
(Continued)
Page 211 of 399
Black plate (14,1)Chevrolet Malibu Owner Manual (GMNA-Localizing-U.S./Canada/Mexico-
7575972) - 2015 - crc - 4/1/14
9-14 Driving and Operating
Starting and
Operating
New Vehicle Break-In
{Caution
The vehicle does not need an
elaborate break-in. But it will
perform better in the long run if
you follow these guidelines:
.Do not drive at any one
constant speed, fast or slow,
for the first 805 km (500 mi).
Do not make full-throttle
starts. Avoid downshifting to
brake or slow the vehicle.
.Avoid making hard stops for
the first 322 km (200 mi) or
so. During this time the new
brake linings are not yet
broken in. Hard stops with
new linings can mean
premature wear and earlier
replacement. Follow this(Continued)
Caution (Continued)
breaking-in guideline every
time you get new brake
linings.
Following break-in, engine speed
and load can be gradually
increased.
Ignition Positions
(Keyless Access)
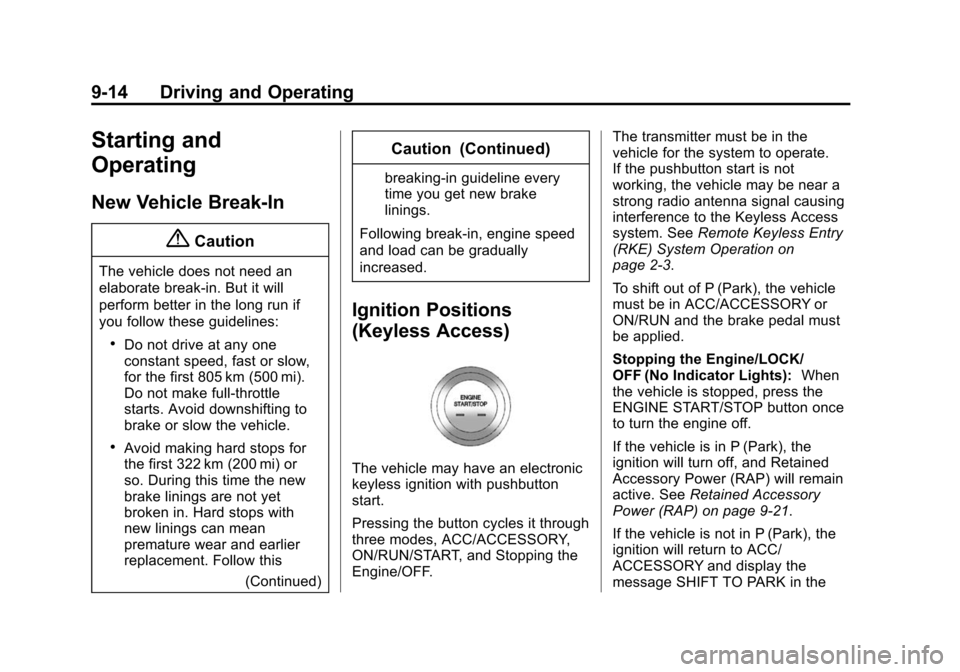
The vehicle may have an electronic
keyless ignition with pushbutton
start.
Pressing the button cycles it through
three modes, ACC/ACCESSORY,
ON/RUN/START, and Stopping the
Engine/OFF. The transmitter must be in the
vehicle for the system to operate.
If the pushbutton start is not
working, the vehicle may be near a
strong radio antenna signal causing
interference to the Keyless Access
system. See
Remote Keyless Entry
(RKE) System Operation on
page 2-3.
To shift out of P (Park), the vehicle
must be in ACC/ACCESSORY or
ON/RUN and the brake pedal must
be applied.
Stopping the Engine/LOCK/
OFF (No Indicator Lights): When
the vehicle is stopped, press the
ENGINE START/STOP button once
to turn the engine off.
If the vehicle is in P (Park), the
ignition will turn off, and Retained
Accessory Power (RAP) will remain
active. See Retained Accessory
Power (RAP) on page 9-21.
If the vehicle is not in P (Park), the
ignition will return to ACC/
ACCESSORY and display the
message SHIFT TO PARK in the