Page 159 of 377
Black plate (16,1)Chevrolet Express Owner Manual (GMNA-Localizing-U.S./Canada/Mexico-
7707481) - 2015 - crc - 2/10/15
7-16 Infotainment System
If the CD is not playing correctly, for
any other reason, try a known
good CD.
If any error occurs repeatedly or if
an error cannot be corrected,
contact your dealer. If the radio
displays an error message, write it
down and provide it to your dealer
when reporting the problem.
Auxiliary Devices
Using the Auxiliary Input Jack
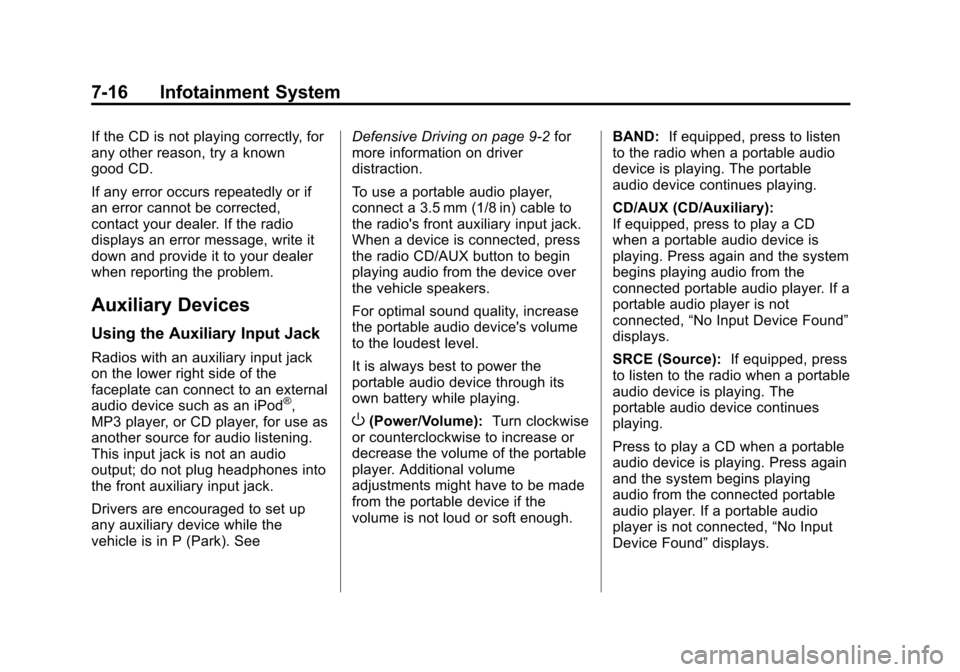
Radios with an auxiliary input jack
on the lower right side of the
faceplate can connect to an external
audio device such as an iPod
®,
MP3 player, or CD player, for use as
another source for audio listening.
This input jack is not an audio
output; do not plug headphones into
the front auxiliary input jack.
Drivers are encouraged to set up
any auxiliary device while the
vehicle is in P (Park). See Defensive Driving on page 9-2
for
more information on driver
distraction.
To use a portable audio player,
connect a 3.5 mm (1/8 in) cable to
the radio's front auxiliary input jack.
When a device is connected, press
the radio CD/AUX button to begin
playing audio from the device over
the vehicle speakers.
For optimal sound quality, increase
the portable audio device's volume
to the loudest level.
It is always best to power the
portable audio device through its
own battery while playing.O(Power/Volume): Turn clockwise
or counterclockwise to increase or
decrease the volume of the portable
player. Additional volume
adjustments might have to be made
from the portable device if the
volume is not loud or soft enough. BAND:
If equipped, press to listen
to the radio when a portable audio
device is playing. The portable
audio device continues playing.
CD/AUX (CD/Auxiliary):
If equipped, press to play a CD
when a portable audio device is
playing. Press again and the system
begins playing audio from the
connected portable audio player. If a
portable audio player is not
connected, “No Input Device Found”
displays.
SRCE (Source): If equipped, press
to listen to the radio when a portable
audio device is playing. The
portable audio device continues
playing.
Press to play a CD when a portable
audio device is playing. Press again
and the system begins playing
audio from the connected portable
audio player. If a portable audio
player is not connected, “No Input
Device Found” displays.
Page 161 of 377
Black plate (18,1)Chevrolet Express Owner Manual (GMNA-Localizing-U.S./Canada/Mexico-
7707481) - 2015 - crc - 2/10/15
7-18 Infotainment System
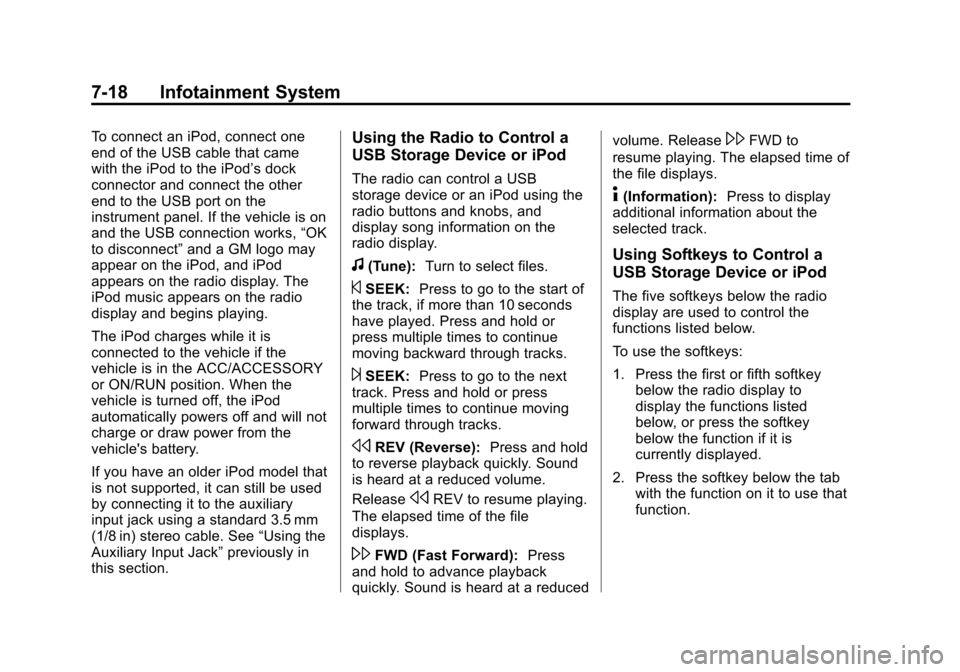
To connect an iPod, connect one
end of the USB cable that came
with the iPod to the iPod’s dock
connector and connect the other
end to the USB port on the
instrument panel. If the vehicle is on
and the USB connection works,“OK
to disconnect” and a GM logo may
appear on the iPod, and iPod
appears on the radio display. The
iPod music appears on the radio
display and begins playing.
The iPod charges while it is
connected to the vehicle if the
vehicle is in the ACC/ACCESSORY
or ON/RUN position. When the
vehicle is turned off, the iPod
automatically powers off and will not
charge or draw power from the
vehicle's battery.
If you have an older iPod model that
is not supported, it can still be used
by connecting it to the auxiliary
input jack using a standard 3.5 mm
(1/8 in) stereo cable. See “Using the
Auxiliary Input Jack” previously in
this section.Using the Radio to Control a
USB Storage Device or iPod
The radio can control a USB
storage device or an iPod using the
radio buttons and knobs, and
display song information on the
radio display.
f(Tune): Turn to select files.
©SEEK:Press to go to the start of
the track, if more than 10 seconds
have played. Press and hold or
press multiple times to continue
moving backward through tracks.
¨SEEK: Press to go to the next
track. Press and hold or press
multiple times to continue moving
forward through tracks.
sREV (Reverse): Press and hold
to reverse playback quickly. Sound
is heard at a reduced volume.
Release
sREV to resume playing.
The elapsed time of the file
displays.
\FWD (Fast Forward): Press
and hold to advance playback
quickly. Sound is heard at a reduced volume. Release
\FWD to
resume playing. The elapsed time of
the file displays.
4(Information): Press to display
additional information about the
selected track.
Using Softkeys to Control a
USB Storage Device or iPod
The five softkeys below the radio
display are used to control the
functions listed below.
To use the softkeys:
1. Press the first or fifth softkey
below the radio display to
display the functions listed
below, or press the softkey
below the function if it is
currently displayed.
2. Press the softkey below the tab with the function on it to use that
function.
Page 175 of 377
Black plate (4,1)Chevrolet Express Owner Manual (GMNA-Localizing-U.S./Canada/Mexico-
7707481) - 2015 - crc - 2/10/15
8-4 Climate Controls
Rear Heating System
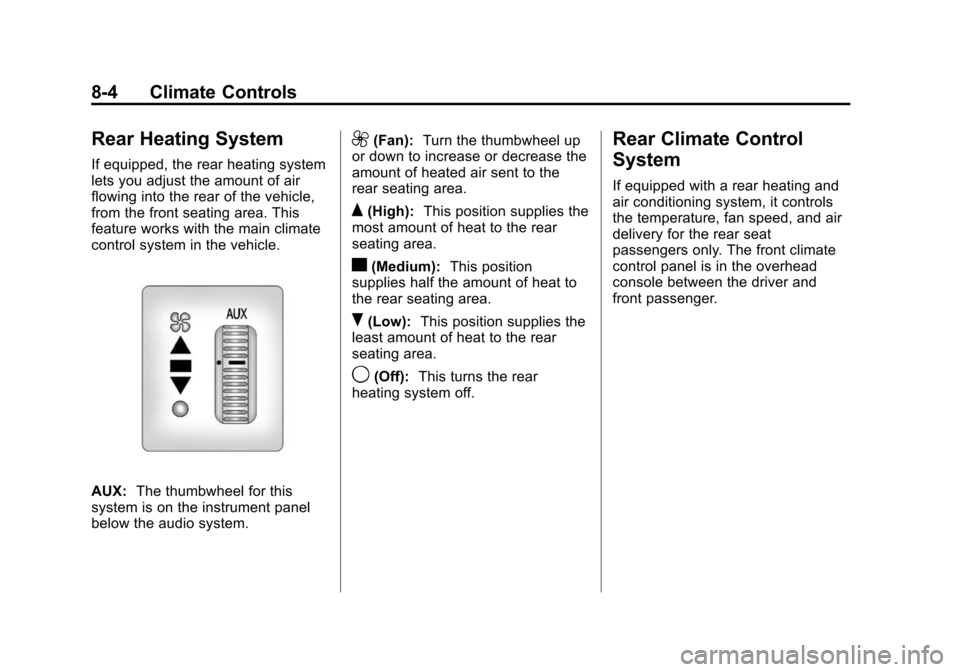
If equipped, the rear heating system
lets you adjust the amount of air
flowing into the rear of the vehicle,
from the front seating area. This
feature works with the main climate
control system in the vehicle.
AUX:The thumbwheel for this
system is on the instrument panel
below the audio system.
9(Fan): Turn the thumbwheel up
or down to increase or decrease the
amount of heated air sent to the
rear seating area.
Q(High): This position supplies the
most amount of heat to the rear
seating area.
c(Medium): This position
supplies half the amount of heat to
the rear seating area.
R(Low): This position supplies the
least amount of heat to the rear
seating area.
9(Off): This turns the rear
heating system off.
Rear Climate Control
System
If equipped with a rear heating and
air conditioning system, it controls
the temperature, fan speed, and air
delivery for the rear seat
passengers only. The front climate
control panel is in the overhead
console between the driver and
front passenger.
Page 176 of 377
Black plate (5,1)Chevrolet Express Owner Manual (GMNA-Localizing-U.S./Canada/Mexico-
7707481) - 2015 - crc - 2/10/15
Climate Controls 8-5
Front Climate Control Panel
1. Fan Control
2. Air Delivery Mode Control
3. Temperature Control
Use this control panel to maintain a
separate temperature setting. Adjust
the direction of the airflow or adjust
the fan speed for the rear seat
passenger(s). When the fan knob is in the AUX
position, the rear climate control
panel can be used to adjust the
climate settings in the rear
seating area.
Page 177 of 377
Black plate (6,1)Chevrolet Express Owner Manual (GMNA-Localizing-U.S./Canada/Mexico-
7707481) - 2015 - crc - 2/10/15
8-6 Climate Controls
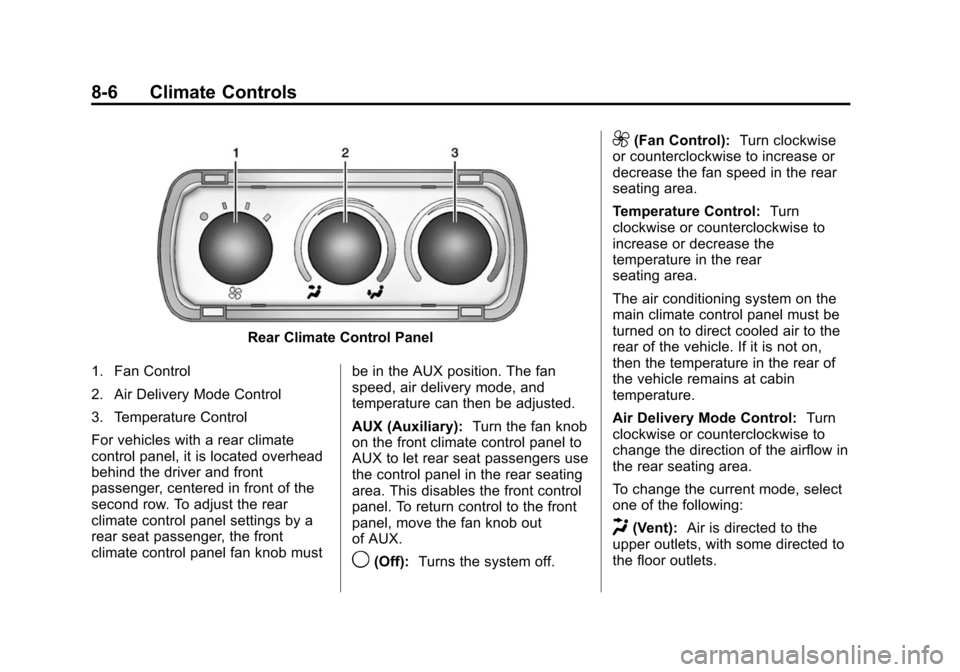
Rear Climate Control Panel
1. Fan Control
2. Air Delivery Mode Control
3. Temperature Control
For vehicles with a rear climate
control panel, it is located overhead
behind the driver and front
passenger, centered in front of the
second row. To adjust the rear
climate control panel settings by a
rear seat passenger, the front
climate control panel fan knob must be in the AUX position. The fan
speed, air delivery mode, and
temperature can then be adjusted.
AUX (Auxiliary):
Turn the fan knob
on the front climate control panel to
AUX to let rear seat passengers use
the control panel in the rear seating
area. This disables the front control
panel. To return control to the front
panel, move the fan knob out
of AUX.
9(Off): Turns the system off.
9(Fan Control): Turn clockwise
or counterclockwise to increase or
decrease the fan speed in the rear
seating area.
Temperature Control: Turn
clockwise or counterclockwise to
increase or decrease the
temperature in the rear
seating area.
The air conditioning system on the
main climate control panel must be
turned on to direct cooled air to the
rear of the vehicle. If it is not on,
then the temperature in the rear of
the vehicle remains at cabin
temperature.
Air Delivery Mode Control: Turn
clockwise or counterclockwise to
change the direction of the airflow in
the rear seating area.
To change the current mode, select
one of the following:
H(Vent): Air is directed to the
upper outlets, with some directed to
the floor outlets.
Page 271 of 377
Black plate (38,1)Chevrolet Express Owner Manual (GMNA-Localizing-U.S./Canada/Mexico-
7707481) - 2015 - crc - 2/10/15
10-38 Vehicle Care
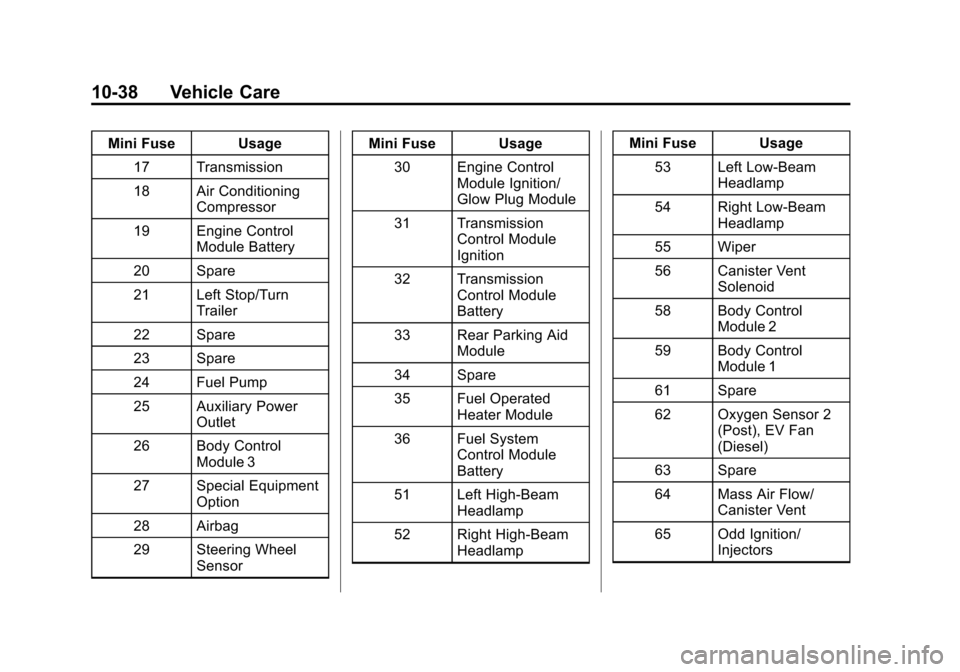
Mini Fuse Usage17 Transmission
18 Air Conditioning Compressor
19 Engine Control Module Battery
20 Spare
21 Left Stop/Turn Trailer
22 Spare
23 Spare
24 Fuel Pump
25 Auxiliary Power Outlet
26 Body Control Module 3
27 Special Equipment Option
28 Airbag
29 Steering Wheel Sensor Mini Fuse Usage
30 Engine Control Module Ignition/
Glow Plug Module
31 Transmission Control Module
Ignition
32 Transmission Control Module
Battery
33 Rear Parking Aid Module
34 Spare
35 Fuel Operated Heater Module
36 Fuel System Control Module
Battery
51 Left High-Beam Headlamp
52 Right High-Beam Headlamp Mini Fuse Usage
53 Left Low-Beam Headlamp
54 Right Low-Beam Headlamp
55 Wiper
56 Canister Vent Solenoid
58 Body Control Module 2
59 Body Control Module 1
61 Spare
62 Oxygen Sensor 2 (Post), EV Fan
(Diesel)
63 Spare
64 Mass Air Flow/ Canister Vent
65 Odd Ignition/ Injectors
Page 272 of 377
Black plate (39,1)Chevrolet Express Owner Manual (GMNA-Localizing-U.S./Canada/Mexico-
7707481) - 2015 - crc - 2/10/15
Vehicle Care 10-39
Mini Fuse Usage66 Daytime Running Lamps 2
(LOLVL-V22) (If
Equipped)
67 Daytime Running Lamps 1 (UPLVL
+V22) (If
Equipped)
68 Auxiliary Stop Lamps
69 Trailer Stop Lamps
70 Spare
71 Fuel Heater/Flex Fuel Sensor
72 Body Control Module 6
73 Lighter/Data Link Connection
75 V6 Fuel Injectors
76 Spare
77 Oxygen Sensor 2 (Pre) Mini Fuse Usage
78 Engine Control Module Powertrain
79 Even Ignition/ Injectors
J-Case Fuse Usage 1 ABS Motor
2 ABS Module
41 Spare
42 Trailer Wiring
43 Fan High
44 Starter Solenoid
45 Engine Control Module/Powertrain
46 Spare
47 Fan Lo
74 Front Blower
Relay Usage
15 Run/Crank Relay
Usage
37 Spare
38 Fuel Pump
39 Crank
40 Air Conditioning Compressor
48 Fan High
49 Powertrain
50 Spare
57 Fan Low
60 Fan Control
Floor Console Fuse Block
The floor console fuse block is
under the driver seat.
Page 273 of 377
Black plate (40,1)Chevrolet Express Owner Manual (GMNA-Localizing-U.S./Canada/Mexico-
7707481) - 2015 - crc - 2/10/15
10-40 Vehicle Care
The vehicle may not be equipped
with all of the fuses, relays, and
features shown.Mini-Fuse Usage
F1 Empty Mini-Fuse Usage
F2 Steering Wheel Sensor
F3 Auxiliary Parking Lamps (Cut-Away)
F4 Front Park Lamps
F5 Trailer Park Lamps
F6 Upfitter Park Lamps
F7 Right Rear Park Lamp
F8 Left Rear Park Lamp
F9 Outside Rearview Mirror Switch
F10 Airbag/Automatic Occupant Sensing
F11 OnStar
®(If
Equipped)
F12 Empty