2015 CHEVROLET CRUZE radio
[x] Cancel search: radioPage 106 of 417
Black plate (3,1)Chevrolet Cruze Owner Manual (GMNA-Localizing-U.S./Canada-7707493) -
2015 - crc - 12/2/14
Instruments and Controls 5-3
b/g(Push to Talk):For vehicles
with a Bluetooth, OnStar,
or navigation system, press to
interact with those systems. See
Bluetooth (Infotainment Controls) on
page 7-19 orBluetooth (Voice
Recognition) on page 7-22 or
Bluetooth (Overview) on page 7-17,
OnStar Overview on page 14-1,
or the infotainment manual.
$/i(Mute/End Call): Press to
silence the vehicle speakers only.
Press again to turn the sound on.
For vehicles with OnStar or
Bluetooth systems, press to reject
an incoming call, or end a
current call.
_SRC^(Source/Favorite): Press
to select a source or turn to change
favorite stations.
Press
_or^to select AM, FM, CD,
or MP3 track.
Turn
_or^to select the next or
previous saved favorite radio
stations. +
x−
(Volume): Press + to
increase the volume. Press −to
decrease the volume.
Horn
Pressaon the steering wheel pad
to sound the horn.
Windshield Wiper/Washer
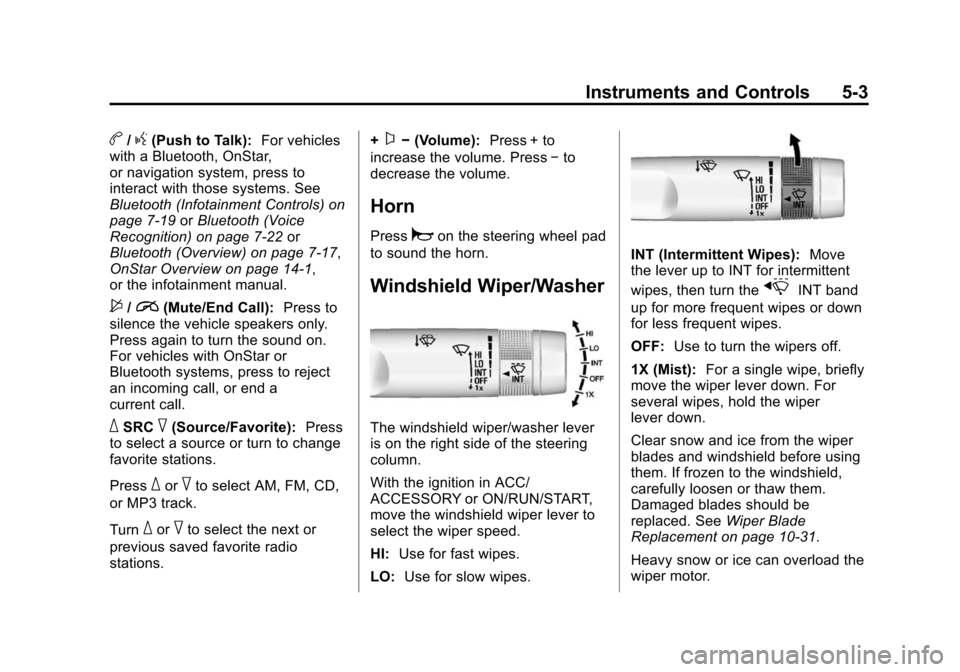
The windshield wiper/washer lever
is on the right side of the steering
column.
With the ignition in ACC/
ACCESSORY or ON/RUN/START,
move the windshield wiper lever to
select the wiper speed.
HI: Use for fast wipes.
LO: Use for slow wipes.
INT (Intermittent Wipes): Move
the lever up to INT for intermittent
wipes, then turn the
xINT band
up for more frequent wipes or down
for less frequent wipes.
OFF: Use to turn the wipers off.
1X (Mist): For a single wipe, briefly
move the wiper lever down. For
several wipes, hold the wiper
lever down.
Clear snow and ice from the wiper
blades and windshield before using
them. If frozen to the windshield,
carefully loosen or thaw them.
Damaged blades should be
replaced. See Wiper Blade
Replacement on page 10-31.
Heavy snow or ice can overload the
wiper motor.
Page 107 of 417
Black plate (4,1)Chevrolet Cruze Owner Manual (GMNA-Localizing-U.S./Canada-7707493) -
2015 - crc - 12/2/14
5-4 Instruments and Controls
Wiper Parking
If the ignition is put in OFF while the
wipers are on LO, HI, or INT, they
will immediately stop.
If the windshield wiper lever is then
moved to OFF before the driver
door is opened or within 10 minutes,
the wipers will restart and move to
the base of the windshield.
If the ignition is put in OFF while the
wipers are performing wipes due to
windshield washing, the wipers
continue to run until they reach the
base of the windshield.
nL(Windshield Washer): Pull
the windshield wiper lever toward
you to spray washer fluid and
activate the wipers. The wipers will
continue until the lever is released
or the maximum wash time is
reached. When the lever is
released, additional wipes may
occur depending on how long the
windshield washer had been activated. See
Washer Fluid on
page 10-25 for information on filling
the windshield washer fluid
reservoir.
{Warning
In freezing weather, do not use
the washer until the windshield is
warmed. Otherwise the washer
fluid can form ice on the
windshield, blocking your vision.
Compass
The vehicle may have a compass
display in the Driver Information
Center (DIC). The compass receives
its heading and other information
from the Global Positioning
System (GPS) antenna, StabiliTrak,
and vehicle speed information.
Avoid covering the GPS antenna,
located on the roof, for long periods
of time with objects that may
interfere with the antenna's ability to
receive a satellite signal. The
compass system is designed to operate for a certain number of
miles or degrees of turn before
needing a signal from the GPS
satellites. When the compass
display shows CAL, drive the
vehicle for a short distance in an
open area where it can receive a
GPS signal. The compass system
will automatically determine when
the GPS signal is restored and
provide a heading again. See
Compass Messages on page 5-27
for more information on the
messages that may be displayed for
the compass.Clock
The infotainment system controls
are used to access the time and
date settings through the menu
system. See
Operation on page 7-4
for information about how to use the
menu system. For vehicles with a
connective radio or navigation
system, see the infotainment
manual.
Page 108 of 417
Black plate (5,1)Chevrolet Cruze Owner Manual (GMNA-Localizing-U.S./Canada-7707493) -
2015 - crc - 12/2/14
Instruments and Controls 5-5
Setting the Time and Date
To set the time and date for the
radio with CD:
1. Press CLOCK.
2. Select Set Time or Set Date.
3. Turn the MENU/SEL knob toadjust the highlighted number.
4. Press the MENU/SEL knob to select the next number.
5. To save the settings, press the MENU/SEL knob.
To set the time and date for the
radio without navigation:
1. Press CLOCK.
2. Select Set Time or Set Date.
3. Turn the MENU/SEL knob to adjust the highlighted number.
4. Press the MENU/SEL knob to select the next number.
5. To save the settings, press OK screen button. To set the time and date for the
radio with navigation:
1. Press CLOCK.
2. Select Set Time or Set Date.
3. Turn the MENU/SEL knob to
adjust the highlighted number.
4. Press the MENU/SEL knob to select the next number.
5. To save the settings, press BACK on the radio faceplate.
If auto timing is set, the time
displayed on the clock may not
update immediately when driving
into a new time zone.
Setting the 12/24 Hour Format
To set the 12/24 hour format for the
radio with CD:
1. Press CLOCK.
2. Highlight 12/24 Hour Format.
3. Press the MENU/SEL knob to select the 12 hour or 24 hour
display format. 4. To save the settings, press the
MENU/SEL knob.
To set the 12/24 hour format for the
radio without navigation:
1. Press CLOCK.
2. Highlight 12/24 Hour Format.
3. Press the MENU/SEL knob to select the 12 hour or 24 hour
display format.
4. To save the settings, press OK screen button.
To set the 12/24 hour format for the
radio with navigation:
1. Press CLOCK.
2. Highlight 12/24 Hour Format.
3. Press the MENU/SEL knob to select the 12 hour or 24 hour
display format.
4. To save the settings, press the BACK on the radio faceplate.
Page 117 of 417
Black plate (14,1)Chevrolet Cruze Owner Manual (GMNA-Localizing-U.S./Canada-7707493) -
2015 - crc - 12/2/14
5-14 Instruments and Controls
The light turns off when the engine
is started. If it does not, have the
vehicle serviced by your dealer.
If the light stays on, or comes on
while driving, there could be a
problem with the electrical charging
system. Have it checked by your
dealer. Driving while this light is on
could drain the battery.
If a short distance must be driven
with the light on, be sure to turn off
all accessories, such as the radio
and air conditioner.
Malfunction
Indicator Lamp
A computer system called OBD II
(On-Board Diagnostics-Second
Generation) monitors the operation
of the vehicle to ensure emissions
are at acceptable levels, helping to
maintain a clean environment. The
malfunction indicator lamp comes
on when the vehicle is placed in
ON/RUN for key access or Service
Only Mode for Keyless Access, as a
check to show it is working. If itdoes not, have the vehicle serviced
by your dealer. See
Ignition
Positions (Keyless Access) on
page 9-14 orIgnition Positions (Key
Access) on page 9-16.
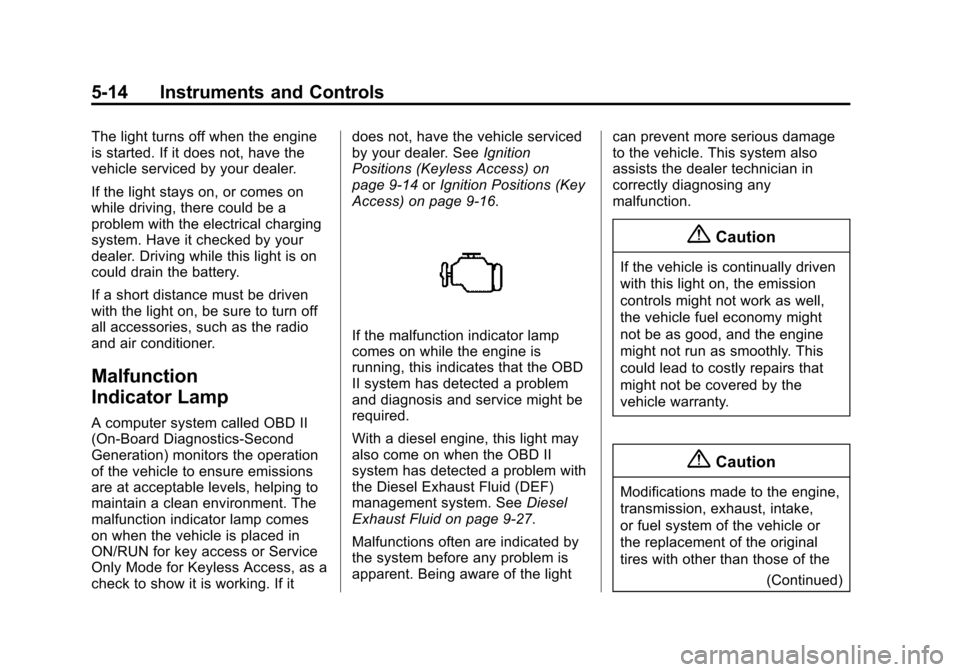
If the malfunction indicator lamp
comes on while the engine is
running, this indicates that the OBD
II system has detected a problem
and diagnosis and service might be
required.
With a diesel engine, this light may
also come on when the OBD II
system has detected a problem with
the Diesel Exhaust Fluid (DEF)
management system. See Diesel
Exhaust Fluid on page 9-27.
Malfunctions often are indicated by
the system before any problem is
apparent. Being aware of the light can prevent more serious damage
to the vehicle. This system also
assists the dealer technician in
correctly diagnosing any
malfunction.
{Caution
If the vehicle is continually driven
with this light on, the emission
controls might not work as well,
the vehicle fuel economy might
not be as good, and the engine
might not run as smoothly. This
could lead to costly repairs that
might not be covered by the
vehicle warranty.
{Caution
Modifications made to the engine,
transmission, exhaust, intake,
or fuel system of the vehicle or
the replacement of the original
tires with other than those of the
(Continued)
Page 139 of 417
Black plate (36,1)Chevrolet Cruze Owner Manual (GMNA-Localizing-U.S./Canada-7707493) -
2015 - crc - 12/2/14
5-36 Instruments and Controls
Vehicle
Personalization
Use the audio system controls to
access the personalization menus
for customizing vehicle features.
The following are all possible
personalization features. Depending
on the vehicle, some may not be
available.
Infotainment System Audio
System Controls
Using the Faceplate
MENU/SELECT Knob
.Press to enter, select, or activate
a highlighted menu option.
.Turn to highlight a menu option.
.Press to enable or disable a
system setting.
/BACK
.Press to exit a menu.
.Press to return to a previous
screen.Using the Touch Screen
Press a screen feature to:
.View more feature options.
.Enable or disable the feature.
w:
Press to scroll up.
x:Press to scroll down.
Back: Press to return to the
previous menu.
To access the
personalization menu:
1. Press Config on the Home page
on the infotainment system
display or CONFIG on the
faceplate.
2. Select the desired feature to display a list of available
options.
3. Select the desired feature setting.
Personalization Menus
The following list of menu items may
be available:
.Languages
.Time and Date
.Radio Settings
.Phone Settings
.Navigation Settings
.Display Settings
.Vehicle Settings
Each menu is detailed in the
following information.
Languages
Select Languages, then select from
the available language(s).
Time and Date
Manually set the time and date. See
Clock on page 5-4.
Radio Settings
Select and depending on the radio
the following may display:
.Auto Volume
.Gracenote Options
.XM Channel Art
.Max Startup Volume
Page 140 of 417
Black plate (37,1)Chevrolet Cruze Owner Manual (GMNA-Localizing-U.S./Canada-7707493) -
2015 - crc - 12/2/14
Instruments and Controls 5-37
.Maximum Startup Volume
.Number of Favorites Pages
.Radio Favorites
.RDS Options
.XM Categories
.Software Versions Menu
Auto Volume
This feature adjusts the volume to
minimize the effects of unwanted
background noise that can result
from changing road surfaces, driving
speeds, or open windows. This
feature works best at lower volume
settings where background noise is
typically louder than the sound
system volume.
Select Off, Low, Medium, or High.
Gracenote Options
Select and the following may
display:
.Normalization Normalization
This feature improves voice
recognition and media groupings.
See
“CD Player,” “USB,” “Auxiliary
Devices,” and“Bluetooth Audio” in
the infotainment manual.
Select to enable or disable.
XM Channel Art
This feature turns the XM Audio
page background on the XM
Channel display on and off.
Select to enable or disable.
Max Startup Volume or Maximum
Startup Volume
This feature sets the maximum
startup volume. If the vehicle is
started and the volume is greater
than this level, the volume is
adjusted to this level.
Press + or −to increase or
decrease the volume. Number of Favorites Pages or
Radio Favorites
Press to set the number of favorites
to display.
Select the desired number.
RDS Options
Select and the following may
display:
.RDS
.Text Scroll Freeze
.RDS Text
RDS
Select to turn RDS on or off. See
“RDS (Radio Data System)” in
AM-FM Radio on page 7-7.
Text Scroll Freeze
When on, this allows the RDS Text
to scroll across the radio screen.
Select to enable or disable.
Page 141 of 417
Black plate (38,1)Chevrolet Cruze Owner Manual (GMNA-Localizing-U.S./Canada-7707493) -
2015 - crc - 12/2/14
5-38 Instruments and Controls
RDS Text
When on, this allows the RDS
information from the station to be
displayed.
Select to enable or disable.
XM Categories
This allows which available XM
Categories are used and displayed.
Press to enable or disable available
categories.
Software Versions Menu
Press to display information about
the system and update software if
available.
Phone Settings
Select and depending on the radio
the following may display:
.Device List
.Pair Device
.Pair Device (Phone)
.Pair Device (GPS)Device List
Select to connect to a different
phone source, disconnect a phone,
or delete a phone.
Pair Device
Select to pair a new device. See
“Pairing a Phone/Device”
in
“Bluetooth” in the infotainment
manual.
Pair Device (Phone) or Pair
Device (GPS)
Select to pair a new phone. See
“Pairing a Phone” in“Bluetooth
(Infotainment Controls)” inBluetooth
(Infotainment Controls) on
page 7-19 orBluetooth (Voice
Recognition) on page 7-22 or
Bluetooth (Overview) on page 7-17
or “Pairing a Phone/Device”
“Bluetooth” in the infotainment
manual.
Navigation Settings
See “Navigation Settings” under
“Configure Menu” in the
infotainment manual.
Display Settings
Press and the following may
display:
.Home Page Menu
.Rear Camera Options
.Display Off
.Map Settings
Home Page Menu
Select and the following may
display:
.Customize
.Sort
.Restore Home Page Defaults
Customize
This feature allows the selection of
what icons will be on the first
Home Page.
Select and follow the screen
prompts.
Sort
This feature allows the icons on the
Home Page to be moved.
Page 142 of 417
Black plate (39,1)Chevrolet Cruze Owner Manual (GMNA-Localizing-U.S./Canada-7707493) -
2015 - crc - 12/2/14
Instruments and Controls 5-39
Select and follow the screen
prompts.
Restore Home Page Defaults
This feature will restore the Home
Page to the factory settings.
Select and follow the screen
prompts.
Rear Camera Options
For more information on Rear
Camera Options, seeRear Vision
Camera (RVC) on page 9-48.
Display Off
Press to turn the display off. The
display will return when any radio
buttons are pressed or the screen is
touched (if equipped).
Map Settings
See “Map Settings” in“Configure
Menu” in the infotainment manual.
Vehicle Settings
Select and the following may
display:
.Climate and Air Quality
.Comfort and Convenience
.Collision Detection Systems
.Lighting
.Power Door Locks
.Remote Lock/Unlock/Start
.Return to Factory Settings?
Climate and Air Quality
Select and the following may
display:
.Auto Fan Speed
.Remote Start Auto Heat Seats
.Auto Defog
.Auto Rear Defog
Auto Fan Speed
This feature sets the climate control
fan speed to maintain the interior
temperature.
Select High, Medium, or Low. Remote Start Auto Heat Seats
When on, this feature will turn the
heated seats on when using remote
start on cold days.
Select On or Off.
Auto Defog
When turned on and high humidity
is detected, the climate control
system may adjust to outside air
supply and turn on the air
conditioner or the heater. The fan
speed may slightly increase to help
prevent fogging. When high
humidity is no longer detected, the
system will return to its prior
operation.
Select On or Off.
Auto Rear Defog
When on, this feature turns on the
rear defogger at vehicle start when
the interior temperature is cold and
fog is likely. The auto rear defog
function can be disabled by
pressing
1. When off, the feature
can be turned on by pressing
1.