2015 CHEVROLET CORVETTE ECU
[x] Cancel search: ECUPage 147 of 393
Black plate (42,1)Chevrolet Corvette Owner Manual (GMNA-Localizing-U.S./Canada/Mexico-
7576293) - 2015 - crc - 10/31/14
5-42 Instruments and Controls
When this message is displayed,
the computer controlled systems will
not assist the driver in controlling
the vehicle. Have the system
repaired by your dealer as soon as
possible. Adjust your driving
accordingly. SeeTraction Control/
Electronic Stability Control on
page 9-38.
To acknowledge the message, press
the SEL button.
SHOCKS INOPERATIVE
This message displays when a
malfunction is present in the
Magnetic Ride Control system,
which is causing the shocks to be in
their full soft mode. This is a
warning to the driver that the vehicle
handling may be affected. Have the
vehicle serviced by your dealer as
soon as possible.
To acknowledge the message, press
the SEL button. The message
reappears every 10 minutes until
this condition changes.
Airbag System Messages
SERVICE AIRBAG
This message displays if there is a
problem with the airbag system.
Take the vehicle to your dealer for
service.
Security Messages
THEFT ATTEMPTED
This message displays if the vehicle
detects a tamper condition.
Service Vehicle Messages
PROGRAM CLUSTER
This message is displayed if there is
a problem with the instrument
cluster. Take the vehicle to your
dealer for service.
SERVICE POWER STEERING
This message is displayed if there is
a problem with the power steering
system and a chime may sound.
Take the vehicle to your dealer for
service.
SERVICE REAR AXLE
If there is a problem detected with
the Electronic Limited-Slip Rear
Axle, this message displays. When
displayed, the system is not
operational and driving should be
adjusted accordingly. Take the
vehicle to your dealer for service as
soon as possible.
When this message is displayed,
the vehicle’ s handling capabilities
will be reduced during severe
maneuvers. StabiliTrak will be
affected. See Traction Control/
Electronic Stability Control on
page 9-38.
Page 157 of 393
Black plate (52,1)Chevrolet Corvette Owner Manual (GMNA-Localizing-U.S./Canada/Mexico-
7576293) - 2015 - crc - 10/31/14
5-52 Instruments and Controls
Restore Vehicle Settings
This allows selection of restoring
vehicle settings.
Select Restore or Cancel.
Clear All Private Data
This allows selection to clear all
private information from the vehicle.
Select Delete or Cancel.
Restore Radio Settings
This allows selection to restore
radio settings.
Select Restore or Cancel.
Software Information
Select to view the infotainment
system current software information.
Universal Remote
System
SeeRadio Frequency Statement on
page 13-12.
The FCC Grant of Equipment
Authorization Certificate number is
NZLSAHL5B.
The Canadian Registration ID
number is 4112A-SAHL5B.
Universal Remote System
Programming
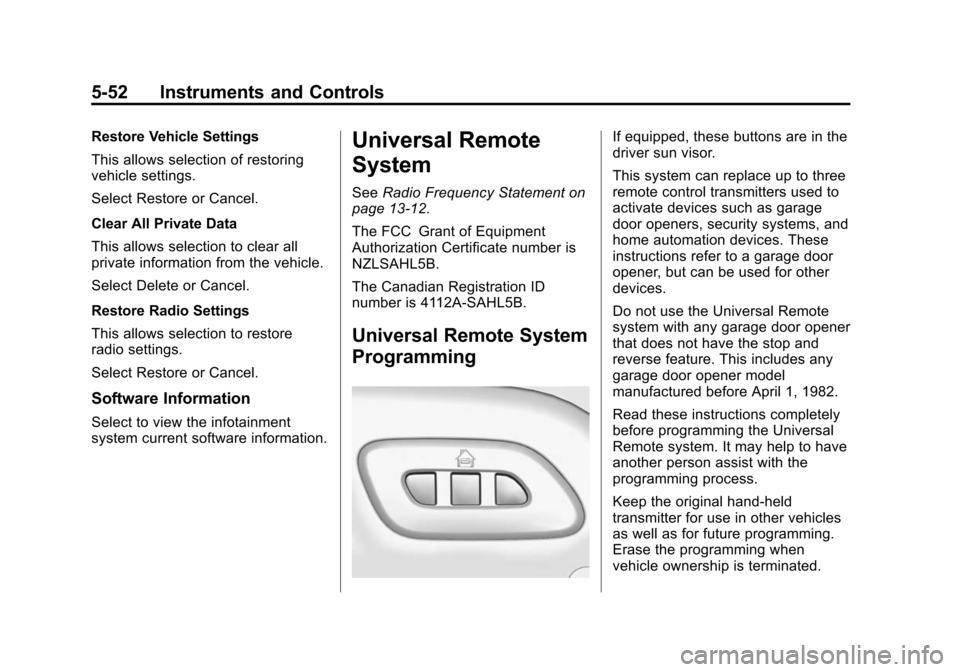
If equipped, these buttons are in the
driver sun visor.
This system can replace up to three
remote control transmitters used to
activate devices such as garage
door openers, security systems, and
home automation devices. These
instructions refer to a garage door
opener, but can be used for other
devices.
Do not use the Universal Remote
system with any garage door opener
that does not have the stop and
reverse feature. This includes any
garage door opener model
manufactured before April 1, 1982.
Read these instructions completely
before programming the Universal
Remote system. It may help to have
another person assist with the
programming process.
Keep the original hand-held
transmitter for use in other vehicles
as well as for future programming.
Erase the programming when
vehicle ownership is terminated.
Page 200 of 393
Black plate (19,1)Chevrolet Corvette Owner Manual (GMNA-Localizing-U.S./Canada/Mexico-
7576293) - 2015 - crc - 10/31/14
Driving and Operating 9-19
Warning (Continued)
.Put things in the rear area
of your vehicle. Try to
spread the weight evenly.
.Never stack heavier
things, like suitcases,
inside the vehicle so that
some of them are above
the tops of the seats.
.Do not leave an
unsecured child restraint
in your vehicle.
.When you carry something
inside the vehicle, secure
it whenever you can.
Starting and
Operating
New Vehicle Break-In
Follow these recommended
guidelines during the first 2 414 km
(1,500 mi) of driving this vehicle.
Parts have a break-in period and
performance will be better in the
long run.
For the first 322 km (200 mi):
.To break in new tires, drive at
moderate speeds and avoid hard
cornering for the first 322 km
(200 mi).
.New brake linings also need a
break- in period. Avoid making
hard stops during the first
322 km (200 mi). This is
recommended every time brake
linings are replaced.
For the first 800 km (500 mi):
.Avoid full throttle starts and
abrupt stops.
.Do not exceed 4000 rpm.
.Avoid driving at any one
constant speed, fast or slow,
including the use of cruise
control.
.Avoid downshifting to brake or
slow the vehicle when the
engine speed will exceed
4000 rpm.
.Do not let the engine labor.
Never lug the engine. With a
manual transmission, shift to the
next lower gear. This rule
applies at all times, not just
during the break-in period.
.After the first 500 miles, change
the engine oil on vehicles with
the LT1 engine and Z51
package, or the LT4 engine.
For the first 2 414 km (1,500 mi):
.Do not participate in track
events, sport driving schools,
or similar activities during the
first 2 414 km (1,500 mi).
Page 260 of 393

Black plate (21,1)Chevrolet Corvette Owner Manual (GMNA-Localizing-U.S./Canada/Mexico-
7576293) - 2015 - crc - 10/31/14
Vehicle Care 10-21
To remove the hood extractor duct
to gain access:
1. Bolts (4)
2. Hood Extractor Duct
1. Open the hood. SeeHood on
page 10-6.
2. Remove the four bolts (1) and the hood extractor duct (2).
3. Reverse Step 2 to replace the hood extractor duct. To inspect or replace the engine air
cleaner/filter:
1. Surge Tank Coolant Hose
2. Screws (2)
3. Hose Retainers (2)
4. Air Duct Clamp
5. Electrical Connector
{Caution
If the engine coolant surge tank
hose is not carefully lifted out of
the hose retainers on the air
(Continued)
Caution (Continued)
cleaner/filter cover assembly, it
may be damaged and cause
engine coolant to leak. Damage
would not be covered by the
vehicle warranty.
1. Carefully lift the surge tank coolant hose (1) from both hose
retainers (3) and position the
hose to be able to remove the
screws securing the air cleaner/
filter endcap.
2. Loosen the air duct clamp (4) at the air cleaner/filter housing
endcap and move the duct out of
the way.
3. Remove the electrical connector (5) from the sensor.
4. Remove the two screws (2).
Page 263 of 393
Black plate (24,1)Chevrolet Corvette Owner Manual (GMNA-Localizing-U.S./Canada/Mexico-
7576293) - 2015 - crc - 10/31/14
10-24 Vehicle Care
{Caution
Using coolant other than
DEX-COOL®can cause
premature engine, heater core,
or radiator corrosion. In addition,
the engine coolant could require
changing sooner. Any repairs
would not be covered by the
vehicle warranty. Always use
DEX-COOL (silicate-free) coolant
in the vehicle.
Cooling System (Aero
Panel)
The aero panel enhances
aerodynamic efficiency and
improves fuel economy.
Remove the aero panel and bracket
to improve engine cooling and air
conditioning performance when
driving aggressively or in hot
weather. To remove the aero panel and
bracket:
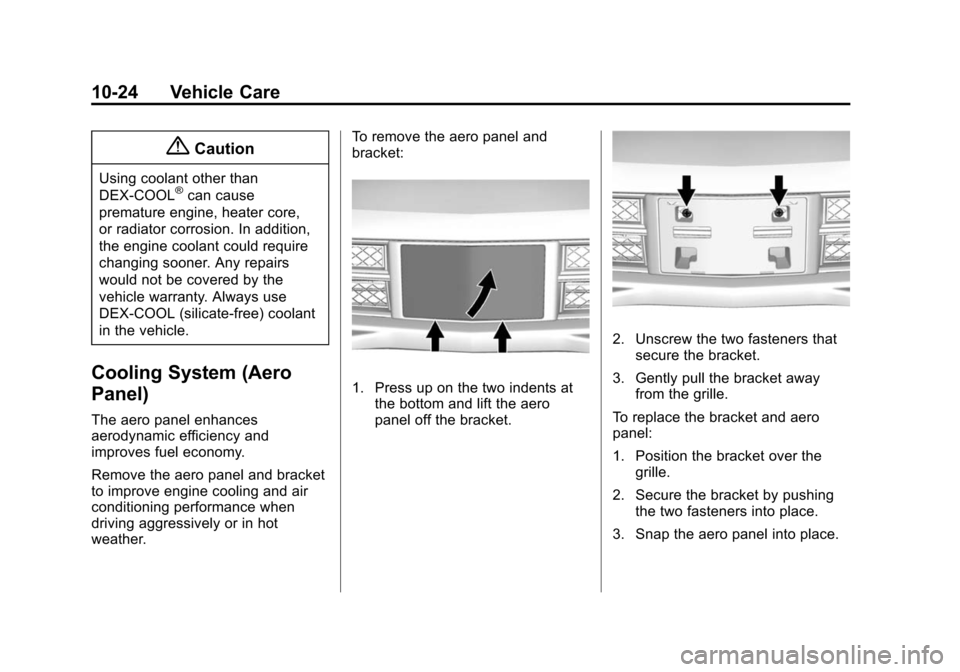
1. Press up on the two indents at
the bottom and lift the aero
panel off the bracket.
2. Unscrew the two fasteners that
secure the bracket.
3. Gently pull the bracket away from the grille.
To replace the bracket and aero
panel:
1. Position the bracket over the grille.
2. Secure the bracket by pushing the two fasteners into place.
3. Snap the aero panel into place.
Page 266 of 393
Black plate (27,1)Chevrolet Corvette Owner Manual (GMNA-Localizing-U.S./Canada/Mexico-
7576293) - 2015 - crc - 10/31/14
Vehicle Care 10-27
If coolant is needed, add the proper
DEX-COOL coolant mixture directly
to the surge tank, but be sure the
cooling system is cool before this
is done.
1. When the cooling system,including the coolant surge tank
pressure cap and upper radiator
hose, is no longer hot, remove
the pressure cap.
Turn the pressure cap slowly
counterclockwise about
one-quarter turn and then stop.
If a hiss is heard, wait for that to
stop. A hiss means there is still
some pressure left.
2. Keep turning the pressure cap slowly, and remove it.
3. Fill the coolant surge tank with the proper DEX-COOL coolant
mixture until the level inside
stabilizes at the cold fill line on
the front of the surge tank. 4. With the coolant surge tank
pressure cap off, start the
engine and let it run until the
upper radiator hose can be felt
getting hot. Any time during this
procedure, watch out for the
engine cooling fan.
By this time, the coolant level
inside the coolant surge tank
may be lower. If the level is
lower, add more of the proper
mixture to the coolant surge tank
until the level stabilizes at the
cold fill line on the coolant
surge tank.
5. Replace the pressure cap tightly. Check the level in the surge tank
when the system has cooled
down. If the coolant is not at the
proper level, repeat Steps 1−4,
then reinstall the pressure cap.
If the coolant is not at the proper
level when the system cools
down again, see the dealer.{Caution
If the pressure cap is not tightly
installed, coolant loss and
possible engine damage may
occur. Be sure the cap is properly
and tightly secured.
Engine Overheating
The vehicle has several indicators
to warn of engine overheating.
There is an engine coolant
temperature gauge on the
instrument cluster. See Engine
Coolant Temperature Gauge on
page 5-15. The vehicle may also
display a message on the Driver
Information Center (DIC). See
Engine Cooling System Messages
on page 5-37.
If the decision is made not to lift the
hood but to get service help right
away, see Roadside Assistance
Program on page 13-5.
Page 286 of 393
Black plate (47,1)Chevrolet Corvette Owner Manual (GMNA-Localizing-U.S./Canada/Mexico-
7576293) - 2015 - crc - 10/31/14
Vehicle Care 10-47
FusesUsage
36 Passenger Window
Switch
37 Front Accessory
Power Outlet
38 Not Used
39 Spare
40 Spare
41 Spare
42 Spare
43 Spare
44 Spare Relays
Usage
R1 Logistics 2
R2 Rear Window
Defogger
R3 Not Used
R4 Front Accessory
Power Outlet
R5 Theft (Door Lock
Security)Wheels and Tires
Tires
Every new GM vehicle has
high-quality tires made by a
leading tire manufacturer. See
the warranty manual for
information regarding the tire
warranty and where to get
service. For additional
information refer to the tire
manufacturer.
{Warning
.Poorly maintained and
improperly used tires are
dangerous.
.Overloading the tires can
cause overheating as a
result of too much flexing.
There could be a blowout
(Continued)
Page 322 of 393
Black plate (83,1)Chevrolet Corvette Owner Manual (GMNA-Localizing-U.S./Canada/Mexico-
7576293) - 2015 - crc - 10/31/14
Vehicle Care 10-83
{Caution
If the jumper cables are
connected or removed in the
wrong order, electrical shorting
may occur and damage the
vehicle. The repairs would not be
covered by the vehicle warranty.
Always connect and remove the
jumper cables in the correct order,
making sure that the cables do
not touch each other or other
metal.
Jumper Cable Removal
Reverse the sequence exactly when
removing the jumper cables.
The power windows may need to be
initialized. See “Window Indexing”
under Power Windows on
page 2-22.
Towing the Vehicle
{Caution
Incorrectly towing a disabled
vehicle may cause damage. The
damage would not be covered by
the vehicle warranty. Do not lash
or hook to any suspension
components —including the
control arms, stabilizer bars, and
links —during towing and
recovery of a disabled vehicle,
or when securing the vehicle to a
flatbed car carrier. For towing and
recovery of a disabled vehicle,
use the proper hooks in the
correct locations on the front and
rear sub-frames. Use the proper
nylon strap harnesses around the
tires to secure them to the flatbed
car carrier.
Have the vehicle towed on a flatbed
car carrier. A wheel lift tow truck
could damage the vehicle. Consult your dealer or a
professional towing service if the
disabled vehicle must be towed.
To tow the vehicle behind another
vehicle for recreational purposes,
such as behind a motor home, see
“Recreational Vehicle Towing”
following.
Recreational Vehicle
Towing
{Caution
Dolly towing or dinghy towing the
vehicle may cause damage
because of reduced ground
clearance. Always put the vehicle
on a flatbed truck or trailer.
The vehicle was neither designed
nor intended to be towed with any of
its wheels on the ground. If the
vehicle must be towed, see Towing
the Vehicle on page 10-83.