2015 CHEVROLET CORVETTE tow
[x] Cancel search: towPage 207 of 393
Black plate (26,1)Chevrolet Corvette Owner Manual (GMNA-Localizing-U.S./Canada/Mexico-
7576293) - 2015 - crc - 10/31/14
9-26 Driving and Operating
If you still are unable to shift out of
P (Park):
1. Fully release the shift leverbutton, and let go of the
shift knob.
2. While holding down the brake pedal, press the shift lever
button again.
3. Move the shift lever to the desired position.
If you still cannot move the shift
lever from P (Park), consult your
dealer or a professional towing
service.
Parking (Manual
Transmission)
Before exiting the vehicle, move the
shift lever into 1 (First) or
R (Reverse), and apply the parking
brake. Once the shift lever has been
placed into 1 (First) or R (Reverse)
with the clutch pedal pressed in,
turn the ignition off and release the
clutch.
Parking over Things
That Burn
{Warning
Things that can burn could touch
hot exhaust parts under the
vehicle and ignite. Do not park
over papers, leaves, dry grass,
or other things that can burn.
Active Fuel Management®
This system allows the engine to
operate on either all or half of its
cylinders, depending on the driving
conditions. With a manual
transmission, the system is only
active in Eco mode. With an
automatic transmission, the system
is available in all modes, but is more
aggressive in Eco mode. See Driver
Mode Control on page 9-40.
When less power is required, such
as cruising at a constant vehicle
speed, the system will operate in
the half cylinder mode, allowing the vehicle to achieve better fuel
economy. When greater power
demands are required, such as
accelerating from a stop, passing,
or merging onto a freeway, the
system will maintain full-cylinder
operation.
Page 210 of 393
Black plate (29,1)Chevrolet Corvette Owner Manual (GMNA-Localizing-U.S./Canada/Mexico-
7576293) - 2015 - crc - 10/31/14
Driving and Operating 9-29
N (Neutral):In this position, the
engine does not connect with the
wheels. To restart the engine when
the vehicle is already moving, use
N (Neutral) only. If the vehicle needs
towing, see Towing the Vehicle on
page 10-83.
{Warning
Shifting into a drive gear while the
engine is running at high speed is
dangerous. Unless your foot is
firmly on the brake pedal, the
vehicle could move very rapidly.
You could lose control and hit
people or objects. Do not shift
into a drive gear while the engine
is running at high speed.
{Caution
Shifting out of P (Park) or
N (Neutral) with the engine
running at high speed may
(Continued)
Caution (Continued)
damage the transmission. The
repairs would not be covered by
the vehicle warranty. Be sure the
engine is not running at high
speed when shifting the vehicle.
D (Drive): This position is for
normal driving. It provides the best
fuel economy. If more power is
needed for passing, push the pedal
down to achieve the desired level of
acceleration.
Downshifting the transmission in
slippery road conditions could result
in skidding. See “Skidding”under
Loss of Control on page 9-4.
The transmission can be shifted like
a manual transmission using the
paddle shift controls while in
D (Drive). See Manual Mode on
page 9-29.
M (Manual Mode): In
M (Manual Mode), the transmission
can be shifted like a manual transmission using the paddle shift
controls. See
Manual Mode on
page 9-29.
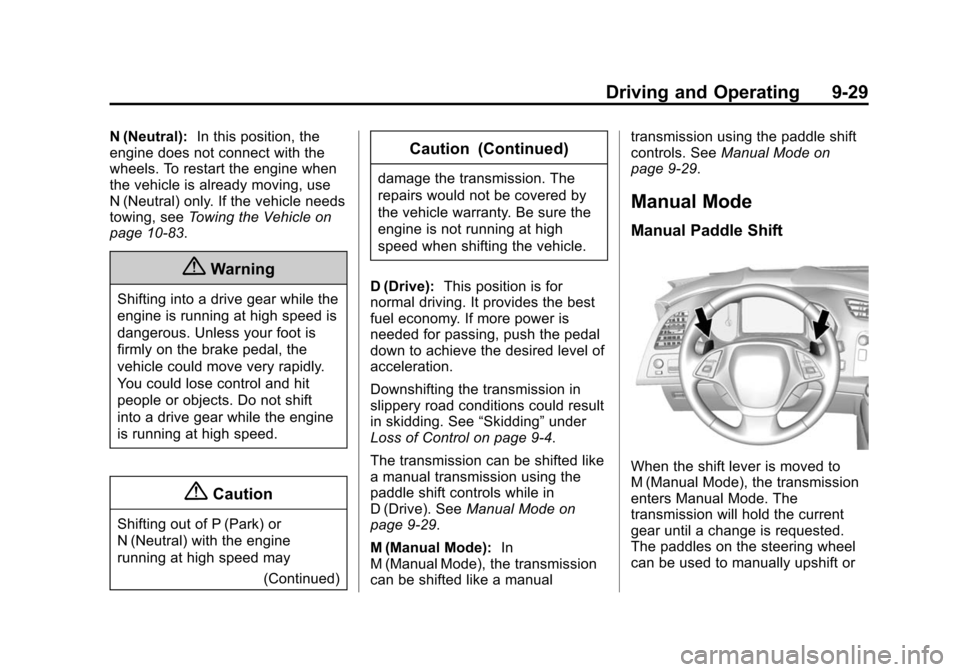
Manual Mode
Manual Paddle Shift
When the shift lever is moved to
M (Manual Mode), the transmission
enters Manual Mode. The
transmission will hold the current
gear until a change is requested.
The paddles on the steering wheel
can be used to manually upshift or
Page 214 of 393
Black plate (33,1)Chevrolet Corvette Owner Manual (GMNA-Localizing-U.S./Canada/Mexico-
7576293) - 2015 - crc - 10/31/14
Driving and Operating 9-33
The vehicle can be safely shifted
into R (Reverse) while the vehicle is
moving less than 5 km/h (3 mph).
If the vehicle is going faster than
that, R (Reverse) is locked out.
Shift Speeds
Use the following shift speeds,
shown in km/h (mph), for the best
fuel economy.1 to 4 27 (17)
4 to 5 40 (25)
5 to 6 64 (40)
6 to 7 72 (45)
{Caution
When shifting gears, do not move
the shift lever around
unnecessarily. This may damage
the transmission. Shift directly
into the next gear.
1–4 Shift Message
When the DIC displays this
message, the vehicle can only be
shifted from 1 (First) to 4 (Fourth).
SeeTransmission Messages on
page 5-44.
Downshifting
Do not downshift into the gear at a
speed greater than shown:
1 (First) 72 km/h (45 mph)
2 (Second) 107 km/h (67 mph) 3 (Third) 160 km/h (100 mph)
4 (Fourth) 233 km/h (145 mph)
{Caution
When downshifting, if more than
one gear is skipped, or the engine
is racing when the clutch pedal is
(Continued)
Caution (Continued)
released, the engine, clutch,
driveshaft or transmission could
be damaged.
If the engine speed drops below
900 rpm, or if the engine is not
running smoothly, downshift to the
next lower gear. It may be
necessary to downshift two or more
gears.
The transmission has a spring that
centers the shift lever near 3 (Third)
and 4 (Fourth). This spring helps to
know what gear the shift lever is in
when shifting. Be careful when
shifting from 1 (First) to 2 (Second)
or downshifting from 7 (Seventh) to
6 (Sixth). The spring will try to pull
the shift lever toward 4 (Fourth) and
3 (Third). Move the lever into
2 (Second) or 6 (Sixth) and do not
let the shift lever move in the
direction of the pulling, or it could
shift from 1 (First) to 4 (Fourth) or
from 7 (Seventh) to 4 (Fourth).
Page 239 of 393
Black plate (58,1)Chevrolet Corvette Owner Manual (GMNA-Localizing-U.S./Canada/Mexico-
7576293) - 2015 - crc - 10/31/14
9-58 Driving and Operating
Warning (Continued)
.Place the nozzle inside the fill
opening of the container
before dispensing fuel, and
keep it in contact with the fill
opening until filling is
complete.
.Fill the container no more
than 95% full to allow for
expansion.
.Do not smoke, light matches,
or use lighters while
pumping fuel.
.Avoid using cell phones or
other electronic devices.
Trailer Towing
General Towing
Information
The vehicle is neither designed nor
intended to tow a trailer.
Conversions and
Add-Ons
Add-On Electrical
Equipment
{Caution
Some electrical equipment can
damage the vehicle or cause
components to not work and
would not be covered by the
warranty. Always check with your
dealer before adding electrical
equipment.
Add-on equipment can drain the
vehicle's 12-volt battery, even if the
vehicle is not operating.
The vehicle has an airbag system.
Before attempting to add anything
electrical to the vehicle, see
Servicing the Airbag-Equipped
Vehicle on page 3-25 andAdding
Equipment to the Airbag-Equipped
Vehicle on page 3-25.
Page 241 of 393
Black plate (2,1)Chevrolet Corvette Owner Manual (GMNA-Localizing-U.S./Canada/Mexico-
7576293) - 2015 - crc - 10/31/14
10-2 Vehicle Care
Tire Rotation . . . . . . . . . . . . . . . 10-62
When It Is Time for NewTires . . . . . . . . . . . . . . . . . . . . . . 10-63
Buying New Tires . . . . . . . . . . . 10-64
Different Size Tires and Wheels . . . . . . . . . . . . . . . . . . . 10-66
Uniform Tire Quality Grading . . . . . . . . . . . . . . . . . . . 10-66
Wheel Alignment and Tire Balance . . . . . . . . . . . . . . . . . . . 10-68
Wheel Replacement . . . . . . . . 10-68
Tire Chains . . . . . . . . . . . . . . . . . 10-70
If a Tire Goes Flat . . . . . . . . . . 10-70
Tire Sealant and Compressor Kit . . . . . . . . . . . 10-71
Storing the Tire Sealant and Compressor Kit . . . . . . . . . . . 10-79
Jump Starting
Jump Starting . . . . . . . . . . . . . . 10-80
Towing the Vehicle
Towing the Vehicle . . . . . . . . . 10-83
Recreational VehicleTowing . . . . . . . . . . . . . . . . . . . . 10-83
Appearance Care
Exterior Care . . . . . . . . . . . . . . . 10-84
Interior Care . . . . . . . . . . . . . . . . 10-89
Floor Mats . . . . . . . . . . . . . . . . . . 10-92
General Information
For service and parts needs, visit
your dealer. You will receive
genuine GM parts and GM-trained
and supported service people.
Genuine GM parts have one of
these marks:
California Proposition
65 Warning
Most motor vehicles, including this
one, contain and/or emit chemicals
known to the State of California to cause cancer and birth defects or
other reproductive harm. Engine
exhaust, many parts and systems,
many fluids, and some component
wear by-products contain and/or
emit these chemicals.
California Perchlorate
Materials Requirements
Certain types of automotive
applications, such as airbag
initiators, safety belt pretensioners,
and lithium batteries contained in
Remote Keyless Entry transmitters,
may contain perchlorate materials.
Special handling may be necessary.
For additional information, see
www.dtsc.ca.gov/hazardouswaste/
perchlorate.
Accessories and
Modifications
Adding non‐dealer accessories or
making modifications to the vehicle
can affect vehicle performance and
safety, including such things as
airbags, braking, stability, ride and
Page 252 of 393
Black plate (13,1)Chevrolet Corvette Owner Manual (GMNA-Localizing-U.S./Canada/Mexico-
7576293) - 2015 - crc - 10/31/14
Vehicle Care 10-13
Obtaining an accurate oil level
reading is essential:
1. If the engine has been runningrecently, turn off the engine and
check within five and 10 minutes
of shutoff. Checking the oil level
too soon after engine shutoff will
not provide an accurate oil level
reading.
{Warning
The engine oil dipstick handle
may be hot; it could burn you.
Use a towel or glove to touch the
dipstick handle.
2. Pull the dipstick and wipe it with a clean paper towel or cloth,
then push it back in all the way.
Remove it again, keeping the tip
down, and check the level.
When to Add Engine Oil
(Except Z51 and Z06)
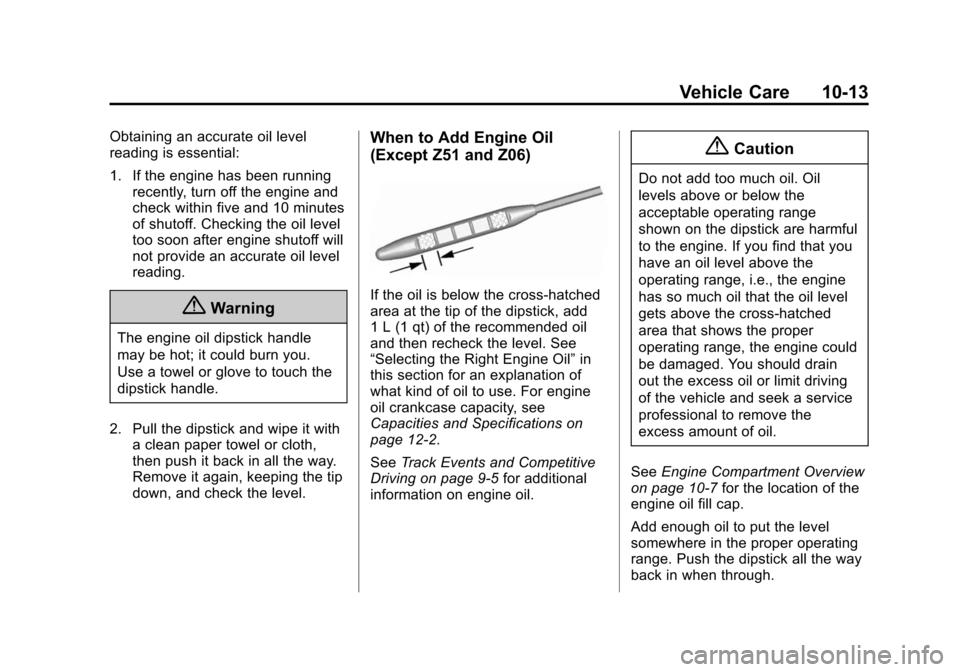
If the oil is below the cross-hatched
area at the tip of the dipstick, add
1 L (1 qt) of the recommended oil
and then recheck the level. See
“Selecting the Right Engine Oil” in
this section for an explanation of
what kind of oil to use. For engine
oil crankcase capacity, see
Capacities and Specifications on
page 12-2.
See Track Events and Competitive
Driving on page 9-5 for additional
information on engine oil.
{Caution
Do not add too much oil. Oil
levels above or below the
acceptable operating range
shown on the dipstick are harmful
to the engine. If you find that you
have an oil level above the
operating range, i.e., the engine
has so much oil that the oil level
gets above the cross-hatched
area that shows the proper
operating range, the engine could
be damaged. You should drain
out the excess oil or limit driving
of the vehicle and seek a service
professional to remove the
excess amount of oil.
See Engine Compartment Overview
on page 10-7 for the location of the
engine oil fill cap.
Add enough oil to put the level
somewhere in the proper operating
range. Push the dipstick all the way
back in when through.
Page 254 of 393
Black plate (15,1)Chevrolet Corvette Owner Manual (GMNA-Localizing-U.S./Canada/Mexico-
7576293) - 2015 - crc - 10/31/14
Vehicle Care 10-15
{Warning
The engine oil dipstick handle
may be hot; it could burn you.
Use a towel or glove to touch the
dipstick handle.
4. Remove the dipstick from the external engine oil tank and wipe
it with a clean lint-free paper
towel or a cloth. Re-insert the
dipstick into the external oil tank,
pushing it all the way in until it
stops.
5. Remove the dipstick from the oil tank and read the level on the
cross-hatched area.
When to Add Engine Oil
(Z51 and Z06)
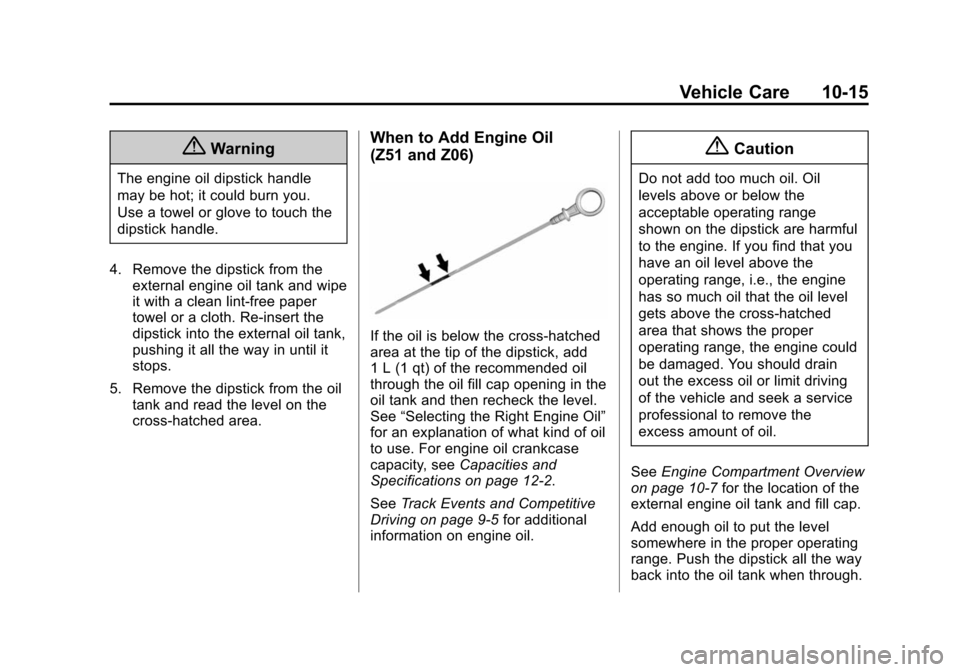
If the oil is below the cross-hatched
area at the tip of the dipstick, add
1 L (1 qt) of the recommended oil
through the oil fill cap opening in the
oil tank and then recheck the level.
See “Selecting the Right Engine Oil”
for an explanation of what kind of oil
to use. For engine oil crankcase
capacity, see Capacities and
Specifications on page 12-2.
See Track Events and Competitive
Driving on page 9-5 for additional
information on engine oil.
{Caution
Do not add too much oil. Oil
levels above or below the
acceptable operating range
shown on the dipstick are harmful
to the engine. If you find that you
have an oil level above the
operating range, i.e., the engine
has so much oil that the oil level
gets above the cross-hatched
area that shows the proper
operating range, the engine could
be damaged. You should drain
out the excess oil or limit driving
of the vehicle and seek a service
professional to remove the
excess amount of oil.
See Engine Compartment Overview
on page 10-7 for the location of the
external engine oil tank and fill cap.
Add enough oil to put the level
somewhere in the proper operating
range. Push the dipstick all the way
back into the oil tank when through.
Page 265 of 393
Black plate (26,1)Chevrolet Corvette Owner Manual (GMNA-Localizing-U.S./Canada/Mexico-
7576293) - 2015 - crc - 10/31/14
10-26 Vehicle Care
coolant disposal. This will help
protect the environment and your
health.
If ambient temperatures are
anticipated below−28°C (−18°F),
make sure a proper mixture ratio of
50% DEX-COOL coolant and 50%
clean, drinkable water is used.
Checking Coolant
The vehicle must be on a level
surface when checking the coolant
level.
Check to see if coolant is visible in
the coolant surge tank. If the coolant
inside the coolant surge tank is
boiling, do not do anything else until
it cools down. If coolant is visible
but the coolant level is not at or
above the cold fill line, add a
mixture of 40% DEX-COOL coolant
and 60% clean, drinkable water at
the coolant recovery tank, but be
sure the cooling system is cool
before this is done. See Engine
Overheating on page 10-27.
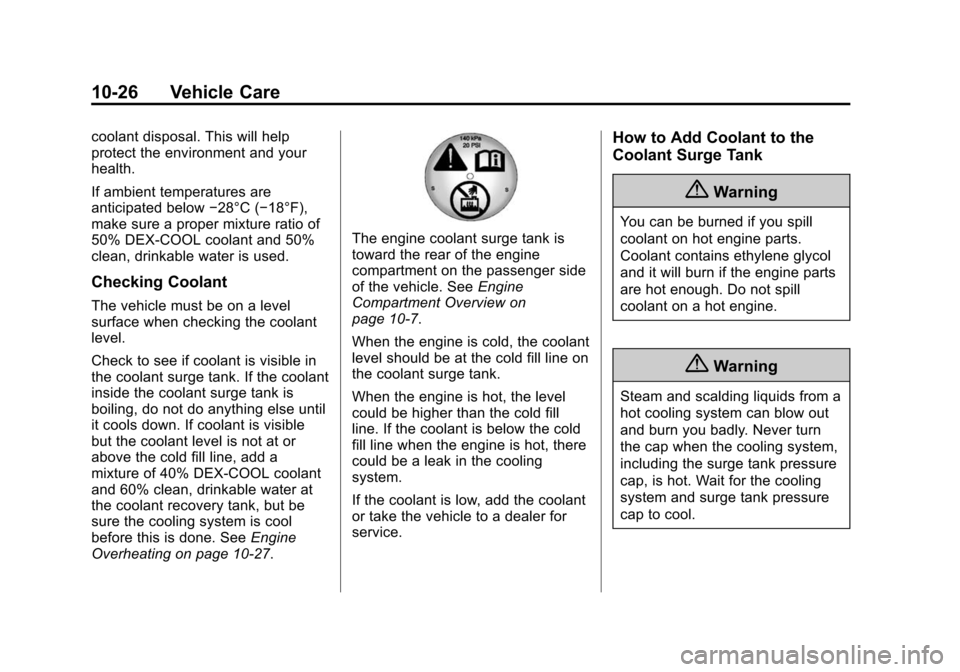
The engine coolant surge tank is
toward the rear of the engine
compartment on the passenger side
of the vehicle. See Engine
Compartment Overview on
page 10-7.
When the engine is cold, the coolant
level should be at the cold fill line on
the coolant surge tank.
When the engine is hot, the level
could be higher than the cold fill
line. If the coolant is below the cold
fill line when the engine is hot, there
could be a leak in the cooling
system.
If the coolant is low, add the coolant
or take the vehicle to a dealer for
service.
How to Add Coolant to the
Coolant Surge Tank
{Warning
You can be burned if you spill
coolant on hot engine parts.
Coolant contains ethylene glycol
and it will burn if the engine parts
are hot enough. Do not spill
coolant on a hot engine.
{Warning
Steam and scalding liquids from a
hot cooling system can blow out
and burn you badly. Never turn
the cap when the cooling system,
including the surge tank pressure
cap, is hot. Wait for the cooling
system and surge tank pressure
cap to cool.