2015 CHEVROLET CORVETTE GRAND SPORT window
[x] Cancel search: windowPage 316 of 391
Black plate (77,1)Chevrolet Corvette Owner Manual (GMNA-Localizing-U.S./Canada/Mexico-
7576293) - 2015 - crc - 6/17/14
Vehicle Care 10-77
3. Place the kit on the ground.Make sure the tire valve stem is
positioned close to the ground
so the hose will reach it.
4. Remove the tire valve stem cap from the flat tire by turning it
counterclockwise.
5. Attach the air only hose (7) onto the tire valve stem by turning it
clockwise until it is tight.
6. Plug the power plug (8) into the accessory power outlet in the
vehicle. Unplug all items from
other accessory power outlets.
See Power Outlets on page 5-4.
If the vehicle has an accessory
power outlet, do not use the
cigarette lighter.
If the vehicle only has a cigarette
lighter, use the cigarette lighter.
Do not pinch the power plug
cord in the door or window.
7. Start the vehicle. The vehicle must be running while using the
air compressor. 8. Press and turn the selector
switch (1) clockwise to the Air
Only position.
9. Press the on/off button (2) to turn the compressor on.
The compressor will inflate the
tire with air only.
10. Inflate the tire to the recommended inflation
pressure using the pressure
gauge (3). The recommended
inflation pressure can be found
on the Tire and Loading
Information label. See Tire
Pressure on page 10-55.
The pressure gauge (3) may
read higher than the actual tire
pressure while the compressor
is on. Turn the compressor off
to get an accurate reading. The
compressor may be turned on/
off until the correct pressure is
reached.
If you inflate the tire higher
than the recommended
pressure you can adjust the excess pressure by pressing
the pressure deflation
button (4) until the proper
pressure reading is reached.
This option is only functional
when using the air only
hose (7).
11. Press the on/off button (2) to turn the tire sealant and
compressor kit off.
Be careful while handling the
tire sealant and compressor kit
as it could be warm after
usage.
12. Unplug the power plug (8) from the accessory power outlet in
the vehicle.
13. Disconnect the air only hose (7) from the tire valve stem, by
turning it counterclockwise, and
replace the tire valve stem cap.
14. Replace the air only hose (7) and the power plug (8) and
cord back in its original
location.
Page 320 of 391
Black plate (81,1)Chevrolet Corvette Owner Manual (GMNA-Localizing-U.S./Canada/Mexico-
7576293) - 2015 - crc - 6/17/14
Vehicle Care 10-81
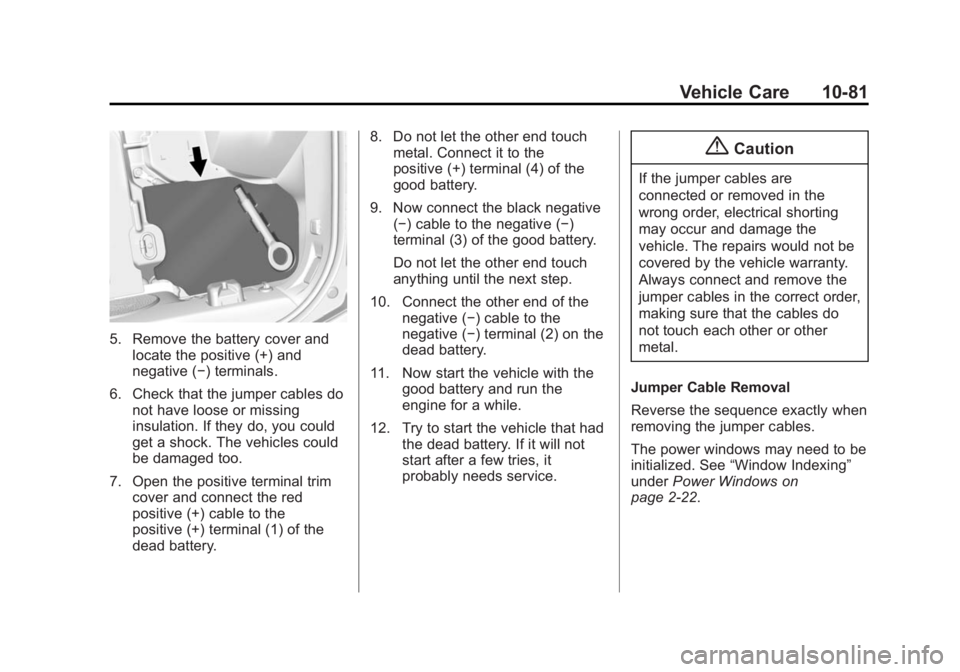
5. Remove the battery cover andlocate the positive (+) and
negative (−) terminals.
6. Check that the jumper cables do not have loose or missing
insulation. If they do, you could
get a shock. The vehicles could
be damaged too.
7. Open the positive terminal trim cover and connect the red
positive (+) cable to the
positive (+) terminal (1) of the
dead battery. 8. Do not let the other end touch
metal. Connect it to the
positive (+) terminal (4) of the
good battery.
9. Now connect the black negative (−) cable to the negative (−)
terminal (3) of the good battery.
Do not let the other end touch
anything until the next step.
10. Connect the other end of the negative (−) cable to the
negative (−) terminal (2) on the
dead battery.
11. Now start the vehicle with the good battery and run the
engine for a while.
12. Try to start the vehicle that had the dead battery. If it will not
start after a few tries, it
probably needs service.
{Caution
If the jumper cables are
connected or removed in the
wrong order, electrical shorting
may occur and damage the
vehicle. The repairs would not be
covered by the vehicle warranty.
Always connect and remove the
jumper cables in the correct order,
making sure that the cables do
not touch each other or other
metal.
Jumper Cable Removal
Reverse the sequence exactly when
removing the jumper cables.
The power windows may need to be
initialized. See “Window Indexing”
under Power Windows on
page 2-22.
Page 327 of 391
Black plate (88,1)Chevrolet Corvette Owner Manual (GMNA-Localizing-U.S./Canada/Mexico-
7576293) - 2015 - crc - 6/17/14
10-88 Vehicle Care
on any switches or controls.
Cleaners should be removed
quickly. Never allow cleaners to
remain on the surface being
cleaned for extended periods
of time.
Cleaners may contain solvents that
can become concentrated in the
interior. Before using cleaners, read
and adhere to all safety instructions
on the label. While cleaning the
interior, maintain adequate
ventilation by opening the doors and
windows.
To prevent damage, do not clean
the interior using the following
cleaners or techniques:
.Never use a razor or any other
sharp object to remove a soil
from any interior surface.
.Never use a brush with stiff
bristles.
.Never rub any surface
aggressively or with excessive
pressure.
.Do not use laundry detergents or
dishwashing soaps with
degreasers. For liquid cleaners,
use approximately 20 drops per
3.8 L (1 gal) of water.
A concentrated soap solution will
leave a residue that creates
streaks and attracts dirt. Do not
use solutions that contain strong
or caustic soap.
.Do not heavily saturate the
upholstery when cleaning.
.Do not use solvents or cleaners
containing solvents.
Interior Glass
To clean, use a terry cloth fabric
dampened with water. Wipe droplets
left behind with a clean dry cloth.
Commercial glass cleaners may be
used, if necessary, after cleaning
the interior glass with plain water.
{Caution
To prevent scratching, never use
abrasive cleaners on automotive
glass. Abrasive cleaners or
aggressive cleaning may damage
the rear window defogger.
Cleaning the windshield with water
during the first three to six months
of ownership will reduce tendency
to fog.
Speaker Covers
Vacuum around a speaker cover
gently, so that the speaker will not
be damaged. Clean spots with just
water and mild soap.
Coated Moldings
Coated moldings should be cleaned.
.When lightly soiled, wipe with a
sponge or soft lint-free cloth
dampened with water.
.When heavily soiled, use warm
soapy water.
Page 328 of 391
Black plate (89,1)Chevrolet Corvette Owner Manual (GMNA-Localizing-U.S./Canada/Mexico-
7576293) - 2015 - crc - 6/17/14
Vehicle Care 10-89
Fabric/Carpet/Suede/
Sueded-Microfiber
Start by vacuuming the surface
using a soft brush attachment. If a
rotating brush attachment is being
used during vacuuming, only use it
on the floor carpet. Before cleaning,
gently remove as much of the soil
as possible using one of the
following techniques:
.Gently blot liquids with a paper
towel. Continue blotting until no
more soil can be removed.
.For solid soils, remove as much
as possible prior to vacuuming.
To clean:
1. Saturate a clean lint-free colorfast cloth with water.
Microfiber cloth is recommended
to prevent lint transfer to the
fabric or carpet.
2. Remove excess moisture by gently wringing until water does
not drip from the cleaning cloth. 3. Start on the outside edge of the
soil and gently rub toward the
center. Fold the cleaning cloth to
a clean area frequently to
prevent forcing the soil in to the
fabric.
4. Continue gently rubbing the soiled area until there is no
longer any color transfer from
the soil to the cleaning cloth.
5. If the soil is not completely removed, use a mild soap
solution followed only by plain
water.
If the soil is not completely
removed, it may be necessary to
use a commercial upholstery
cleaner or spot lifter. Test a small
hidden area for colorfastness before
using a commercial upholstery
cleaner or spot lifter. If ring
formation occurs, clean the entire
fabric or carpet.
Following the cleaning process, a
paper towel can be used to blot
excess moisture.
Cleaning High Gloss Surfaces
and Vehicle Information and
Radio Displays
For vehicles with high gloss
surfaces or vehicle displays, use a
microfiber cloth to wipe surfaces.
Before wiping the surface with the
microfiber cloth, use a soft bristle
brush to remove dirt that could
scratch the surface. Then use the
microfiber cloth by gently rubbing to
clean. Never use window cleaners
or solvents. Periodically hand wash
the microfiber cloth separately,
using mild soap. Do not use bleach
or fabric softener. Rinse thoroughly
and air dry before next use.
{Caution
Do not attach a device with a
suction cup to the display. This
may cause damage and would
not be covered by the warranty.
Page 337 of 391
Black plate (6,1)Chevrolet Corvette Owner Manual (GMNA-Localizing-U.S./Canada/Mexico-
7576293) - 2015 - crc - 6/17/14
11-6 Service and Maintenance
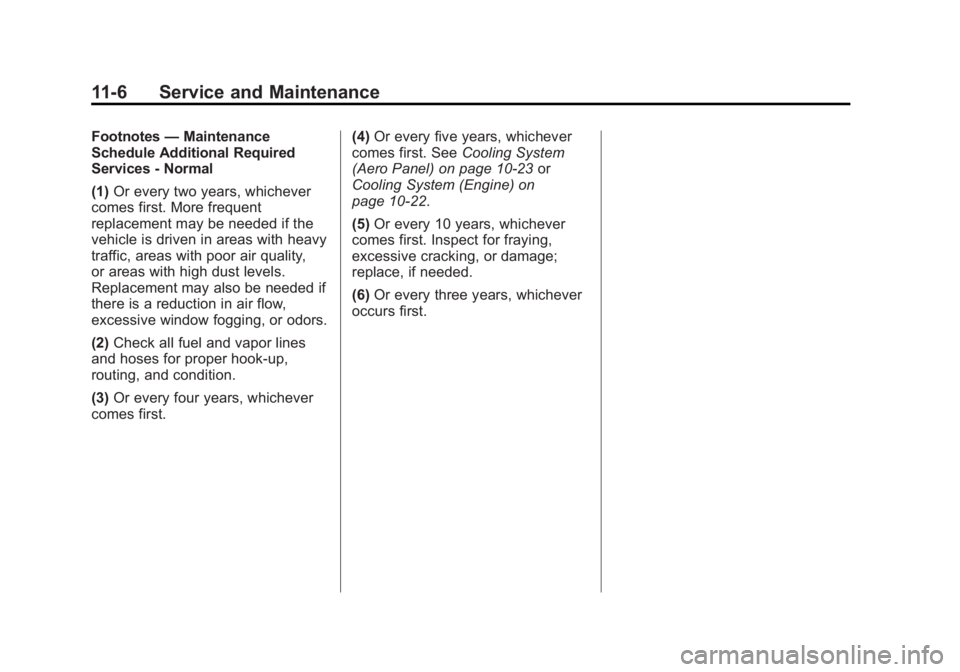
Footnotes—Maintenance
Schedule Additional Required
Services - Normal
(1) Or every two years, whichever
comes first. More frequent
replacement may be needed if the
vehicle is driven in areas with heavy
traffic, areas with poor air quality,
or areas with high dust levels.
Replacement may also be needed if
there is a reduction in air flow,
excessive window fogging, or odors.
(2) Check all fuel and vapor lines
and hoses for proper hook-up,
routing, and condition.
(3) Or every four years, whichever
comes first. (4)
Or every five years, whichever
comes first. See Cooling System
(Aero Panel) on page 10-23 or
Cooling System (Engine) on
page 10-22.
(5) Or every 10 years, whichever
comes first. Inspect for fraying,
excessive cracking, or damage;
replace, if needed.
(6) Or every three years, whichever
occurs first.
Page 339 of 391
Black plate (8,1)Chevrolet Corvette Owner Manual (GMNA-Localizing-U.S./Canada/Mexico-
7576293) - 2015 - crc - 6/17/14
11-8 Service and Maintenance
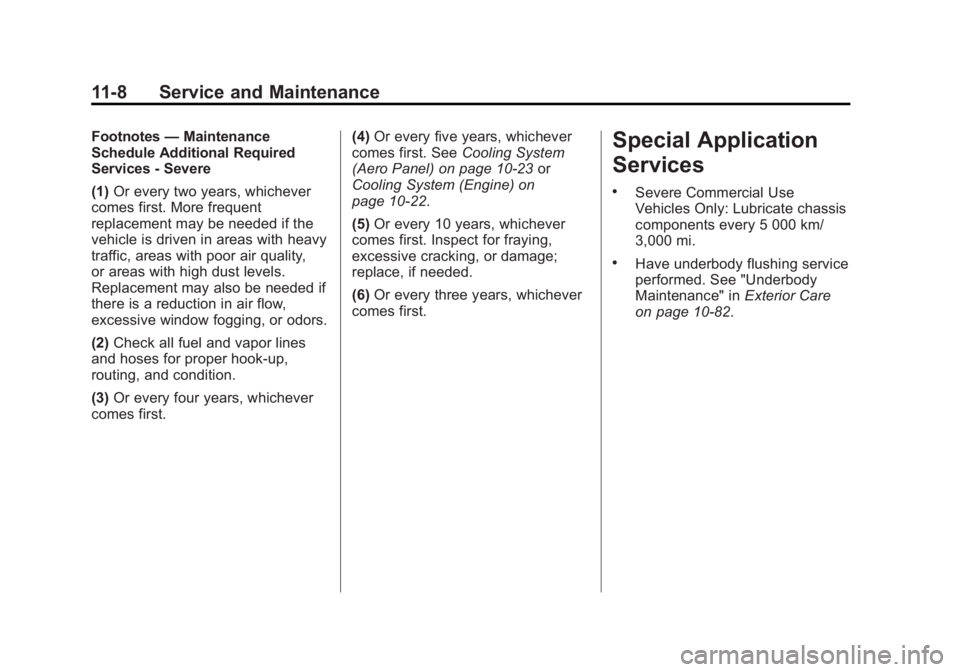
Footnotes—Maintenance
Schedule Additional Required
Services - Severe
(1) Or every two years, whichever
comes first. More frequent
replacement may be needed if the
vehicle is driven in areas with heavy
traffic, areas with poor air quality,
or areas with high dust levels.
Replacement may also be needed if
there is a reduction in air flow,
excessive window fogging, or odors.
(2) Check all fuel and vapor lines
and hoses for proper hook-up,
routing, and condition.
(3) Or every four years, whichever
comes first. (4)
Or every five years, whichever
comes first. See Cooling System
(Aero Panel) on page 10-23 or
Cooling System (Engine) on
page 10-22.
(5) Or every 10 years, whichever
comes first. Inspect for fraying,
excessive cracking, or damage;
replace, if needed.
(6) Or every three years, whichever
comes first.Special Application
Services
.Severe Commercial Use
Vehicles Only: Lubricate chassis
components every 5 000 km/
3,000 mi.
.Have underbody flushing service
performed. See "Underbody
Maintenance" in Exterior Care
on page 10-82.
Page 371 of 391
Black plate (4,1)Chevrolet Corvette Owner Manual (GMNA-Localizing-U.S./Canada/Mexico-
7576293) - 2015 - crc - 6/17/14
14-4 OnStar
2. Say“Repeat.” System responds
with the last direction given, then
responds with “OnStar ready,”
then a tone.
Get My Destination
1. Press
Q. System responds:
“OnStar ready,” then a tone.
2. Say “Get my destination.”
System responds with the
address and the distance to the
destination, then responds with
“OnStar ready,” then a tone.
Other Navigation Services
Available from OnStar
OnStar eNav:Subscribers can
send destinations from
MapQuest.com to the vehicle
Turn-by-Turn Navigation or
screen-based navigation system (if
equipped). When ready, the
directions will be downloaded to the
vehicle.
Destination Download: Press
|,
then request the Advisor to
download directions to the navigation system in the vehicle (if
equipped). After the call ends, press
the
“Go” button on the navigation
screen to begin driving directions.
If directions are downloaded to the
navigation system, the route can
only be canceled through the
navigation system.
Destinations can also be
downloaded on the go. For
information about eNav and
Destination Download, see
www.onstar.com (U.S.) or
www.onstar.ca (Canada).
Connections
The required specific Onstar
subscription plan includes the
services that follow to help
customers stay connected.
For coverage maps, see
www.onstar.com (U.S.) or
www.onstar.ca (Canada). WiFi Connectivity (If Equipped)
The vehicle has a WiFi hotspot that
provides a high-speed, wireless
Internet connection to connect
multiple mobile devices (data plan
required).
1. To retrieve WiFi hotspot
information, press
Qand select
or say “WiFi settings.”
2. The WiFi settings will display the WiFi network name/SSID,
passphrase, and level of
encryption.
3. To change the SSID or passphrase, press
|or call
1-888-4-ONSTAR to connect
with an Advisor.
OnStar RemoteLink
®Mobile App
(If Equipped)
Download the OnStar RemoteLink
mobile app to select Apple
®,
Android™, and BlackBerry®or
Windows 7 or 8 mobile devices.
From the mobile device, check the
vehicle’s fuel level, oil life, or tire
Page 386 of 391
Black plate (7,1)Chevrolet Corvette Owner Manual (GMNA-Localizing-U.S./Canada/Mexico-
7576293) - 2015 - crc - 6/17/14
INDEX i-7
Lumbar Adjustment . . . . . . . . . . . . . 3-3Front Seats . . . . . . . . . . . . . . . . . . . . 3-3
M
Maintenance
Records . . . . . . . . . . . . . . . . . . . . .11-15
Maintenance and Care Additional . . . . . . . . . . . . . . . . . . . . . 11-9
Maintenance Schedule . . . . . . . . 11-2
Recommended Fluidsand Lubricants . . . . . . . . . . . . .11-12
Malfunction Indicator Lamp . . . . 5-18
Manual Mode . . . . . . . . . . . . . . . . . . 9-28
Manual Transmission . . . . . . . . . . 9-31 Fluid . . . . . . . . . . . . . . . . . . . . . . . . 10-19
Matching Active Rev . . . . . . . . . . . . . . . . . . . . 9-33
Memory Features . . . . . . . . . . . . . . . 1-9
Memory Seats . . . . . . . . . . . . . . . . . . 3-4
Messages
Airbag System . . . . . . . . . . . . . . . . 5-42
Battery Voltage andCharging . . . . . . . . . . . . . . . . . . . . 5-34
Brake System . . . . . . . . . . . . . . . . 5-34
Compass . . . . . . . . . . . . . . . . . . . . . 5-35
Convertible Top . . . . . . . . . . . . . . . 5-35 Messages (cont'd)
Door Ajar . . . . . . . . . . . . . . . . . . . . . 5-36
Engine Cooling System . . . . . . . 5-37
Engine Oil . . . . . . . . . . . . . . . . . . . . 5-37
Engine Power . . . . . . . . . . . . . . . . 5-38
Fuel System . . . . . . . . . . . . . . . . . . 5-38
Key and Lock . . . . . . . . . . . . . . . . . 5-38
Lamp . . . . . . . . . . . . . . . . . . . . . . . . . 5-39
Ride Control System . . . . . . . . . . 5-39
Security . . . . . . . . . . . . . . . . . . . . . . 5-42
Service Vehicle . . . . . . . . . . . . . . . 5-42
Starting the Vehicle . . . . . . . . . . . 5-43
Tire . . . . . . . . . . . . . . . . . . . . . . . . . . . 5-43
Transmission . . . . . . . . . . . . . . . . . 5-44
Vehicle . . . . . . . . . . . . . . . . . . . . . . . 5-34
Vehicle Reminder . . . . . . . . . . . . . 5-44
Vehicle Speed . . . . . . . . . . . . . . . . 5-44
Washer Fluid . . . . . . . . . . . . . . . . . 5-45
Window . . . . . . . . . . . . . . . . . . . . . . . 5-45
Mirrors Automatic Dimming . . . . . . . . . . . 2-20
Automatic DimmingRearview . . . . . . . . . . . . . . . . . . . . 2-21
Convex . . . . . . . . . . . . . . . . . . . . . . . 2-19
Folding . . . . . . . . . . . . . . . . . . . . . . . 2-20
Heated . . . . . . . . . . . . . . . . . . . . . . . 2-20 Mirrors (cont'd)
Manual Rearview . . . . . . . . . . . . . 2-21
Power . . . . . . . . . . . . . . . . . . . . . . . . 2-20
Tilt in Reverse . . . . . . . . . . . . . . . . 2-20
Mirrors, Interior Rearview . . . . . . 2-21
Mode Driver Control . . . . . . . . . . . . . . . . . 9-39
Monitor System, Tire Pressure . . . . . . . . . . . . . . . . . . . . 10-57
N
Navigation
OnStar®. . . . . . . . . . . . . . . . . . . . . . 14-3
Net, Convenience . . . . . . . . . . . . . . 4-5
New Vehicle Break-In . . . . . . . . . . 9-18
O
Odometer . . . . . . . . . . . . . . . . . . . . . . 5-12 Trip . . . . . . . . . . . . . . . . . . . . . . . . . . . 5-12
Off-Road Recovery . . . . . . . . . . . . . . . . . . . . . . 9-4