2015 CHEVROLET CAMARO ECO mode
[x] Cancel search: ECO modePage 4 of 435

Black plate (3,1)Chevrolet Camaro Owner Manual (GMNA-Localizing-U.S./Canada/Mexico-
7695163) - 2015 - crc - 9/4/14
Introduction iii
The names, logos, emblems,
slogans, vehicle model names, and
vehicle body designs appearing in
this manual including, but not limited
to, GM, the GM logo, CHEVROLET,
the CHEVROLET Emblem,
CAMARO, Z/28, 1LE and ZL1, and
the CAMARO Emblem are
trademarks and/or service marks of
General Motors LLC, its
subsidiaries, affiliates, or licensors.
For vehicles first sold in Canada,
substitute the name“General
Motors of Canada Limited” for
Chevrolet Motor Division wherever it
appears in this manual. This manual describes features that
may or may not be on the vehicle
because of optional equipment that
was not purchased on the vehicle,
model variants, country
specifications, features/applications
that may not be available in your
region, or changes subsequent to
the printing of this owner manual.
Refer to the purchase
documentation relating to your
specific vehicle to confirm the
features.
Keep this manual in the vehicle for
quick reference.
Canadian Vehicle Owners
Propriétaires Canadiens
A French language manual can be
obtained from your dealer, at
www.helminc.com, or from:
On peut obtenir un exemplaire de
ce guide en français auprès du
concessionnaire ou à l'adresse
savant:
Helm, Incorporated
Attention: Customer Service
47911 Halyard Drive
Plymouth, MI 48170
Using this Manual
To quickly locate information about
the vehicle, use the Index in the
back of the manual. It is an
alphabetical list of what is in the
manual and the page number where
it can be found.
Litho in U.S.A.
Part No. 23121192 B Second Printing©2014 General Motors LLC. All Rights Reserved.
Page 19 of 435

Black plate (12,1)Chevrolet Camaro Owner Manual (GMNA-Localizing-U.S./Canada/Mexico-
7695163) - 2015 - crc - 9/4/14
1-12 In Brief
instrument cluster. When using the
ERS mode a number will display
next to the M, indicating the current
maximum gear allowed.
To use this feature:
1. Move the shift lever toM (Manual Mode).
2. Press the plus/minus buttons on the back of the steering wheel,
to increase or decrease the gear
range available.
See Manual Mode on page 9-31.Manual Transmission
One to Four Shift Message
(V8 Only)
When this message comes on, you
can only shift from 1 (First) to
4 (Fourth) instead of 1 (First) to
2 (Second). The message will be
displayed in the Driver Information
Center. See Manual Transmission
on page 9-34.
Vehicle Features
Infotainment System
The base radio is included in this
manual. See Infotainment on
page 7-1. See the infotainment
manual for information on the
uplevel radio, audio players, phone,
navigation system, and voice or
speech recognition. There is also
information on settings and
downloadable applications (if
equipped).
Radio(s)
VOL/O: Press to turn the system
on and off. Turn to increase or
decrease the volume.
RADIO/BAND: Press to choose
between FM, AM, or SiriusXM
®,
if equipped.
MENU/SELECT: Turn to select
radio stations.
SEEK
7: Press to seek the
previous radio station or track.
Page 44 of 435
Black plate (17,1)Chevrolet Camaro Owner Manual (GMNA-Localizing-U.S./Canada/Mexico-
7695163) - 2015 - crc - 9/4/14
Keys, Doors, and Windows 2-17
the top of the window inward while
closing the door so the top of the
window goes under the roof seal.
Express Window Operation
Coupe and Convertible Top
The window switches have an
express-up and down feature that
raises or lowers the window without
holding the switch. Pull the switch
up or press it down all the way and
release it. Stop the window by
operating the switch in the same
direction.
Convertible Top Only
To express-up a front window, the
same side rear window must be
closed.
To close all the windows, pull all
window switches up fully and
release within four seconds. This
will result in the windows closing
automatically.
Express Window Anti-Pinch
Feature
When express-up is active, the
window will auto-reverse if there is
an obstruction or severe icing. The
window returns to normal operation
after the obstruction or condition is
removed.
If conditions prevent a window from
closing and it continues to
auto-reverse, the window can be
closed by having the ignition in ON/
RUN and holding the window switch
up until the window is closed.
Express Window Anti-Pinch
Override
{Warning
If express override is activated,
the window will not reverse
automatically. You or others could
be injured and the window could
be damaged. Before you use(Continued)
Warning (Continued)
express override, make sure that
all people and obstructions are
clear of the window path.
In an emergency, the anti-pinch
feature can be overridden in a
supervised mode. Hold the window
switch all the way up to the second
position. The window will rise for as
long as the switch is held. Once the
switch is released, the express
mode is re-activated.
In this mode, the window can still
close on an object in its path. Use
care when using the override mode.
Programming the Power
Windows
If the battery on the vehicle has
been recharged or disconnected,
or is not working, you may need to
reprogram the windows for the
express-up feature to work. Before
reprogramming, replace or recharge
the vehicle's battery.
Page 70 of 435
Black plate (19,1)Chevrolet Camaro Owner Manual (GMNA-Localizing-U.S./Canada/Mexico-
7695163) - 2015 - crc - 9/4/14
Seats and Restraints 3-19
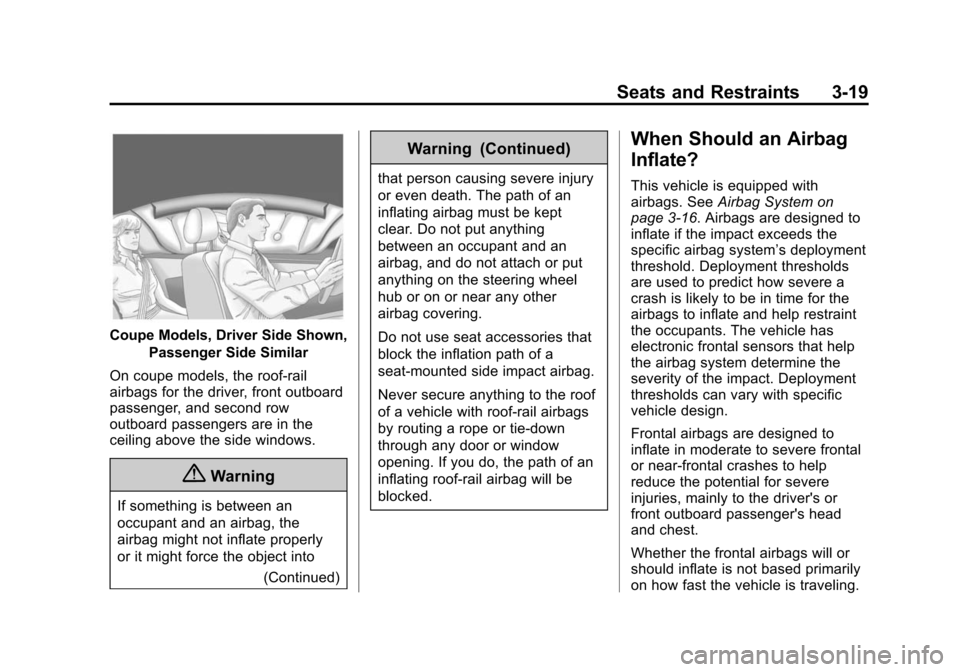
Coupe Models, Driver Side Shown,Passenger Side Similar
On coupe models, the roof-rail
airbags for the driver, front outboard
passenger, and second row
outboard passengers are in the
ceiling above the side windows.
{Warning
If something is between an
occupant and an airbag, the
airbag might not inflate properly
or it might force the object into (Continued)
Warning (Continued)
that person causing severe injury
or even death. The path of an
inflating airbag must be kept
clear. Do not put anything
between an occupant and an
airbag, and do not attach or put
anything on the steering wheel
hub or on or near any other
airbag covering.
Do not use seat accessories that
block the inflation path of a
seat-mounted side impact airbag.
Never secure anything to the roof
of a vehicle with roof-rail airbags
by routing a rope or tie‐down
through any door or window
opening. If you do, the path of an
inflating roof-rail airbag will be
blocked.
When Should an Airbag
Inflate?
This vehicle is equipped with
airbags. SeeAirbag System on
page 3-16. Airbags are designed to
inflate if the impact exceeds the
specific airbag system’ s deployment
threshold. Deployment thresholds
are used to predict how severe a
crash is likely to be in time for the
airbags to inflate and help restraint
the occupants. The vehicle has
electronic frontal sensors that help
the airbag system determine the
severity of the impact. Deployment
thresholds can vary with specific
vehicle design.
Frontal airbags are designed to
inflate in moderate to severe frontal
or near-frontal crashes to help
reduce the potential for severe
injuries, mainly to the driver's or
front outboard passenger's head
and chest.
Whether the frontal airbags will or
should inflate is not based primarily
on how fast the vehicle is traveling.
Page 72 of 435
Black plate (21,1)Chevrolet Camaro Owner Manual (GMNA-Localizing-U.S./Canada/Mexico-
7695163) - 2015 - crc - 9/4/14
Seats and Restraints 3-21
moderate to severe side collisions,
even belted occupants can contact
the inside of the vehicle.
Airbags supplement the protection
provided by safety belts by
distributing the force of the impact
more evenly over the
occupant's body.
Rollover capable roof-rail airbags
are designed to help contain the
head and chest of occupants in the
outboard seating positions in the
first and second rows. The rollover
capable roof-rail airbags are
designed to help reduce the risk of
full or partial ejection in rollover
events, although no system can
prevent all such ejections.
But airbags would not help in many
types of collisions, primarily
because the occupant's motion is
not toward those airbags. SeeWhen
Should an Airbag Inflate? on
page 3-19.
Airbags should never be regarded
as anything more than a supplement
to safety belts.What Will You See after
an Airbag Inflates?
After the frontal airbags and
seat-mounted side impact airbags
inflate, they quickly deflate, so
quickly that some people may not
even realize an airbag inflated.
Roof-rail airbags may still be at least
partially inflated for some time after
they inflate. Some components of
the airbag module may be hot for
several minutes. For location of the
airbags, see Where Are the
Airbags? on page 3-17.
The parts of the airbag that come
into contact with you may be warm,
but not too hot to touch. There may
be some smoke and dust coming
from the vents in the deflated
airbags. Airbag inflation does not
prevent the driver from seeing out of
the windshield or being able to steer
the vehicle, nor does it prevent
people from leaving the vehicle.
{Warning
When an airbag inflates, there
may be dust in the air. This dust
could cause breathing problems
for people with a history of
asthma or other breathing trouble.
To avoid this, everyone in the
vehicle should get out as soon as
it is safe to do so. If you have
breathing problems but cannot
get out of the vehicle after an
airbag inflates, then get fresh air
by opening a window or a door.
If you experience breathing
problems following an airbag
deployment, you should seek
medical attention.
The vehicle has a feature that may
automatically unlock the doors, turn
on the interior lamps and hazard
warning flashers, and shut off the
fuel system after the airbags inflate.
The feature may also activate,
without airbag inflation, after an
event that exceeds a predetermined
Page 73 of 435

Black plate (22,1)Chevrolet Camaro Owner Manual (GMNA-Localizing-U.S./Canada/Mexico-
7695163) - 2015 - crc - 9/4/14
3-22 Seats and Restraints
threshold. You can lock the doors,
and turn off the interior lamps, and
turn off the hazard warning flashers
by using the controls for those
features.
{Warning
A crash severe enough to inflate
the airbags may have also
damaged important functions in
the vehicle, such as the fuel
system, brake and steering
systems, etc. Even if the vehicle
appears to be drivable after a
moderate crash, there may be
concealed damage that could
make it difficult to safely operate
the vehicle.
Use caution if you should attempt
to restart the engine after a crash
has occurred.
In many crashes severe enough to
inflate the airbag, windshields are
broken by vehicle deformation. Additional windshield breakage may
also occur from the front outboard
passenger airbag.
.Airbags are designed to inflate
only once. After an airbag
inflates, you will need some new
parts for the airbag system.
If you do not get them, the
airbag system will not be there
to help protect you in another
crash. A new system will include
airbag modules and possibly
other parts. The service manual
for the vehicle covers the need
to replace other parts.
.The vehicle has a crash sensing
and diagnostic module which
records information after a
crash. See
Vehicle Data
Recording and Privacy on
page 13-14 andEvent Data
Recorders on page 13-14.
.Let only qualified technicians
work on the airbag systems.
Improper service can mean that an airbag system will not work
properly. See your dealer for
service.
Passenger Sensing
System
The vehicle has a passenger
sensing system for the front
outboard passenger position. The
passenger airbag status indicator
will be visible on the overhead
console when the vehicle is started.
Page 88 of 435
Black plate (37,1)Chevrolet Camaro Owner Manual (GMNA-Localizing-U.S./Canada/Mexico-
7695163) - 2015 - crc - 9/4/14
Seats and Restraints 3-37
recommends that the booster seat
be secured with the LATCH system,
this can be done as long as the
booster seat can be positioned
properly and there is no interference
with the proper positioning of the
lap-shoulder belt on the child.
Make sure to follow the instructions
that came with the child restraint,
and also the instructions in this
manual.
When installing a child restraint with
a top tether, you must also use
either the lower anchors or the
safety belts to properly secure the
child restraint. A child restraint must
never be installed using only the top
tether and anchor.
The LATCH anchorage system can
be used until the combined weight
of the child plus the child restraint is
29.5 kg (65 lbs). Use the safety belt
alone instead of the LATCH
anchorage system once the
combined weight is more than
29.5 kg (65 lbs).The following explains how to attach
a child restraint with these
attachments in the vehicle.
Not all vehicle seating positions or
child restraints have lower anchors
and attachments or top tether
anchors and attachments.
In Canada, the law requires that
forward-facing child restraints have
a top tether, and that the tether be
attached.
Convertible models do not have top
tether anchors to secure a child
restraint. If a national or local law
requires that the top tether be
anchored, do not use a child
restraint in this vehicle because a
top tether cannot be properly
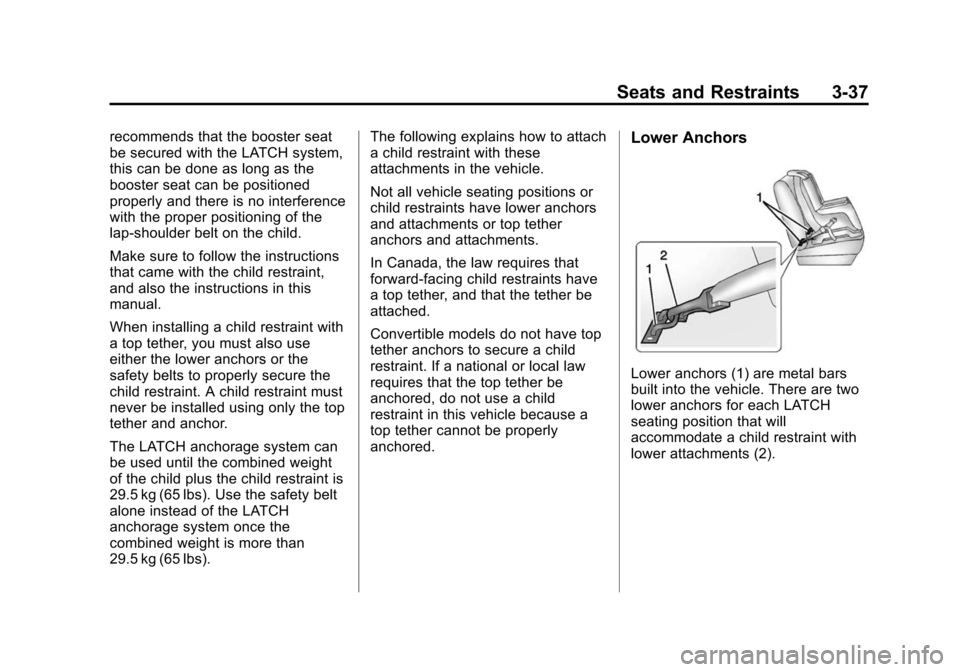
anchored.Lower Anchors
Lower anchors (1) are metal bars
built into the vehicle. There are two
lower anchors for each LATCH
seating position that will
accommodate a child restraint with
lower attachments (2).
Page 92 of 435
Black plate (41,1)Chevrolet Camaro Owner Manual (GMNA-Localizing-U.S./Canada/Mexico-
7695163) - 2015 - crc - 9/4/14
Seats and Restraints 3-41
{Caution
Do not let the LATCH
attachments rub against the
vehicle’s safety belts. This may
damage these parts. If necessary,
move buckled safety belts to
avoid rubbing the LATCH
attachments.
Do not fold the empty rear seat
with a safety belt buckled. This
could damage the safety belt or
the seat. Unbuckle and return the
safety belt to its stowed position,
before folding the seat.
If you need to secure more than one
child restraint in the rear seat, see
Where to Put the Restraint on
page 3-35.
This system is designed to make
installation of child restraints easier.
When using lower anchors, do not
use the vehicle's safety belts.
Instead, use the vehicle's anchors
and child restraint attachments to secure the restraints. Some
restraints also use another vehicle
anchor to secure the top tether.
1. Attach and tighten the lower
attachments to the lower
anchors. If the child restraint
does not have lower
attachments, secure the child
restraint with the safety belts
and top tether, if equipped. Refer
to the child restraint
manufacturer instructions and
the instructions in this manual.
1.1. Find the lower anchors for the desired seating
position.
1.2. Put the child restraint on the seat.
1.3. Attach and tighten the lower attachments on the child
restraint to the lower
anchors. 2. On coupe models, if the child
restraint manufacturer
recommends that the top tether
be attached, attach and tighten
the top tether to the top tether
anchor, if equipped. Refer to the
child restraint instructions and
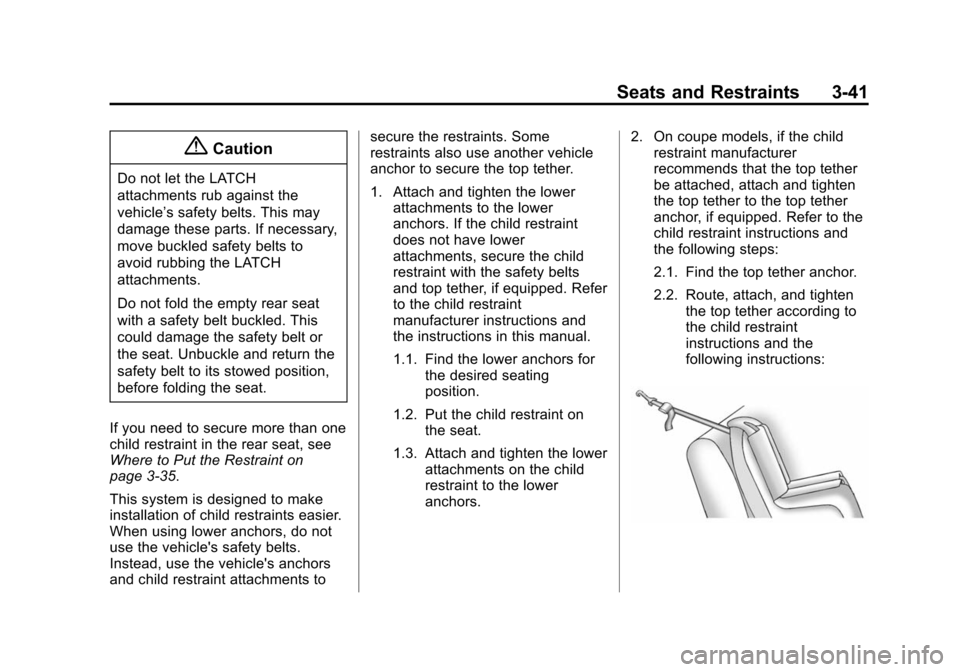
the following steps:
2.1. Find the top tether anchor.
2.2. Route, attach, and tighten
the top tether according to
the child restraint
instructions and the
following instructions: